How to View Wi-Fi Passwords in Windows 11 (5 Methods)
There have been previous reports of Wi-Fi not showing up in Windows 11 and Wi-Fi even keeps dropping out for some users even after troubleshooting. If you are still facing connection issues on your Windows 11 PC, you can forget about the Wi-Fi network and reconnect to the same wireless network. However, make sure you know the Wi-Fi password as you will need it when reconnecting. If you don't remember it, follow our guide and learn how to view Wi-Fi passwords in Windows 11. You can find saved Wi-Fi passwords in Windows 11 using five easy ways, so let's check them out.
Find Wi-Fi Passwords in Windows 11 (2022)
In this guide, we've included five ways to find Wi-Fi passwords in Windows 11, including the Settings app, Command Prompt, Control Panel, PowerShell, and a third-party app. On that note, let's dive in. Expand the table below and jump to the desired section.
View Wi-Fi password in Windows 11 using Control Panel
You can find Wi-Fi passwords in Windows 11 through the Network and Sharing Center in Control Panel. Follow our instructions below and you will be able to view the passwords of all saved Wi-Fi networks on your Windows 11 PC. Here is how it works:
1. First, use the Windows 11 keyboard shortcut “Windows + R” to open the Run window. Here, type ncpa.cpl and press Enter. This will open the Network and Sharing Center right in the Control Panel in Windows 11.
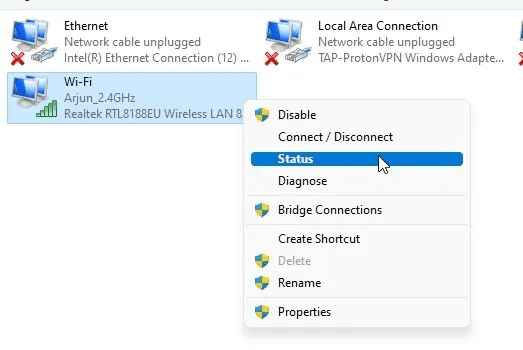
2. Then right-click on the Wi-Fi network you are currently connected to. Then click "Status" in the context menu.

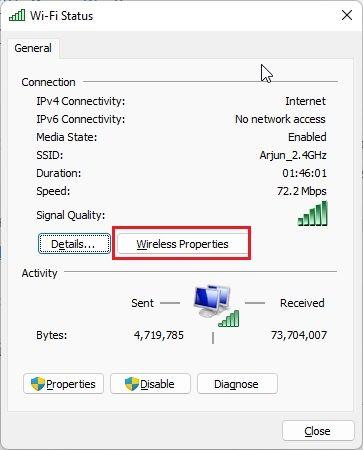
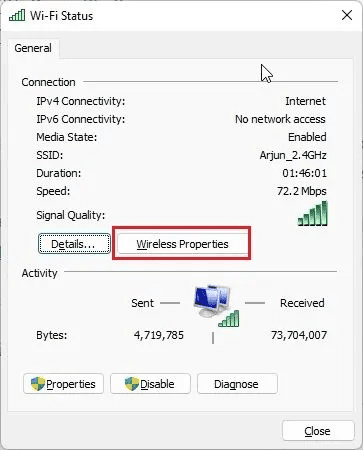
3. In the Wi-Fi Status pop-up window that appears, click Wireless Properties.
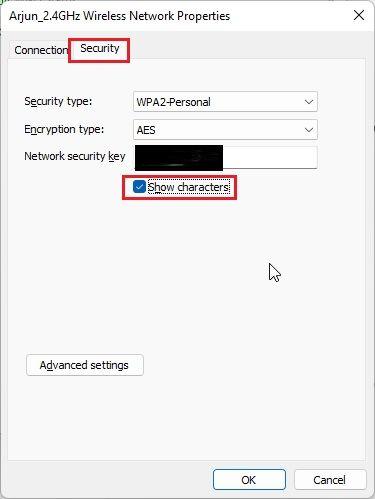
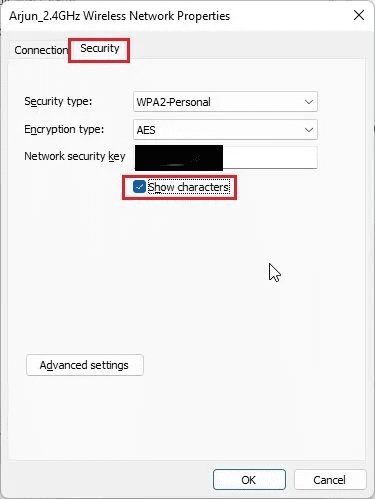
4. Another window will open. Here, go to the "Security" tab and check the box next to "Show Symbols". It will show the password of your current Wi-Fi network. This is the easiest way to see your Wi-Fi password in Windows 11.
Find Wi-Fi password in Windows 11 using the Settings app
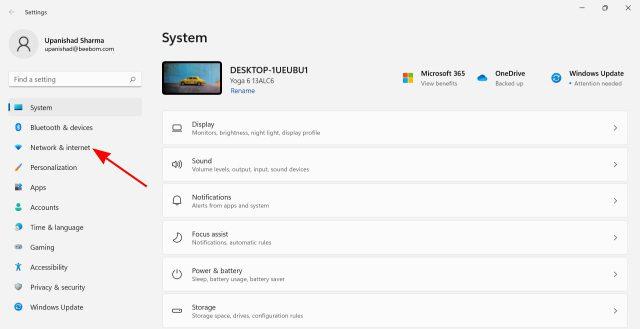
1. You can also find the Wi-Fi password in Windows 11 using the Settings app. Press "Windows + I" to open the "Settings" app and go to the "Network and Internet" section on the left sidebar.
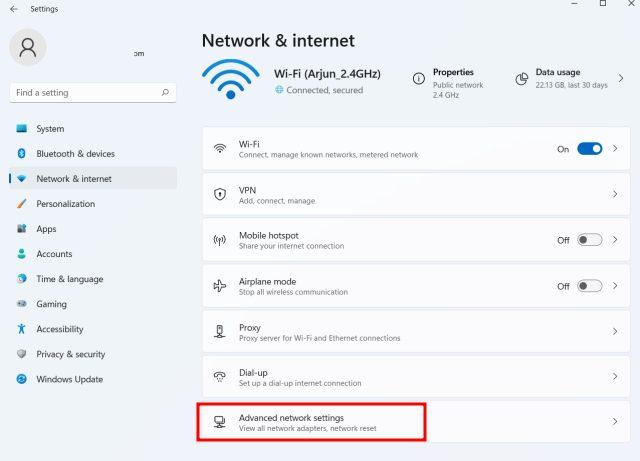
2. Then click "Advanced Network Settings" at the bottom of the right pane.
2. Then scroll down and click "Advanced network adapter settings". The "Network and Sharing Center" in the Control Panel will open.

3. Now right-click on the "Wi-Fi" adapter and select "Status" from the context menu.
4. Then open "Wireless Network Properties" in the pop-up window that will appear on your screen.
5. After that, in the next window, go to the "Security" tab and check the "Show symbols" box to show the Wi-Fi password of your current network. Here's how you can view your Wi-Fi password using the Windows 11 Settings app.
Find Wi-Fi password in Windows 11 using CMD or PowerShell
If you want to find the Wi-Fi password in Windows 11 using Command Prompt or PowerShell, you can do so by following these steps. We have demonstrated the steps on the command line, but the same commands work in PowerShell.
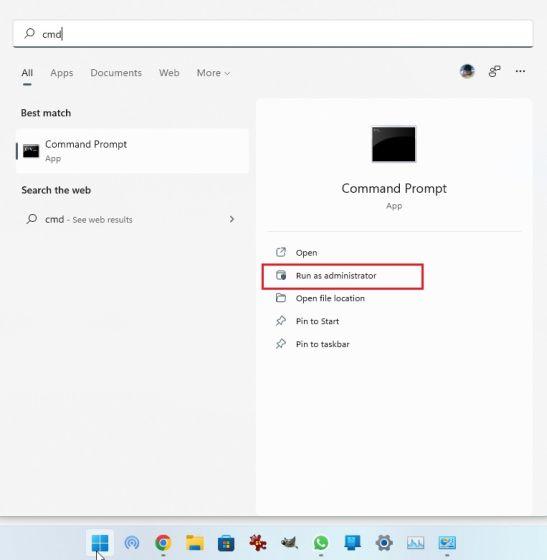
1. Press the Windows key and type "cmd" in the start menu search bar. Now click "Run as administrator" in the right pane. What's more, if you always want to open apps as an administrator on Windows 11, follow our linked guide.
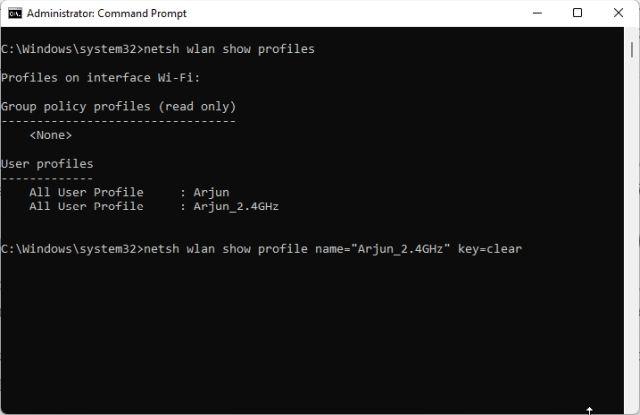
2. In the CMD window, run the command below to display a list of all saved Wi-Fi networks on your Windows 11 PC. Here, write down the name of the profile (case sensitive) for which you want to know the password.
netsh wlan show profiles

3. Then run the below command with the following syntax. Just replace the WiFi profile name with the profile name you provided in the step above.
netsh wlan show profile name="WiFi profile name" key=clear
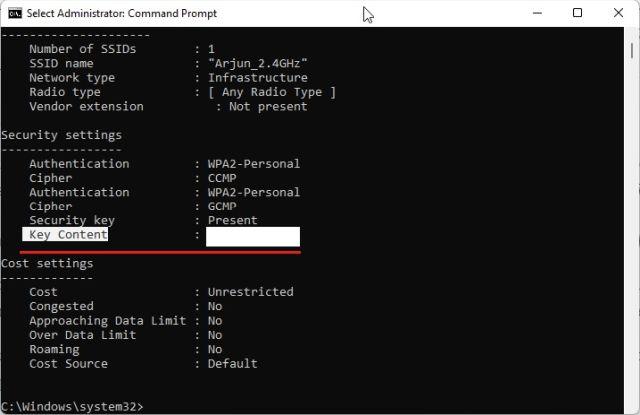
4. Now run the command and the command line will display all the details about that particular Wi-Fi network. Then scroll down and find "Key Content" under "Security Settings". This is the password for your Wi-Fi network.
See the Wi-Fi password of all saved networks with a PowerShell script
If you want to check the passwords of all saved Wi-Fi networks on your Windows 11 PC, you can do it with a PowerShell script. A GitHub user has created a handy script that lists all Wi-Fi names and their passwords in a neat table. Here's how to use it.
1. First, open Notepad on your PC and paste the code below.
$listProfiles = netsh wlan show profiles | Select-String -Pattern "All User Profile" | %{ ($_ -split ":")[-1].Trim() };$listProfiles | foreach { $profileInfo = netsh wlan show profiles name=$_ key="clear"; $SSID = $profileInfo | Select-String -Pattern "SSID Name" | %{ ($_ -split ":")[-1].Trim() }; $Key = $profileInfo | Select-String -Pattern "Key Content" | %{ ($_ -split ":")[-1].Trim() }; [PSCustomObject]@{ WifiProfileName = $SSID; Password = $Key }} 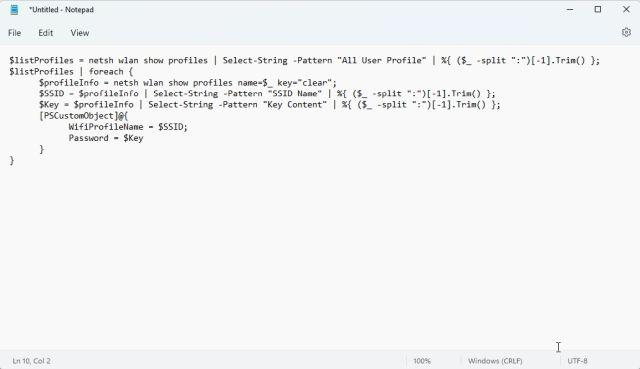
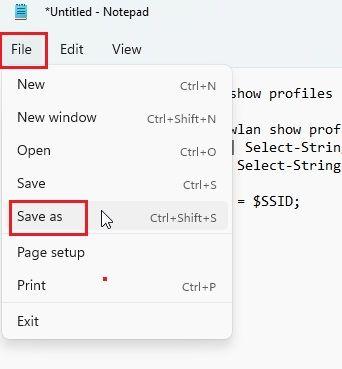
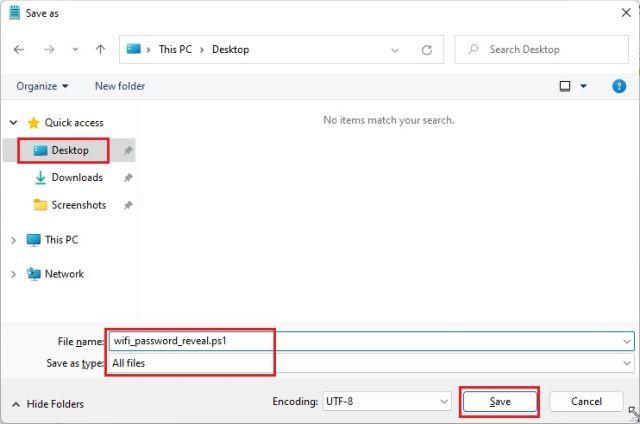
2. Now click "File" in the top menu and select "Save As".
3. After that, click on the drop-down menu next to "Save as type" and select "All Files". Now give a name to your script file. But don't forget to add .ps1 (extension) at the end. Finally, save the PS1 file. Be sure to save the file to your desktop. This will make it easier for the script to work.
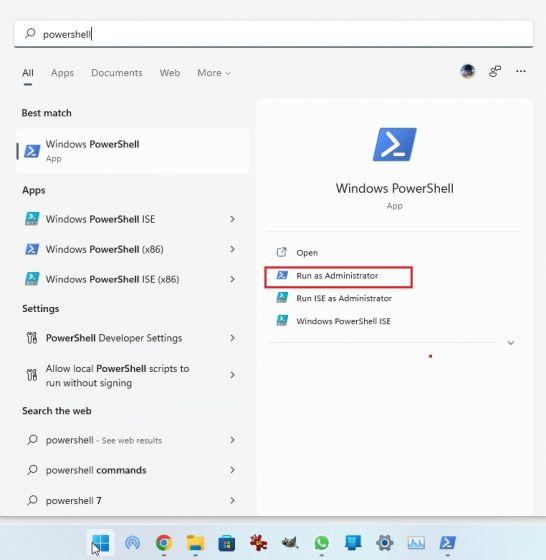
4. Then press the Windows key and type "powershell". Now click "Run as administrator" in the right pane.
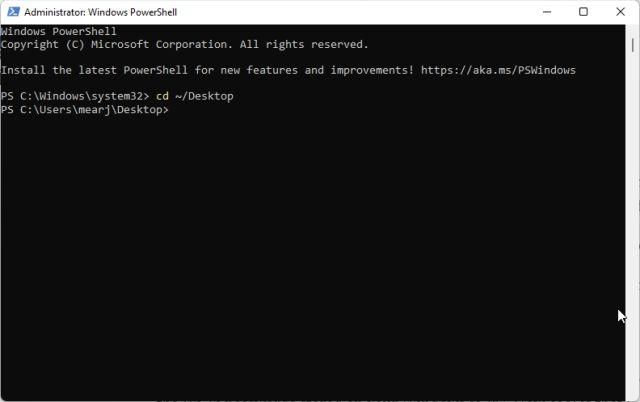
5. In a PowerShell window, run the following command to navigate to the desktop.
cd ~/Desktop
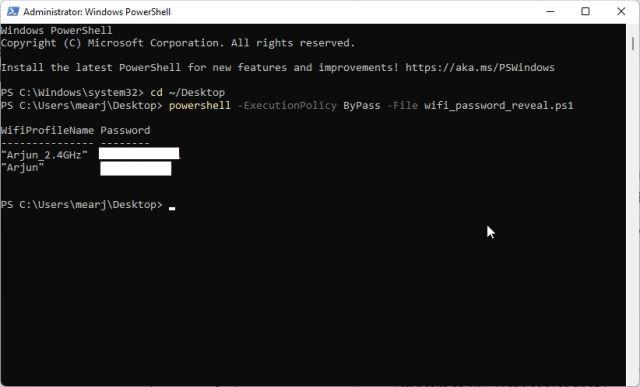
6. After that run the below command. Be sure to replace the filename with the name of the script. That's all. PowerShell will now display all Wi-Fi passwords stored on your Windows 11 PC. How cool is that?
powershell -ExecutionPolicy ByPass -File filename.ps1
View Wi-Fi passwords of all networks in Windows 11 using a third-party tool
If you are looking for a way to see passwords for all saved Wi-Fi networks with just one click on your Windows 11 PC, you can use a third party tool called WirelessKeyView developed by NirSoft. This is a free utility that shows Wi-Fi passwords in Windows 11 with just one click. Here's how it works:
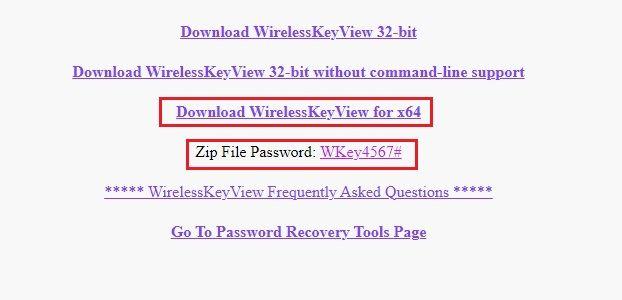
1. Download WirelessKeyView from the link here. Scroll down and click on the 64-bit link to download the file. Also write down the password of the Zip file. You will need it to run the program.
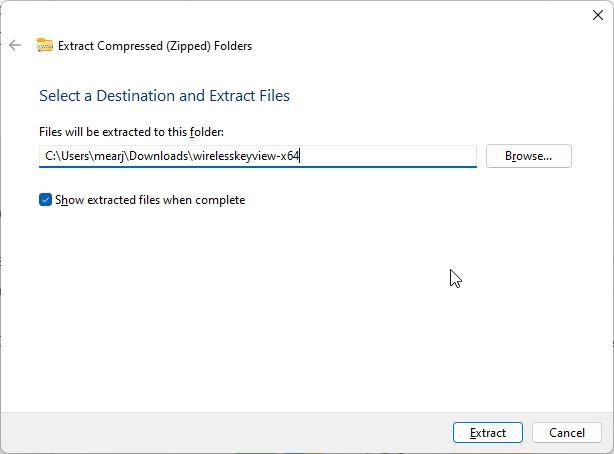
2. After downloading the program, right-click it and extract the folder.
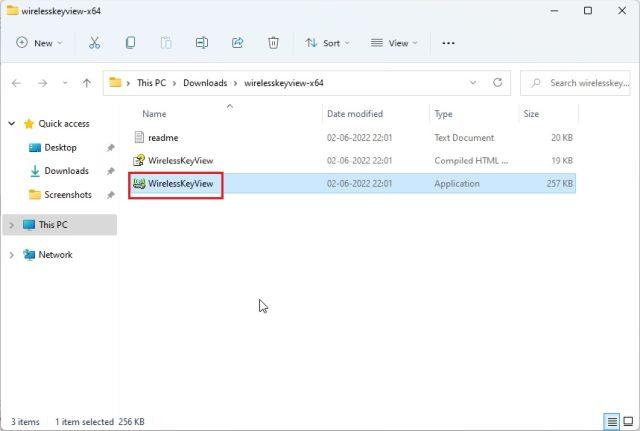
3. Open the extracted folder and launch WirelessKeyView. It will ask for a password and you need to enter the one you provided above.
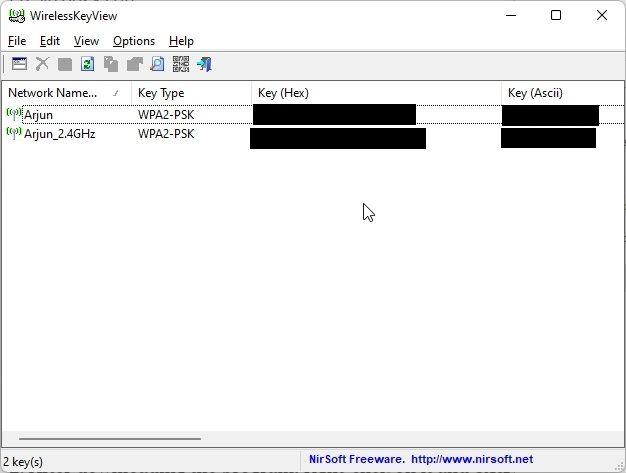
4. Finally, WirelessKeyView will display a list of all saved Wi-Fi networks with their passwords in the Key (Ascii) column. Easy, right?
Quick View Saved Wi-Fi Passwords in Windows 11
So those are five ways to find Wi-Fi passwords in Windows 11. From individual Wi-Fi networks to all saved ones, we've rounded up the best ways to see the password of every network on your PC. Now, if you want to find an IP address on a Windows 11 PC, head over to our linked guide. And to find the Windows 11 startup folder, follow our quick guide. Finally, if you have any questions, please let us know in the comments section below.