How to use System Restore in Windows 11
Windows 11 comes with a great System Restore feature that allows you to take your PC back in time and restore your data and settings if something accidentally goes wrong. For example, if you uninstalled some programs from Windows 11 and your computer started to malfunction because you uninstalled some system applications by mistake, you can easily return your computer to a working state. Or after editing the Hosts file in Windows 11, if the Internet stops working, you can use System Restore in Windows 11 to restore your computer to a previous date. In all of these scenarios, System Restore works wonders to get your Windows 11 PC back up and running. And in this article, we bring you a detailed guide on how to create a restore point and use System Restore in Windows 11.
Use System Restore in Windows 11 (2022)
In this article, we've included a 3-step process to create and use a restore point in Windows 11. Even if your PC won't boot, you can still access System Restore and go back to a backup from an earlier date. Expand the table below and jump to the appropriate section.
How to create a system restore point in Windows 11
Before you make system-wide changes like unlocking Windows 11 or applying registry hacks in Windows 11, you should remember to create a restore point to protect your data. If something breaks or your PC crashes, you can use the System Restore feature in Windows 11 to restore your PC to an earlier date. Here's how to create a restore point in Windows 11.
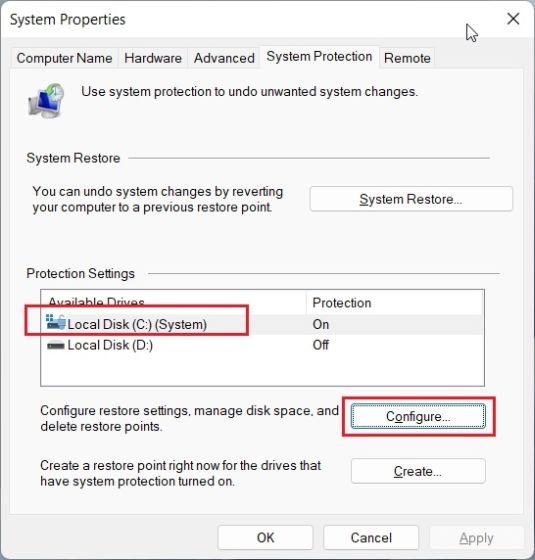
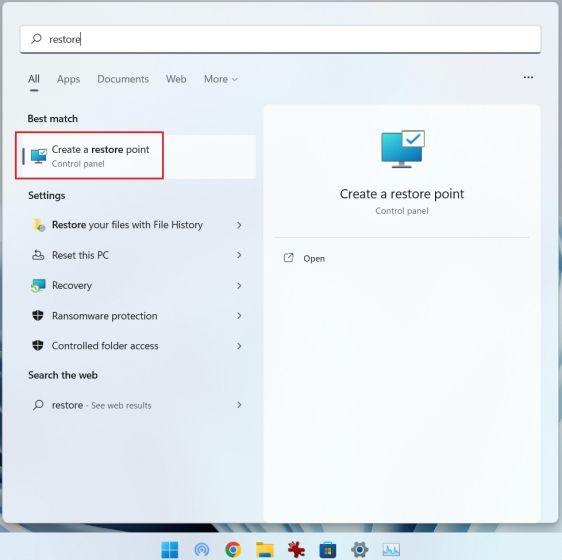
1. Press the Windows key and type "restore". From the search results, click "Create a restore point". This will instantly open the System Properties window.
2. Next, you need to enable system protection before creating a restore point. To do this, select the "C" drive and click "Configure".
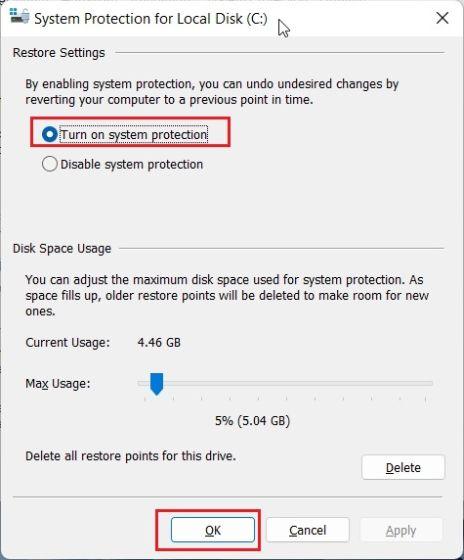
3. Here enable "Turn on system protection" and click "OK".
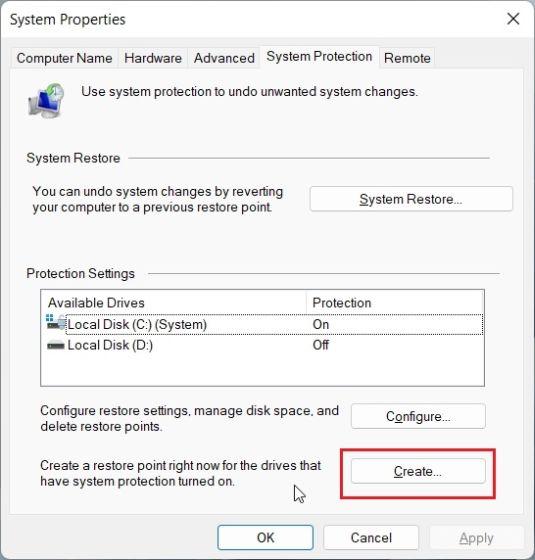
4. Now click "Create" to create a restore point in Windows 11.
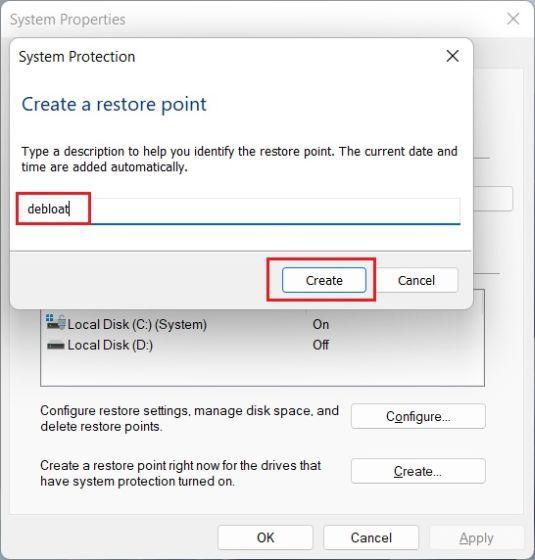
5. Give the restore point a name. The date and time are added automatically, so it is recommended that you specify the reason for creating the restore point. For example, I want to unlock my Windows 11 PC to improve its performance, so I added "debloat" as the system restore point name.
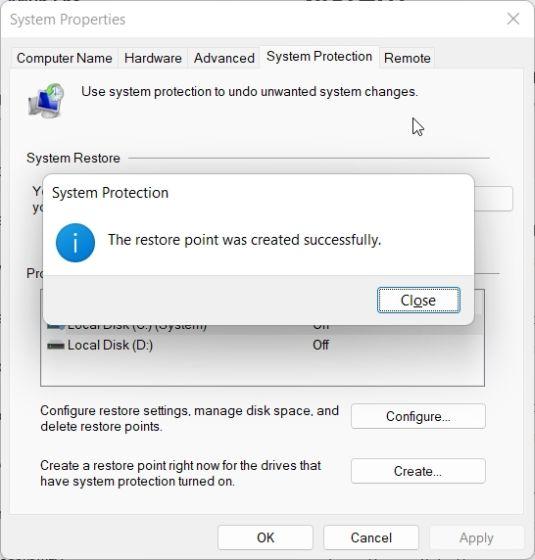
6. After 10-20 seconds, a restore point will be created on your Windows 11 PC. Some PCs may take significantly longer, depending on available storage and hardware. That's why we also suggest periodically deleting temporary files in Windows 11 and freeing up disk space to keep junk out of your PC.
Use System Restore Point in Windows 11 from Desktop
1. Now that you have successfully created a restore point, it's time to use System Restore in Windows 11 to go back in time. Press the Windows key and type "restore" again. And open the "System Properties" tab by clicking "Create a restore point" as we did in the section above.
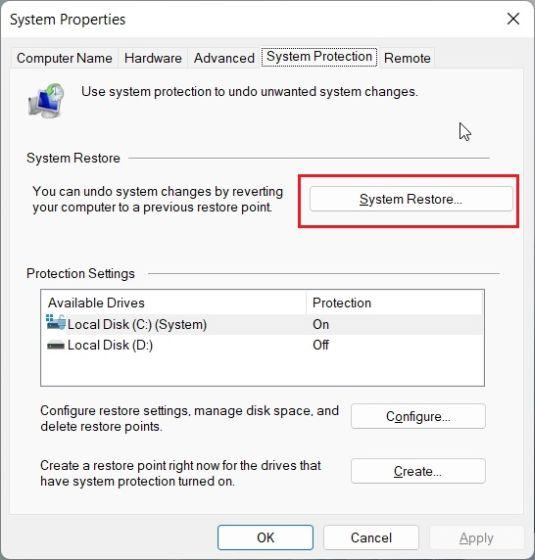
2. Then click System Restore.
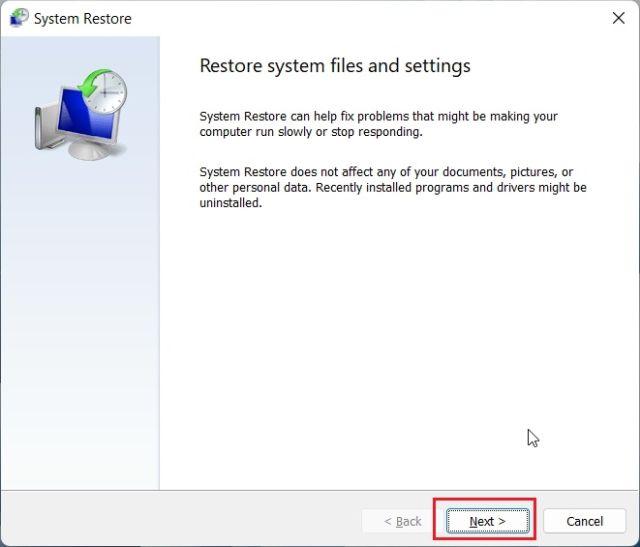
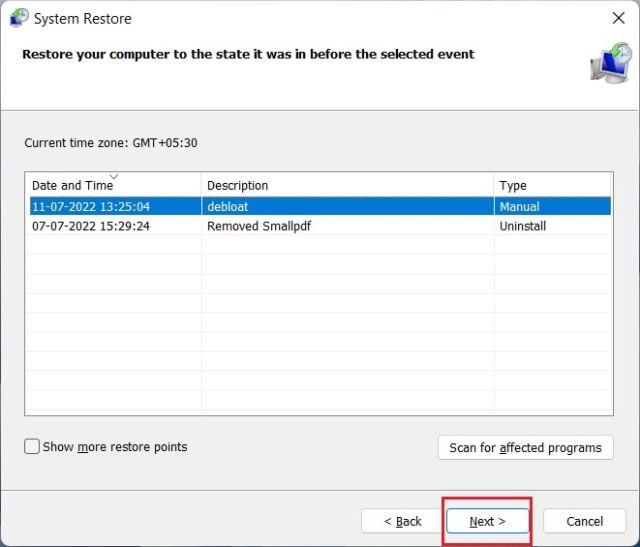
3. A new System Restore window will open. Click "Next" here.
4. You will find all the restore points you have created on your Windows 11 PC to date. Based on the date, time, and event name, select a restore point and click Next.
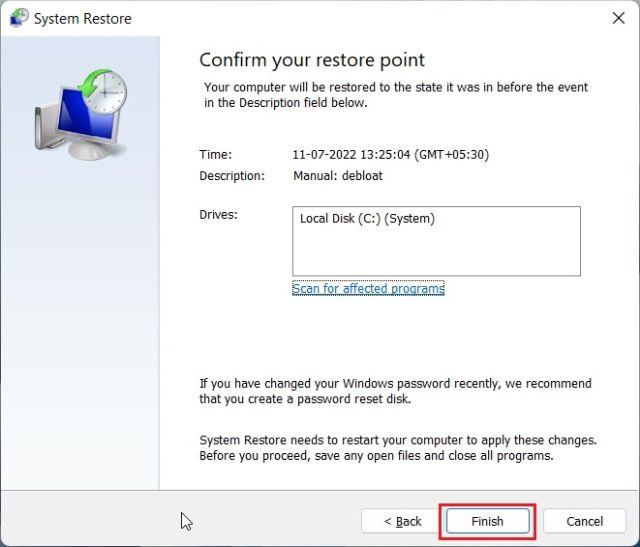
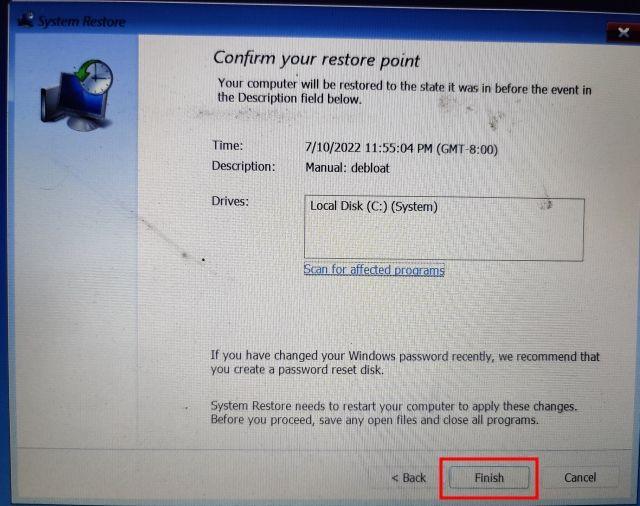
5. Finally, click Finish and this will restart your Windows 11 PC to begin the system restore process.
Run System Restore in Windows 11 from Advanced Boot Options
If your Windows 11 PC won't boot or shows a black screen after updating Windows, you can restore your system from the Advanced Boot screen. Here's how you can get your computer back up and running from the boot menu.
1. If your PC boots up with the Advanced Options screen, click this button to open the troubleshooting page.
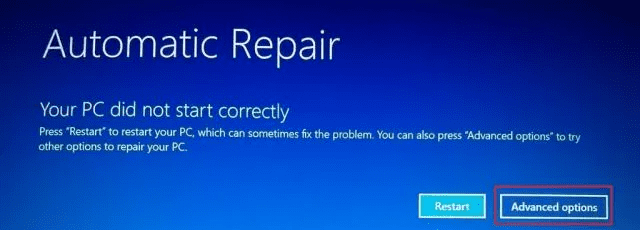
2. If not, follow these instructions to force open the recovery menu. First, turn off your computer. Now turn it on and when the Windows loading sign appears, turn off your computer again. Repeat this 2-3 times and Windows will be forced to load its recovery screen. On some computers, pressing F2, F8, or F12 during boot will also open the Startup Repair screen, so try using those keys as well.

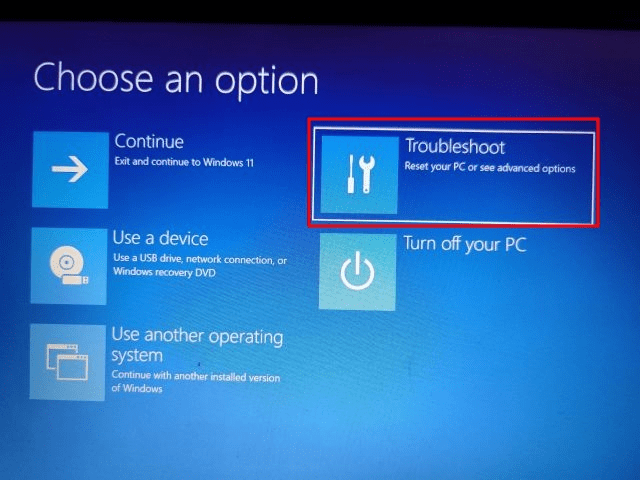
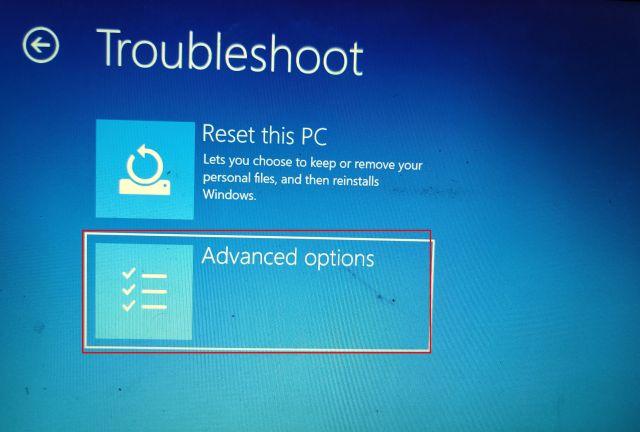
3. Then click Troubleshoot.
4. After that, open the "Advanced Options" menu.
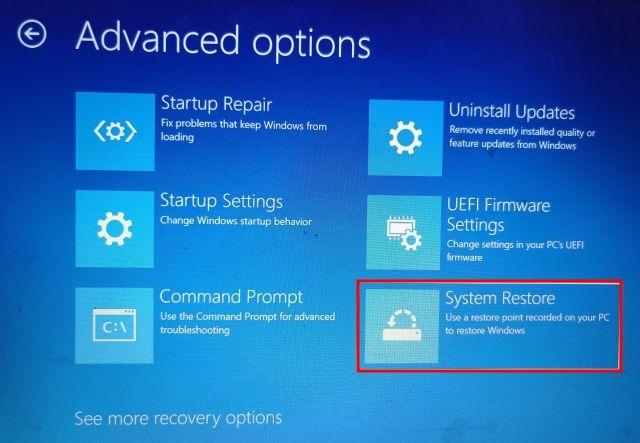
5. Here you will find the "System Restore" option. Press here.
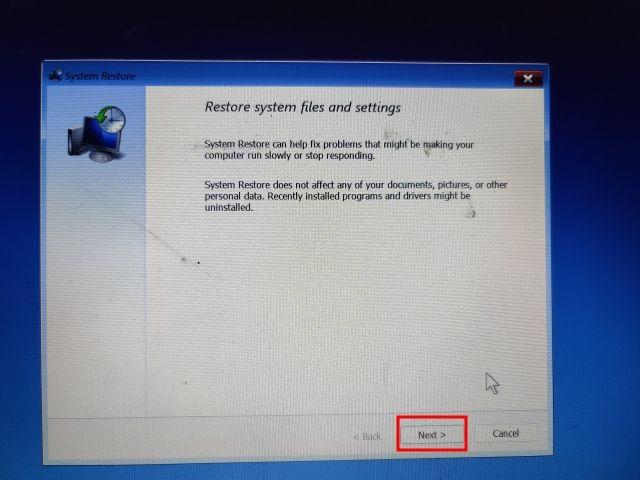
6. A new System Restore window will open and you need to click Next to continue.
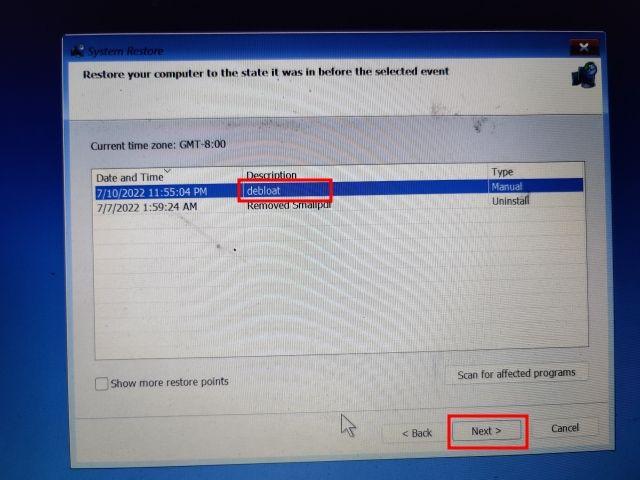
7. Here, from the list that appears, select the restore point you want to return to on your Windows 11 PC.
8. Finally, click Finish and this will start the System Restore process in Windows 11 from the loading screen.
Restore your PC with System Restore in Windows 11
Here's how you can use System Restore in Windows 11. While I haven't had to use this tool in a long time, it's nice to have this feature in Windows 11. If you can't restart your Windows 11 PC, System Restore will have your back. In any case, that's pretty much everything you need to know about how to create a system restore point and restore your Windows 11 PC using this feature. Also, if you forgot your Windows 11 password, follow our linked guide to sign in again and restore your PC without data loss. Finally, if you have any questions, please let us know in the comments section below.