How to split the screen into 2, 3 or 4 parts in Windows 10/11
Let's check out how to split screen in Windows 10/11 for multitasking like a pro.
One of the many hidden features of Windows that most users don't know about is split screen.
This was something I badly needed as sometimes my 2 year old will show up and say to include anything on YouTube.
Instead, I usually disagreed and gave him one of my old laptops to watch him take life from his keyboard.
Thanks to the split screen feature in Windows, this is no longer necessary. 😉
But seriously, you can stop switching windows every time and split the screen to get the job done.
So let's go ahead and see how to split screen in Windows 10/11.
Notably, this article has three methods for splitting the screen in Windows:
- Dragging windows manually (Windows 10/11)
- Using keyboard shortcuts (Windows 10/11)
- Using the built-in Windows split option (Windows 11 only)
But first, be sure to enable the Snap windows feature in the settings:
Windows 10 users can go to Settings > Multitasking and make sure the Snap windows toggle is enabled.
Windows 11 users can do the same by going to Settings > System > Multitasking and confirming that Windows Snap is enabled.
Now let's start dividing the screen into two, then into three and four divisions.
Split screen into 2 in Windows 10/11
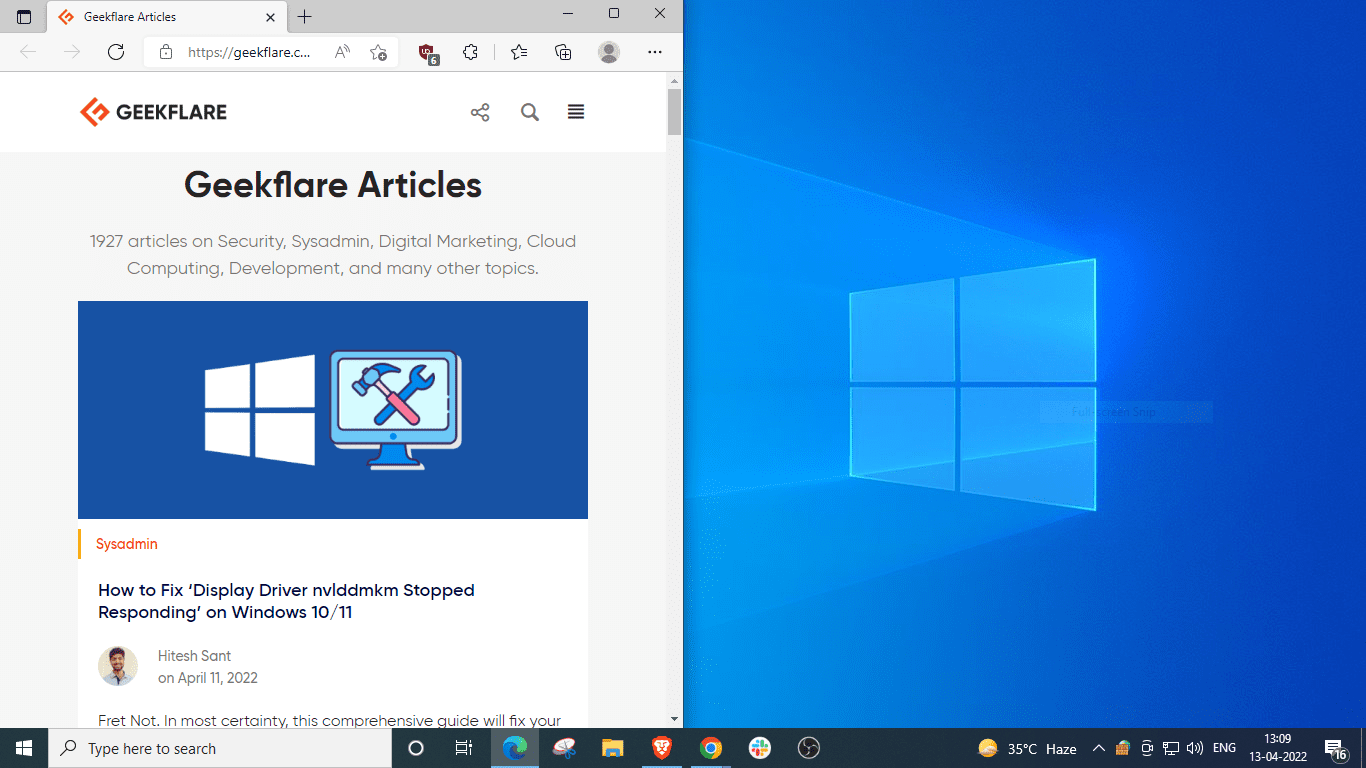
It's very simple. Just hold and keep dragging the window from both sides until you see the split indication:
You can later do this for another window to split the display in half. In addition, you can change the size of the division by moving the border as you wish.
However, there is a limit to how narrow a particular application can be. The most I could go for was Slack, with another window taking up roughly over 75% of the real estate.

In addition, you can also use keyboard shortcuts.
Open the theme window, press and hold the Windows key ⊞ and press the left arrow key ⬅️to place it in the left half of the display. After that, place another window on the other half by holding ⊞ and pressing ➡️.
Split screen by 3 in Windows 10/11
Screen division by 3 suggests the following layout:

The easiest way to get this combination is to drag the windows one at a time.
However, we will also try to reproduce this with keyboard shortcuts.
To do this, open the first window and place it on the left half by holding the windows key ⊞ + and pressing the left arrow ⬅️:

Then open the second window, hold ⊞, tap ➡️, and then ⬆️.
Note that Windows + up/down arrows also work as shortcuts for maximizing/restoring windows.
Thus, do not enlarge the windows that you want to place in the corners. Instead, let it hang somewhere in between and continue with the above keyboard shortcut.
Let's take a look:
Here Windows suggests filling in the bottom right quadrant, but if you don't see the options you can just hold ⊞, press and leave ➡️and then press ⬇️.
Split screen into 4 parts in Windows 10/11
Let's do this one last time and divide the screen into four parts by dragging each to a corner:
Alternatively, we can do this with Windows shortcuts. Please remember to avoid maximizing any window.
Here are the steps:
These were the methods valid for Windows 10 and 11. The following section describes an exclusive method that will only work for Windows 11 users.
Split screen for Windows 11
In Windows 11, you can hover over the expand/recovery icon to select a layout (2, 3, or 4 partitions) and start populating your preferred position sequentially.
However, you need to stick to the same layout for all your selections. Otherwise, it will change the layout with each step and you won't see the desired final separation.
It is very similar to solving a puzzle and putting the pieces one by one.
Summary
So, it was about splitting the screen into 2, 3 or 4 parts in Windows 10 and 11.
Maybe Windows 11 users can do it faster without drag and drop or using shortcuts. And it's terrible that Microsoft has banned some users with other hardware from getting this update.