How to restore a Windows image using the DISM command
DISM (Deployment Image Servicing and Management) is an advanced utility used for online and offline health scanning and recovery of a compromised Windows operating system.
What is the DISM command?
Are you experiencing issues with your Windows 8, 8.1, 10, or 11 operating system, such as blue screens, unexpected app crashes, or utilities or features that don't work?
DISM (Deployment Image Servicing and Management) is a command-line tool built into Windows to fix corrupted or corrupted Windows operating system files and functions directly from Windows online servers.
It is used for both online images (the currently running operating system) and offline Windows images in .wim, .vhd or .vhdx format to troubleshoot issues. DISM is accessed through the command line and Windows PowerShell.
System administrators also use the DISM utility to maintain, migrate, and create new images, especially during Windows PE (Preinstallation Environment), Windows RE (Recovery Environment), and Windows Setup.
First introduced in Windows 8 and Windows Server 2012 R2 in 2012, DISM is now part of all Microsoft operating systems running the most recent version.
Another program to fix corrupted Windows files is System File Checker (sfc.exe); however, it compares the corrupted files against the saved .wim system storage; if the latter is corrupted, SFC will not be able to fix the issues. The DISM tool solves this problem. Based on parent copies stored on Microsoft's update servers, it can scan and repair the .wim store.
In the following section, we will look at some DISM commands and their practical use with PowerShell and the Windows command line to scan and debug the Windows operating system:
How to run the DISM utility through the command line
You can use the command line to run the DISM tool and check and fix Windows for errors:
Enter cmd (a shorthand for command prompt) in the search bar.
As shown below, right-click Command Prompt and select "Run as administrator". You must be an administrator to use the DISM command line tool.
The part below shows you how to use several DISM commands to scan and fix Windows issues.
How to repair Windows 10 using DISM?
DISM uses three important options to scan, verify, and repair a broken or corrupted Windows image, namely:
ScanHealth, CheckHealth и RestoreHealth.
There are two more inputs used in conjunction with the above commands for advanced validation.
Cleanup-image for extensive checking and
Online to check a running operating system.
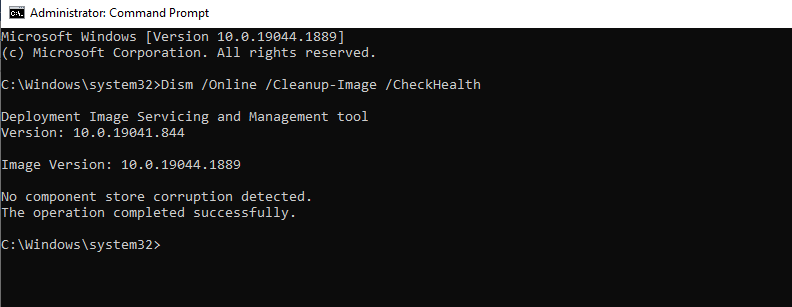
How to use the DISM CheckHealth command?
The CheckHealth argument triggers a fundamental check for corruption in the component store. It is fast and only looks for errors that were already part of the log file. This command scans part of the component store.
The Component Store tracks and maintains each component that makes up the Windows operating system. To run CheckHealth online, type the following on the command line and type.
Dism /Online /Cleanup-Image /CheckHealth
After the scan is completed, the window shown below will appear:
How to use the DISM ScanHealth command?
ScanHealth takes longer than CheckHealth because it thoroughly scans the component store for corruption. The time it takes to complete the Windows Component Store check will depend on how well your Windows 10 operating system works.
Run the following command from the command line to start scanning:
Dism /Online /Cleanup-Image /ScanHealth
After scanning is completed, the window shown below will appear:
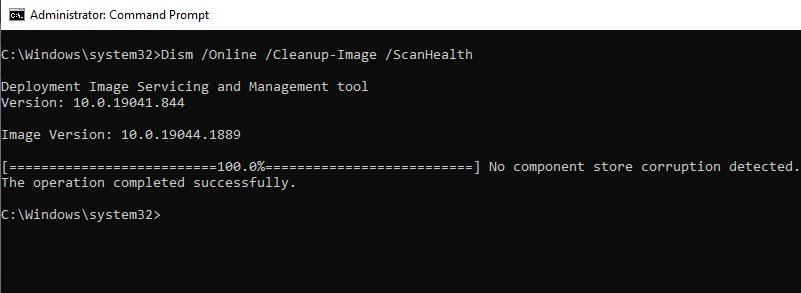
ScanHealth checks individual components for corruption in the component store by comparing the hash value of the current file with the stored hash value, so a Scanhealth scan typically takes longer than a CheckHealth scan.
In addition, a log file is generated that can be used for failure analysis. If lost, first check the DISM.log file for specific issues. Then review the Sessions.xml log file and then the CBS.log file.
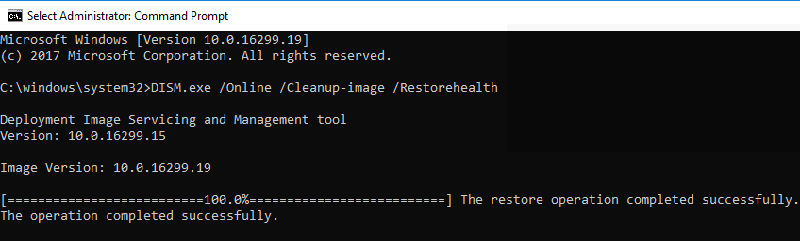
How to use the DISM RestoreHealth command?
RestoreHealth is the third most important DISM parameter after CheckHealth and ScanHealth.
It is used with DISM to restore an online or office Windows image using various source files.
The following Restorehealth command is used to restore the online operating system:
DISM.exe /Online /Cleanup-image /Restorehealth
DISM uses Windows Update to get the necessary files to fix corruption when this command is run. Depending on the degree of wear, scanning and restoring the Component Store may take some time. From Windows Update servers, DISM automatically downloads and replaces files for corrupted or missing components.
After the command completes, the following screen will appear:
Offline Windows Image Recovery
The DISM commands explained above are designed to work online for the current Windows operating system.
Adding and removing updates, drivers, language packs, and other configuration tasks can be done offline using DISM.
We will now see how DISM is used to fix Windows Offline Files.
To perform the operation offline, you can use bootable installation discs, Windows 10 ISO files, or locally stored source files such as "install.wim" or "install.esd" files from another device and mount them as a drive.
Before proceeding, make sure the files match the version, edition, and language of the version of Windows 10 that needs to be fixed.
Let's look at one example of how to use the DISM command line to fix an offline image.
To fix the offline image, run the DISM command below from a command prompt:
Dism /Image:C:offline /Cleanup-Image /RestoreHealth /Source:c:testmountwindowsLimitAccess
The source location needs to be changed for your offline image, and is usually a WIM, VHD, or VHDX file.
LimitAccess tells DISM not to check Windows Update or Windows Server Update source files.
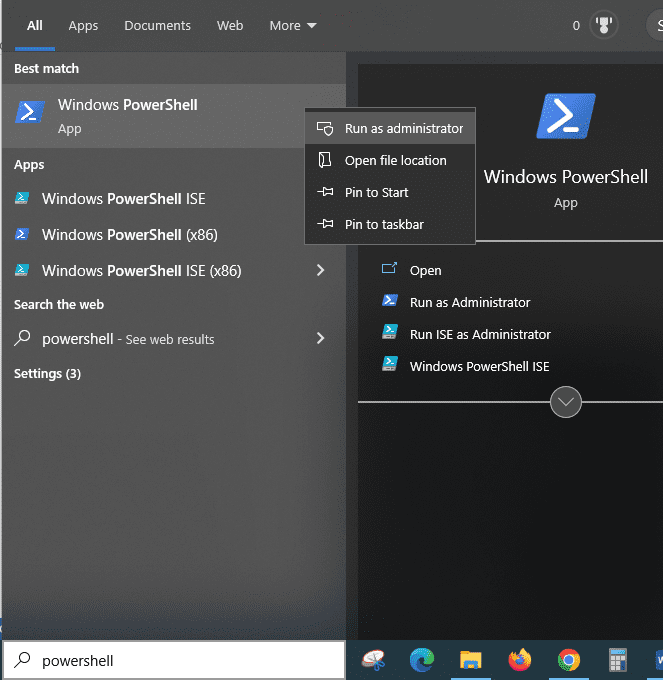
How to run the DISM utility through PowerShell?
In the sections above, we looked at using the Windows command line tool to scan, identify, and fix operating system issues. However, the same operations can be performed using Windows PowerShell cmdlets.
Type a PowerShell command in the search box and run it as an administrator as shown in the screenshot below to access the PowerShell cmdlets.
powershell
PowerShell DISM cmdlets often correspond directly to arguments in Dism.exe. You can get a complete table of all DISM commands along with their PowerShell cmdlet equivalents on the Microsoft website.
To see the corresponding syntax, switches, and options, use the "get-help -examples" PowerShell command.
Some of the commands used in PowerShell are
- Для CheckHealth: Repair-WindowsImage -CheckHealth
- Для ScanHealth: Repair-WindowsImage -ScanHealth
- Для RestoreHealth: Repair-WindowsImage -RestoreHealth
Examples of Using PowerShell to Run the DISM Command
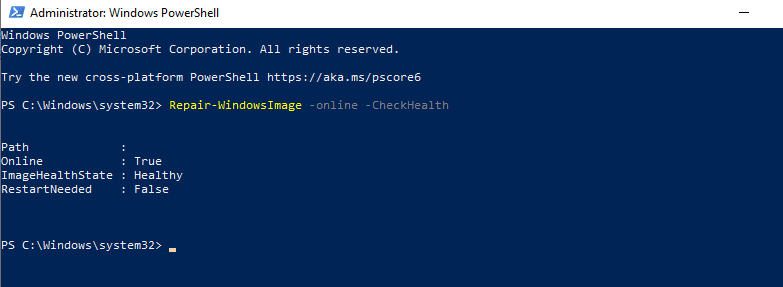
Type the following to run the CheckHealth Powershell cmdlets.
Repair-WindowsImage -online –CheckHealth
After the command completes, the following screen will appear:
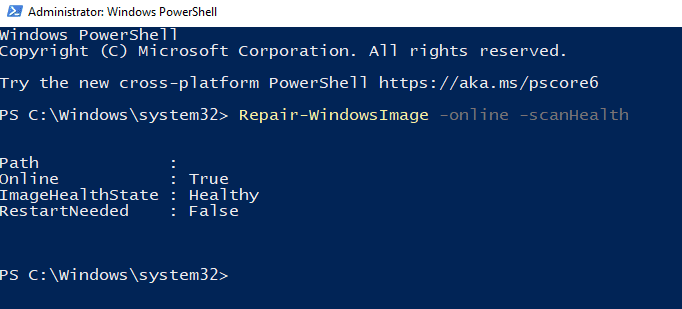
You can use the ScanHealth Powershell cmdlets for a thorough check and fix as follows:
Repair-WindowsImage -online –ScanHealth
The following screen will appear after the command is successfully executed.
Keep in mind that you must have administrator rights to run these commands; otherwise, you will get the error "The requested operation requires elevation" and the DISM command will not work.
You can find all information about the PowerShell cmdlet module on this Microsoft page.
Troubleshooting DISM errors
The purpose of DISM is to automatically scan and repair the operating system. But sometimes it can fail.
This section will highlight some common errors that you may encounter when running the DISM utility.
Error: 0x800f0954 - DISM error. The operation was not carried out.
This error is a common issue that occurs when the DISM command fails.
This error occurs when a third-party antivirus program interferes with DISM while the command is running. Active Proxy, Windows Update Services, read-only install.wim, etc. can also cause this error.
Let's see how to overcome these issues so that DISM works successfully.
Intervention of the antivirus program
Solution: If the error still occurs after stopping the antivirus, you can uninstall and reinstall it after the DISM function ends. There is no need for a third-party antivirus because Microsoft Defender is a powerful antivirus for Windows 10.
Damaged Windows update components and registry.
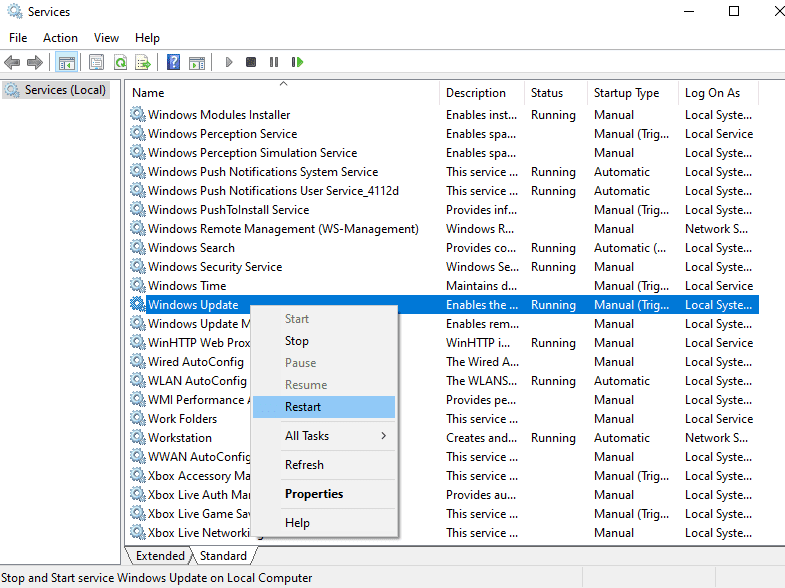
If Background Intelligent Transfer Service (BITS), Cryptographic Services (CryptSvc), and Windows Update Services are configured incorrectly, DISM fails.
Decision. To successfully run Windows Automatic Updates, these services must have an automatic startup type and startup status. Sometimes restarting these services also fixed the problem:
Disabling proxy
You can use a proxy server to maintain privacy, which will prevent DISM from executing the command.
Decision. The solution is to disable the proxy server and run the DISM tool.
Read-only access to Install.wim
In most cases, the install.wim file is copied directly from the Windows 10 install ISO to run an offline DISM scan. Because the install.wim file is read-only, DISM does not work.
Decision. Remove read-only permissions by going to the "Read-only" box, selecting "Properties" from the context menu when you right-click on the install.wim file.
How to Fix DISM Error 50
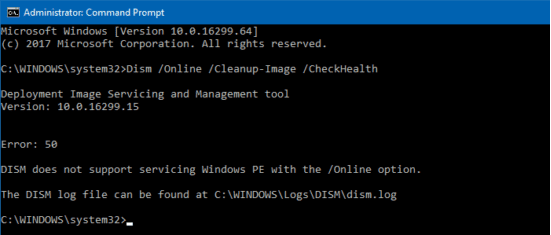
DISM Error 50 is another common type of error. This happens when the user tries to run one of the following commands:
- Dism /Online /Cleanup-Image /CheckHealth
- Dism /Online /Cleanup-Image /ScanHealth
- Dism /Online /Cleanup-Image /RestoreHealth
The root cause of this error is due to a misplaced registry key.
Therefore, in order to fix this problem, you must remove this key as follows:
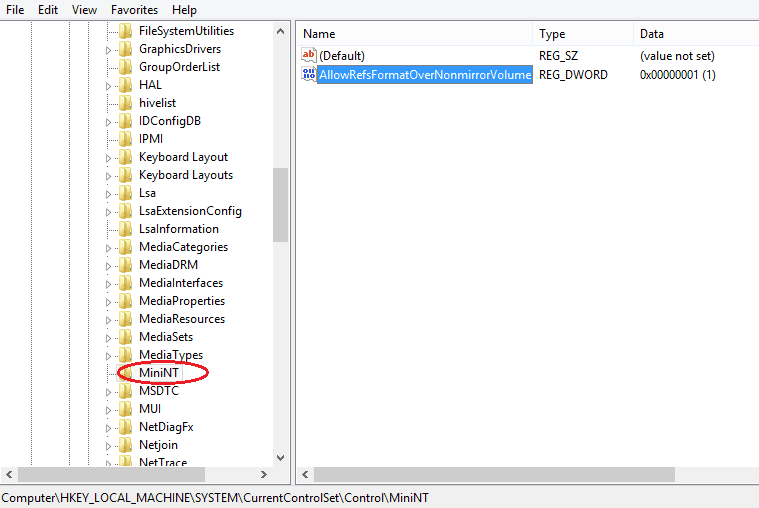
Using the command line, run Regedit to access the registry.
Navigate to HKEY_LOCAL_MACHINESYSTEMCurrentControlSetControl.
After that, find the MiniNT folder and delete it as shown in the picture below.
Restart your Windows 10 PC after verifying the changes.
Summary
The DISM tool is a versatile and advanced tool that professionals with a technical background can use. It is ideal for system administrators. Sophisticated tool fixes component store corruption that SFC and CHKDSK can't handle to fix operating system issues.