How to install Windows 11 on your Chromebook
We already have a guide for installing Windows 10 on Chromebooks, but users want to upgrade to Windows 11, the latest operating system from Microsoft. There are several Chromebook emulators to help you run Windows 11 on your Chromebook, and in this guide, we will discuss one of the easiest ones. We are going to use QEMU to show you how to install Windows 11 on your Chromebook. But note that running a virtual machine requires powerful hardware. If you just want to run Windows programs or games, I would suggest configuring Wine to run Windows apps on a Chromebook instead of a full Windows virtual machine. That being said, follow our guide to installing and using Windows 11 on a Chromebook.
Installing Windows 11 on a Chromebook: A Step-by-Step Guide (2023)
In this guide, we've included all the requirements you need to complete to install Windows 11 on a Chromebook. In addition, we've added detailed instructions on how to create a Windows 11 virtual machine and fix any errors along the way.
Prerequisites for running Windows 11 on a Chromebook
1. To be able to install Windows 11 on a Chromebook, you must have a powerful Chromebook, preferably with a 64-bit Intel or AMD processor. In addition, you must have at least 128 GB of storage and 8 GB of RAM.
2. Your Chromebook must support KVM (Kernel Based Virtual Machine) for better performance. If your Chromebook is equipped with an 11th Gen Intel processor or later, KVM support is already enabled. You can learn how to check for KVM support on your Chromebook in this guide below.
3. Linux support is absolutely essential on your Chromebook. Since Windows 11 requires 64 GB of storage, you should allocate about 80 GB of space for the Linux partition. Depending on the administrator, Linux support may vary on a Chromebook issued by a school.
4. Finally, you will need the Windows 11 ISO file to set up the virtual environment. Download a fresh copy of Windows 11 ISO by following our linked guide.
Set up QEMU and Virtual Machine Manager
1. I'm assuming you've already enabled Linux on your Chromebook. If not, follow our guide at the link here and set up Linux right away. Don't forget to allocate 80 GB or more disk space for the Linux partition.
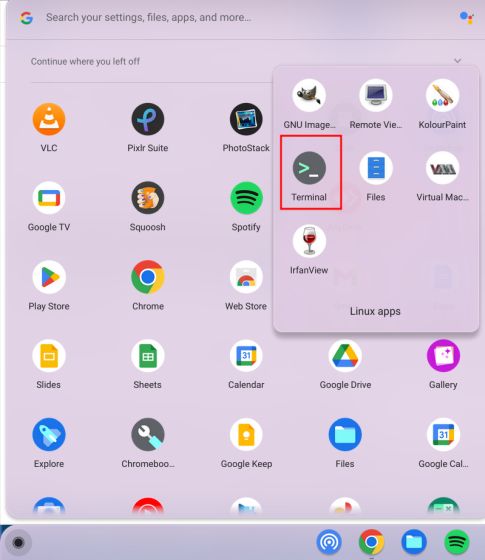
2. Then go to the Linux Applications folder in the application launcher and open a terminal.
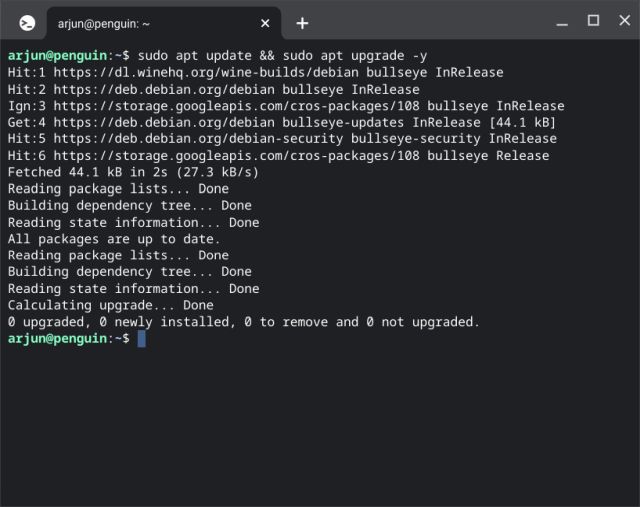
3. After that, run the command below to update all packages and dependencies.
sudo apt update && sudo apt upgrade -y
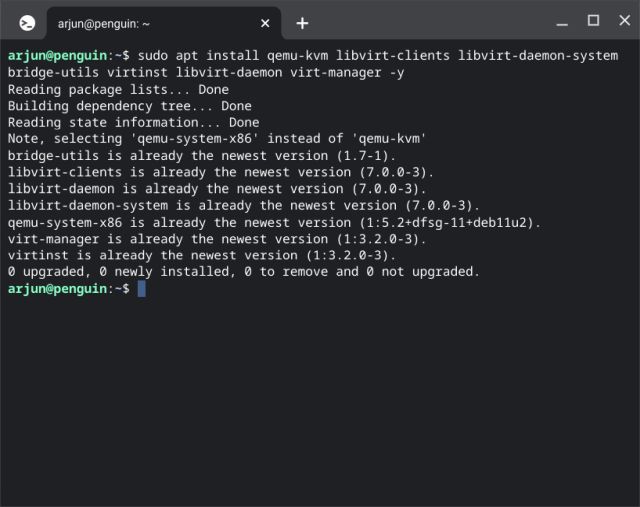
4. Then run the command below to install QEMU and Virtual Machine Manager.
sudo apt install qemu-kvm libvirt-clients libvirt-daemon-system bridge-utils virtinst libvirt-daemon virt-manager -y
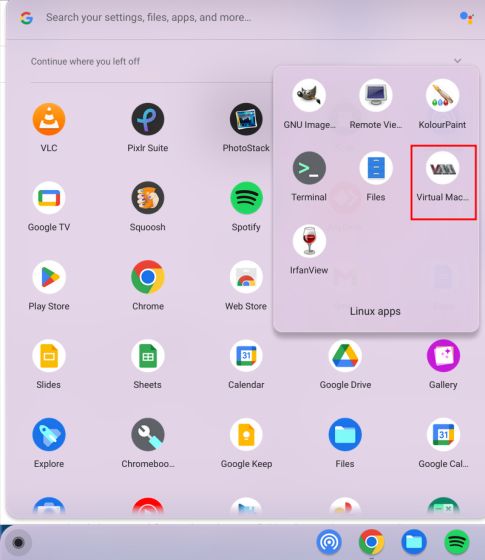
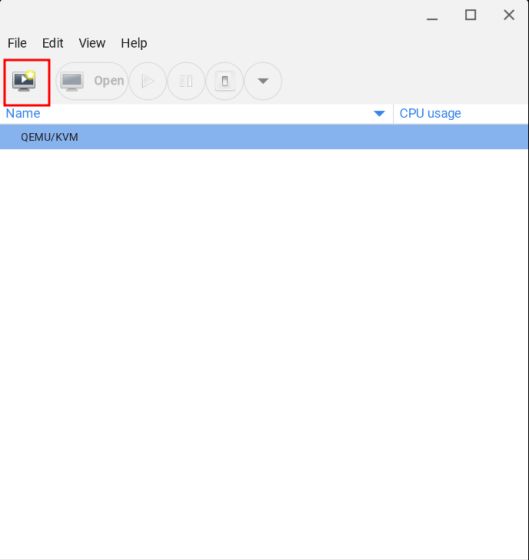
5. When done, open the application launcher and launch "Virtual Machine Manager" from the Linux Applications folder.
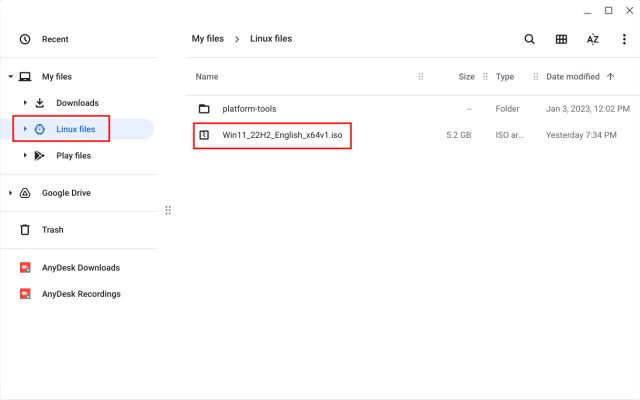
6. Now move the Windows 11 ISO you downloaded above to the Linux Files section using the Files app.
Install Windows 11 on your Chromebook
Once you've set up QEMU and Virtual Machine Manager, it's time to install Windows 11 on your Chromebook. Follow these steps to create a Windows 11 virtual machine on a Chromebook:
1. In the Virtual Machine Manager, click the New button.
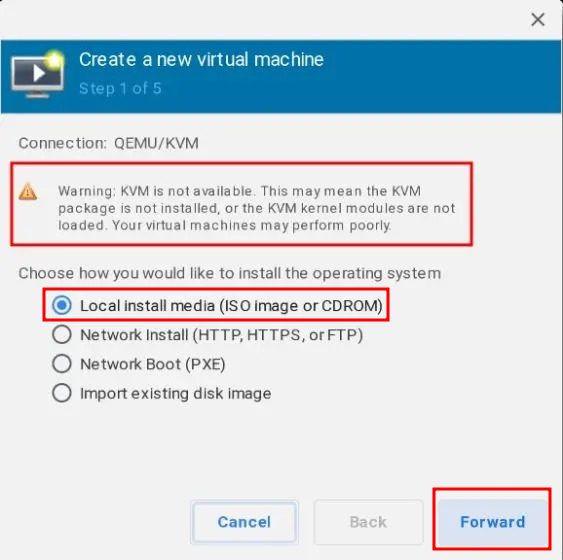
2. Here, select "Local Installation Media" and click "Next". If your Chromebook does not support KVM, you will see a warning at the top. Without KVM support, performance will be quite poor.
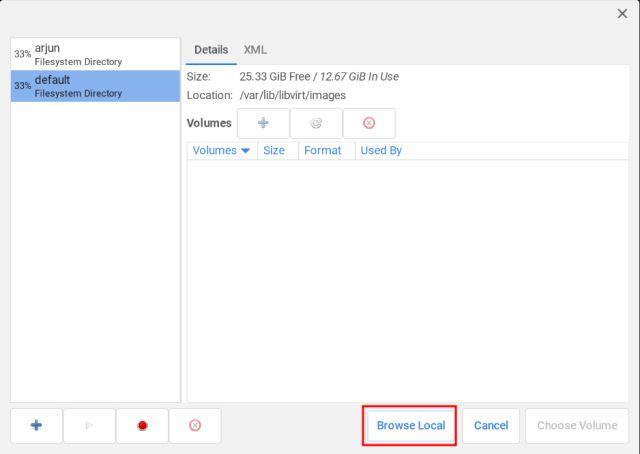
3. On the next page, click Browse.

4. A new window will open. Here, click "View Local".
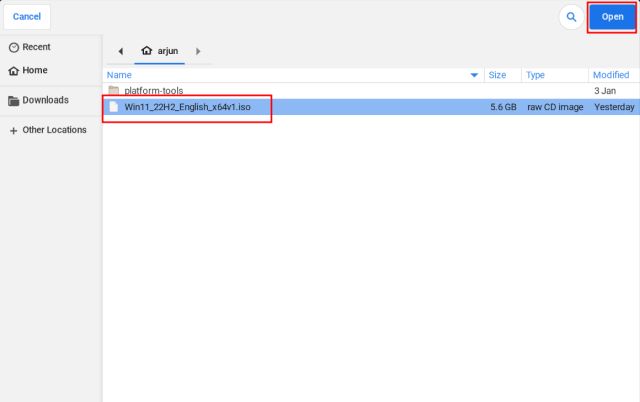
5. Now select the Windows 11 ISO image and click Open.
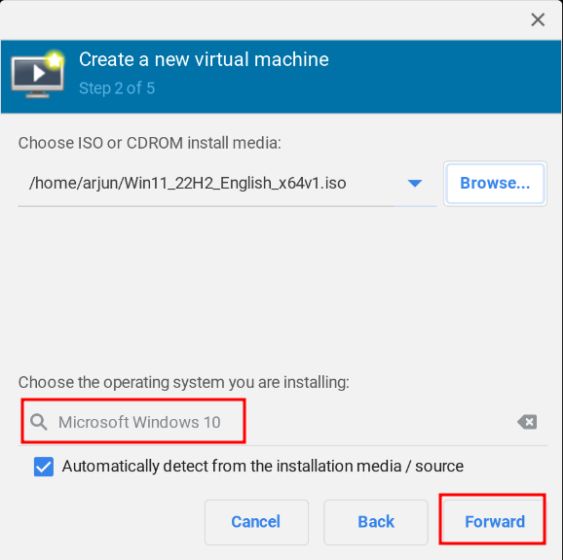
6. The software will automatically detect the OS as Windows 10. This is not a problem and you can ignore it. Click "Forward".
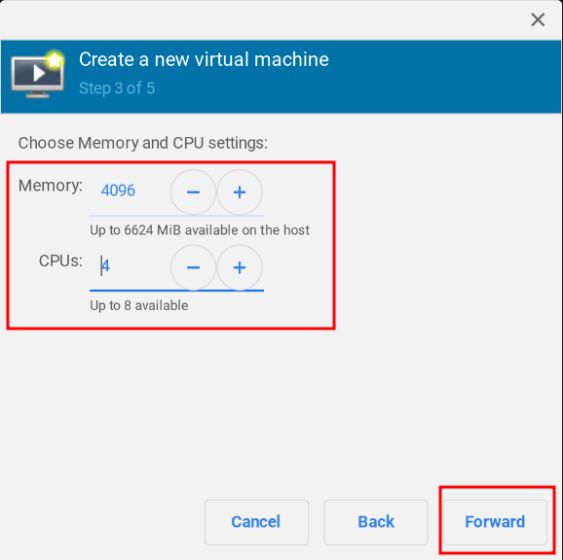
7. On the next page, leave memory at 4096 (4 GB) and increase the number of CPU cores to 4. Again, if you have a powerful CPU with more cores and RAM, assign more RAM and CPU cores to improve performance.
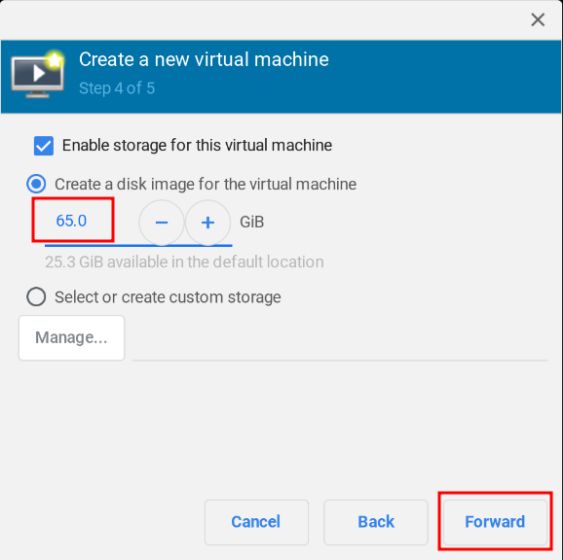
8. On the next page, allocate at least 65 GB of disk space for Windows 11. If you have more space, you can allocate it as you wish.
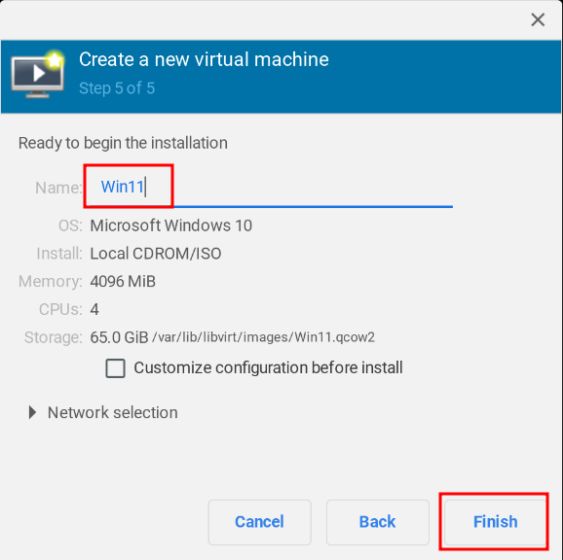
9. Then change the name of the virtual machine to "Win11" or "Windows 11" and click "Finish".
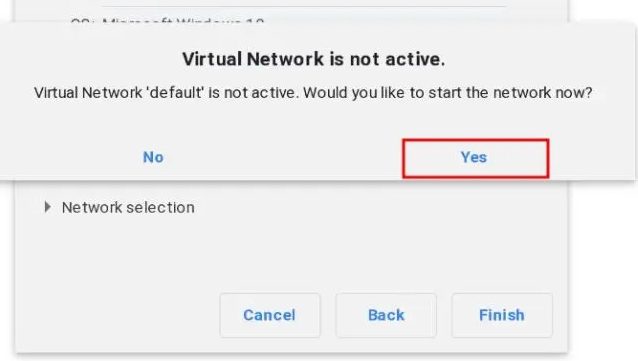
10. You may receive a pop-up window with the message "Virtual network is not active". Click "Yes" to continue.
Note. If you receive an error like "Unable to install XATTR as trusted…..", continue to the next section of this article for a solution.
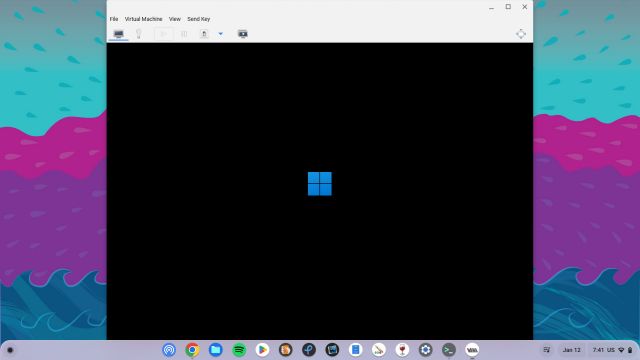
11. Finally, Windows 11 will boot up on your Chromebook. Now you can proceed with the installation and use Windows 11 without problems.
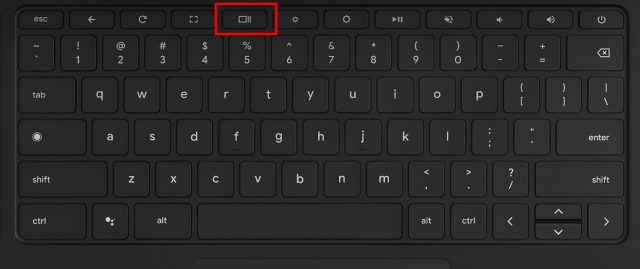
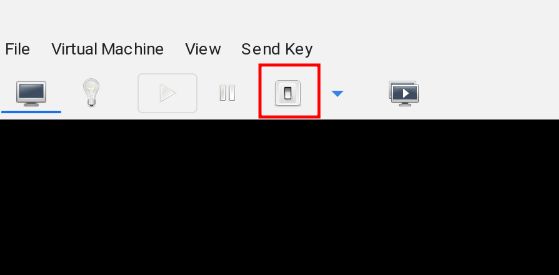
12. To exit the Windows 11 VM to the Chrome OS environment, press the browse button on the top row of the keyboard (usually above the 5 key).
Facing "Unable to install XATTR Trusted" error on Chromebook? Here is the fix!
If you're getting the error "Unable to complete installation: 'Unable to install XATTR trust.libvirt.security.dac…'" when setting up a Windows 11 virtual machine on your Chromebook, don't worry. You need to make a few changes and it will work without problems. Here are the steps to follow.
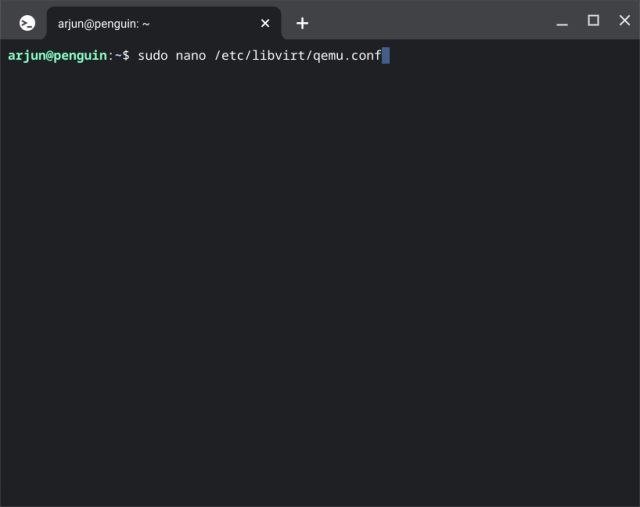
1. Open a terminal and run the command below to edit the "qemu.conf" file.
sudo nano /etc/libvirt/qemu.conf
2. This will open the nano editor in the Terminal. Now add the lines below at the top. Keep in mind that you can only use the keyboard in this editor.
user="root"group="root" remember_owner=0
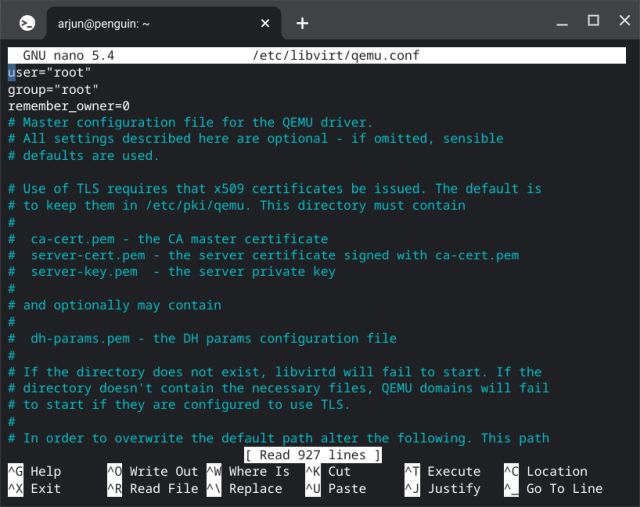
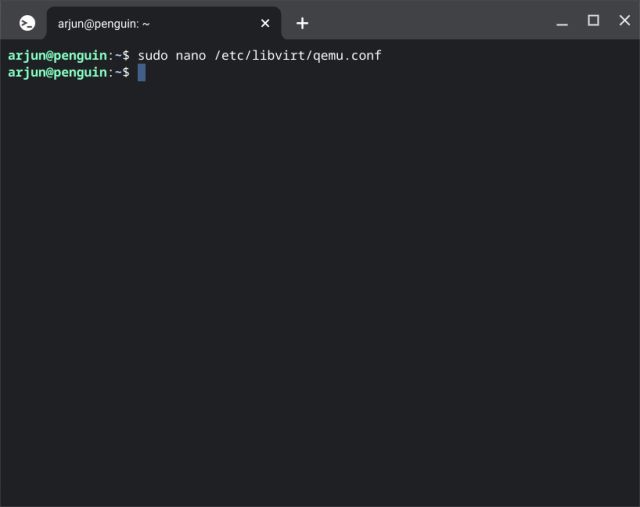
3. Now press "Ctrl + O" and press Enter to save the changes in the nano editor. After that, press "Ctrl + X" to exit the nano editor.
4. Finally, go ahead and follow the steps above. Installing a Windows 11 virtual machine will definitely work. If that doesn't work, we recommend restarting your Chromebook and trying again.
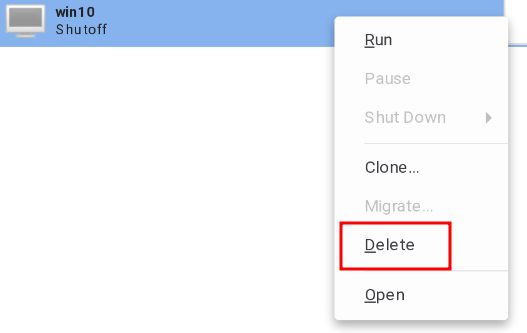
How to shut down and delete a Windows 11 virtual machine on a Chromebook
1. If you are not satisfied with the performance and want to shut down the Windows 11 virtual machine, click the arrow icon and select Shut down. If the virtual machine is not responding, select Force shutdown.
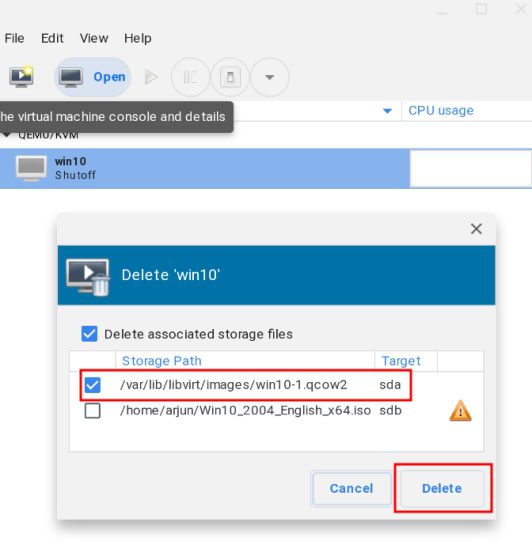
2. If you want to completely remove Windows 11 from your Chromebook and free up some space, please shut down the virtual machine first and then open the Virtual Machine Manager. Now right-click on it and select Delete. Don't worry, this won't delete anything on your Chromebook since the virtual machine is isolated from the rest of the system.
3. On the next page, make sure the "sda" checkbox is checked, and then click "Remove". Within a few seconds, the Windows 11 virtual machine will be deleted and your storage will be freed up. You can also remove the Windows 11 ISO along with it.
Install and Use Windows 11 on a Chromebook
Here's how you can install and use Windows 11 on a Chromebook. As mentioned above, you need powerful hardware to run Windows 11 on a Chromebook. Otherwise, performance will be poor and you won't be able to do anything productive. However, this is all from us. If you want to try Chrome OS Flex on other PCs, follow our guide and learn how to install Chrome OS Flex on a Windows PC. And to find the best Chromebook apps to serve as alternatives to popular Windows apps, check out our detailed list. Finally, if you run into any issues, please let us know in the comments section below.