How to Find Your MAC Address in Windows 11 (5 Methods)
If you are trying to set up your Raspberry Pi on your PC, you may need to find the IP address of your Windows 11 PC along with other details such as the MAC address. Also, if you want to block or allow a PC on your network, you need to find the MAC address in Windows 11 in order to apply the restriction policy through the router settings. In such scenarios, the MAC address works well because it does not change constantly, unlike the IP address. By the way, in Windows 11 there is an option to randomize the MAC address, but it is not enabled by default. However, if you want to find your MAC address in Windows 11, check out our detailed guide below. We have mentioned five different ways to find a physical address in Windows 11.
Find MAC Address in Windows 11 (2022)
In this guide on how to find the MAC address in Windows 11, we have mentioned five methods, from the Windows Settings app to the command line. Expand the table below and navigate to the method you think is appropriate to check the physical address of network adapters in Windows 11 right away.
Find MAC Address in Windows 11 Using the Settings App
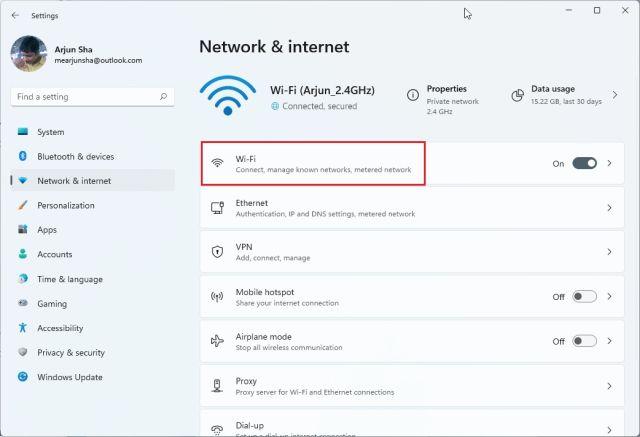
1. First, use the Windows 11 keyboard shortcut “Windows + I” to open the Settings app. Here go to "Network & Internet" settings on the left sidebar and open "Wi-Fi" on the right pane if you have a wireless connection. If you have connected an Ethernet cable to your computer, click Ethernet.
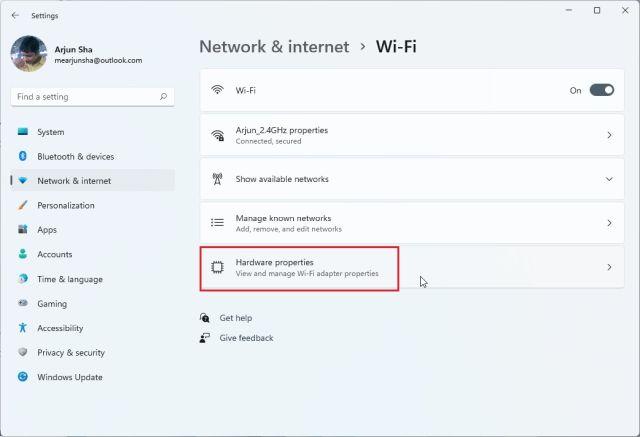
2. Now scroll down and click on Hardware Properties.
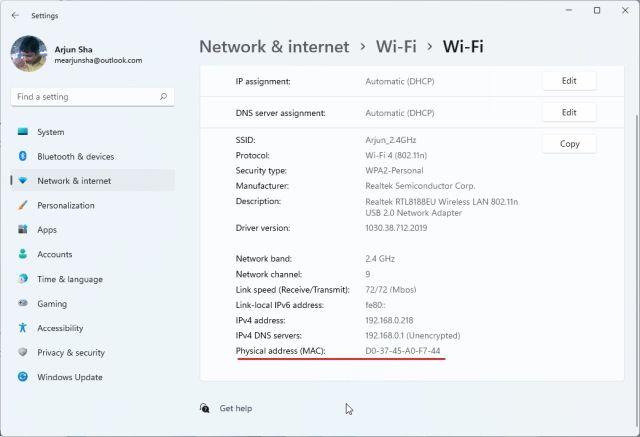
3. Here you will find the MAC address of your Windows 11 PC at the bottom.
Find MAC Address in Windows 11 from Control Panel
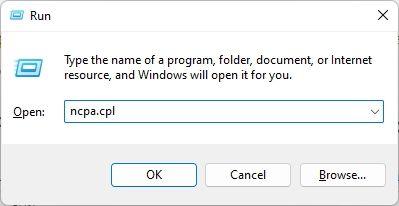
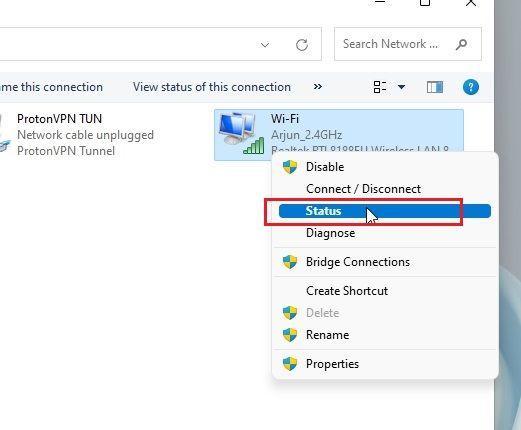
1. Another easy way to find out the MAC address in Windows 11 is through the control panel. Just press "Windows + R" to open the "Run" window. Here, type ncpa.cpl in the text box and press Enter.
2. This will open the Network and Sharing Center directly. Now find the network you are connected to - be it Wi-Fi or Ethernet. If you are using Wi-Fi, right-click on the "Wi-Fi" adapter and select "Status". If you are using Ethernet, right click it and do the same.
3. In the Status window, click Details.
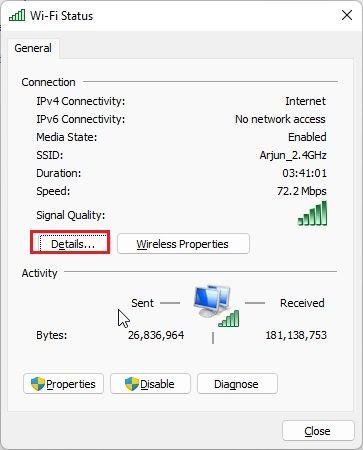
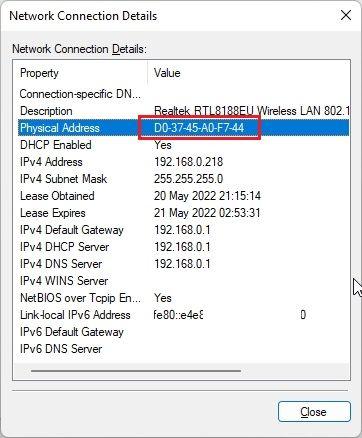
4. Here you will find the "Physical Address" of your network adapter. This is actually the MAC address of your Windows 11 PC.
Check MAC Address in Windows 11 from System Information
Along with Windows Settings and the Control Panel, the System Information app in Windows 11 also keeps a record of your MAC address. So, here is how you can check the physical address of your PC:
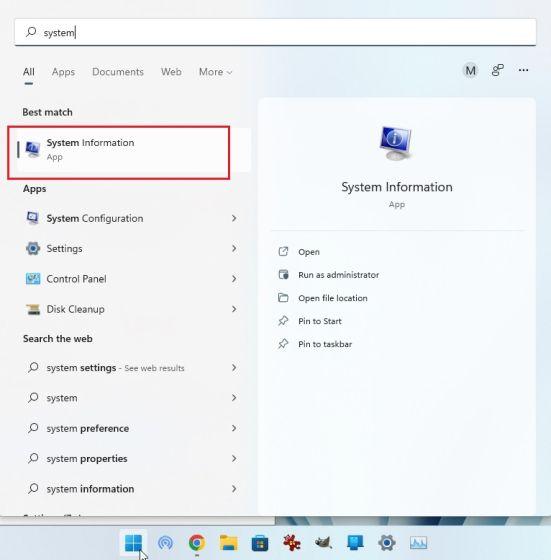
1. Press the Windows key once and search for "system". Now open System Information.
2. Here go to Components -> Network -> Adapter.
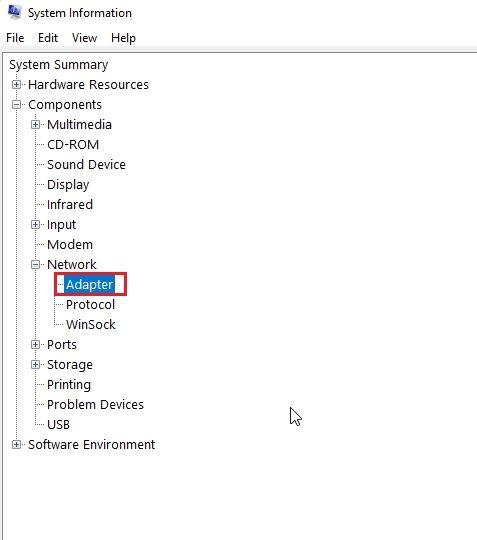
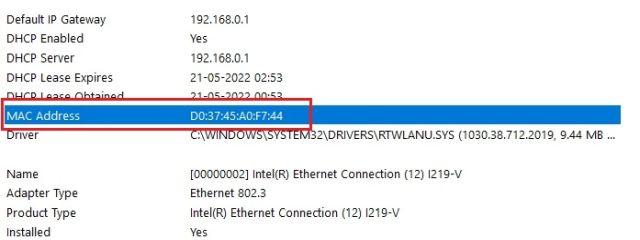
3. In the right pane, find "MAC Address". The value next to it is your Windows 11 MAC address.
Check MAC Address in Windows 11 Using Command Prompt
The command line offers a lot of hints and tricks, and one of the commands allows you to find the physical address of network adapters in Windows 11. Let's see how it works:
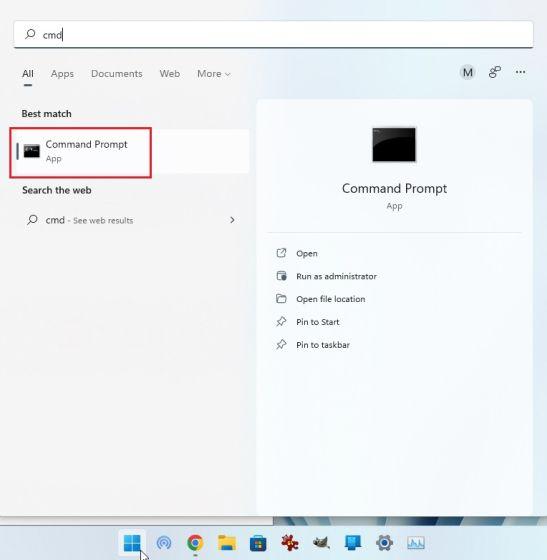
1. To start, press the Windows key once and search for "cmd". Now open "Command Prompt" from the search results. No need to run the program as administrator in Windows 11.
2. Once you are in the CMD terminal, run the command below. This will neatly list all network adapters and their MAC addresses on your Windows 11 PC. Note that the "physical address" mentioned here is actually a MAC address.
getmac /v /for list
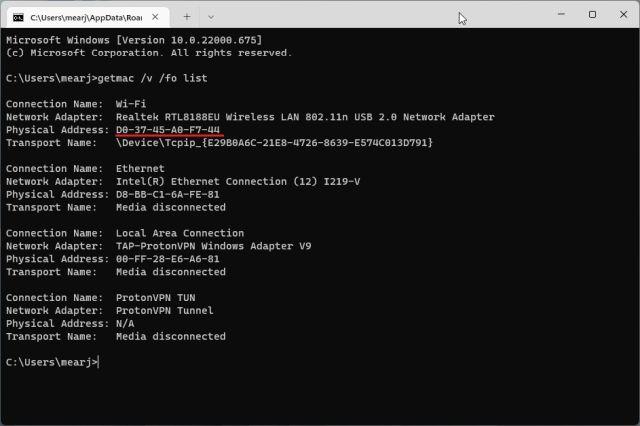
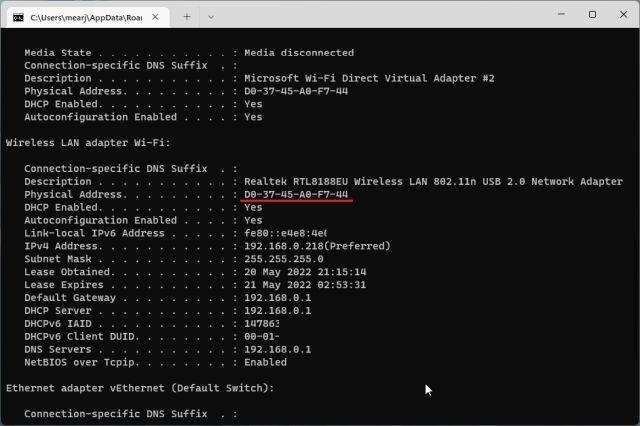
3. Alternatively, you can run another network command in CMD. This will display even more information, but you need to find the MAC address of your current network. If you are connected to a Wi-Fi network, go to the "Wireless LAN Wi-Fi" section and write down the "Physical Address". This is the MAC address of your Windows 11 computer.
ipconfig /all
Find MAC Address in Windows 11 with PowerShell
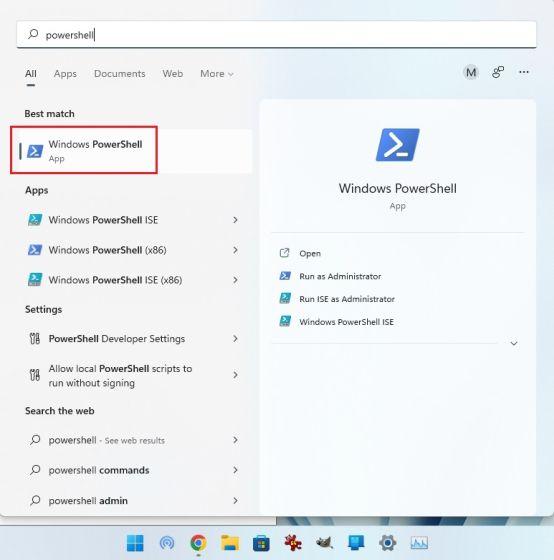
1. You can also find out the MAC address of your Wi-Fi and Ethernet network using PowerShell. Press the Windows key once and search for "powershell". Now open the application. Again, you don't need to open PowerShell as an administrator.
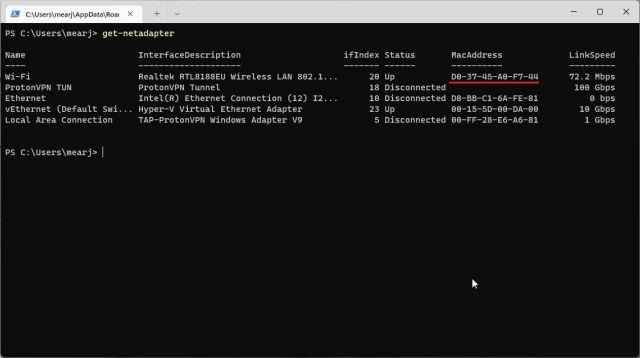
2. Then paste the command below into the PowerShell window and press Enter. This will instantly display the MAC addresses of all network adapters connected to your Windows 11 PC in tabular form. It's cool, right?
get-netadapter
Check Physical Address (MAC) on Windows 11 PC
So, these are five easy ways to find the MAC address of your network adapters in Windows 11. For most users, the Windows Settings app method will suffice. However, if you're good with Windows, you can open Terminal and access more detailed information about your network. Anyway, that's pretty much all for this tutorial. If Wi-Fi keeps dropping out on your Windows 11 PC, follow our guide and fix the problem immediately. And if you're getting the "Network discovery is disabled" error, we've got a handy guide for that too. Finally, if you have any questions, please let us know in the comments section below.