How to Enable Windows Sandbox in Windows 11 Home Edition
The Windows Sandbox is one of the best features of Windows 11, but it's missing from the popular home version of the OS. Similar is the case with Hyper-V and the Group Policy Editor in Windows 11 Home. There are many such differences between Windows 11 Pro and Home, which we previously highlighted in this dedicated article. Windows Sandbox, which is one of the most important security features, should have been present in Windows 11 Home. However, we've got you covered and you can follow this guide to learn how to enable Windows Sandbox in Windows 11 Home. We've also provided an alternative in case the native Sandbox tool doesn't work via this workaround.
Install Windows Sandbox in Windows 11 Home Edition (2022)
In this guide, we have demonstrated the steps to install and use Windows Sandbox on Windows 11 Home. Along with that, we have also included an alternative to Windows Sandbox so that you can run programs in a safe environment on any version of Windows 11. However, let me first explain what Windows Sandbox is.
What is the Windows Sandbox?
Simply put, Windows Sandbox is a secure sandbox inside the main OS (Windows 10 or Windows 11). Here you can run unverified programs and scripts and download attachments without worrying about malware infecting your computer. Essentially, it is a lightweight VM with a protected state that has memory integrity enabled at all times.
No program or file running in the Windows sandbox can modify or interfere with the main OS. This is a little different from your normal VM software, since Sandbox doesn't save any changes made inside the environment. Every time you open Windows Sandbox, it starts over, discarding all previous data. The Windows sandbox is mainly used to test unknown applications and scripts, open suspicious websites, download suspicious attachments from emails, and more.
Enable and use Windows Sandbox in Windows 11 Home Edition
1. First of all, you need to enable virtualization in the BIOS or UEFI menu. To do this, you need to boot into the BIOS/UEFI menu on your Windows 11 PC and look for "Virtualization" or "SVM Mode". Now turn it on and restart your computer.
Note. If you want to know in detail what UEFI is and understand why modern computers refuse BIOS, read the article at the link.

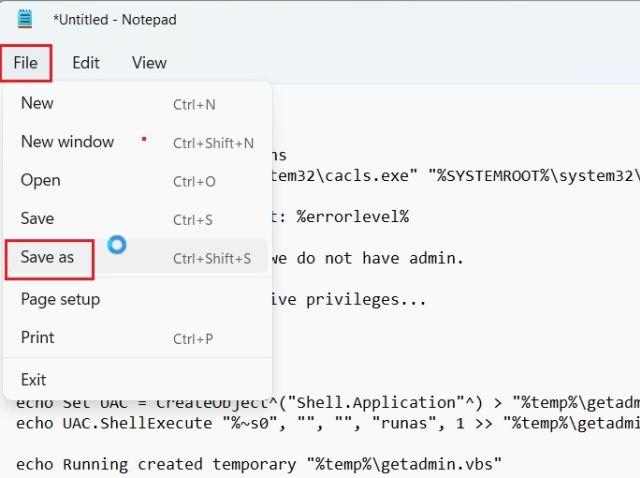
2. After logging into your computer, open Notepad and paste the following content.
@echo offecho Checking for permissions >nul 2>&1 "%SYSTEMROOT%system32cacls.exe" "%SYSTEMROOT%system32configsystem" echo Permission check result: %errorlevel% REM --> If error flag set, we do not have admin. if '%errorlevel%' NEQ '0' ( echo Requesting administrative privileges... goto UACPrompt ) else ( goto gotAdmin ) :UACPrompt echo Set UAC = CreateObject^("Shell.Application"^) > "%temp%getadmin.vbs" echo UAC.ShellExecute "%~s0", "", "", "runas", 1 >> "%temp%getadmin.vbs" echo Running created temporary "%temp%getadmin.vbs" timeout /T 2 "%temp%getadmin.vbs" exit /B :gotAdmin if exist "%temp%getadmin.vbs" ( del "%temp%getadmin.vbs" ) pushd "%CD%" CD /D "%~dp0" echo Batch was successfully started with admin privileges echo . cls Title Sandbox Installer pushd "%~dp0" dir /b %SystemRoot%servicingPackages*Containers*.mum >sandbox.txt for /f %%i in ('findstr /i . sandbox.txt 2^>nul') do dism /online /norestart /add-package:"%SystemRoot%servicingPackages%%i" del sandbox.txt Dism /online /enable-feature /featurename:Containers-DisposableClientVM /LimitAccess /ALL pause
3. Now click "File" in the top menu and select "Save As".
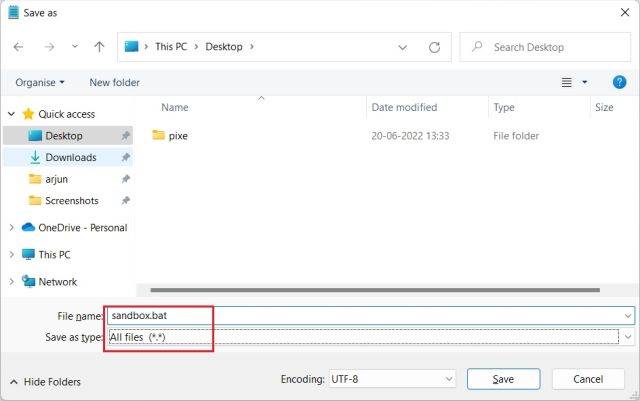
4. After that, select "All Files (.)" from the "File Type" drop-down menu and give the file a name. Then add the .bat extension at the end to save it as a batch file. Make sure there is no .txt or other file extension at the end. Finally, click Save.
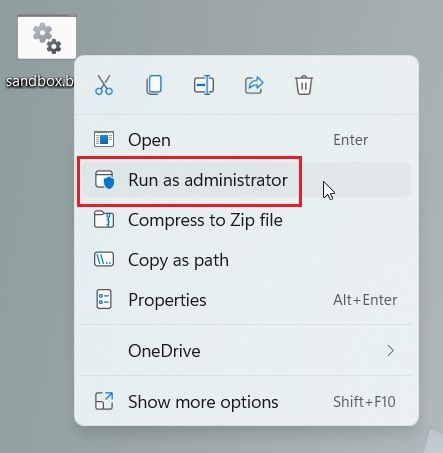
5. Now right click on the saved batch file and select "Run as administrator".
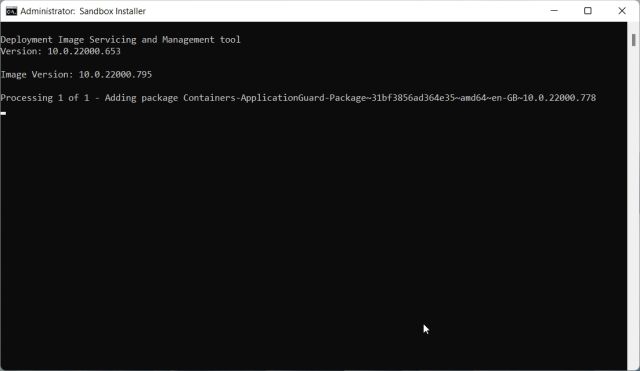
6. A command prompt window will open and Windows Sandbox will start installing on your Windows 11 Home PC. Once installed, press "y" and press Enter. This will restart your Windows 11 PC.
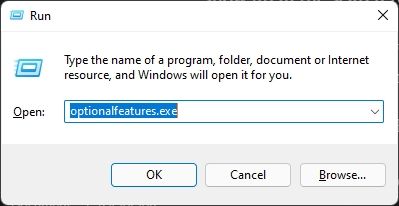
7. After logging in, use the Windows 11 Windows + R keyboard shortcut to open the Run window. Here you need to type optionfeatures.exe and press Enter.
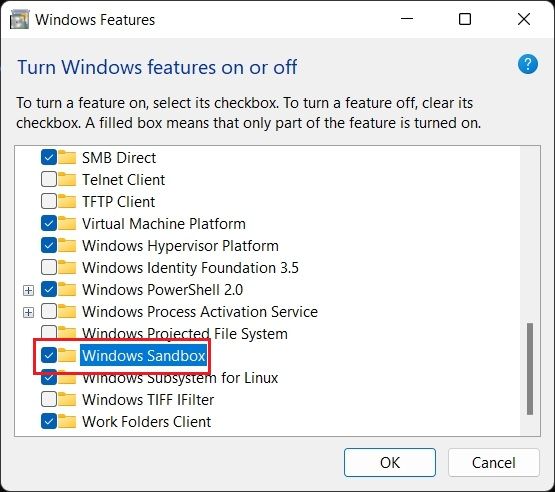
8. The Windows Features window will open. Here scroll down and enable Windows Sandbox, Virtual Machine Platform and Windows Hypervisor Platform. Finally, click OK. It will start installing the necessary packages and after a while will ask you to restart your computer.
Note. If you are using Windows 11 Pro Edition, you can skip to this step and enable the required features to start using the Windows Sandbox virtual environment on your PC.
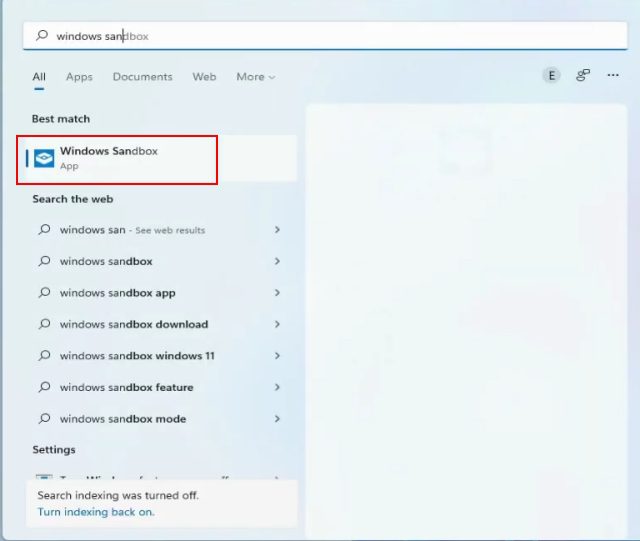
9. Finally, open the start menu and search for "windows sandbox". It will appear on top and you can click to open Windows Sandbox.
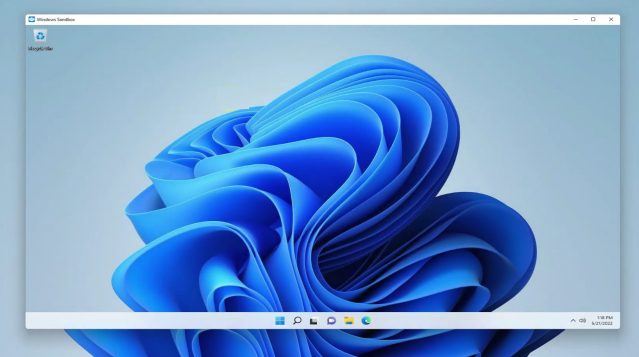
10. Here it is! You have successfully enabled the Windows Sandbox on Windows 11 Home edition.
Removing the Windows Sandbox in Windows 11 Home Edition
11. If you want to uninstall Windows Sandbox from Windows 11 Home, open the start menu and search for "cmd". Now in the right pane, click on "Run as administrator". If you always want to run CMD as an administrator, follow our linked guide for more details.

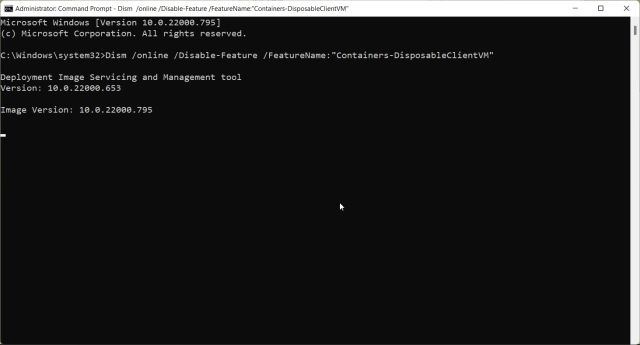
12. In the CMD window, paste the following command and press Enter. This will remove Windows Sandbox from your PC.
Dism /online /Disable-Feature /FeatureName:"Containers-DisposableClientVM"
Windows Sandbox Alternative: Run Sandboxie Plus on Windows 11
If the method above didn't work on your Windows 11 PC and you're still looking for a way to run and test untrusted programs in an isolated environment, you can install Sandboxie Plus. This is an open source third party program developed by David Xanatos that works well on all editions of Windows 11 including the Home edition. The best part is that it's absolutely free. On that note, let's go ahead and try out Sandboxie Plus on Windows 11 Home, an alternative to Windows Sandbox.
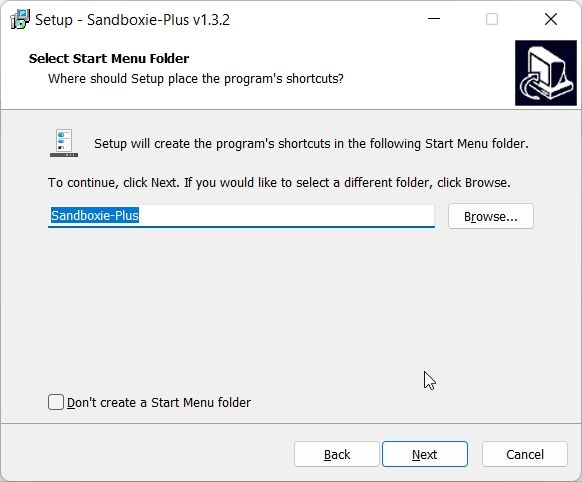
1. Visit this link and download the Sandboxie Plus version. The Plus version has a modern user interface and works quite well.
2. After downloading the program, install Sandboxie Plus on your Windows 11 PC and open the app.
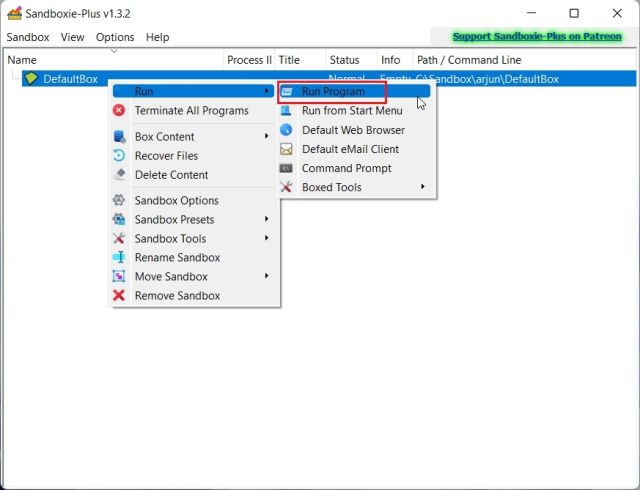
3. Now right click on "DefaultBox" and select "Run". Here you can open an isolated web browser, an email reader, any program from the start menu, and more. I'm going to select "Run Program". This will open another prompt and ask you to select the program you wish to open.
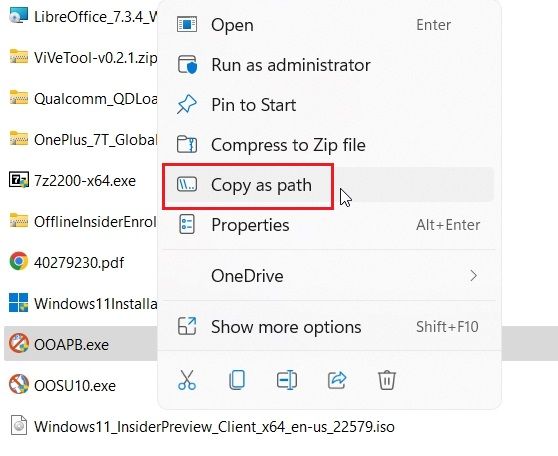
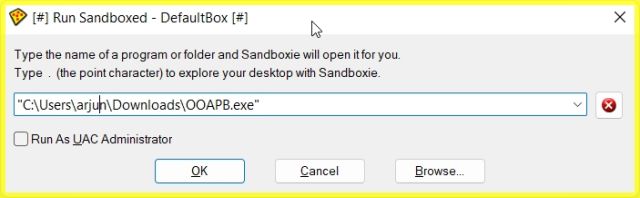
4. To run the EXE file in Sandboxie, right-click on the EXE program and select "Copy as path". This will copy the address of the EXE file.
5. Paste this path into the Sandboxie prompt and click OK.
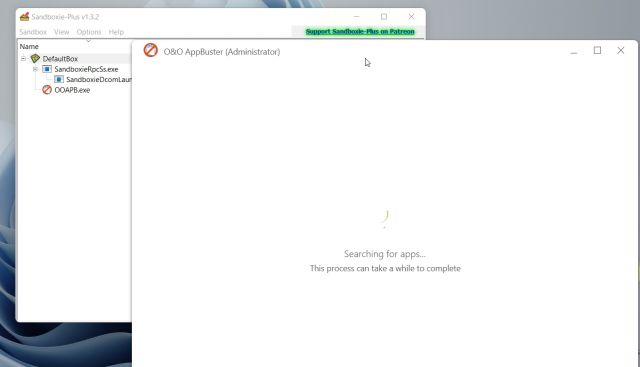
6. That's all. Sandboxie will run the program in a sandboxed environment on your Windows 11 PC. Here's how you can run any program in a safe environment on Windows 11 using a third-party app.
Check for untrusted programs in the Windows 11 sandbox
So, these are two ways to run apps in a secure environment on Windows 11. Rootkit and malware attacks are getting more sophisticated every day. So we must do our due diligence before running any unknown program. And Windows Sandbox is designed to do just that. However, this is all from us. If you want to protect your privacy in Windows 11, follow our article on the link for a detailed guide. And to enable Hyper-V in Windows 11 Home—another feature missing from the Home edition—follow our nifty instructions. Finally, if you have any questions, please let us know in the comments section below.