How to Access Hidden WindowsApps Folder in Windows 11/10
You need to access the WindowsApps folder if you want to back up your Windows applications or clear space on your computer's hard disk drive (HDD).
The Microsoft Windows operating system comes with some restricted and hidden folders that usually contain files that help you run Windows 11 or 10 without problems. Violation of these files can lead to system errors or a complete malfunction of the Windows OS.
Some of these folders are Program Data, System32, AppData, WindowsApps, etc. Among these folders, WindowsApps is of particular interest because this drive takes up a lot of disk space unless you limit the installation of apps from the Windows Store.
Let's learn more about the WindowsApps folder, its purpose, and how to access the WindowsApps folder if you need to backup or clear disk space.
What is the WindowsApps folder?
The WindowsApps folder is available in the Program Files of the Windows 10 or 11 installation directory and contains application files for Windows applications. Starting with Windows 8, Microsoft introduced a set of applications that work differently than regular software.
In the past, Microsoft has referred to these apps as Metro-style apps, Windows Store apps, Universal Windows Platform (UWP) apps, and now just Windows apps. Windows 10 or 11 stores Windows apps and other UWP apps like Your Phone in the WindowsApps folder.
This folder is a very safe place in the Windows OS installation directory and is protected by several layers of security. First of all, you won't see the folder until you show it.
Secondly, normal user and system administrator accounts do not have the necessary file permissions to access a folder or check its size, subfolders, files, etc. Microsoft has reserved the necessary rights for the TrustedInstaller user account, which is a system account. record.
TrustedInstaller manages read and write access to the WindowsApps folder so that Windows applications can run smoothly without any user intervention.
What is the purpose of the WindowsApps folder?
The WindowsApps folder is a safe haven for all Windows apps that you install or ship with the factory version of your copy of Windows 10 or 11. Here are some uses for this folder:
Saves UWP packages
Similar to Program Files and Program Files (x86) for regular Windows PC software, WindowsApps is the default file location for all Windows apps or UWP packages. However, the subfolder naming convention is different from Program Files.
For example, Netflix apps for Windows will have multiple folders with the following names: app name, version number, CPU architecture (x64), and Microsoft Store ID. There are multiple folders to differentiate the same application with different CPU architectures.
Works like a Windows Apps sandbox
Regular Windows software, such as Data Recovery or PC Troubleshooter, can override system values and make visible changes to the Windows OS ecosystem. That's why Windows features like User Account Control (UAC), User Account Permissions, and Windows Security are there to control them.
However, Windows apps cannot make huge changes to the operating system. Microsoft did this by storing these applications in a sandbox inside the WindowsApps folder. These applications by themselves cannot access computer hardware or data and require permissions at all stages.
User convenience
Most Windows applications don't come with executables like traditional software does. Instead, they are a combination of automated command line scripts and Java programs. It may be difficult for users to run such applications.
In addition, users can unknowingly make irreversible changes to these system files if they have access to Windows application files. Therefore, Microsoft Windows shows application icons in the Start menu and hides all internal data for security and convenience.
How to access the WindowsApps folder
There are several ways to access the WindowsApps folder. The steps are identical for Windows 10 and Windows 11 operating systems.
Using the Task Manager Program
Accessing the WindowsApps folder for a specific application from the Task Manager program is the easiest way. It also requires less effort. However, to access its folder, you need to run the target UWP (Universal Windows Platform) or Windows app in the background. Here are the quick steps you can follow on a Windows 11 or 10 PC:
Step #1: Launch the UWP app or Windows app for which you want to access the WindowsApps folder. In this tutorial, this is the WhatsApp application. You can try this or try others like Netflix, Instagram, Skype, etc.
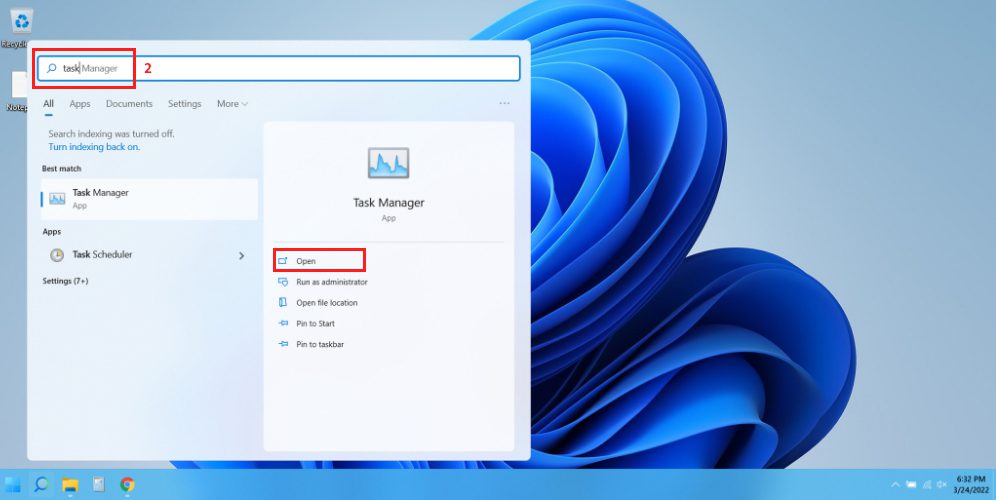
Step #2: To launch the task manager program, you can press this key combination: Ctrl + Shift + Esc. Alternatively, you can find the Task Manager folder by searching in the search bar.
Step #3: Locate the application's process in Task Manager by scrolling through the list or sorting it by name.
Step #4: Click on the dropdown arrow next to the app name to expand its processes. If there is no drop-down arrow, continue to the next step.
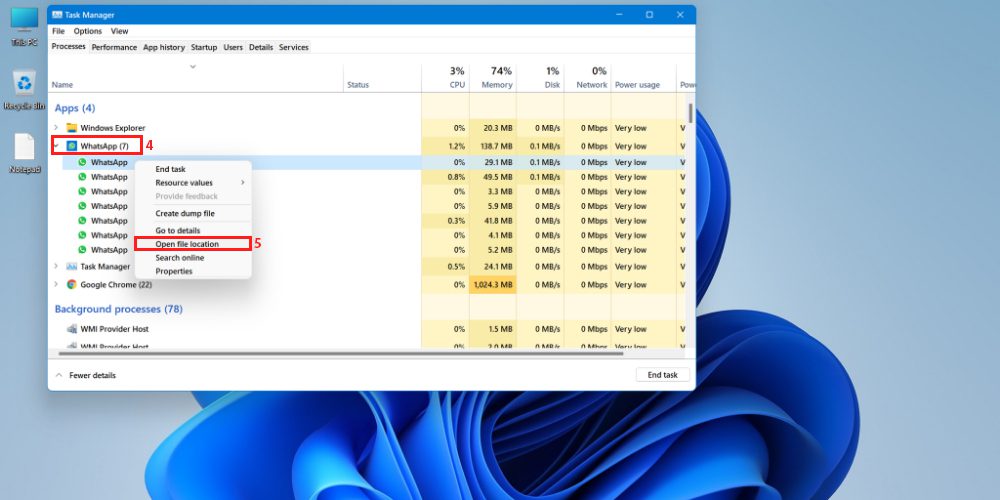
Step #5: Right click on the application icon and select "Open file location" from the context menu that follows.
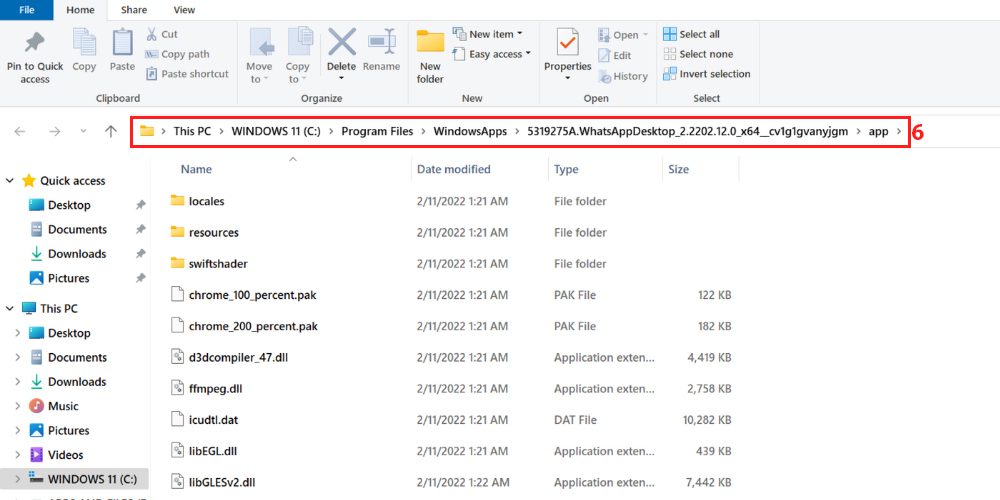
Step #6: Windows Explorer will take you to the isolated WindowsApps subfolder for the target application. In this case, the WhatsApp app.
Accessing the WindowsApps folder through Task Manager gives you permission to browse. For example, you can view all files and folders of a UWP app and check their size. This step is good if you want to backup your application files and folders.
This process does not allow you to delete or move files from the WindowsApps folder. To gain write and delete access, you need to complete any of the following steps.
Using Windows Explorer
The most practical and convenient way to access the WindowsApps folder is through the Windows File Explorer program. This process gives you full read and write access to this folder. So you can make any changes you want.
This process is also reversible if you need to restrict access to the WindowsApps folder after making the necessary changes. The File Explorer based method has two steps. In the first step, you need to map the WindowsApps folder.
In the second step, you need to get exclusive read and write permissions on the folder by changing the owner of the folder. By default, Microsoft has assigned Read/Write permission to the TrustedInstaller user account on your Windows 10/11 computer. Without further ado, let's display and take control of the folder of interest:
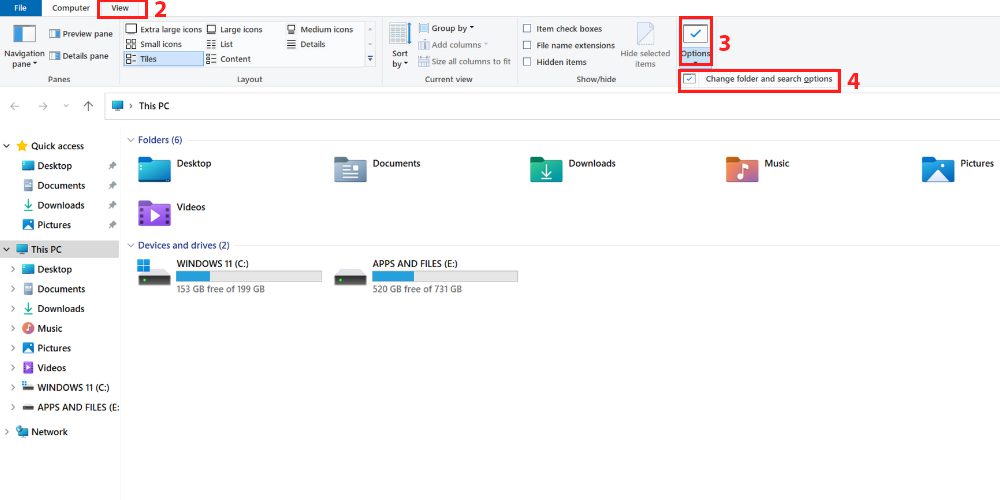
Step #1: Click on File Explorer on the taskbar to access the This PC window.
Step #2: On the top ribbon, select View.
Step #3: You will see "Options" under the "View" menu. Click on it.
Step #4: Now click "Change folder and search options" to open the "Folder Options" window.
Step #5: You will see three tabs in the Folder Options window. Select the one in the middle, the "View" tab.
Step #6: The View tab has two sections, Folder View and Advanced Options.
Step #7: In the Advanced Options section, select the Show hidden files, folders, and drives option.
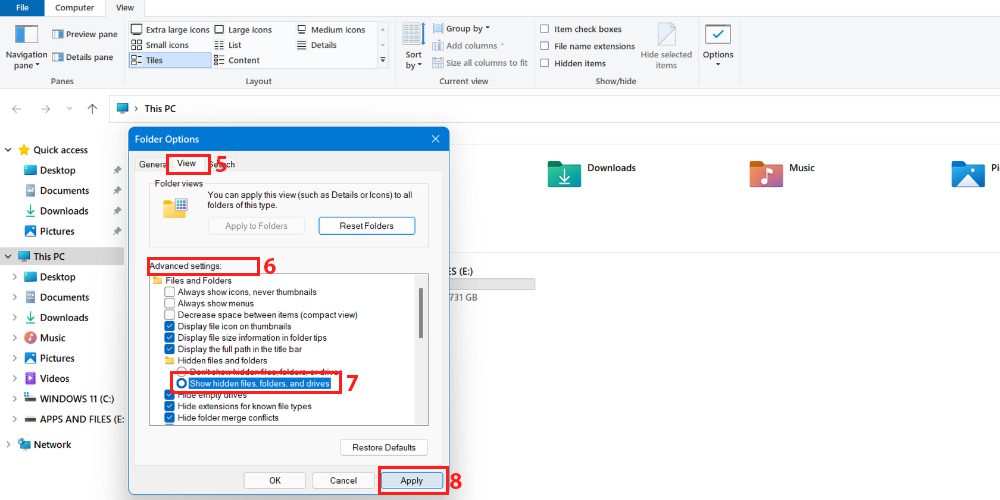
Step #8: Now click the Apply button to save the changes.
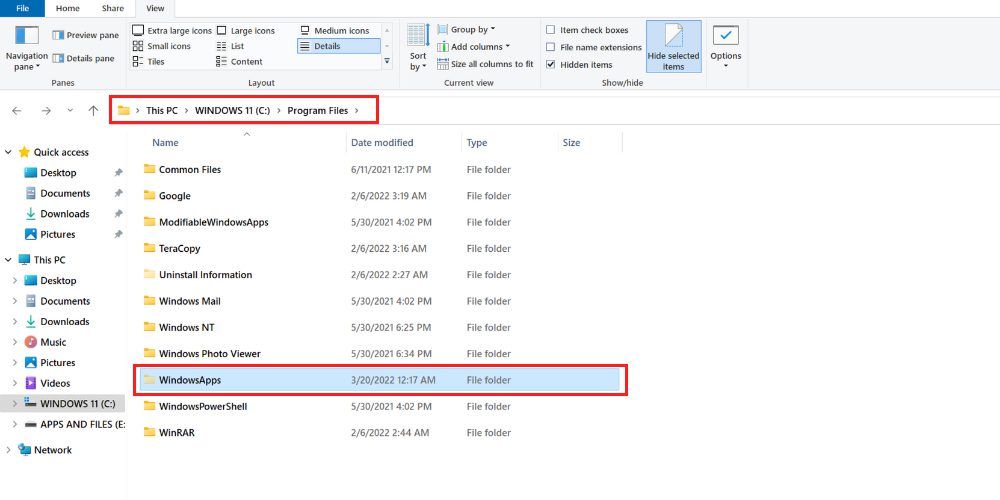
Step #9: If you navigate to the Program Files folder in your Windows 11 installation directory, you should now find the WindowsApps folder in an open state.
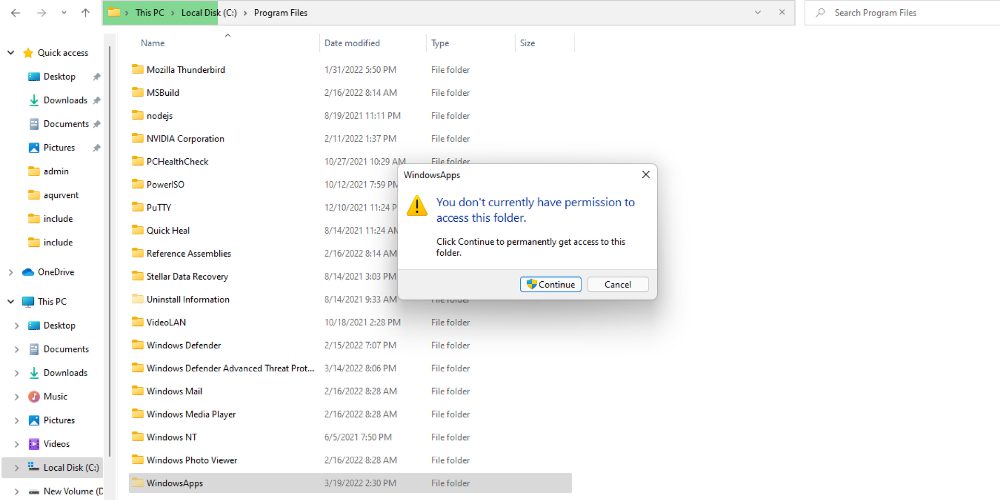
The WindowsApps folder is now visible. But you can't access it yet. You need to manually take ownership of the folder to get read/write access.
To change ownership, you will need a user account with administrative rights. If you are not an administrator user on your computer, you need to log out of this account. Then log in again using an administrator account.
Once you have finished switching your Windows user account, you can follow these steps to transfer ownership of the WindowsApps folder:
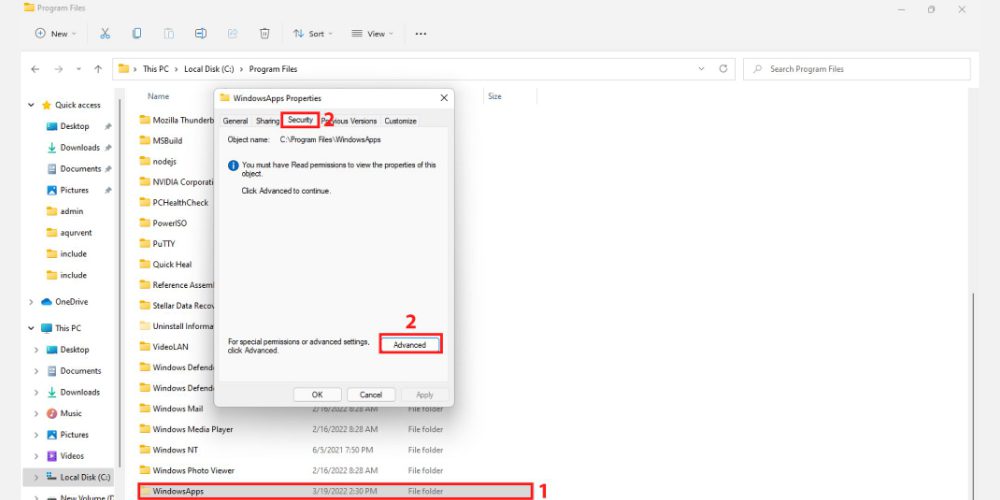
No. 1. Right-click the WindowsApps folder and select Properties.
#2: While on the Properties screen, click on the Security tab to open more options. Click "Advanced".
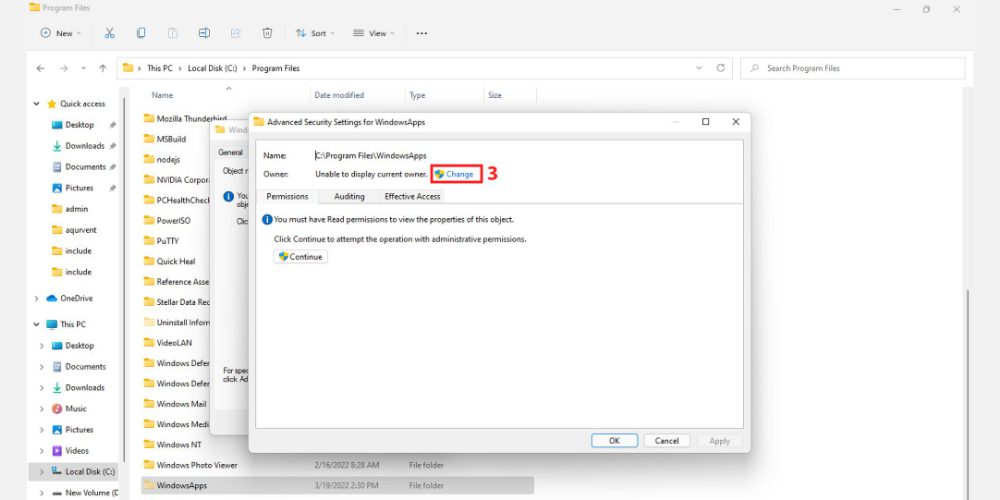
Number 3. On the Advanced Security Settings for WindowsApps screen, click Change.
No. 4. You will see the user or group selection screen.
No. 5. In the Object name field, enter the name of your PC user account with administrator rights.
#6 You can just write the user account name in small letters. The system will automatically recognize it. However, you need to enter a valid username.
No. 7. Now click "Check Names" to fill in the full address of the user account.
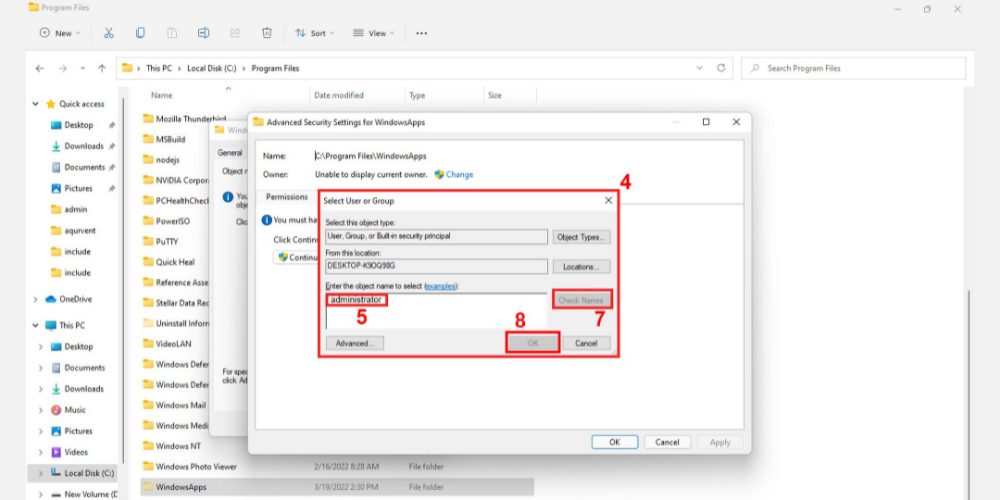
No. 8. Click "OK" to apply the changes.
#9 You will now see your user account name in the Advanced Security Settings for WindowsApps window.
No. 10. Below your user account name, you'll see a "Replace Owner" checkbox for subcontainers and objects. Check this box.
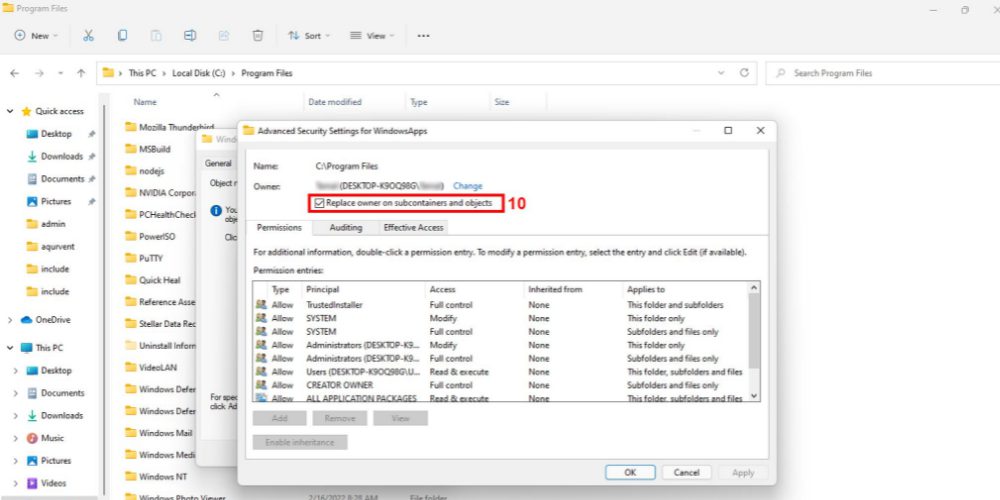
#11. Now click the Apply button and click OK to start the process of changing ownership.
No. 12. After the process is completed, click "OK" in the subsequent notification.
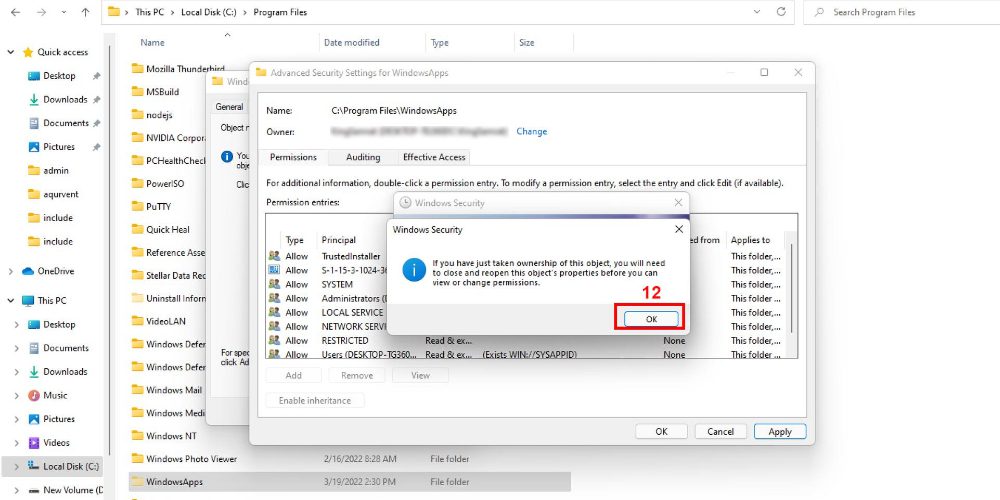
#13: Refresh your computer and try accessing the WindowsApps folder from Program Files again by double-clicking it.
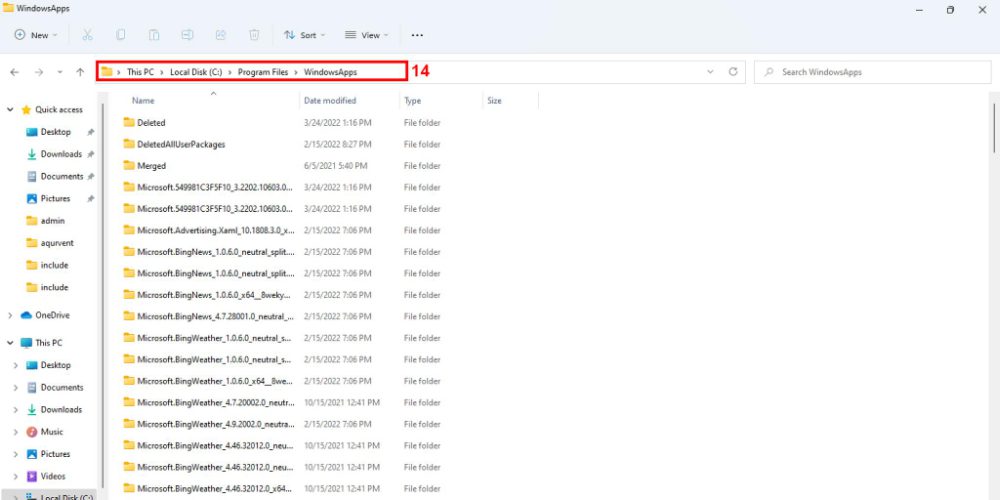
No. 14. You will get full access to the folder with read and write permissions.
You can now move or delete files from the WindowsApps folder if you took ownership of the WindowsApps folder using the process mentioned above. However, be careful when making any changes to subfolders. Because if you delete vital application files, the corresponding Windows application may no longer work.
This step is especially useful when you need to clear disk space. If you have stopped using certain Windows applications or deleted them, you can remove their internal files from the WindowsApps folder to save disk space.
Using Windows PowerShell
The process of changing the owner of the WIndowsApps folder based on Windows Explorer is somewhat complicated. You need to follow the instructions correctly or you will lose valuable time.
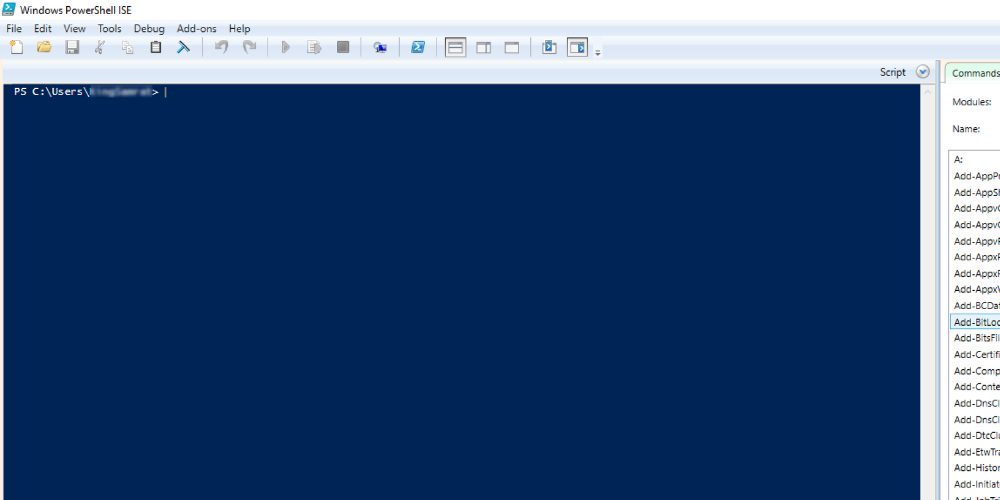
There is a simple automated process that you can also try using Windows Powershell. It is a robust task customization and automation program for Windows. All versions of the Windows operating system, starting with Windows 7, come with this program.
So you can apply this process to take ownership of the target folder on both Windows 10 and Windows 11 PCs. You also don't need to show hidden files, folders, and drives.
In situations where you cannot risk showing Windows system files, the Powershell based method is the ideal choice. Here are the steps to run a Powershell command that assigns you the necessary permissions to access and modify the WindowsApps folder:
Step #1: Click on the Windows 11 search magnifying glass.
Step #2: Enter Powershell and wait until the application appears.
Step #3: You will see the Windows Powershell application on the right side of the Search Console.
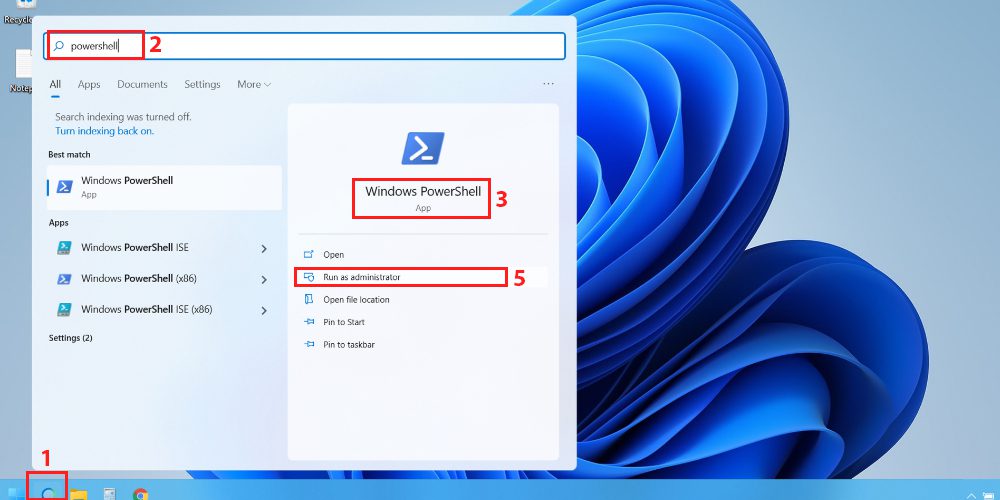
Step #4: The app will show options like "Open", "Run as administrator", "Open file location", etc.
Step #4: Click "Run as Administrator" to open the program.
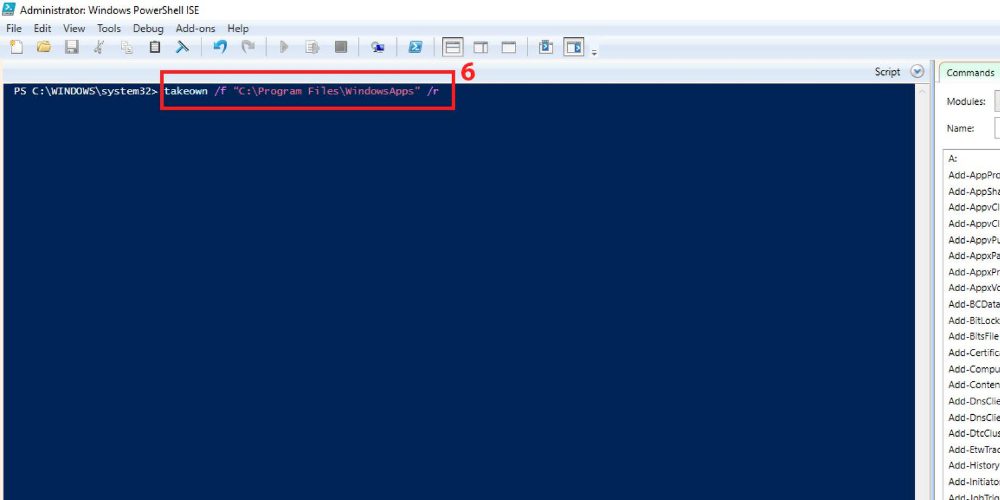
Step #6: After launching the program, run the following command. You can copy the command below and paste it as is in Powershell and press Enter.
takeown /f “C:Program FilesWindowsApps” /r
Step #7: The Powershell takeown command returns ownership of the file or folder to the system administrator. Advanced users use this command to facilitate the transfer of ownership of batch files.
Step #8: After the takeown syntax, you need to use the /f option to specify the name of a file, folder, or directory.
Step #9: The /r closing option tells Powershell to transfer ownership of all files and subdirectories to the administrator.
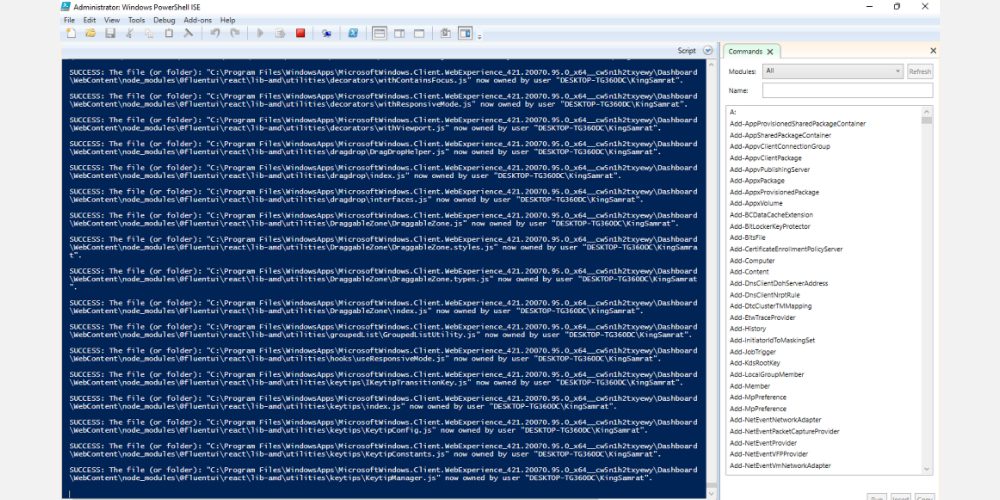
Step #10: Powershell will take some time to transfer ownership of the WindowsApps folder and its contents to your administrator account.
Step #11: When the process is complete, a blinking cursor will appear.
The access you get by following the above process is similar to the method access based on Windows Explorer. You have just automated the process and eliminated the display of system files. You can now back up, free up space, or make changes to internal Windows application files.
Final words
Now that you have a good understanding of the WindowsApps folder, you can responsibly make changes to your Windows 10 or 11 OS. Before deleting any files from this folder, you need to know the folder inside out so as not to make a fatal mistake that can damage the entire operating system. system.
If you are facing any problems with Windows 10 and you need some automatic tools to solve these problems, you can use these 7 recovery tools to solve Windows 10 problems.