Fully Customize the Windows 11 Taskbar - Complete Guide
The Windows 11 taskbar behaves differently than in previous versions. Its context menu is different, its settings have been completely redesigned, and even pinning icons to the taskbar works differently.
After installing Windows 11, the first thing you will probably notice is a change in the taskbar. There are a bunch of new icons moved to the middle while Cortana appears to have been demoted from her job at the front desk. These preliminary changes are just the tip of the iceberg.
If you're having trouble setting up the new Windows 11 taskbar, we've got you covered. We'll show you how to customize the Window 11 taskbar to your liking, as well as share some hacks to access features that are no longer officially available in Windows 11.
Delete the default icons.
By default, there are several icons on the taskbar that cannot be removed using the unpin feature. Apart from the Start menu, you can remove other icons using the taskbar settings. Right-click on the taskbar and then select the Taskbar Settings option.
Here at the top you will see all default taskbar items with a toggle button next to them. Just disable the items you don't want to see on the taskbar and they will be removed.
Move the taskbar icons to the left.
I don't mind the taskbar icons in the middle, but I still moved them to the left because of the start menu. In the middle, I have to direct the mouse to click the start menu. However, in the far left corner, I can just blindly move the mouse in the bottom left direction and it works, which saves my attention.
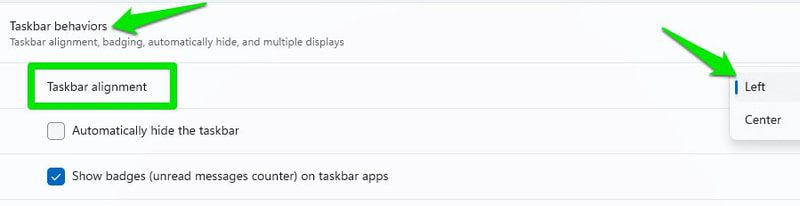
If you also want to move the taskbar icons to the left, just go to the taskbar settings as we did above. Here, scroll down and open the taskbar behavior section. After that, select "Left" in the "Taskbar Alignment" option.
Pin icons to the taskbar
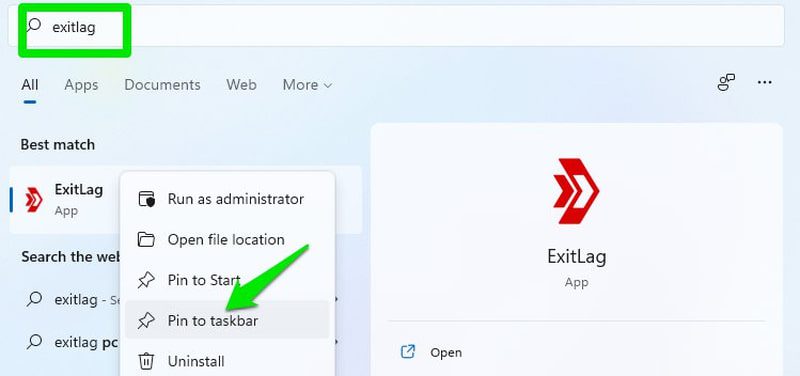
If you like the convenience of using the drag and drop feature to pin icons to the taskbar, unfortunately it won't work on Windows 11. For now, you'll have to use other ways to pin an app to the taskbar. task bar. The easiest way would be to find the application using Windows search and then right-click on it and select "Pin to taskbar".
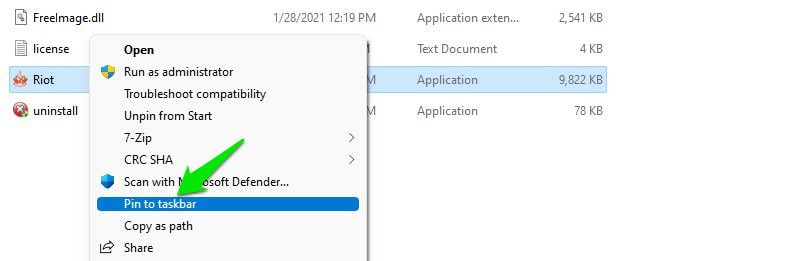
To do this from Windows Explorer, you must first right-click on the application icon and select the "Show more" option, and then you will see the "Pin to taskbar" option.
Enable automatic hiding of the taskbar
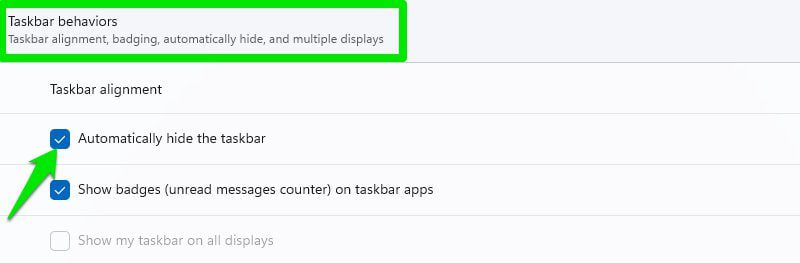
Windows 11 retains the auto-hide feature like previous versions and it can be found in the taskbar settings. Scroll down in Taskbar Settings and open the Taskbar Behavior section. Here, check the box next to the Automatically hide the taskbar option. Now, if you don't hover over the taskbar area, the taskbar will remain hidden.
Make the Windows 11 taskbar transparent.
You can also change the color of the taskbar depending on the background and make it transparent. You have to do it from Windows 11 settings, here's how:
Click on the "Start" menu and select "Settings".
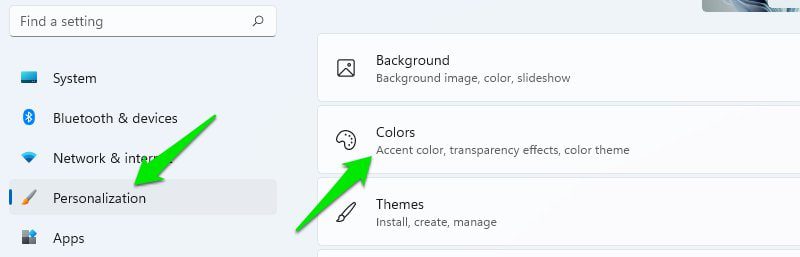
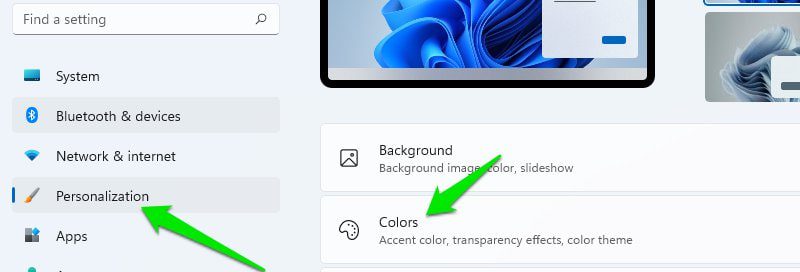
Here, select "Personalization" from the left panel and then click on "Colors".
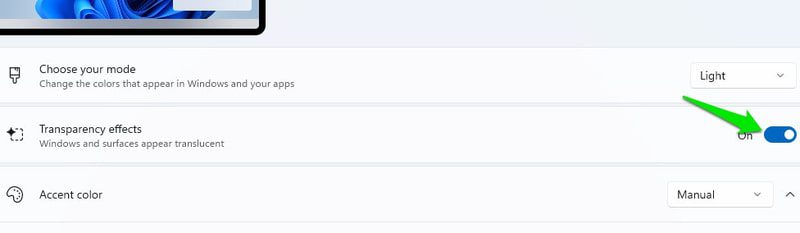
Now enable the Transparency Effects option and it will make the taskbar transparent.
Hide/show icons on the taskbar.
In previous versions of Windows, you could easily hide/show icons on the taskbar directly from the taskbar. However, in Windows 11, the name of the system tray has been changed to overflow the corner of the taskbar, and you have to manage it from the taskbar settings.
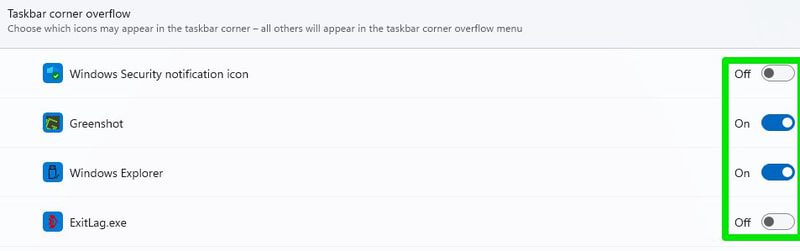
There is a special section in the taskbar settings for taskbar corner overflow. You can click on it to open all applications that can display their icon in the overflow corner of the taskbar. You will have to separately enable/disable applications here to hide/show their icons in the right corner of the taskbar.
Disable the "Show Desktop" button on the taskbar.
The "Show Desktop" button on the taskbar in Windows 11 is much smaller and does not display the desktop when you hover over it with the mouse. However, if you are still not interested in using this feature and feel that it is taking up unnecessary space on your taskbar, you can disable it.
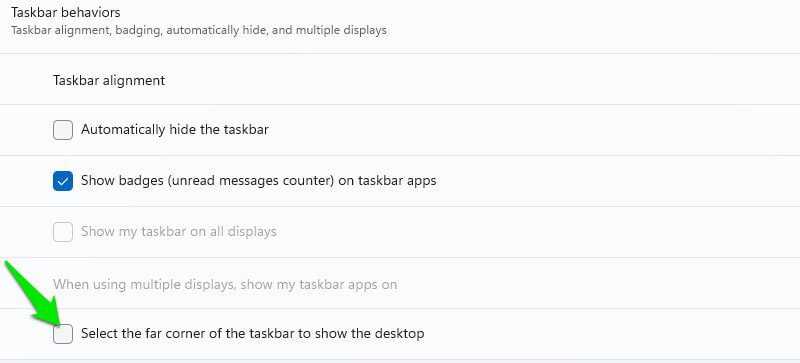
Go to your taskbar settings and open the "Taskbar Behavior" section. Here, uncheck "Select the far corner of the taskbar to show the desktop" and the button will be removed.
Change the color of the taskbar.
You can also use custom colors for the taskbar that won't be affected by your theme color. Here's how to do it:
In Windows 11 settings, click Personalization in the left pane and then select the Colors option.
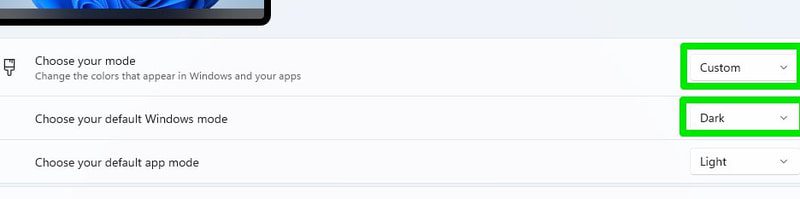
Here select "Custom" under "Choose a mode" and "Dark" under "Choose a default Windows mode".
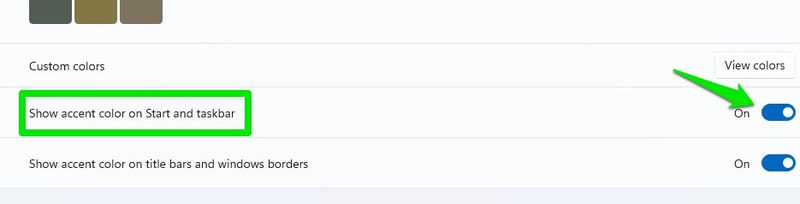
Now scroll down and turn on the option "Show accent color in start menu and taskbar".
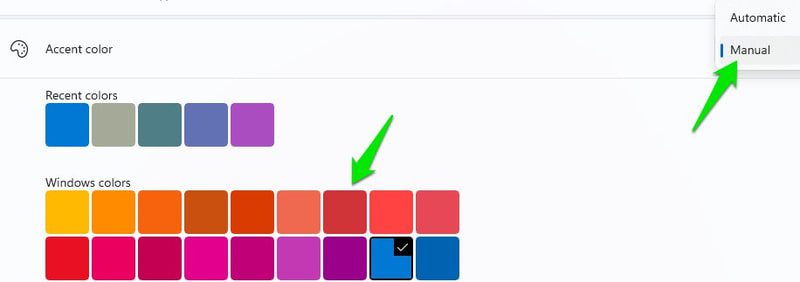
After that, set the Accent Color option to Manual and select any color you like below to choose as your taskbar color. You can also open the color wheel by clicking the Custom Colors option to set your own color.
Move the taskbar up.
Previous versions of Windows let you move the taskbar up, left, or right, but Windows 11 made it stay at the bottom. If you still want to move the taskbar in Windows 11, you will have to edit the Windows Registry.
Even so, there is no guarantee that the taskbar will work properly since this is not an official workaround. Based on my experience and reports from other users, moving the taskbar to the left or right completely breaks it. So your only option is to move it to the top. Even at the top, the Start menu is aligned slightly to the left compared to the button.
Therefore, before following the instructions below, please be aware that after making changes, the taskbar may not work as intended.
Open the Windows Registry using the search bar or by pressing Windows Key + R and using the Run command regedit.
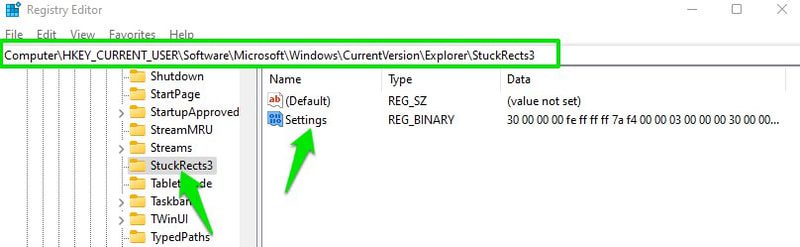
Here follow the path below. You can either copy it and paste it into the registry search bar at the top, or manually open the specified folders in sequence.
HKEY_CURRENT_USERSoftwareMicrosoftWindowsCurrentVersionExplorerStuckRect3
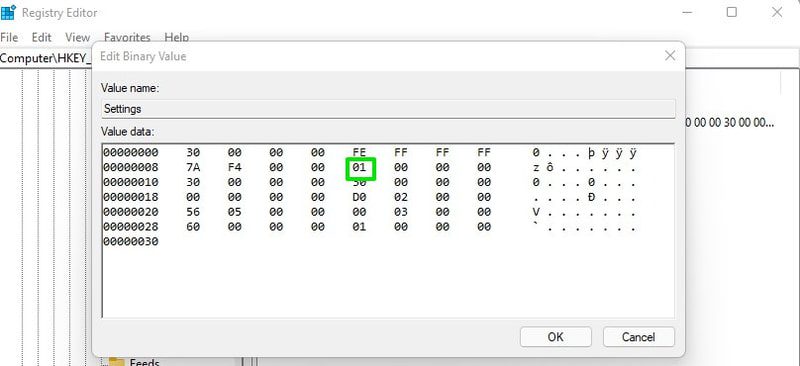
In StuckRect3, open the "Settings" key by double-clicking on it and you'll see a bunch of values.
In the 2nd row, under the FE column, change the value from "03" to "01" and click "OK".
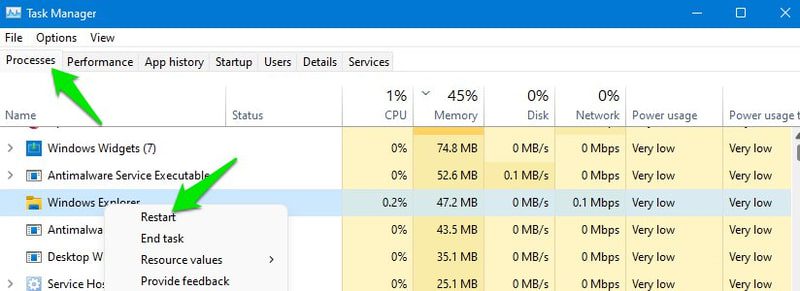
You need to restart Windows Explorer to see the changes. Just press the Ctrl + Shift + Esc keys to open Task Manager and here right click on the Windows Explorer process and choose Restart. If you wish, you can also restart your computer for the changes to take effect.
Resize the taskbar.
If you want to improve the look of the icons on the taskbar, or want to fit more icons on the taskbar, you can do this by increasing or decreasing the size of the taskbar. However, to do this, you will have to edit the registry. But don't worry, this little hack won't break the taskbar. Here's what you need to do:
Open the registry again and access the following location as shown above.
HKEY_CURRENT_USERSoftwareMicrosoftWindowsCurrentVersionExplorerAdvanced
With the Advanced folder selected, right-click an empty space in the right pane and choose New > DWORD (32-bit) Value.
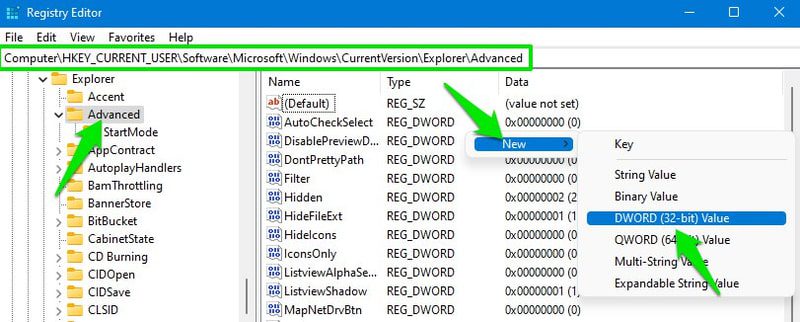
Name this new key TaskbarSi and double click it to open it.
In the Value section, change the value to 0, 1, or 2 to change the size to small, medium, or large, respectively. Here, medium is the default size of the Windows 11 taskbar.
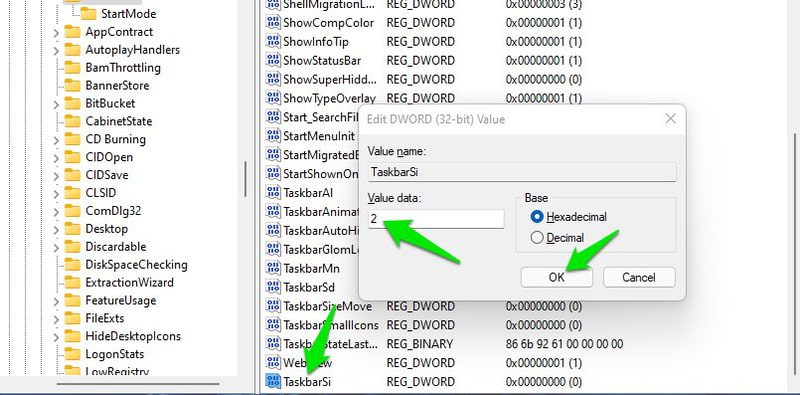
After that, click OK and restart Windows Explorer as shown above for the changes to take effect.
Final Thoughts 👨💻
Along with these customization options, I also recommend that you try third-party tools to further customize the taskbar and even remove features in Windows 11. ExplorerPatcher is a good taskbar replacement tool for this purpose. You can even try some Windows 10 Start Menu alternatives. Many of them work great on Windows 11.