Fix VDS Error Code 490 01010004 in Windows 10
You may see an unexpected error message about the underlying VDS provider in Windows 10; this bug was first noticed in update KB979391. However, there was no direct solution to fix this error. Mostly users get error code 490 01010004 when they get VDS error. You can use various methods to fix VDS provider errors on your computer.
How to Fix VDS Error Code 490 01010004 in Windows 10
Error code 490 01010004 appears on your computer for several reasons. Some of them are mentioned below:
- Virtual Disk service not running
- Incorrect permission for Virtual Disk service
- Faulty VDS system utility
- Issues due to VDS tracing
- Corrupted system files
- Windows is not updated
- Problems due to Virtual Drive software
The following guide will give you ways to resolve error code 490 01010004 on your computer.
Method 1: Restart the VDS provider
The first method you would like to use to resolve the VDS provider error is to restart the underlying VDS provider. You can follow these simple steps to safely restart the underlying VDS provider.
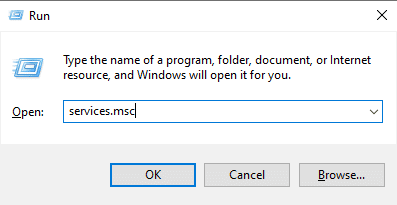
1. Press the Windows + R keys at the same time to open the Run dialog box.
2. Type services.msc and press the Enter key to open the Services window.

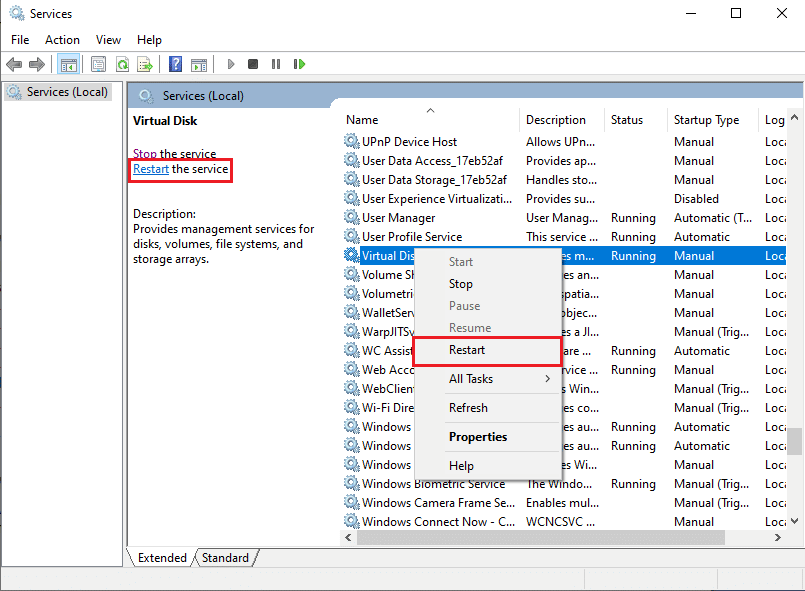
3. In the "Services" window, find the virtual disk.
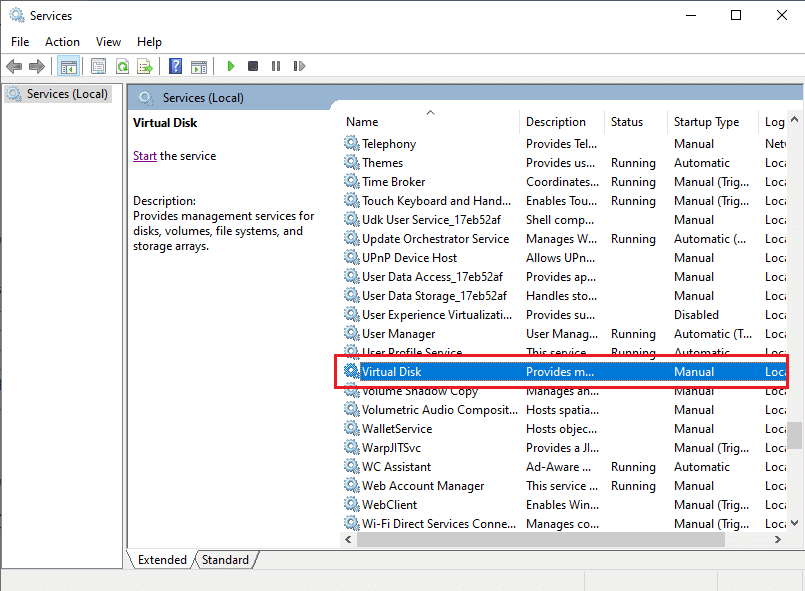
4. Right-click on the virtual disk and select Restart.
Note. You can also find "Restart Service" in the menu on the left.
5. Finally, restart your computer and check if the error is resolved.
Method 2: Allow the VDS provider to interact with the desktop
Another approach to troubleshooting the unexpected failure of the underlying VDS provider error is to verify that the underlying VDS provider is working properly. You may get errors if the VDS provider is not allowed to interact with the desktop. You can follow these simple steps to allow the underlying VDS provider to interact with the desktop.
1. Launch the Run dialog box, type services.msc and press the Enter key to open the Services window.
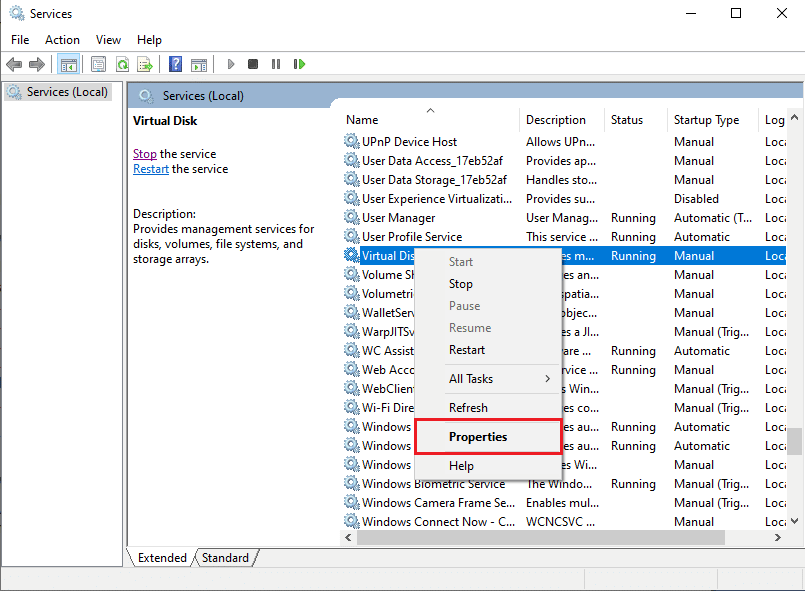
2. Here, right-click on the Virtual Disk service.

3. Then select Properties.
4. On the General tab, select the Startup Type as Automatic and make sure the Service status is Running.

5. Now go to the "Login" tab and check the "Allow the service to interact with the desktop" box.
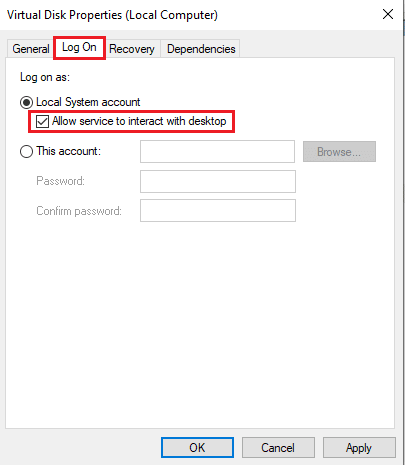
6. Click OK and Apply.
7. Finally, restart your computer . If you keep getting error code 490 01010004, move on to the next method.
Method 3: Stop VDS tracing
To resolve the VDS provider error code 490 01010004 issue, you can try to stop VDS tracing on your computer. You can follow these simple steps to safely stop a VDS trace.
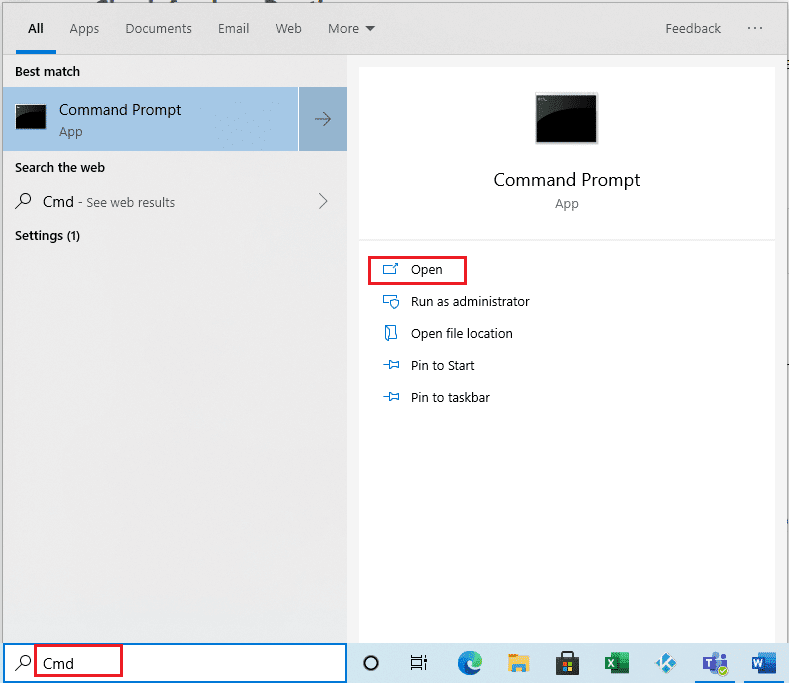
1. Press the Windows key, type command and click "Open" to launch Command Prompt.
3. Type the following command and press the Enter key.
md %systemroot%system32LogFilesVDS

3. Then type this command and press the Enter key.
Logman start vds -o %systemroot%system32LogFilesVDSVdsTrace.etl -ets -p {012F855E-CC34-4da0-895F-07AF2826C03E} 0xffff 0xff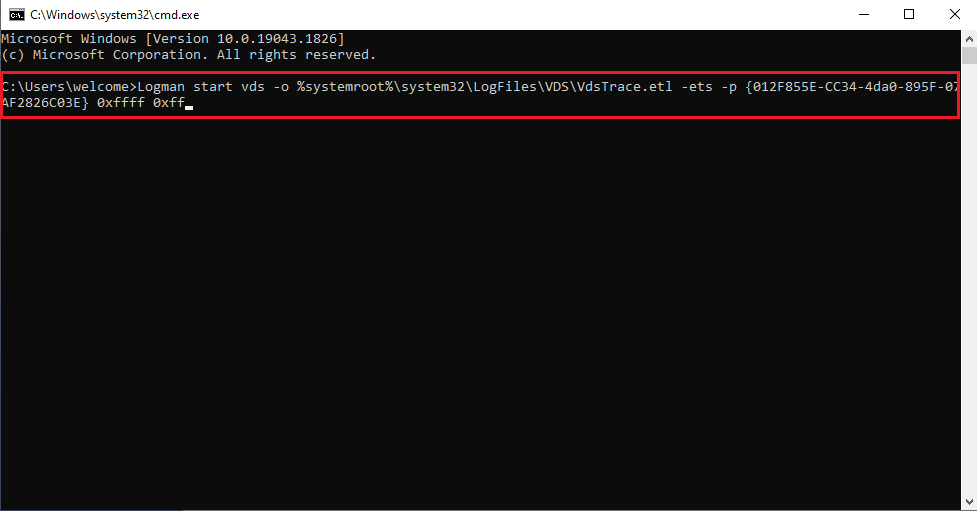
After entering these commands, reproduce the issue.
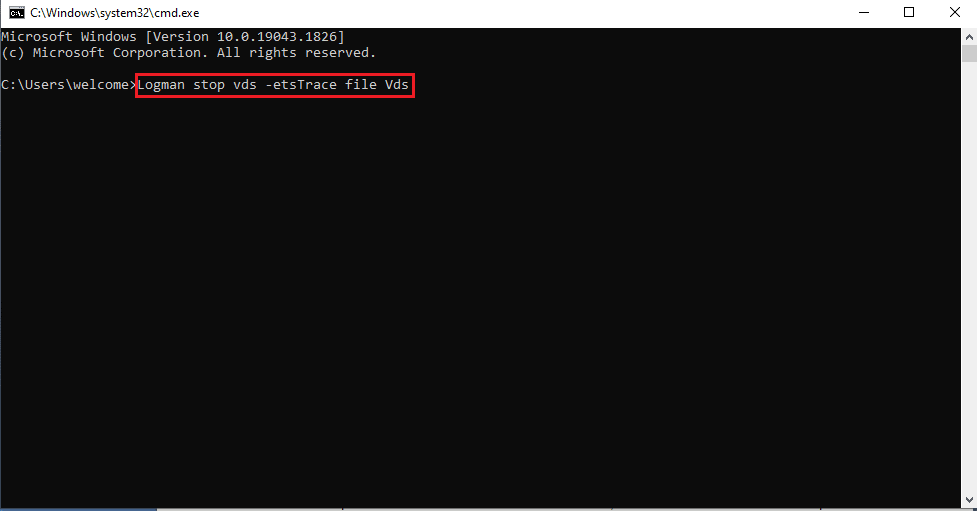
4. Finally, run the following command to stop VDS tracing.
Logman stop vds -etsTrace file Vds
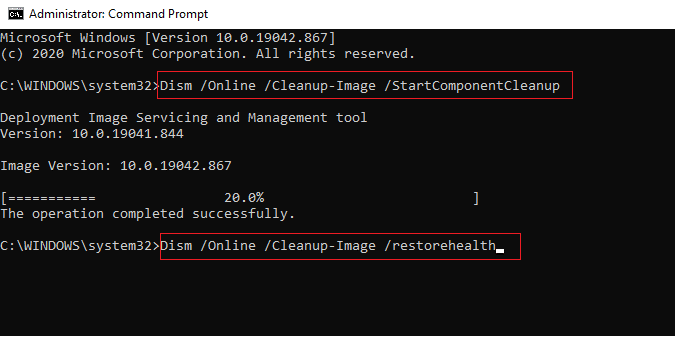
Method 4: Repair System Files
If there are any corrupted system files in your Windows operating system, then your PC may face a lot of internet connection problems. Luckily, your Windows 10 PC has built-in recovery tools like SFC (System File Checker) and DISM (Deployment Image Servicing and Management) to help you fix any corrupted files. Read our guide to restoring system files in Windows 10 and follow the steps to repair any corrupted files.
Method 5: Repair Windows with Media Creation Tool
To fix error code 490 01010004, you can try repairing Windows using the Microsoft Media Creation Tool. Follow these simple steps to restore Windows.
1. Download the Microsoft Media Creation Tool.
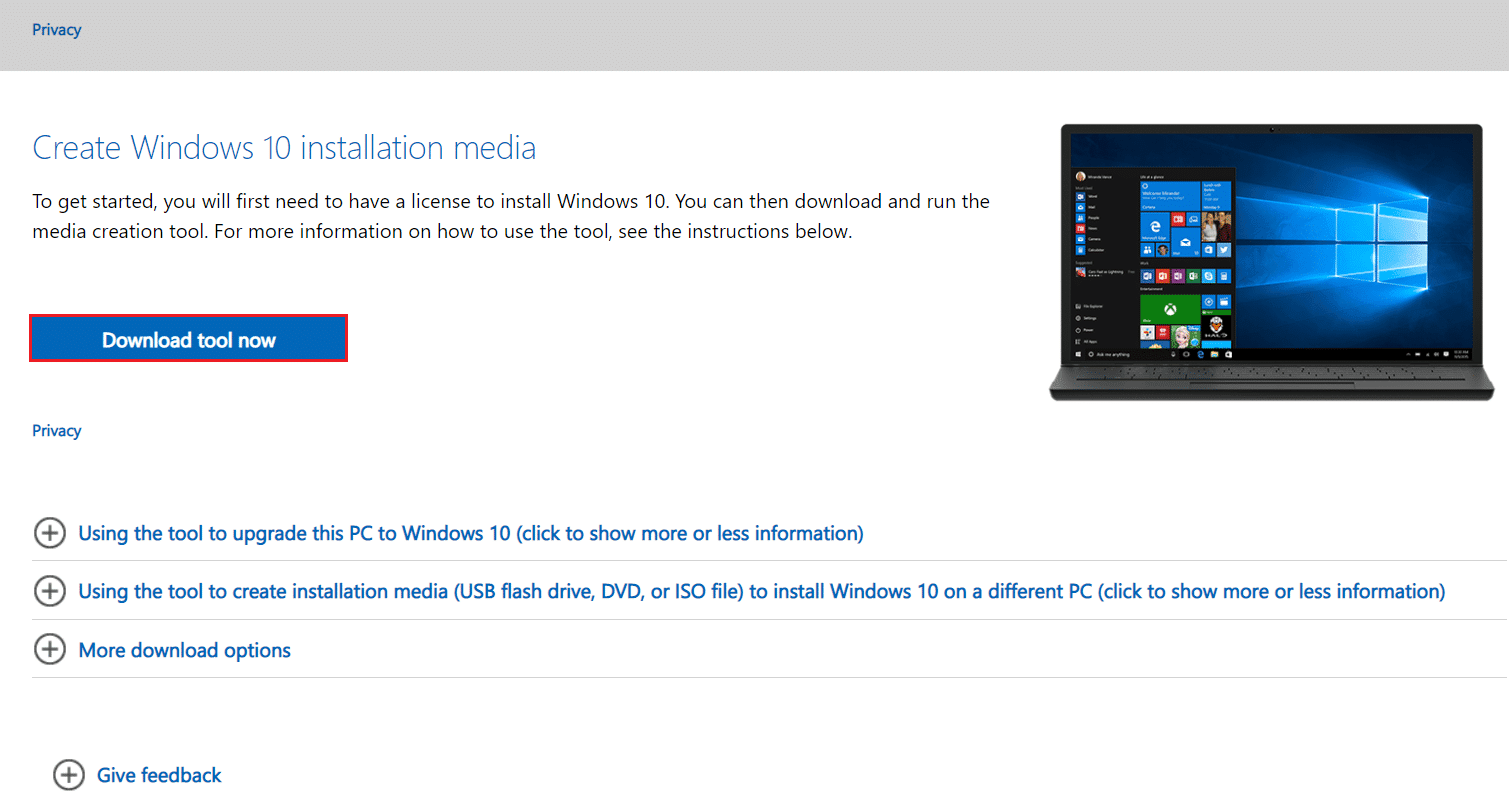
2. After successfully downloading, run the tool and click "Upgrade this PC now".
3. Select Keep all my files and application settings.
4. Click Update.
5. Wait for the update to finish and restart your PC.
Method 6: Change registry keys
If the previous methods failed to fix error code 490 01010004, you can try changing the SPTD key folder in the Registry Editor.
Note. Uninstalling the Virtual Drive software may leave the SPTD.sys driver on your computer. This drive has caused a lot of VDS errors on Windows computers. You can modify the Windows registry to disable the SPDT.sys driver on your computer.
You can follow these simple steps to disable the SPTD.sys driver.
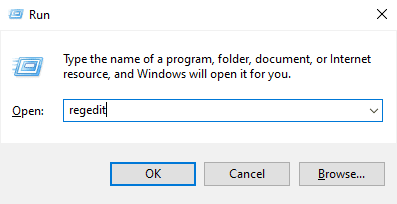
1. Press the Windows + R keys at the same time to open the Run dialog box.
2. Type regedit here and press the Enter key to launch the Registry Editor.
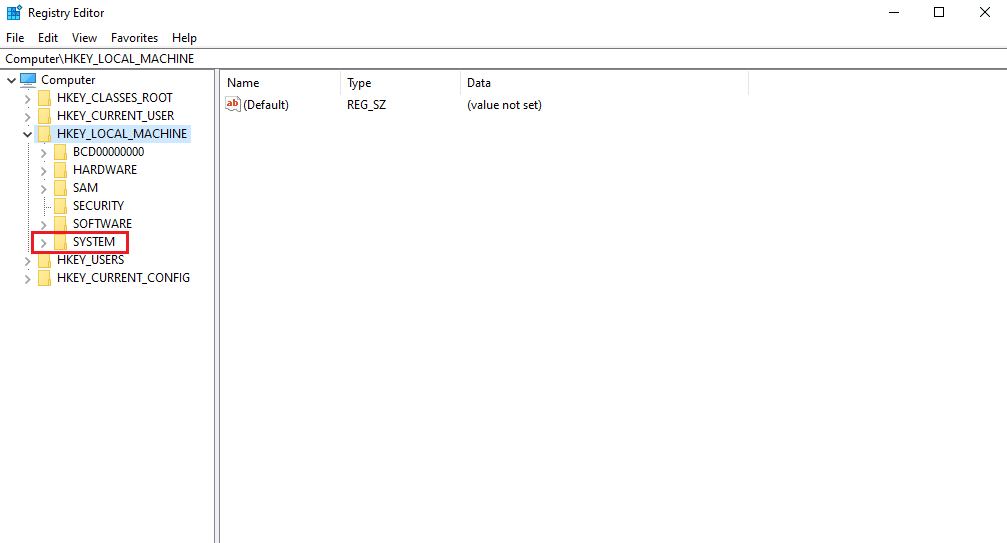
3. In the Registry Editor window, navigate to and click HKEY_LOCAL_MACHINE.
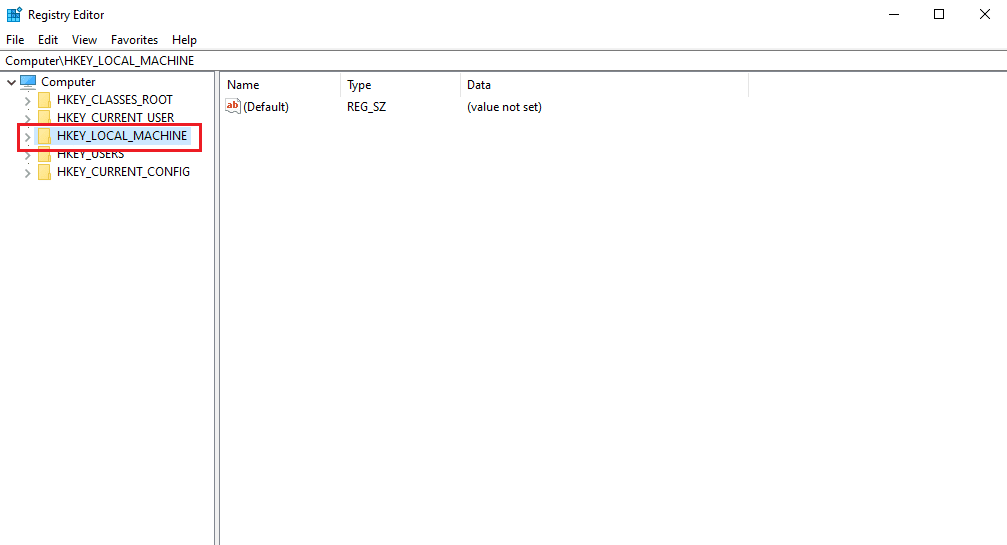
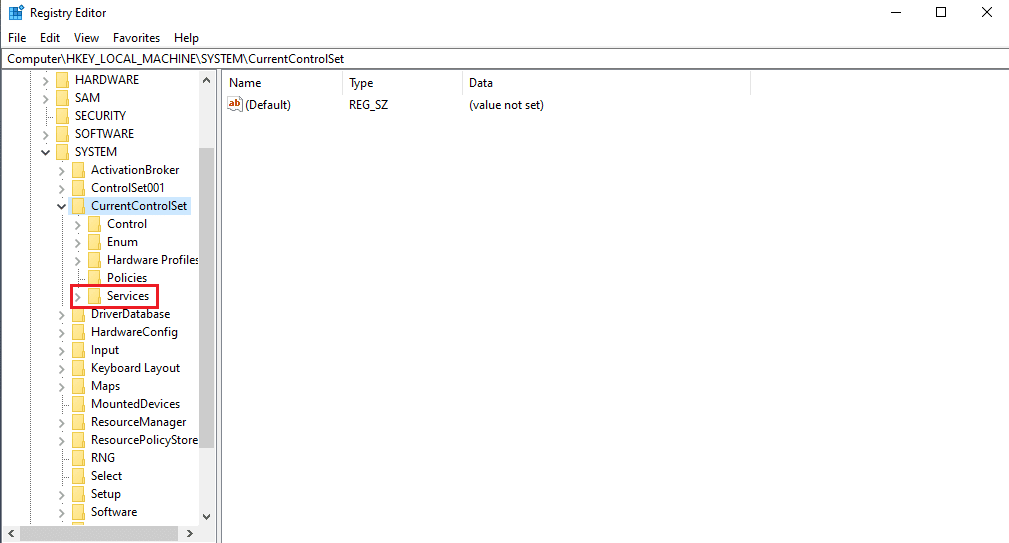
4. Now go and click the system folder.
5. Now go and click the CurrentControlSet folder.

6. Then click the Services folder.
7. Then click the Sptd folder.
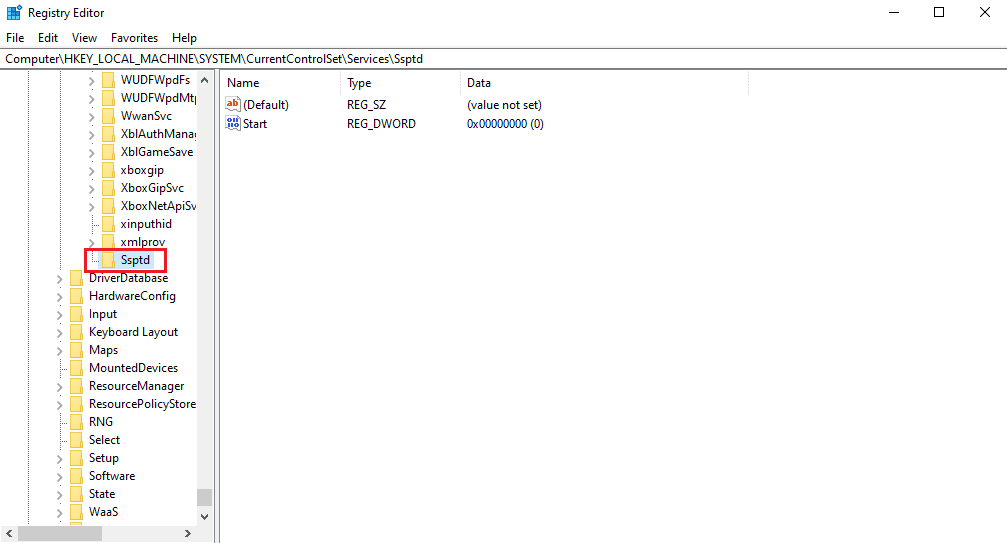
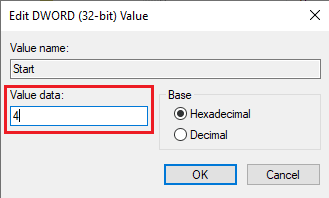
8. Right-click the Start DWORD file and select Edit....
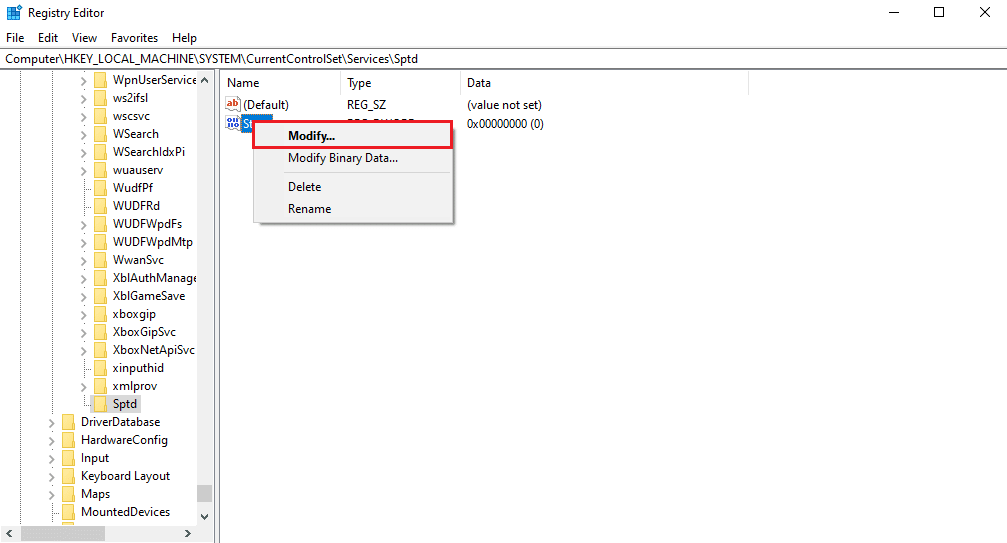
9. Change the data value to 4.
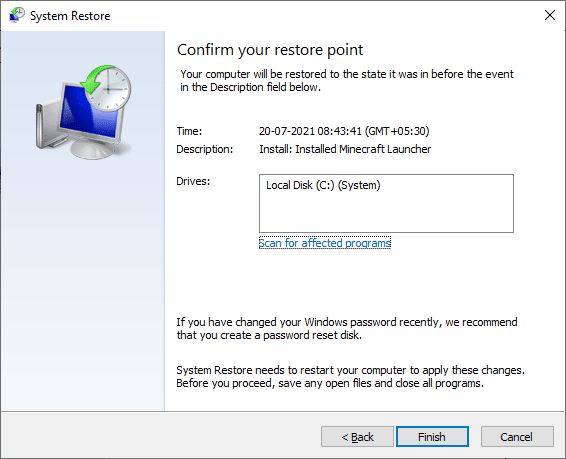
Method 7: Perform a System Restore
If none of the methods mentioned above work, you can try performing a system restore. You can check out the How to Use System Restore in Windows 10 guide to restore your Windows 10 system safely.
Frequently Asked Questions (FAQ)
Q1. What Causes VDS Provider Error in Windows 10?
Answer Various system errors can cause errors in the underlying VDS provider; some common causes include faulty windows updates and corrupted system files.
Q2. What is meant by virtual disk service?
Answer Virtual Disk Service is a technology developed by Microsoft. This technology helps expand the existing storage capacity of Windows.
Q3. How can I restore the underlying VDS provider?
Answer You can repair the underlying VDS provider using the repair utility. You can download the VDS provider recovery utility from the internet.
***
We hope this guide was helpful and that you were able to troubleshoot VDS error code 490 01010004 on your computer. Comment and let us know which method worked best for you. Also, if you have questions, questions, or suggestions, feel free to share them with us.