Fix Steam Client Loader Not Responding on Windows 10
When you try to connect to your Steam account, you will see that the Steam client loader is not responding or that Steam is not responding. In short, it may stop responding for no apparent reason. Bootstrapper is a required service, so you won't be able to run the launcher if it has problems. This can happen because we have different hardware and configurations on our desktops. Continue reading to fix the Steam client loader launch issue.
How to Fix Steam Client Loader Not Responding in Windows 10
We've compiled a list of all the possible ways to fix the Steam client loader launch issue, starting with the most effective and easiest. So, go down in the same order.
Basic Troubleshooting Methods
Before proceeding with the advanced troubleshooting methods, follow these basic preliminary steps to resolve the issue.
1. Restart your computer
Sometimes, simply restarting your computer can cause the Steam client loader to become unresponsive. So, just restart your computer and only use the Steam program to ensure a smooth experience.
1. Press the Windows key.
2. Then press the power button.
3. Select the Restart option.

2. Reconnect to the Internet
The downloader relies on the Internet. Sometimes obstructions or sluggish internet are to blame for the Steam client loader not responding. Close all active windows on your computer and restart the Steam client. I hope this solution helps those who have internet problems.
Here are the possible troubleshooting methods to resolve the issue.
Method 1: Run Steam as Administrator
Steam probably lacks certain permissions required to run, which is why the bootloader fails to load in this scenario. You can try running Steam as an administrator.
Option I: via the context menu
1. Go to This PC and double-click Local Disk C.

2. Double-click Program Files (x86).
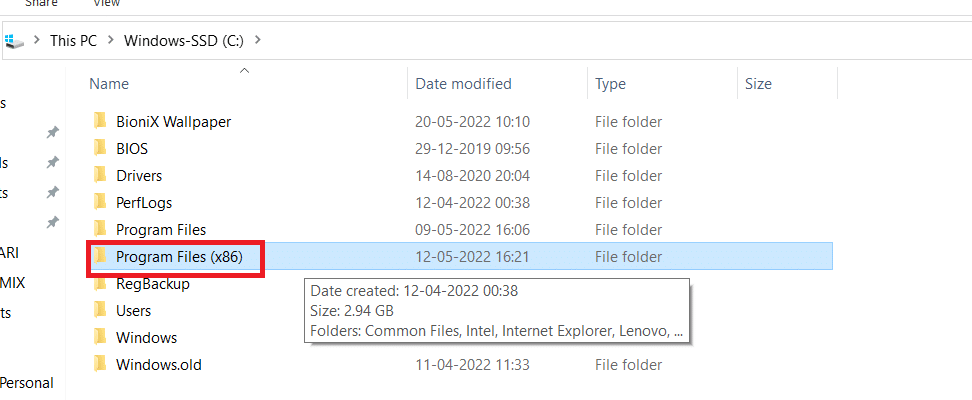
3. Then open the Steam folder.

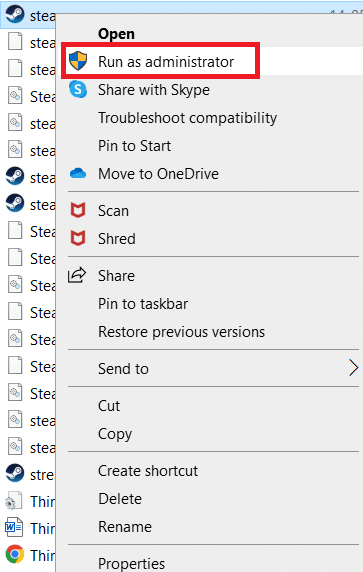
4. Right-click on the Steam application and select "Run as administrator".
This will give Steam all the necessary permissions and it should start up normally.
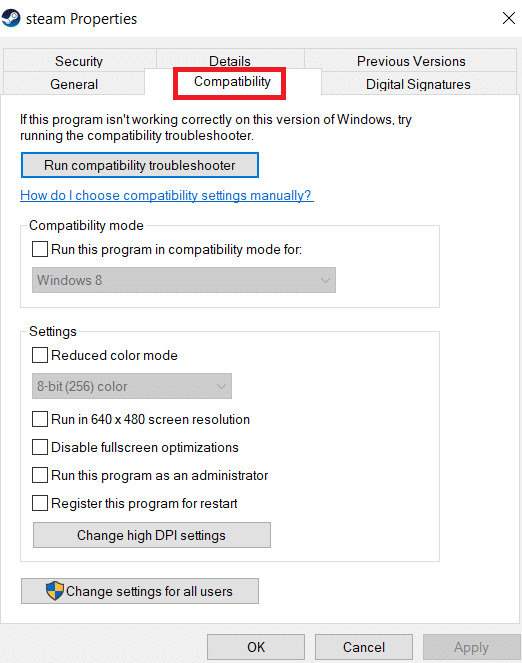
Option II: Through Compatibility Properties
There may be an issue on your system that causes the Steam client loader to not respond due to compatibility issues. Here's how to run Steam in Compatibility Mode.
1. Navigate to the Steam application folder.
2. Right-click on the Steam.exe shortcut and select "Properties".
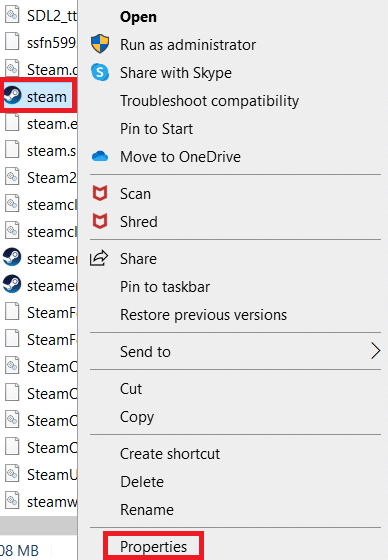
3. Click the Compatibility tab.
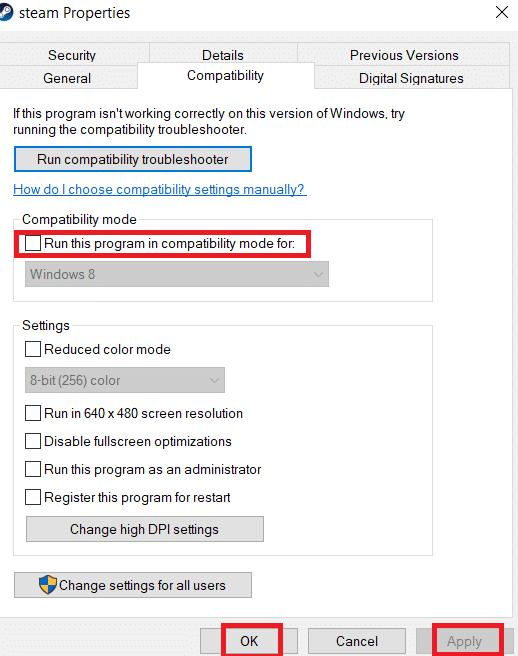
4. Be sure to uncheck "Run this program in compatibility mode for". Click "Apply" and "OK".
5. Launch Steam as an administrator.
Check if the issue still persists with the Steam client loader not responding.
Method 2: Launch Large Image Mode
If you see the Steam client loader not responding when you try to install the game, try running Steam in Big Picture mode. This is not a solution, but a workaround that has worked for many users and may work for you.
1. Press the Windows key, type Steam and click Open.

2. Click the View menu, then select Large Picture Mode.

Method 3: Update date and time settings
If the date and time settings are incorrect, the server's security certificate may appear suspicious to network services, and they may refuse the machine to connect to this server. As a result, we will update the date and time settings. Follow the given steps to fix the issue with launching the Steam client loader by updating the date and time setting.
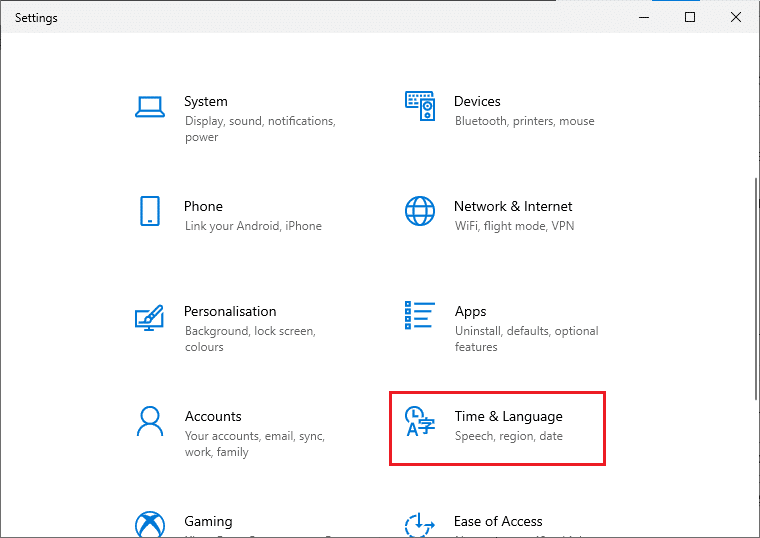
1. Press the Windows + I keys at the same time to launch the settings.
2. Select the Time and language setting.
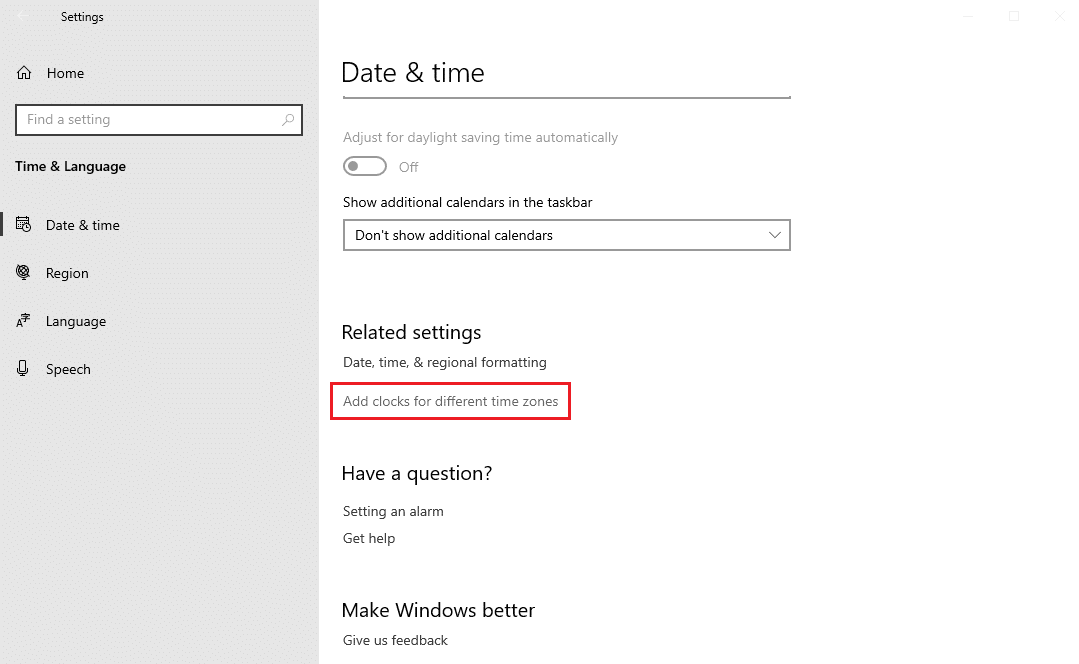
3. Now scroll down and select the option "Add clocks for different time zones" in the right pane.
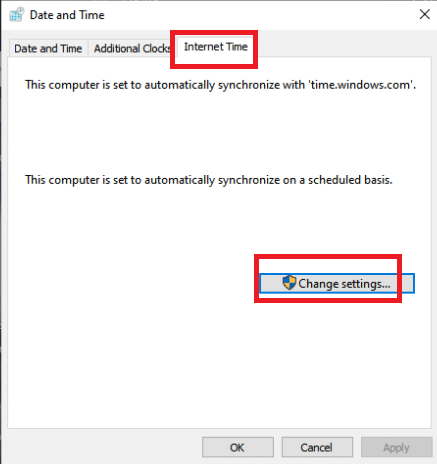
4. In the pop-up window, go to the Internet Time tab and select Change settings.
5. Check "Synchronize with Internet Time Server" in the "Internet Time Options" window, and then select an Internet time server on the next screen.
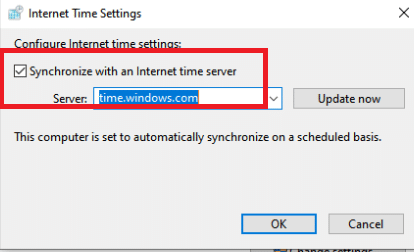
6. Close the window by clicking the Update Now button in the next window.
Check if this solves the Steam client issue.
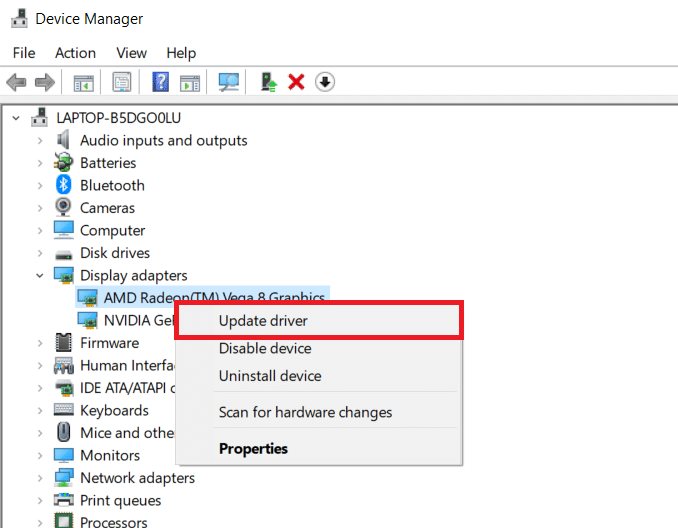
Method 4: Update GPU drivers
The problem with the Steam client loader not responding can also be caused by outdated graphics drivers. To resolve this issue, make sure your drivers are up to date. As a result, in this step we will try to update the GPU drivers in the hope of fixing the problem. Read our guide on 4 ways to update your graphics driver in Windows 10.
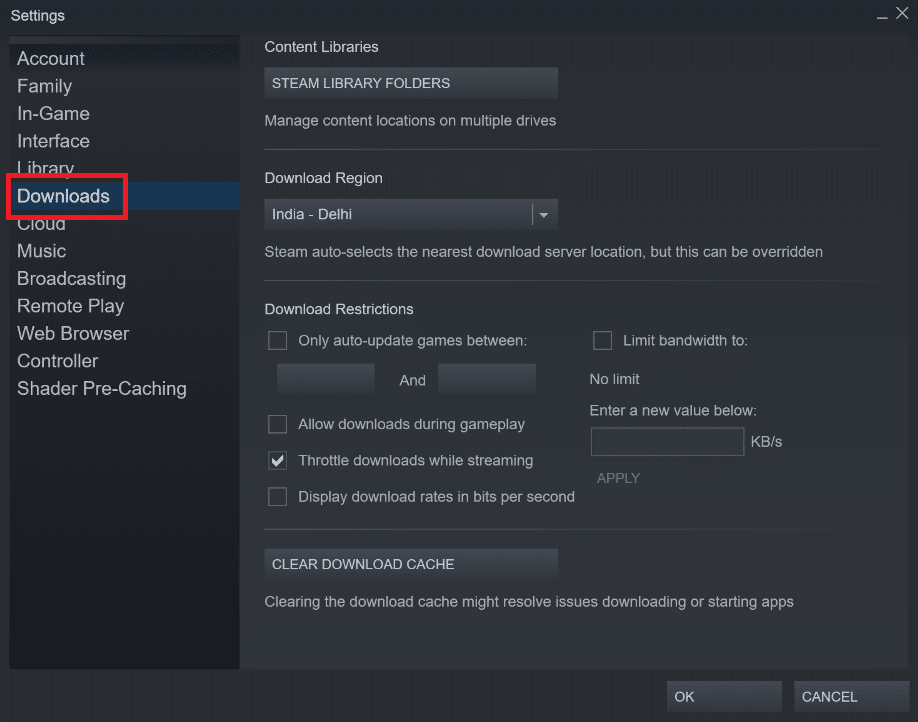
Method 5: Clear Download Cache
Data from update files and download files is cumulative, causing the Steam client to overload. As a result, the Steam client loader is not responding. In order to solve the problem with the bootloader, we should try clearing the download cache.
1. Launch the Steam app from Windows Search.
2. Go to "Settings".
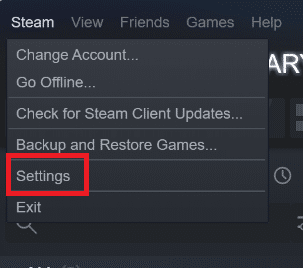
2. In the Settings panel, find Downloads.
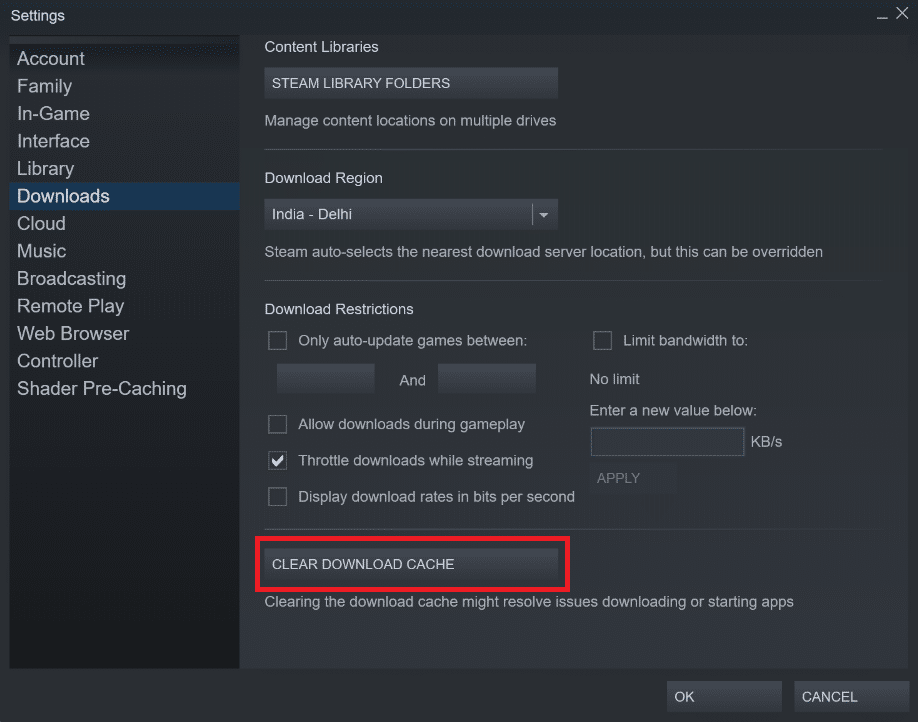
3. Click the Clear Download Cache button. After a few seconds, Steam will ask for your login credentials.
4. Click OK to confirm your decision.
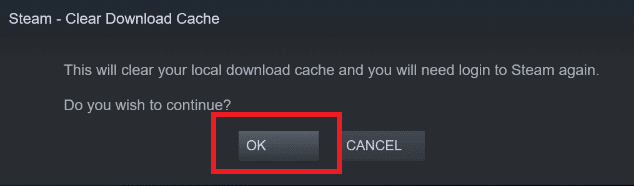
Steam will launch as expected after logging back in.
Method 6: Disable Cortana
Cortana can sometimes conflict with your app. It also interferes with the Steam client program for many users. As a result, you should disable Cortana in order to fix the issue.
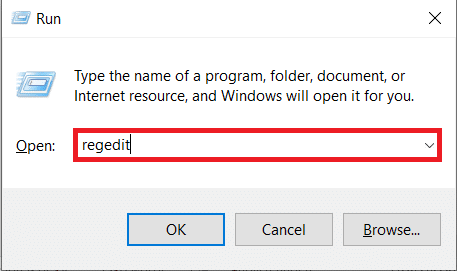
1. Press the Windows + R keys at the same time to open the Run dialog box.
2. Type regedit and press the Enter key to launch the Registry Editor.
3. Click Yes on the User Account Control window.
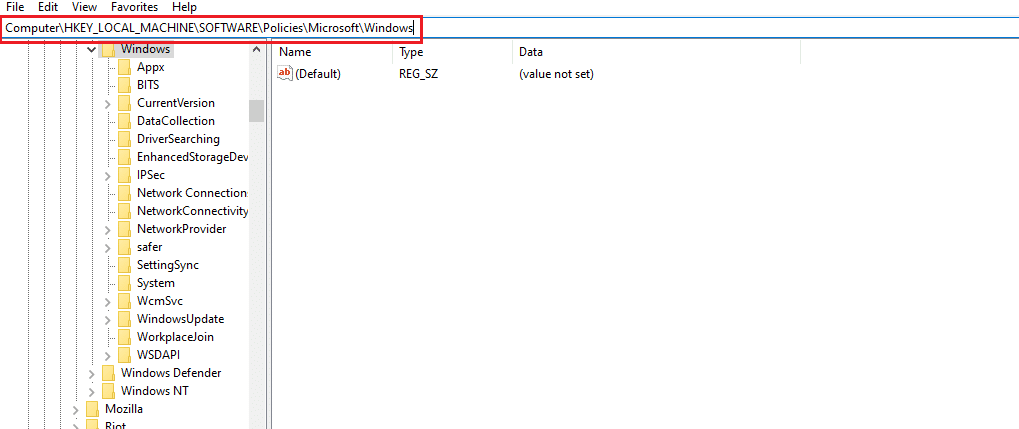
4. Navigate to the following folder path in the Registry Editor.
ComputerHKEY_LOCAL_MACHINESOFTWAREPoliciesMicrosoftWindows
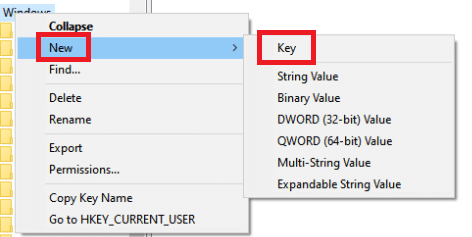
Note. You may not find a folder named Windows Search. If so, you can make it yourself as shown below.
5. Right-click the Windows Keys folder and select New > Key.
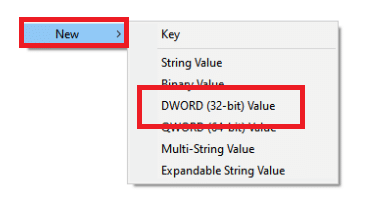
6. When you are in Windows Search, right-click on an empty space, click "New" and select "DWORD (32bit)" from the drop-down menu.
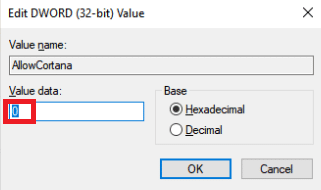
7. After selecting an option, a new list will appear, ready to be named. Name it AllovCortana.
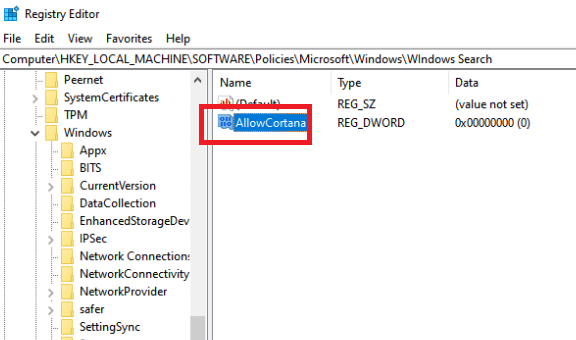
8. Once you've given it a name, double-click it to make sure the data value is set to 0.
9. Restart your computer after closing the registry editor.
10. Cortana is long gone and you can use "Run as Administrator" to open Steam.
Note. If this method doesn't work and you want Cortana back, open Registry Editor and delete the folder you just created. Cortana should be available again after you restart your computer.
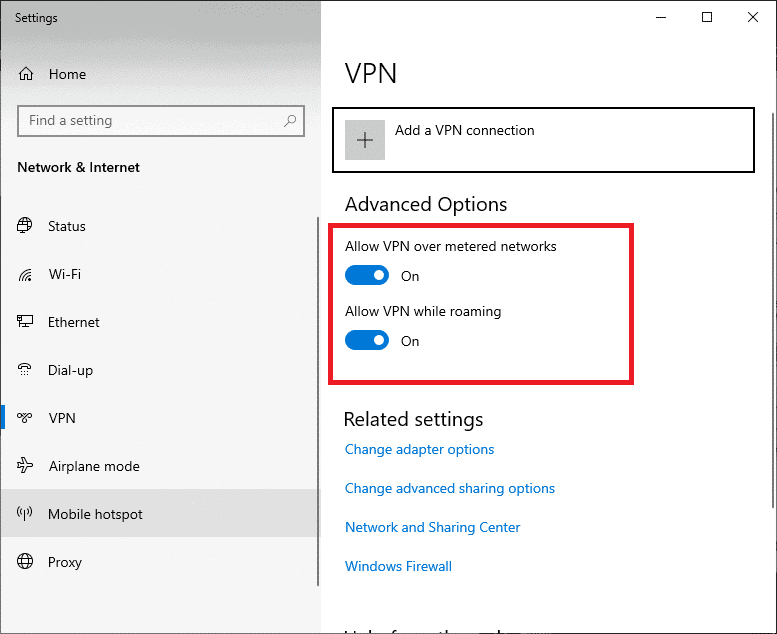
Method 7: Disable VPN and Proxy Server
Steam recently declared several applications that provide cloaking or VPN services as incompatible with Steam. VPN apps can be temporarily disabled or uninstalled. Read our guide on how to disable VPN and proxy on Windows 10 to do just that.
Method 8: Reset Winsock
Winsock is a critical web application component that handles input and output requests. You will not be able to connect to Steam if it has an error. As a result, try uninstalling it to fix the problem that the Steam client loader won't start.
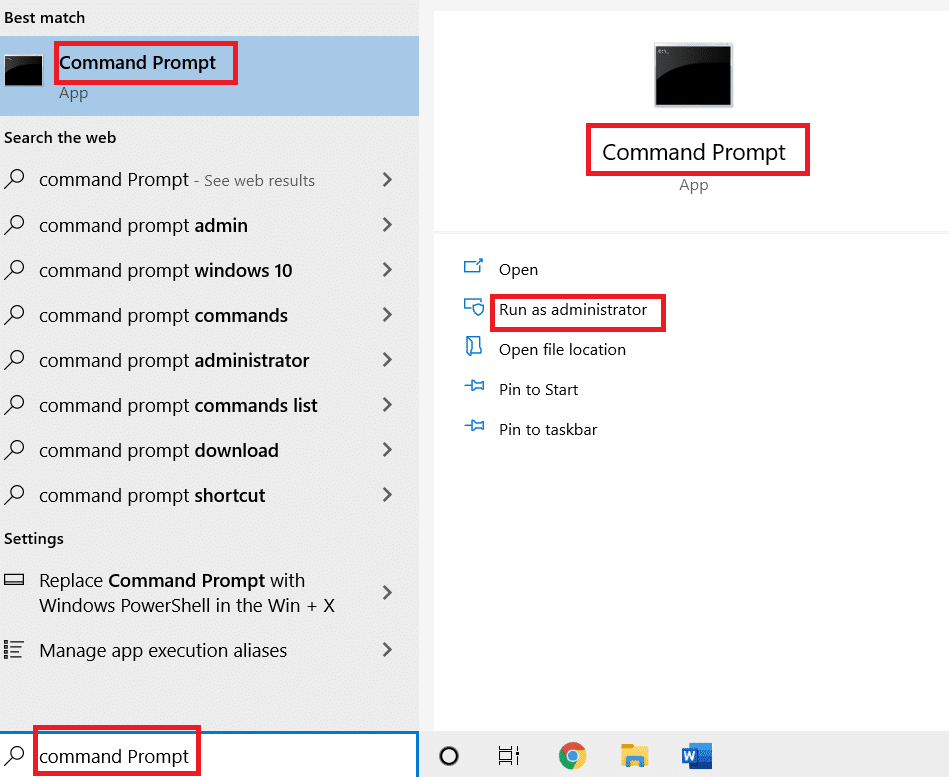
1. Search for cmd in the Windows search bar. Click "Run as administrator".
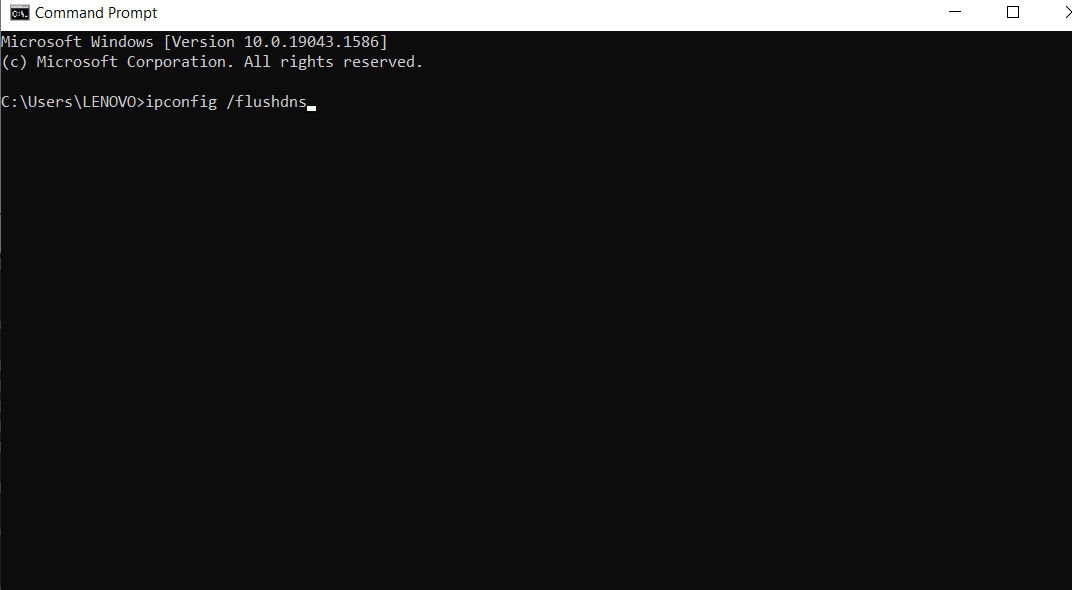
2. Run the following command now.
netsh winsock reset

3. If that doesn't work, try the command below.
netsh winsock reset catalog

4. If none of the commands above worked, try these.
netsh int ip reset reset.log hitipconfig / release ipconfig / renew

5. After that, restart your computer to check if the problem is still there.
Method 9: reset IP settings
Although you can ping a machine on your network, if your TCP/IP settings on your machine are messed up or erroneous, you won't be able to load some web pages correctly, and your Internet will work for some addresses but not others . Read our guide to fixing network connection problems in Windows 10 to do just that.
Method 10: add an exception to the antivirus
There are several options for adding steam as an exception to your antivirus software. If you don't see your preferred antivirus in the list below, go to its official website and follow the instructions. As an example, we showed McAfee LiveSafe Antivirus. With McAfee Antivirus, the only option is to completely disable your antivirus until the game is updated. Follow the steps listed below to fix the Steam Client Loader launch issue.
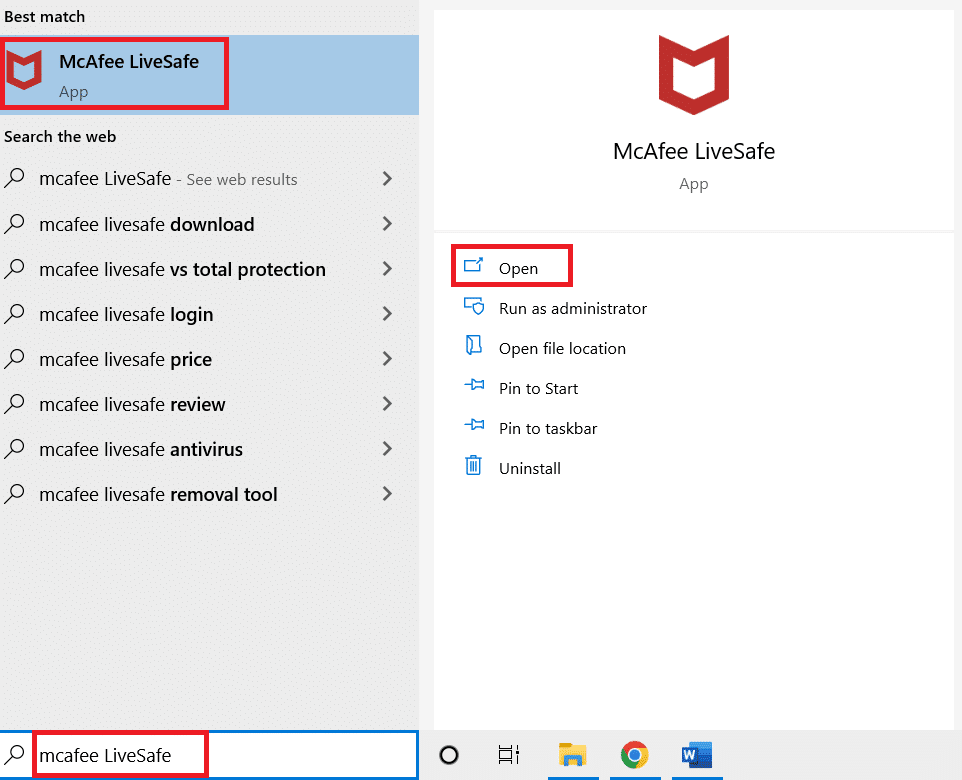
1. Press the Windows key, type McAfee LiveSafe and click Open.
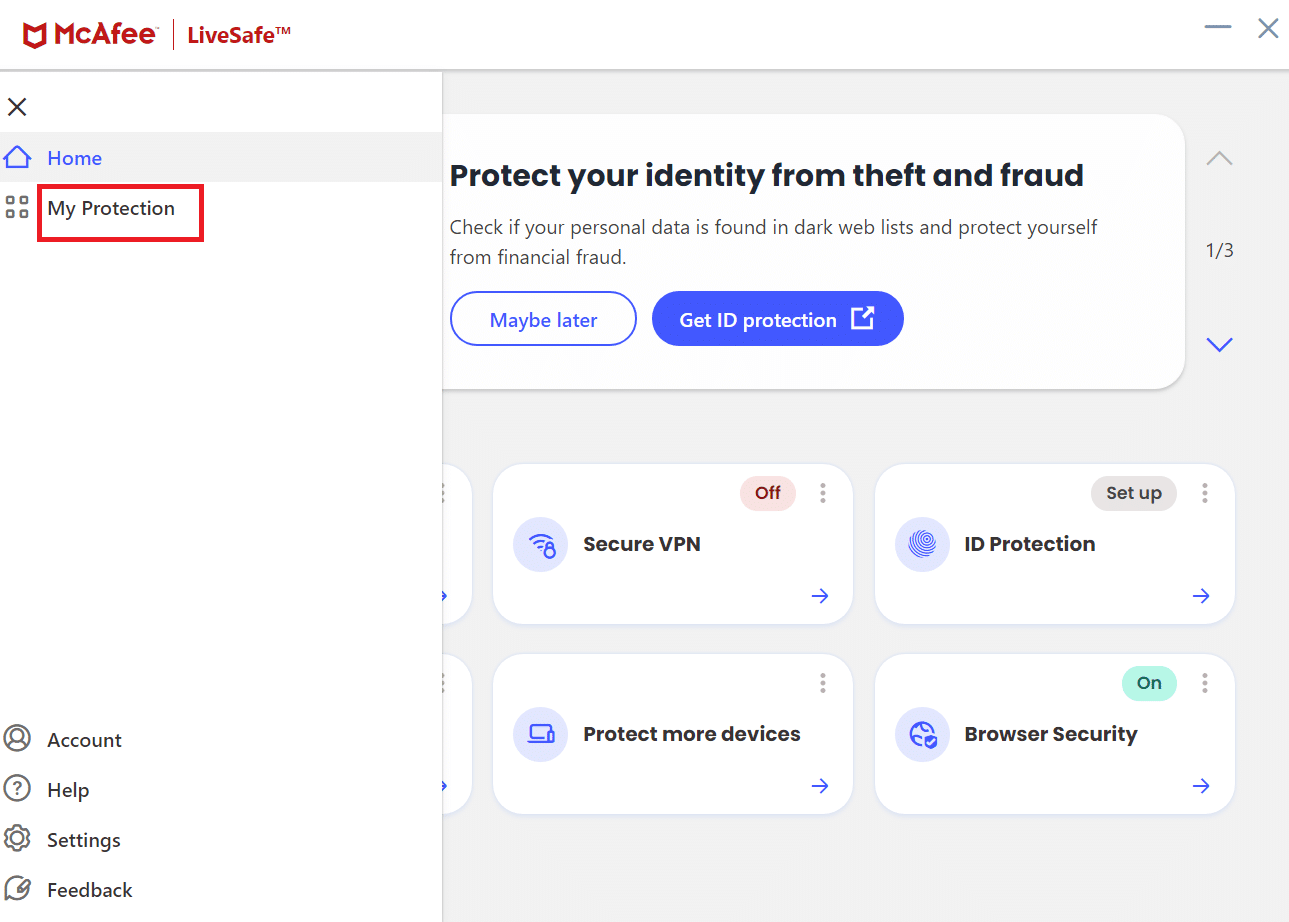
2. Click on the three lines in the top left corner.
3. Then click My Security.
4. Then click Real-time Scan.
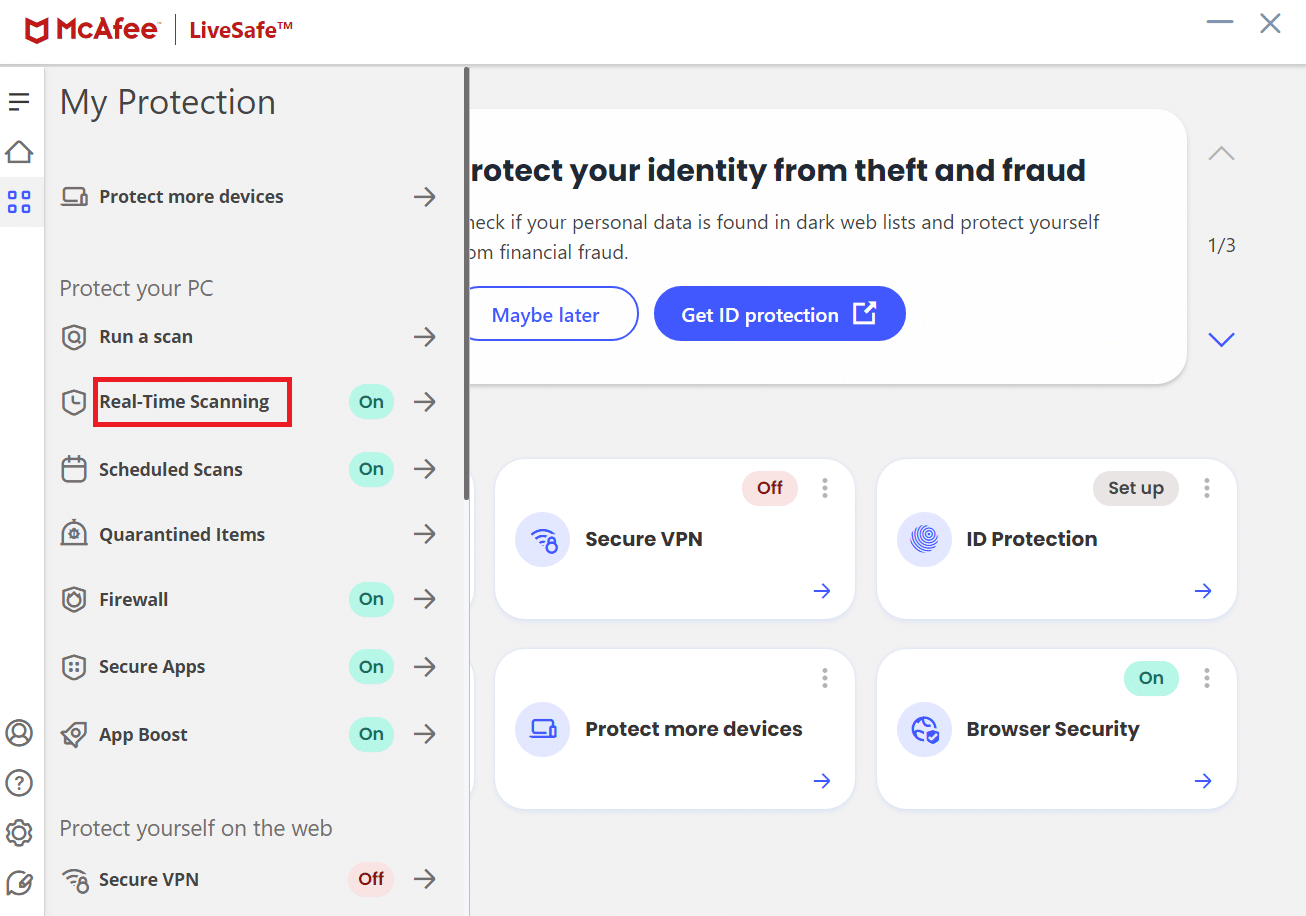
5. Finally, click "Turn off".
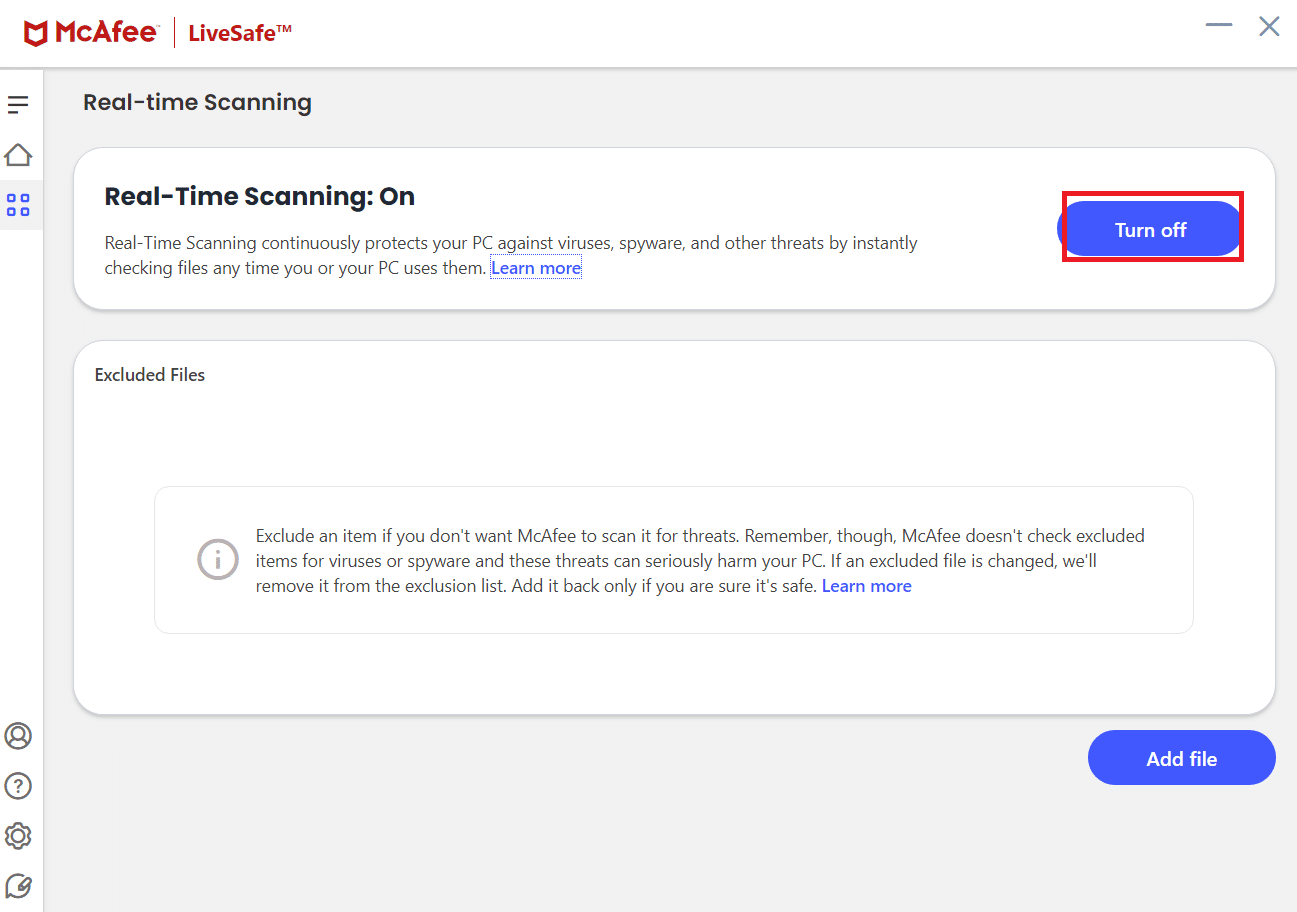
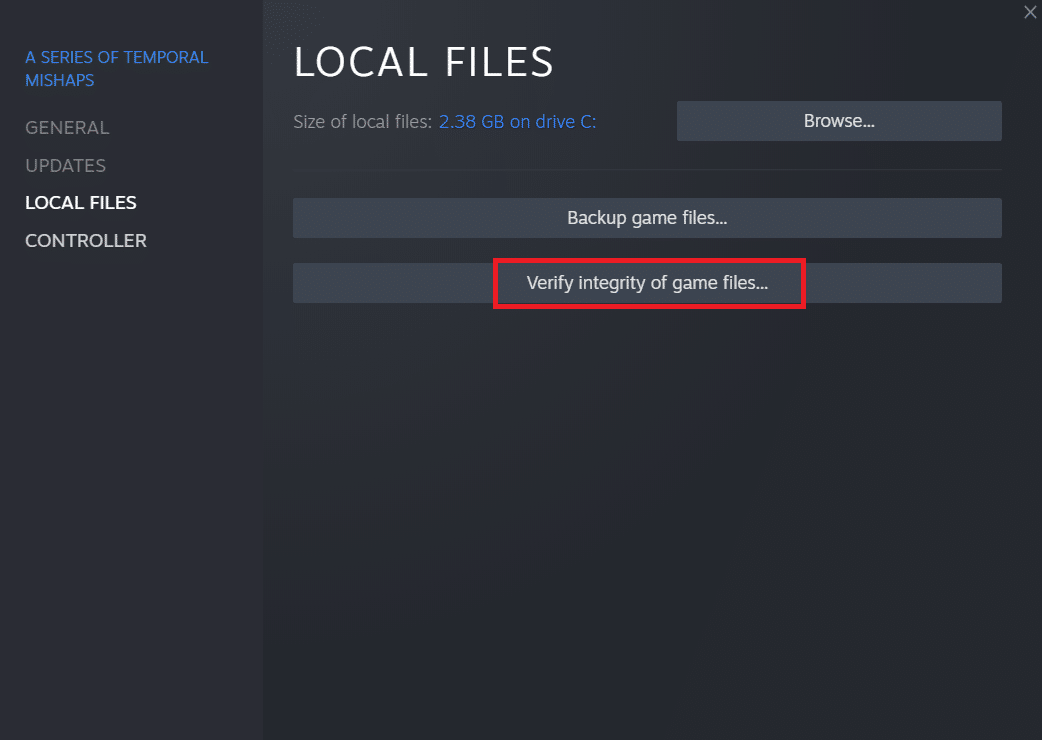
6. Then, to verify the integrity of the game files, follow these steps. Read our guide on how to verify the integrity of game files on Steam to do so.
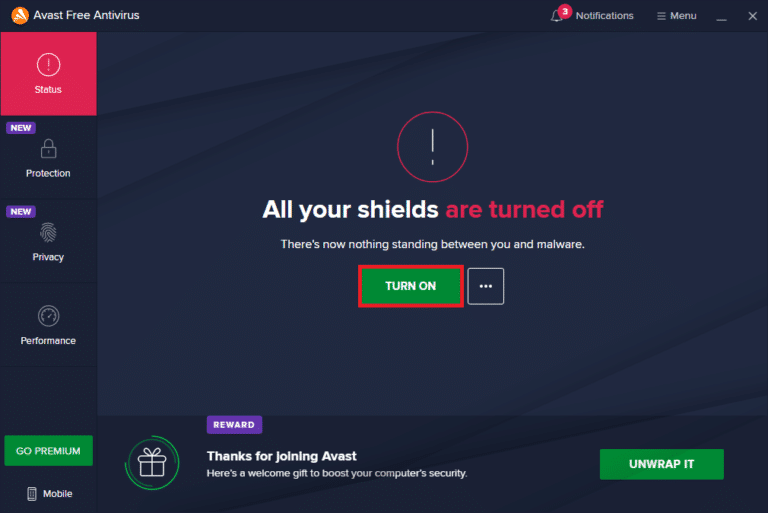
Method 11: Disable your antivirus program (if applicable)
Most antivirus systems block files connected to the Steam application. As a result, it is recommended to temporarily disable your antivirus application before attempting to launch the Steam client. Read our guide on how to temporarily disable your antivirus in Windows 10 to do so.
Method 12: Disconnect the Xbox 360 controller
This issue can be caused by a conflict between the Steam beta and the Xbox 360 controller. The Xbox 360 (and even PS4) controller seems to have a glitch in the Steam beta. Follow the instructions below to fix the Steam Client Loader launch issue.
1. Open the Task Manager by simultaneously pressing the Ctrl + Shift + Esc keys.
2. Right-click the Steam process and select End Task. This ensures that the changes we make are permanent and saved, and that the client does not have any problems when restarting.
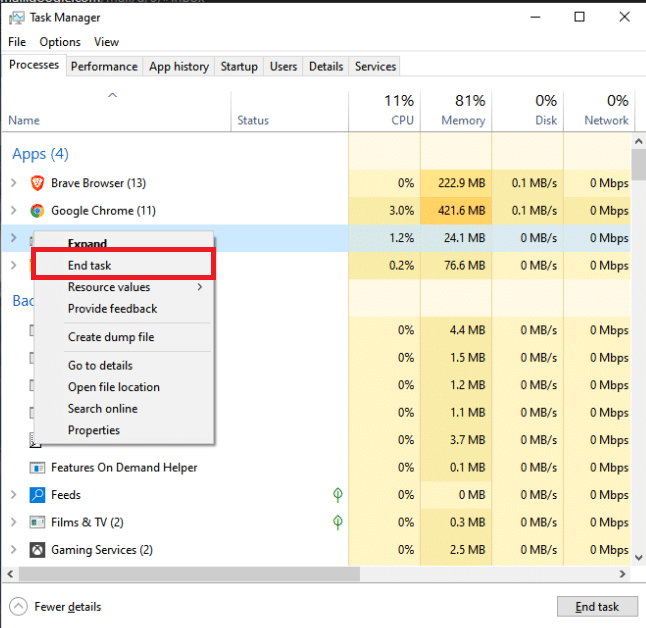
3. Disconnect the controller from the port after closing all processes and close any open applications that control the controller hardware.
4. To opt out of the Steam Beta, refresh your screen and continue to the next step.
Note. If you opt out of beta testing, you will not receive updates until they are officially released. The beta phase has both advantages and disadvantages. You can test new features before they are officially released in a few months; but updates can still be problematic and cause you problems. In this situation, connecting a controller causes Steam to crash.
5. Launch the Steam application, click on the Steam menu in the top left corner and select "Settings".
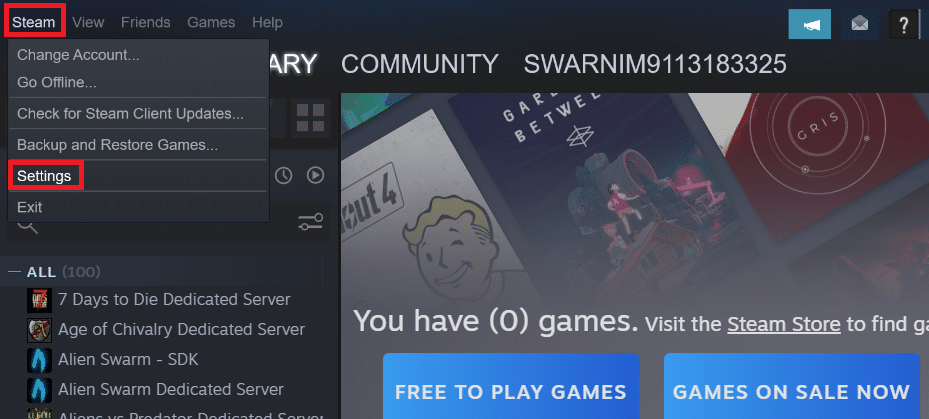
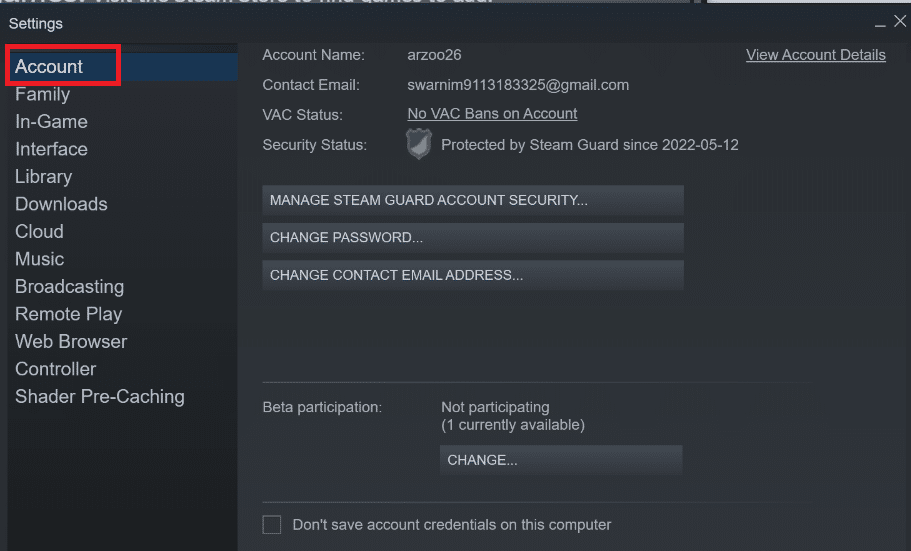
6. When you are in the settings, select Account. There is an option called "Participate in beta testing". We need to make sure your client is not in beta testing.
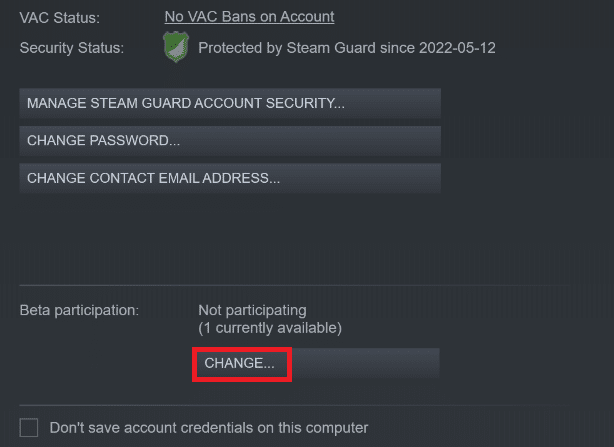
7. Click Edit.
8. Select NO - Opt out of all beta programs.
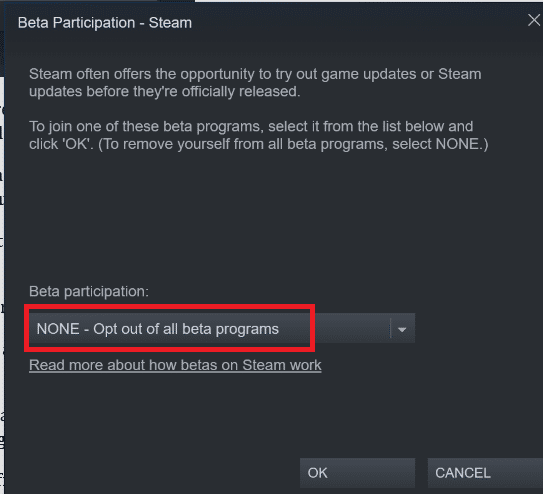
9. Then end all Steam processes.
10. Next, restart your computer and restart Steam. If you were a beta tester, your client will need to be updated before you can play your games again.
If you're having trouble opting out of the beta, go to your directory and delete the beta files there. To do this, follow these steps.
11. Go to This PC and double-click Local Disk C.
12. Double click Program Files (x86).

13. Double click the Steam folder.

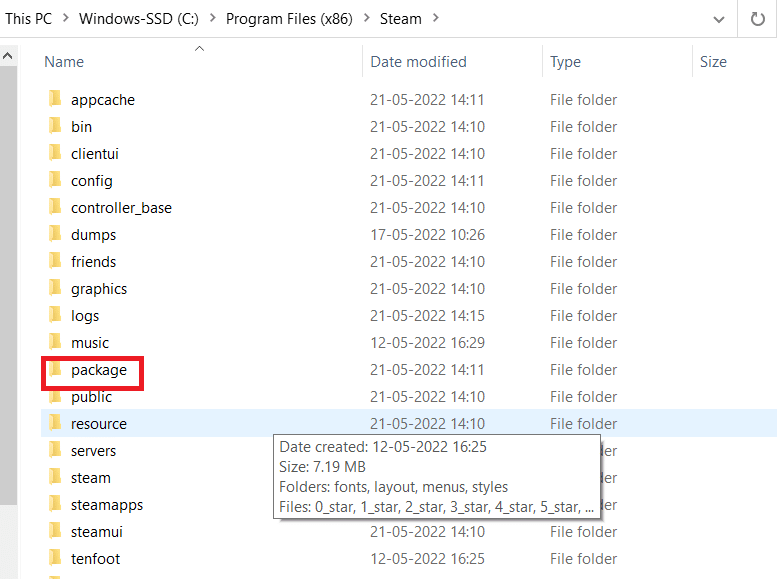
14. Click the "Package" folder.
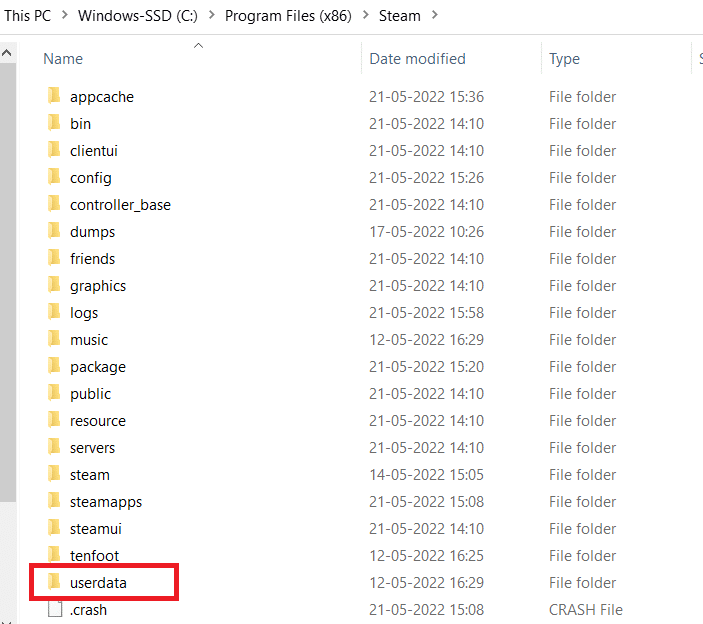
15. Delete all files starting with beta in the Package folder.
16. Close the window and restart the Steam client, then follow the instructions in step 4 to opt out of the beta program.
Method 13: Delete the config file
We can easily delete the config file from the PC and Steam should generate it immediately without losing any data. However, you may see that some of your choices have been reset. For this you must:
1. Go to the Steam folder.

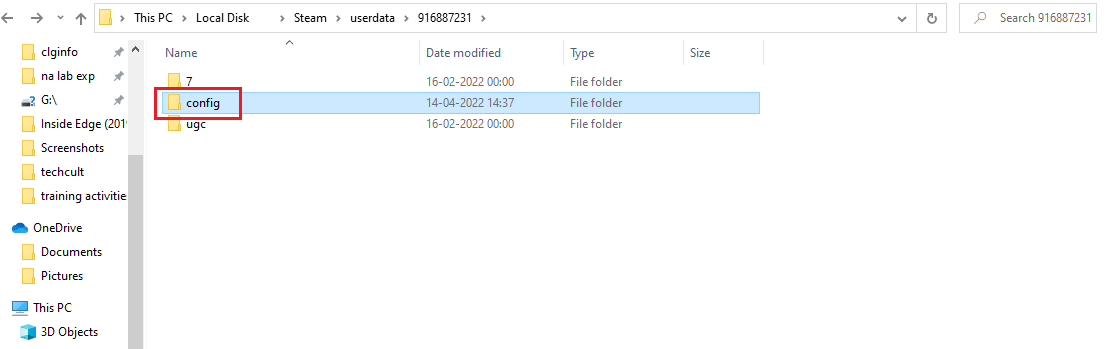
2. Double-click user data.
3. Double-click the subfolder, then open the configuration folder.
4. Inside this folder there should be a localconfig.vdf file, which can be replaced with your username or a random number, but there will almost certainly be a .cfg file.
5. To remove this file from your computer, right-click on it and select Delete.
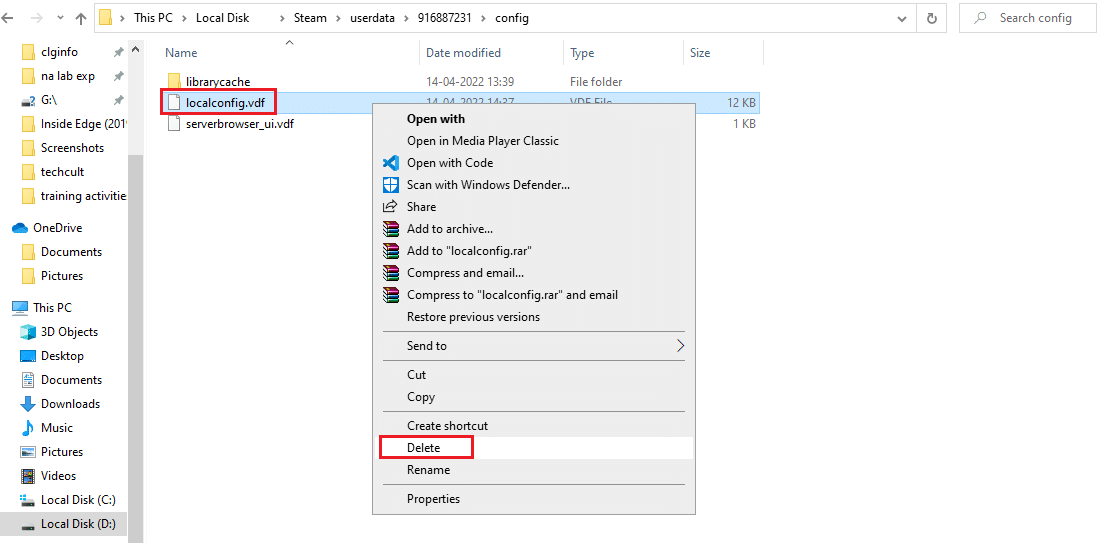
Check if the problem persists after restarting Steam.
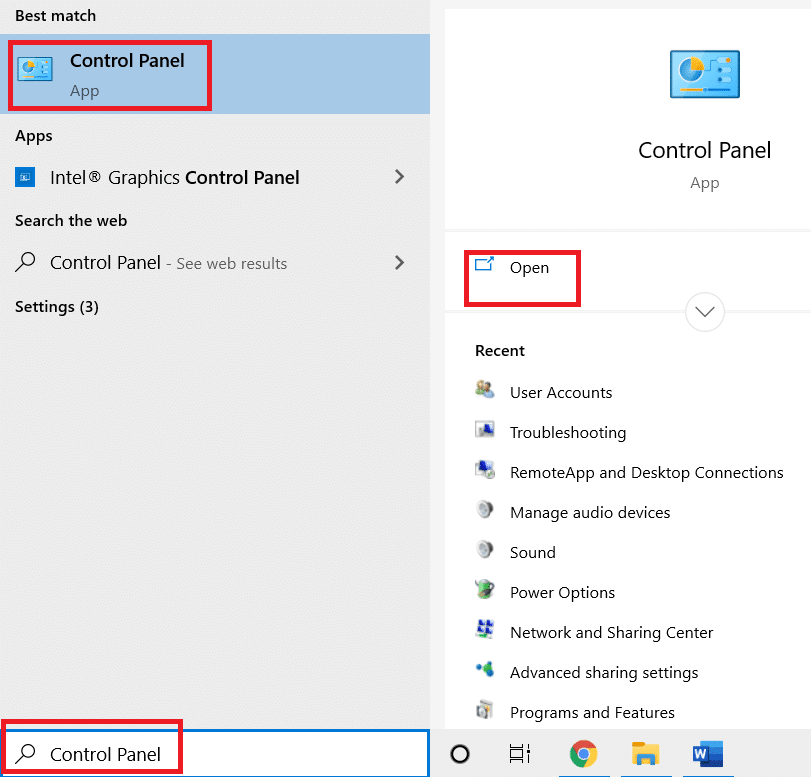
Method 14: Reinstall Steam
If nothing else works, we will have to go to the last option - restart the Steam client. So, remove Steam from your Windows settings, then download and install a fresh copy on your computer. Hopefully this should fix the problem that the Steam client loader won't launch.
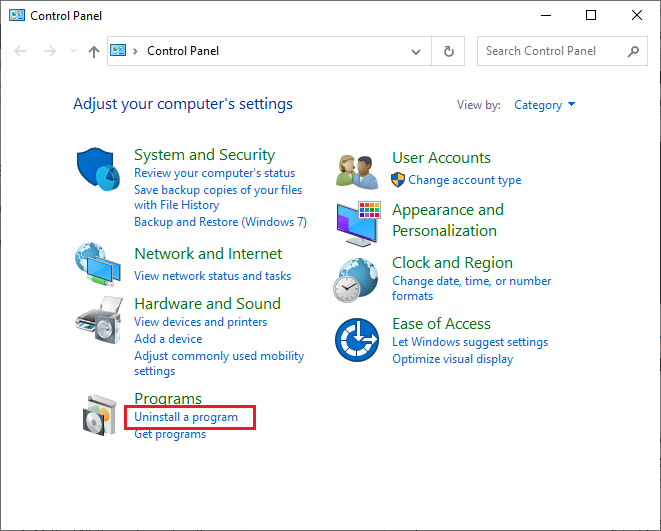
1. Press the Windows key, type control panel and press the Enter key.
2. Select the "Category" option from the "View" drop-down menu in the upper right corner, and select the "Uninstall a Program" option from the "Programs" section of the menu.
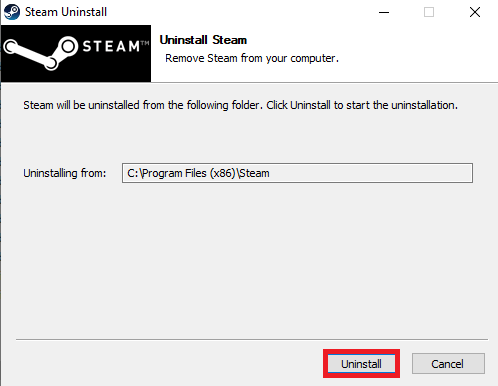
3. Select the Steam application from the list and click the Uninstall button on the top bar to start uninstalling the Steam application.
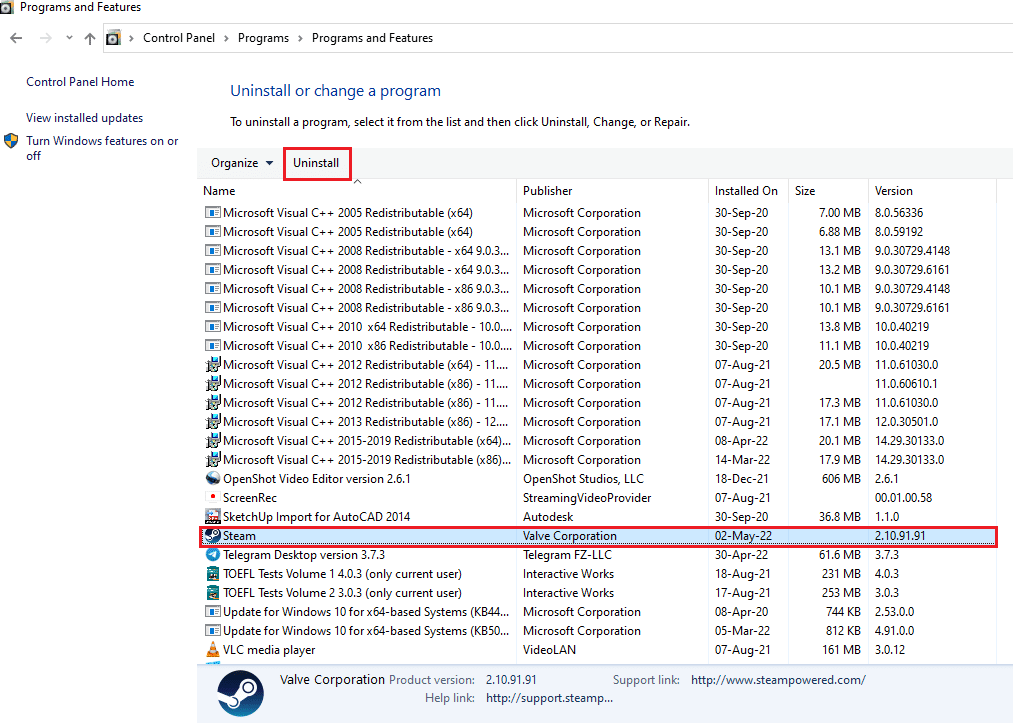
4. Click the Uninstall button on the Steam uninstall window to uninstall the Steam app on your PC.
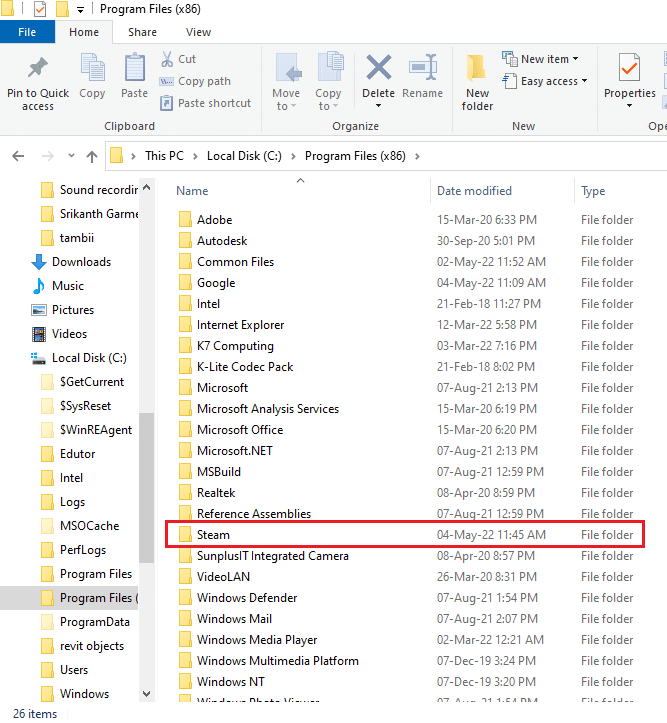
5. Delete the Steam folder along the path Local Disk (C:) > Program Files (x86) by pressing the Delete key.
The steps below will help you reinstall the Steam app on your computer from scratch.
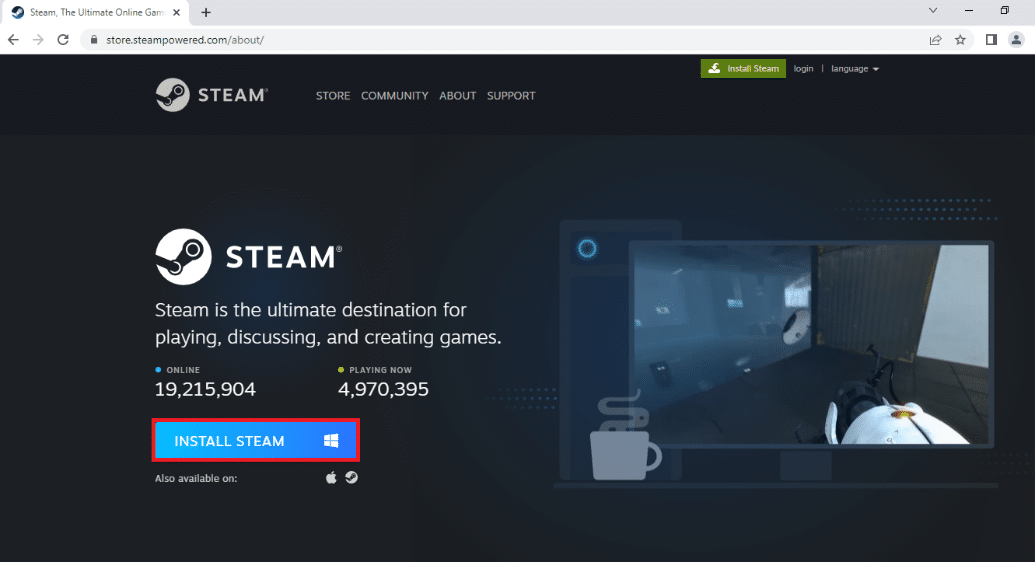
6. Open the official website of the Steam app in your default web browser and click the "Install Steam" button in the top right corner of the home page.

7. Click the INSTALL STEAM button on the next page to download the Steam application to your computer.
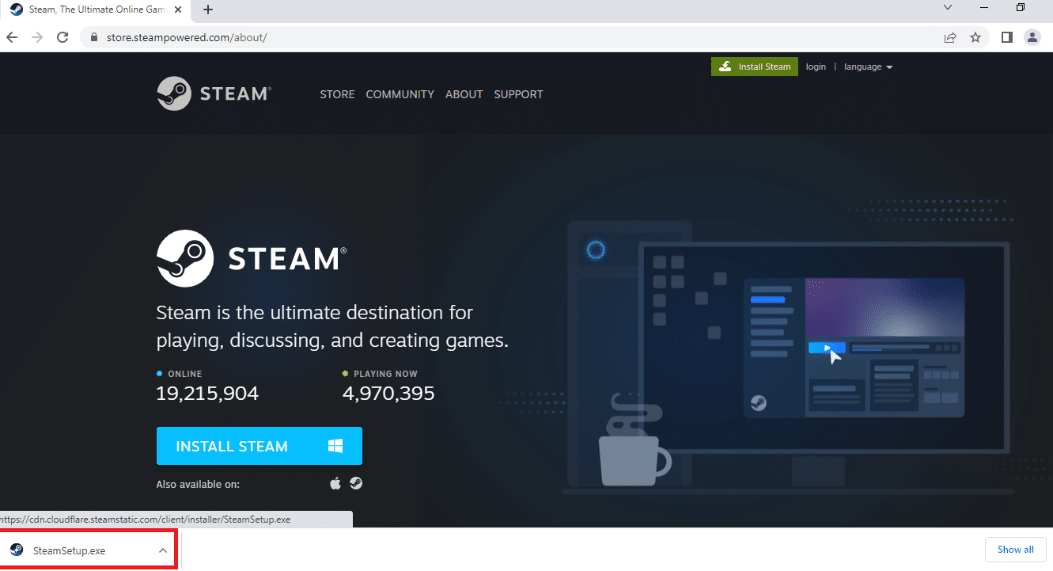
8. Click on the downloaded SteamSetup.exe file at the bottom left of the page to launch the Steam application on your PC.
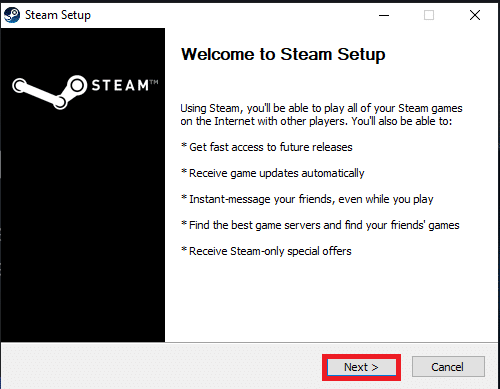
9. Click the "Next" button on the "Steam Setup" window to start installing the Steam app on your PC.
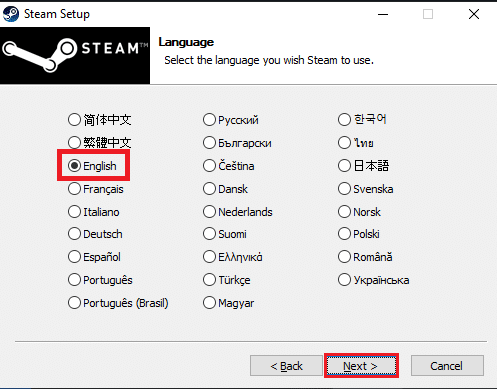
10. Select the desired language in the next window and click the Next button in the wizard.
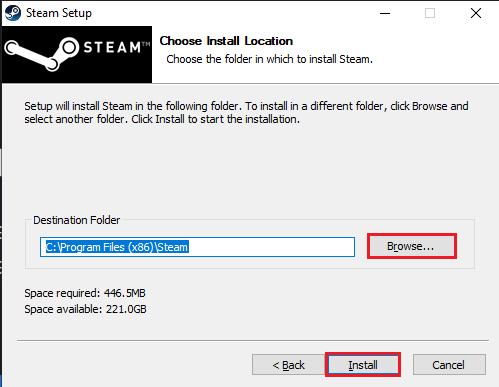
11. Select the destination folder for the Steam application by clicking the "Browse..." button and clicking the "Install" button to complete the installation of the application.
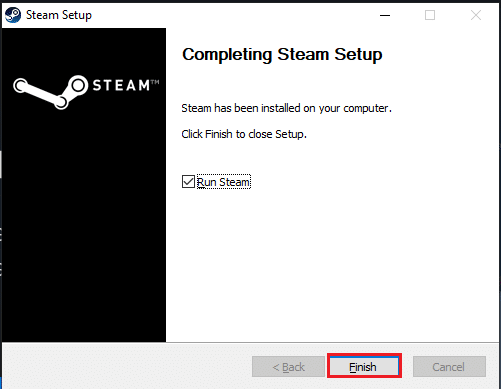
12. Click the "Finish" button on the "Complete Steam Setup" window to complete your steam setup.
13. Create a new account or sign in to an existing account using your Steam app login credentials.
The problem with the Steam client can be solved by replacing the drive where Steam is installed. This procedure is identical to reinstalling, except that you must first change the intended location before redownloading Steam. Before you begin, back up your files in case something goes wrong and follow the steps above to install Steam elsewhere.
***
We hope you found this information helpful and were able to fix the Steam client loader not responding on Windows 10. Please let us know which method was most helpful to you. Please use the form below if you have any questions or comments.