Fix Skype Can't Access Sound Card in Windows 10
Skype is a communication software used by millions of people around the world. A division of Microsoft, the application is mainly used for calling, file sharing, messaging, free video calls and other functions using the Internet via the Internet or through the Skype application. The application is available for installation on Internet-enabled devices, including mobile phones, desktop computers, tablets, etc. Skype is a truly modern way of communicating, although it is not without some drawbacks that make it a little more difficult to use the application. One such glitch is when Skype is unable to access the Windows 10 sound card, which prevents the use of services required for communication, such as messaging and calling. If you are now solving the same problem in Skype, then you have come to the right place. Our ideal guide, which you will expand along the way, discusses the causes and reliable ways to fix the sound card error in Skype. So, without further ado, let's get started with our troubleshooting guide for Skype and its sound card error.
How to Fix Skype Can't Access Sound Card in Windows 10
Sound cards are extremely important for communications services, the same goes for Skype , where instant messaging and calling functions rely on the sound card to play incoming audio and record the microphone. If Skype cannot access the sound card on your system, in this case a Windows PC, then this may be due to the reasons listed below:
- A recent Windows update may cause an error
- Internet connection problems
- Interference from other streaming applications
- Corrupted or outdated sound card drivers
- Minor glitches with the audio recording device and its settings
- Pending operating system updates
- Corrupt Skype installation
The sound card issue in Skype can be resolved with a few simple fixes, which are listed below as broken down methods. Now that you know about the possible causes, let's start by trying to work around these troubleshooting methods:
Method 1: Connect your speaker and microphone correctly
If you encounter a sound card issue during a Skype call, you should make sure that the speakers and microphone on your Windows PC are properly connected. If the other person cannot hear your voice during a Skype call, the problem is most likely with your microphone. You may have connected the microphone to the wrong port. Typically, a 3.5 mm jack is used for the microphone, as is used for headphone speakers. So, make sure you connect it to the right one. After doing that, check if the problem with the sound card is fixed when using Skype.
 Free stock photo image from www.rupixen.com from Pixabay
Method 2: Troubleshoot your network connection
This is probably the easiest and also one of the first methods to implement when you are trying to fix sound card issues in Skype. As discussed earlier, Skype is reliable on the Internet, and if you have problems connecting to the Internet on your system, Skype will automatically change the audio quality to keep the call active. Thus, it is important to maintain a wired connection to deal with interference problems on your network. Alternatively, you can check out our guide "Troubleshooting Network Connections in Windows 10" to learn more about what can be done to ensure a good Internet connection on your system.
Method 3: End background processes
The next important way to resolve the Windows 10 problem on your computer that Skype cannot access the sound card is to disable all streaming apps and downloads. It is possible that other applications are interfering with Skype and causing problems with your sound card. Therefore, turning them off is the best option possible in this case. You can check out our guide to end a task in Windows 10 to help you close all background apps. Once this is done, Skype will be free to use the bandwidth on your PC without the interference of any streaming application.

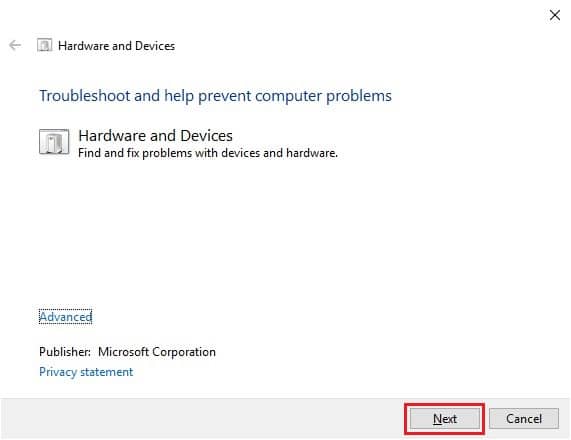
Method 4: Run the Hardware and Devices troubleshooter
Skype cannot access the sound card related to your system hardware, you can run the troubleshooter for the same on your system. This can be done through the troubleshooting settings. Read our guide to running the Hardware and Devices troubleshooter.
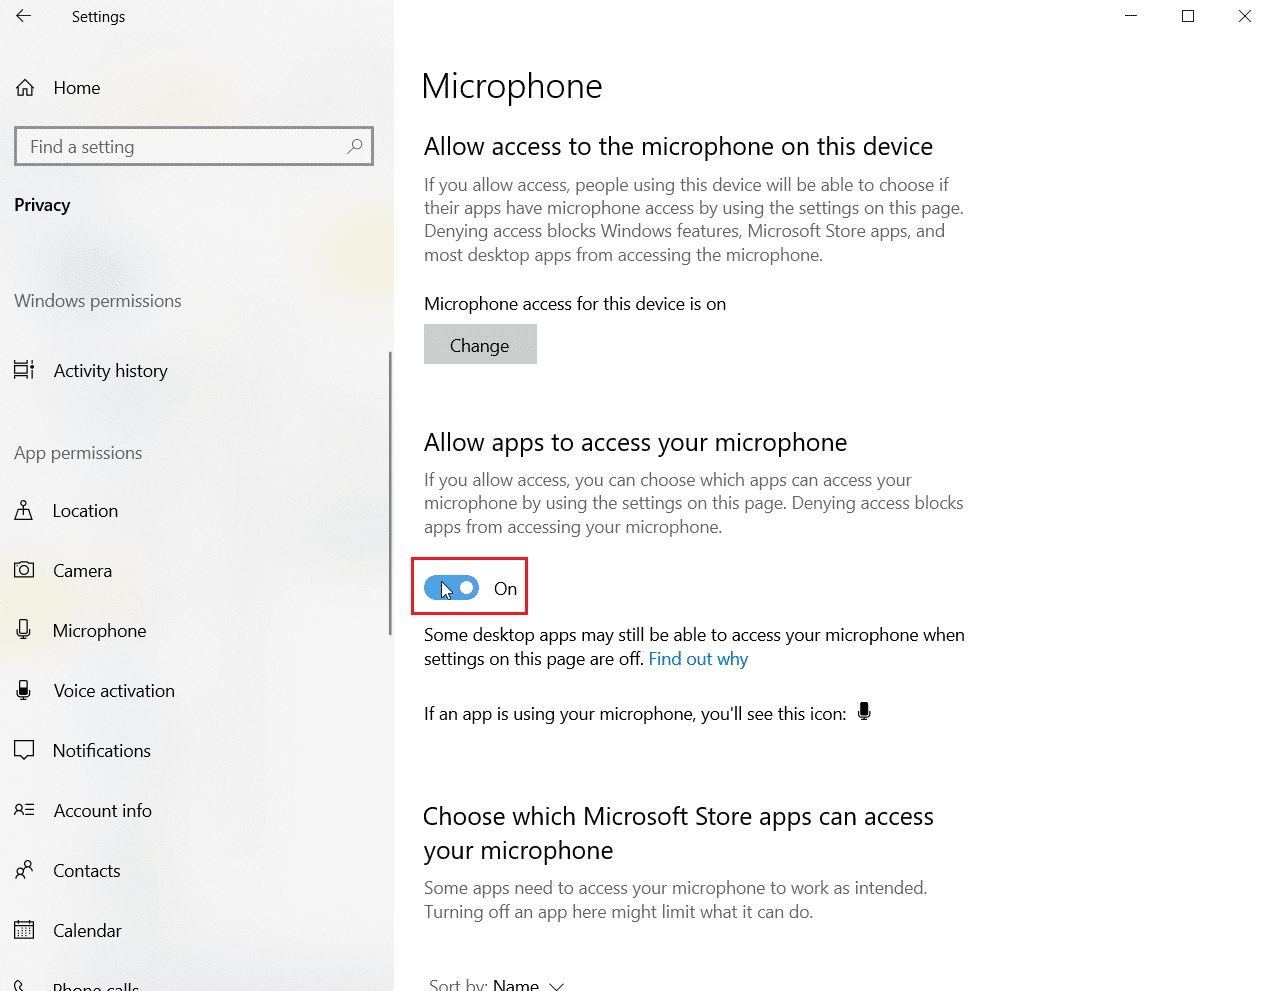
Method 5: Allow apps to use the microphone
Skype cannot access the sound card. Windows 10 may be running if apps on your PC are not allowed to use the microphone. If, for some reason, microphone use is disabled on your system, be sure to enable it to fix this problem.
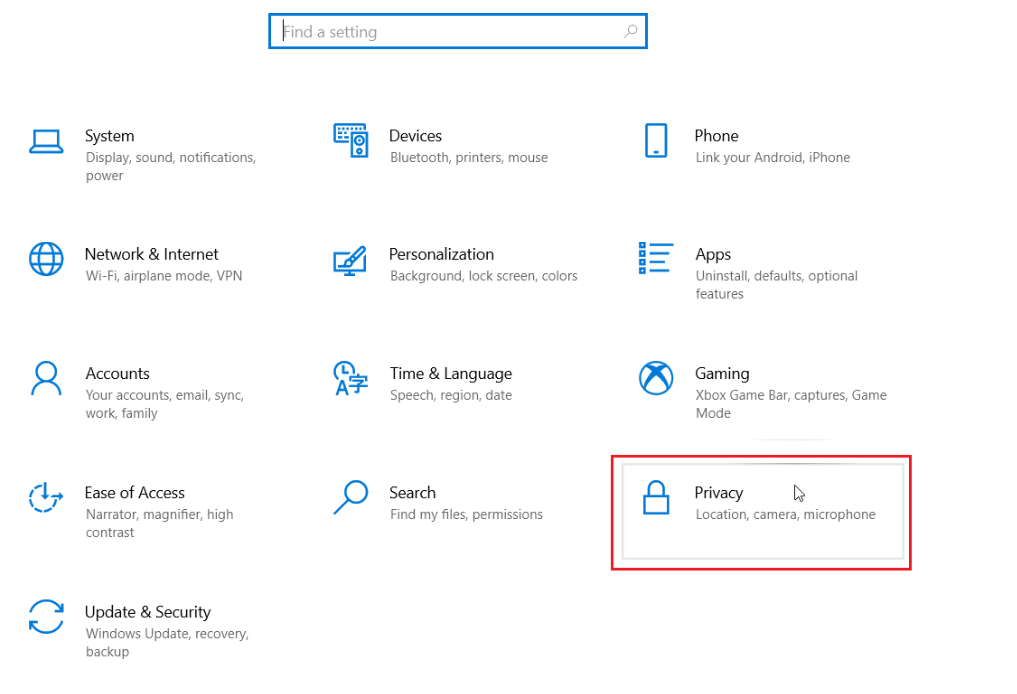
1. Press the Windows + I keys at the same time to open Settings on your computer.
2. Now select the "Privacy" option.
3. Then select the Microphone option from the sidebar.
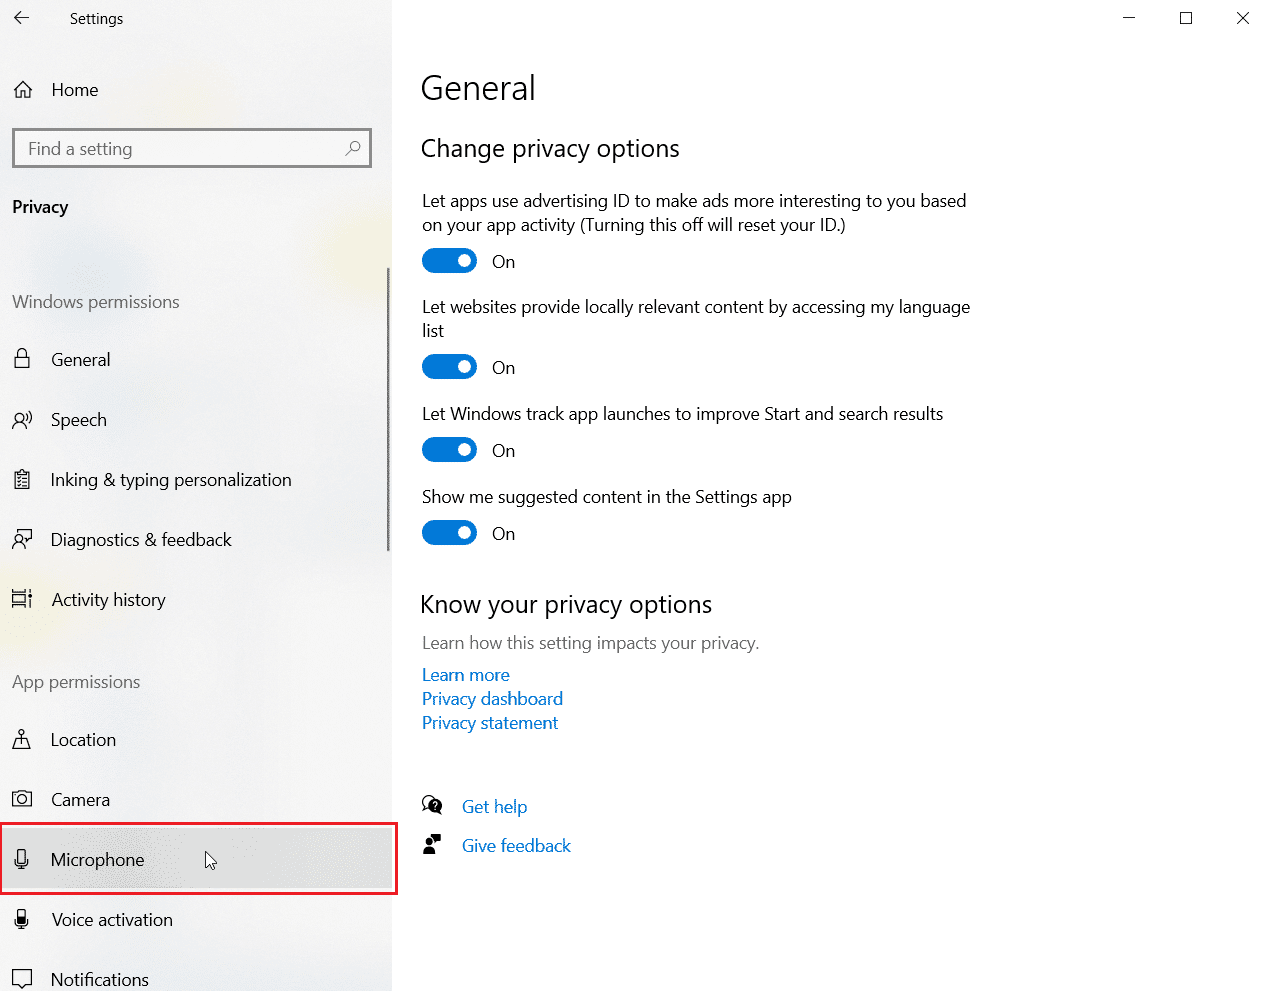
4. Now turn on the switch for Allow apps to access your microphone.
Method 6: Adjust Microphone Settings
Changing your microphone settings can also help resolve the issue that Skype can't access your sound card in Windows 10. Follow these steps to adjust some of your audio settings:
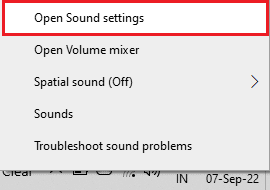
1. Right-click the sound icon on the taskbar and select "Open Sound Settings".
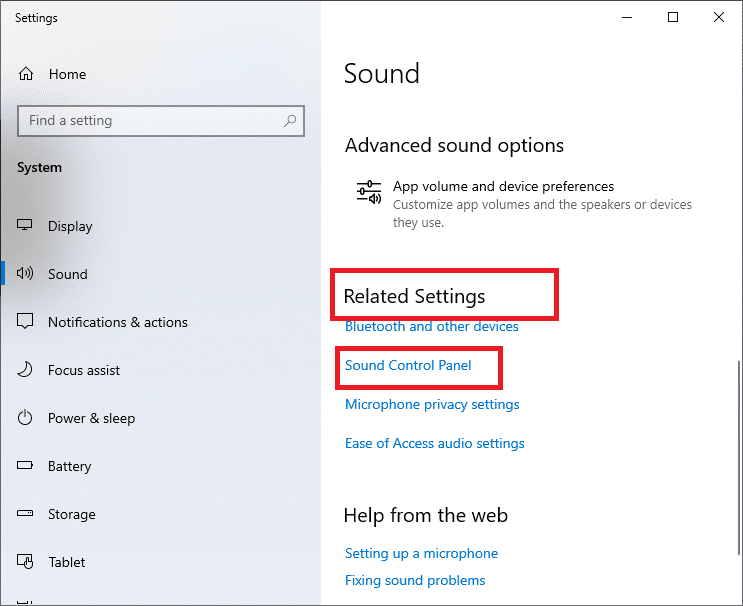
2. Now click on Sound Control Panel.
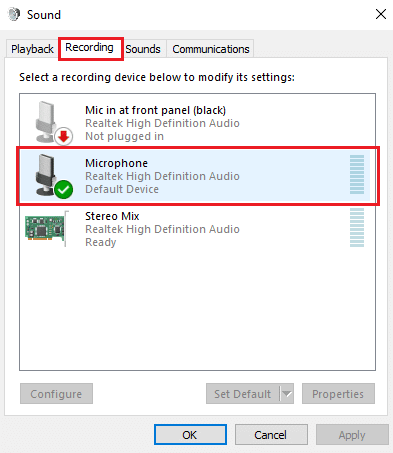
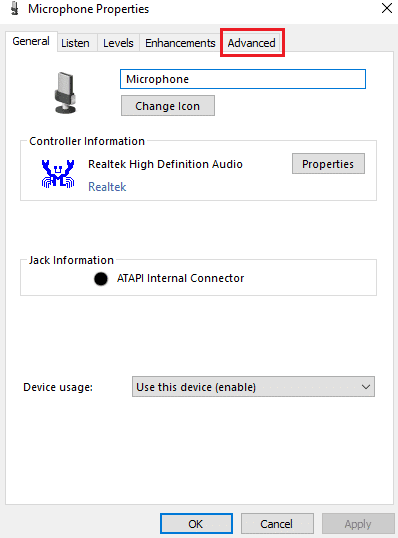
3. On the Recording tab, double-click Microphone.
4. In the Microphone Properties window, click the Advanced tab.
5. Now check the Allow apps to take exclusive control of this device checkbox.
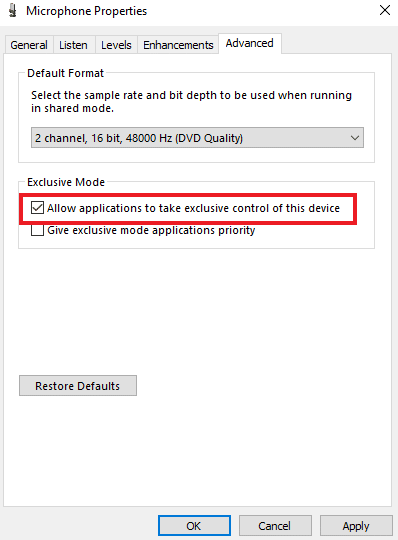
6. Click Apply and then OK.

Method 7: Set up speakers and microphone in Skype
The speaker and microphone settings in Skype may have changed due to a recent update. If so, you should set them up properly to make sure there are no audio issues.
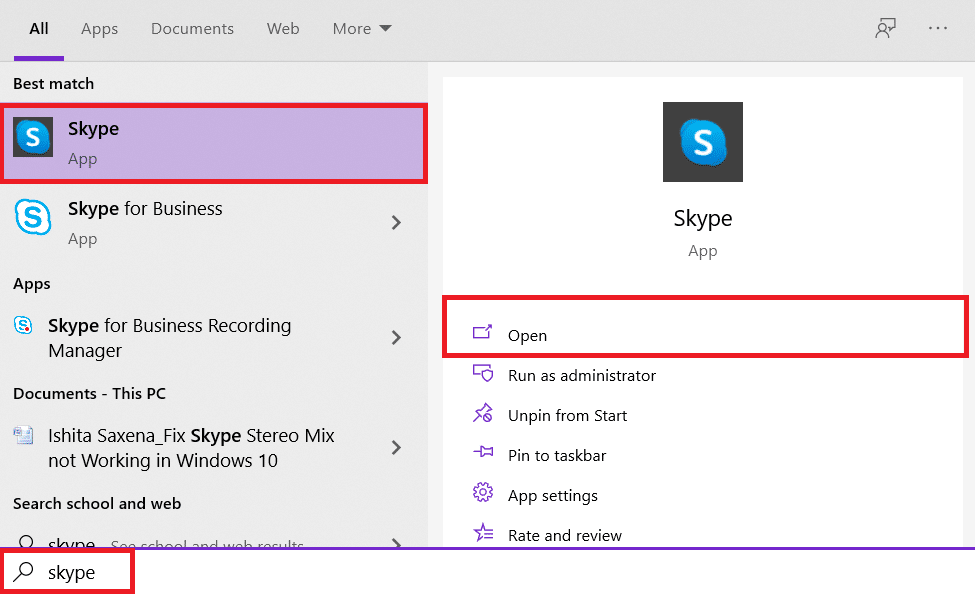
1. Open the Skype application from the Windows search bar, go to tools and open the options in it.
2. Then click "Sound Settings".
3. In it, make sure that Microphone is set to Internal Microphone and Speakers is set to Headphones and Speakers.
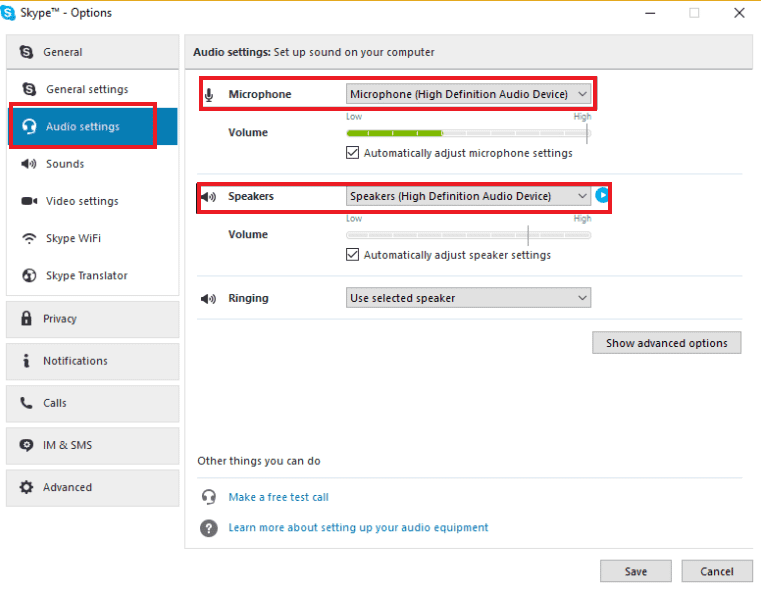
4. In addition, select the Automatically adjust microphone settings and Automatically adjust speaker settings check boxes.
5. Now click Save at the bottom and restart your computer.
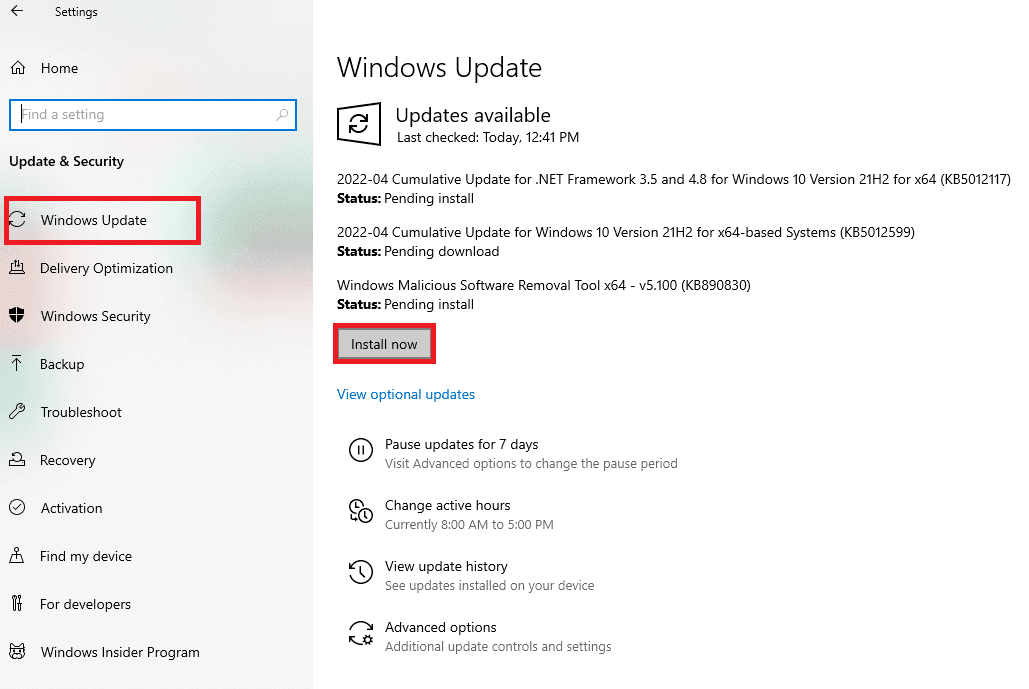
Method 8: Update Windows
An outdated version of your operating system may also be the reason why Skype cannot access your sound card. Windows needs regular updates not only to maintain the PC, but also to ensure that all programs and applications on the system run without any glitches due to outdated software. Hence, it is important to keep track of the latest version of Windows. With our guide How to download and install the latest Windows 10 update, you can proceed with this method.
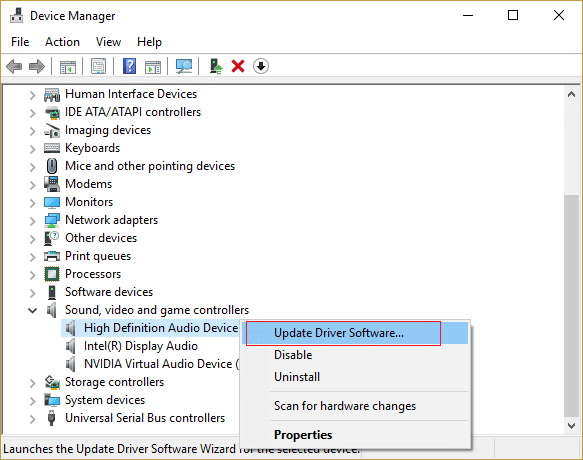
Method 9: Update your sound card drivers
The drivers on your system need to be updated from time to time. If their update is skipped, they can cause various errors and BSODs on the system. So make sure your sound card drivers are up to date to fix Skype unable to access Windows 10 sound card. Read our guide on updating audio drivers.
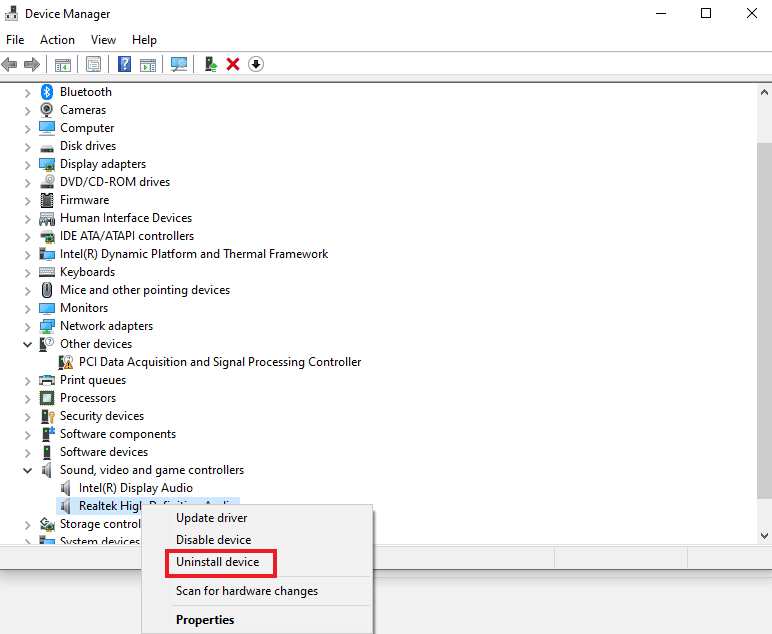
Method 10: Reinstall the audio driver
If the update doesn't fix your Skype sound card issue, try reinstalling the sound driver on your system. To do this, you must first uninstall the existing driver and install the latest version from the manufacturer's web page. Follow the steps to uninstall and reinstall drivers in Windows 10.
Method 11: Restart the Windows Audio Service
Restarting the Windows Audio Service is also extremely helpful in resolving the problem that Skype cannot access the Windows 10 sound card. This is a simple but very effective method to follow if none of the methods mentioned above worked.
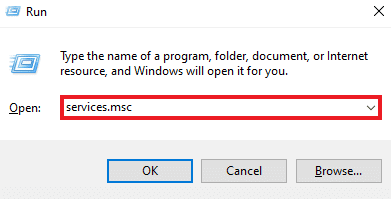
1. Launch the Run dialog box by pressing the Windows + R keys at the same time.

2. Now type services.msc into it and press the enter key.
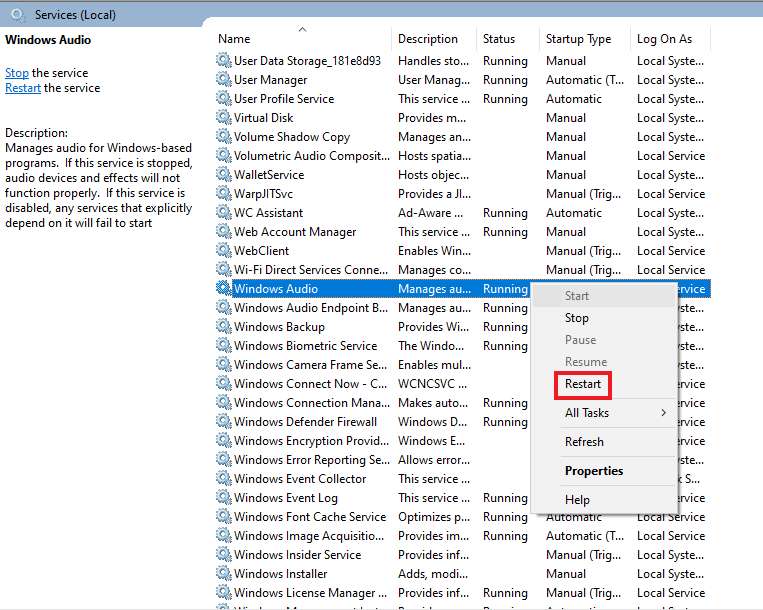
3. Then in the Services (Local) window, find Windows Audio and right-click it.
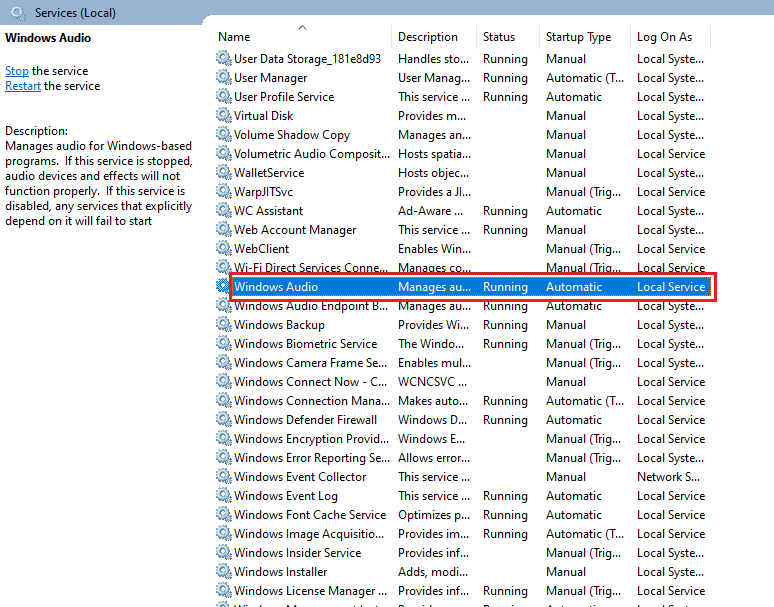
4. Now click "Reboot" in the menu.
Method 12: Reinstall Skype
If you have followed all the methods above and still cannot find a fix for Skype cannot access the sound card, then in a pinch, reinstalling the application can help you. With this, all Skype settings and configuration will be updated, which will save you from the sound card problems that you are currently experiencing.
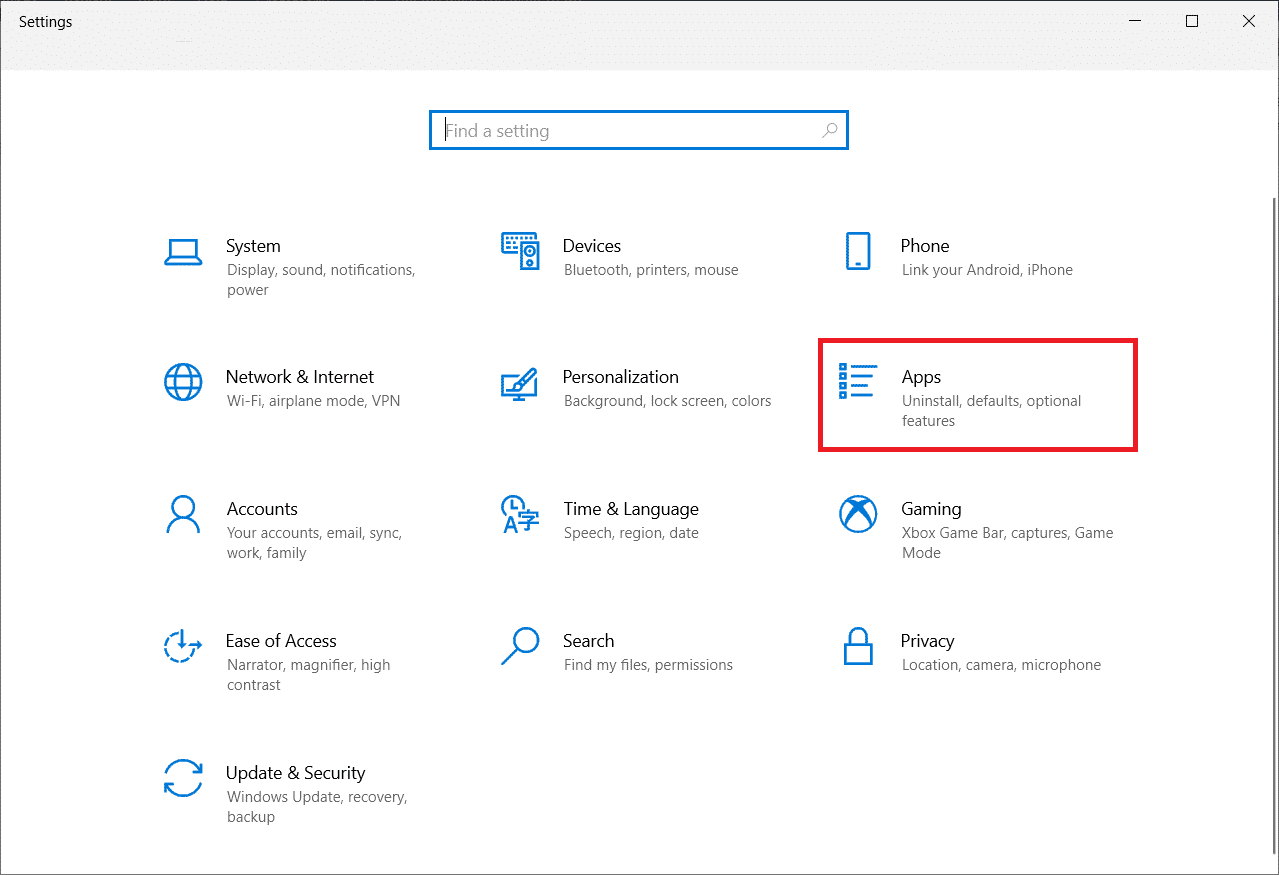
1. Launch Windows Settings.
2. Now click "App Settings".
3. Now find and click on Skype and select the "Uninstall" option.
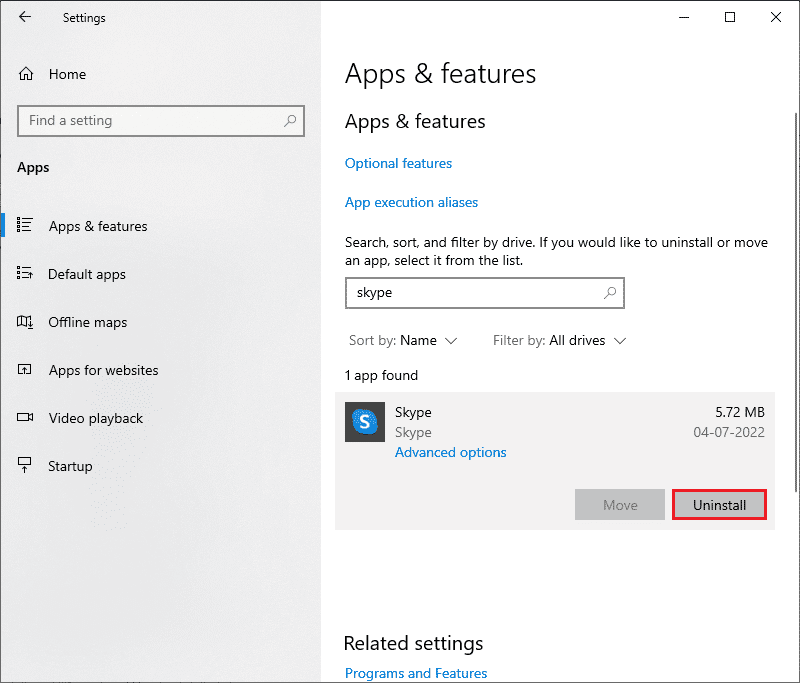
4. Now confirm the prompt if there is one and restart your computer after uninstalling Skype.
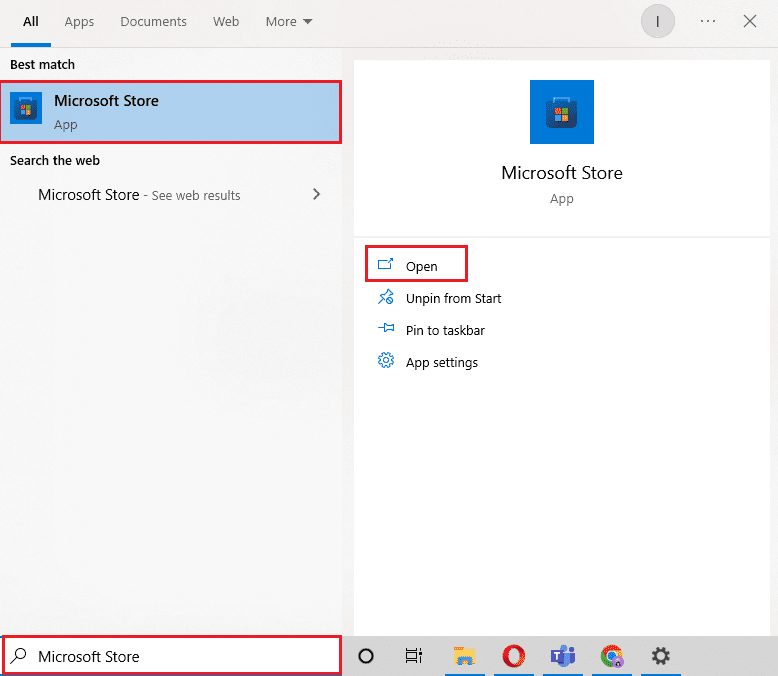
5. Once the uninstall process is complete, go to start menu search, type Microsoft Store and open it.
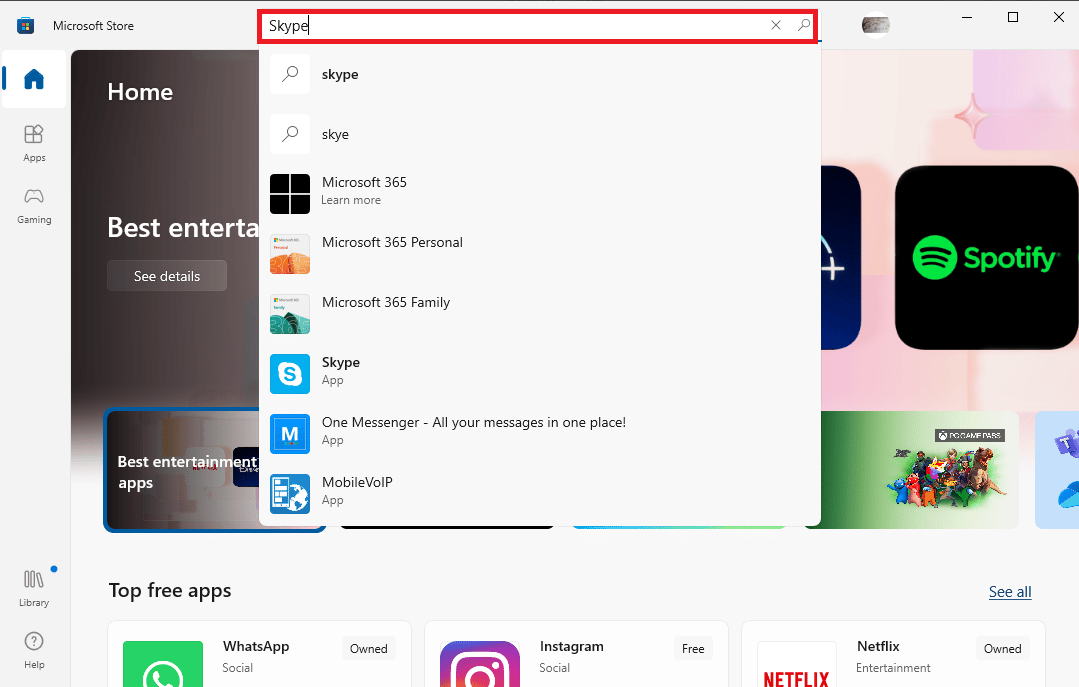
6. In the Microsoft Store, search for Skype.
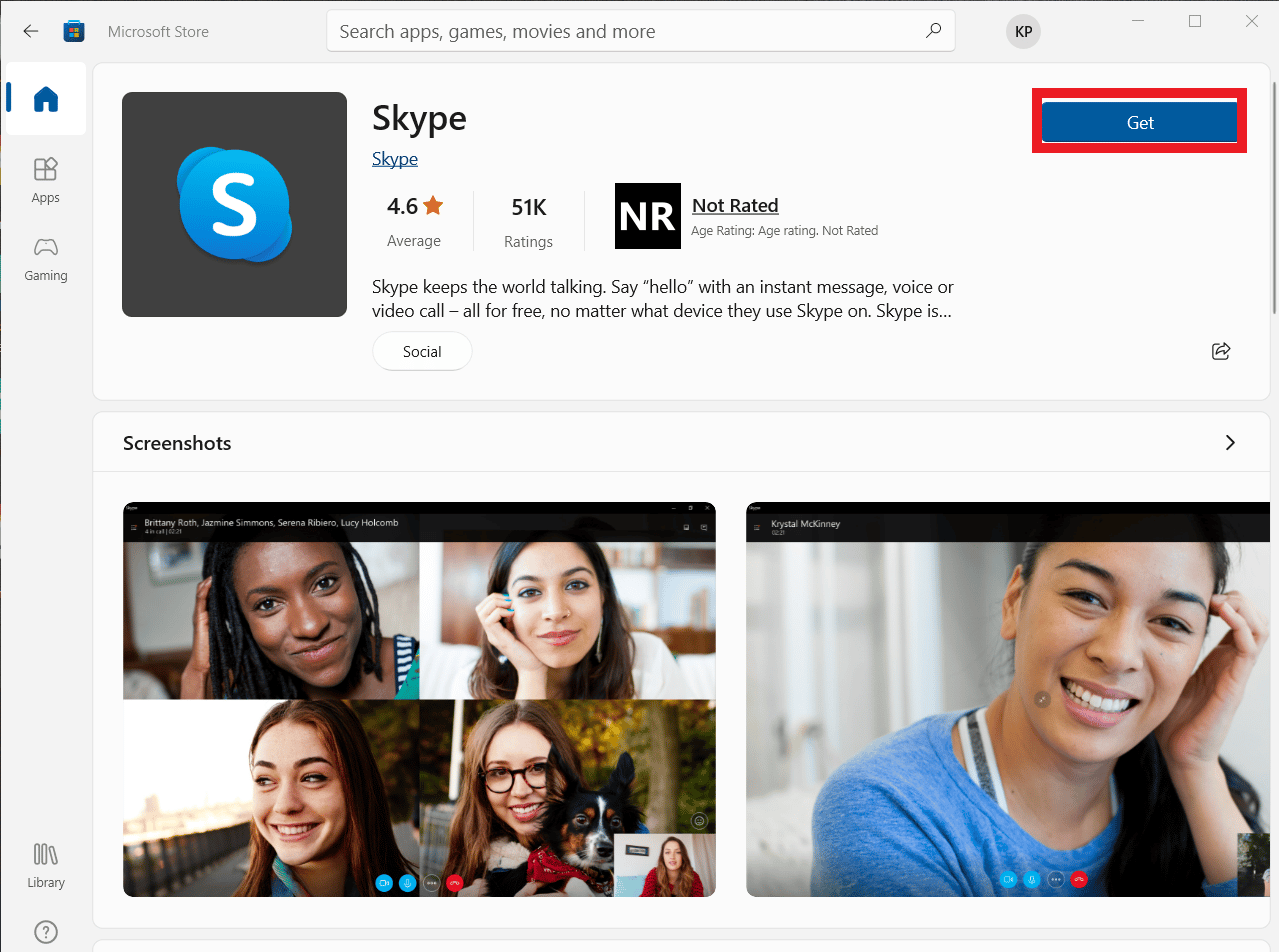
7. Click the "Get" button to install the Skype application on your computer.
Once the installation of Skype is complete, launch it and open your account to finally use the error-free Skype application.
***
Skype is perfect for our fast-paced modern times, when one application for messaging, file sharing, voice and video calls does all the work of simplifying and convenient the communication process. Even with Skype's all-in-one characteristics, it is subject to some inevitable issues that often get in the way of using it. We hope that our guide helped you solve such an issue where Skype cannot access the Windows 10 sound card. Please let us know which of the methods above made this possible for you. If you have any further questions or suggestions, please leave them in the comments section below and we will get back to you as soon as possible.