Fix missing NVIDIA Control Panel on Windows 10
Whether you're an avid gamer or a casual computer user, the NVIDIA graphics card always holds a special place. This GPU application was developed and launched by NVIDIA Corporation, the world's leading manufacturer of technology products. Typically, an NVIDIA GPU is added to your system for high performance and powerful graphics. Here, the NVIDIA Control Panel app allows you to control and access the settings, properties, and operation of your graphics card. But what happens when you can't open or even find the NVIDIA Control Panel app out of the blue? It makes you worry. Roll up your sleeves to everyone who is struggling with this problem! This article will help you fix NVIDIA Control Panel missing issue on Windows 10. So, keep reading to fix NVIDIA Control Panel display settings missing issue.
How to Fix Nvidia Control Panel Missing in Windows 10
Various reasons for the absence of the NVIDIA Control Panel app in Windows 10 can be listed. But note that these reasons are not the direct cause of the problem, which means that only the possible outcomes or scenarios that led to this problem are compiled together.
- Having an outdated, corrupted, or incompatible driver causes errors in your graphics card.
- A recent Windows 10 update may not be compatible with the NVIDIA driver. Thus, you need to rollback it to an earlier version.
- When files get corrupted in the NVIDIA Control Panel app, it gets corrupted.
- Other common bugs and bugs can cause issues with this particular issue.
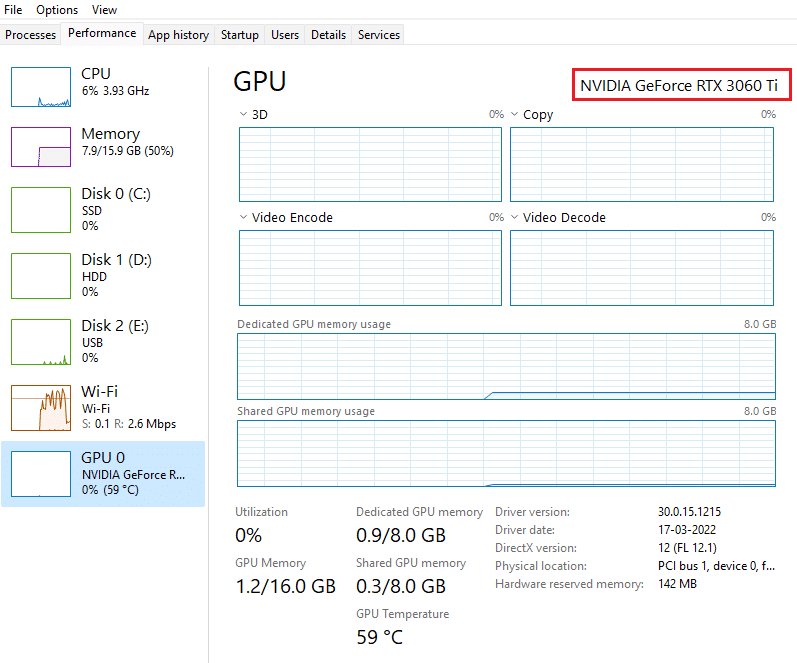
Please make sure your PC has an NVIDIA chip installed before proceeding. Follow the steps below to check for the presence of the NVIDIA Control Panel app for Windows 10 through the Task Manager service.
1. Press the Ctrl + Shift + Esc keys together to open Task Manager.
2. In the Task Manager window, go to the Performance tab and select either GPU 0 or GPU 1 in the left pane.
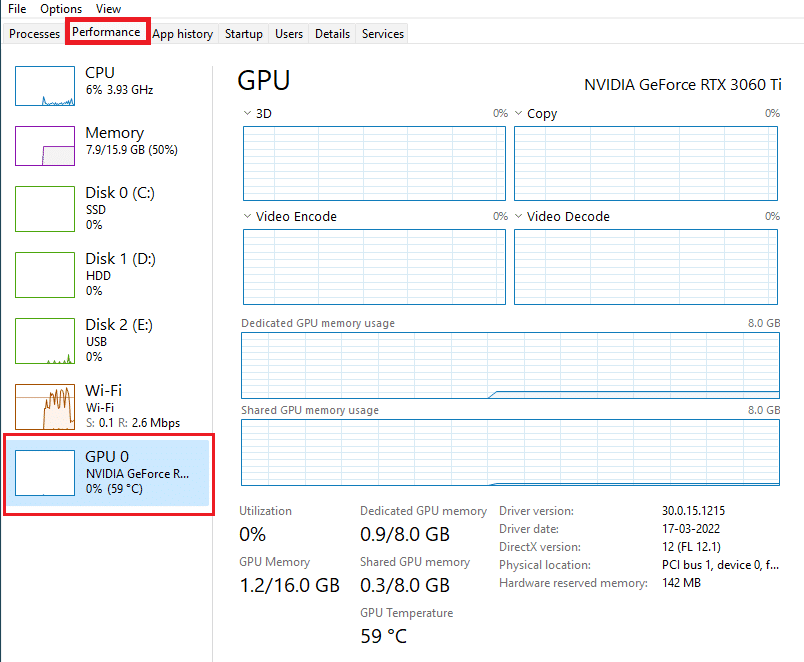
3. In the right panel of the GPU, see the model name of the graphics card in the upper right corner of the page. If it starts with NVIDIA, then the NVIDIA Control Panel should be available on your computer.
After checking, if the NVIDIA driver pleases you with its presence and only the NVIDIA Control Panel is missing, you can use the troubleshooting methods given below to fix the problem.
Method 1: Roll back Windows Update
Looking to upgrade your Windows 10 operating system is a valuable endeavor. But sometimes it is possible that your graphics driver might not be compatible with the latest release or updated version of Windows. Thus, undo the latest Windows update from your system to fix Windows 10 missing from NVIDIA Control Panel.
1. Press Windows Key + I to launch Settings.
2. Select Update & security.
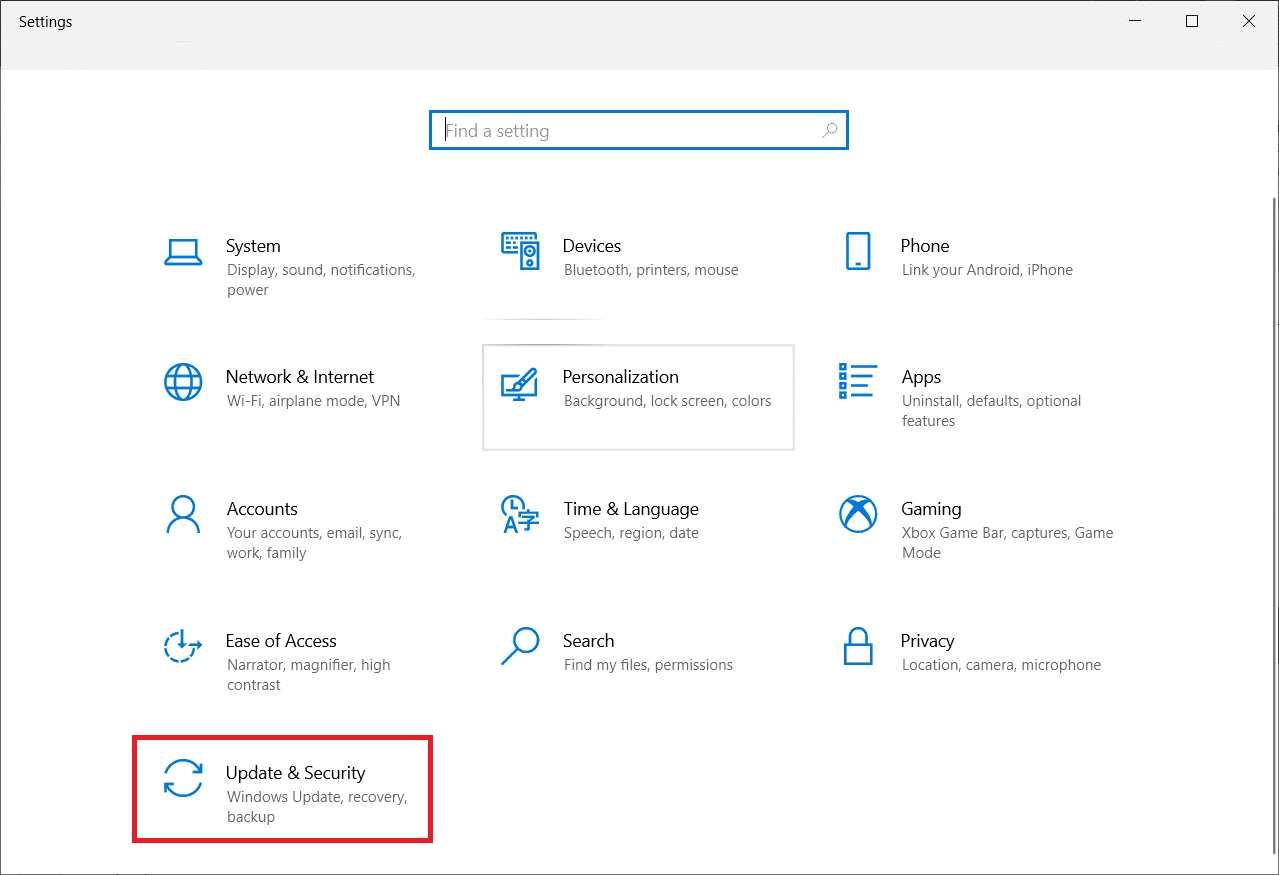
3. Select Recovery from the left pane.
4. Click the Start button.
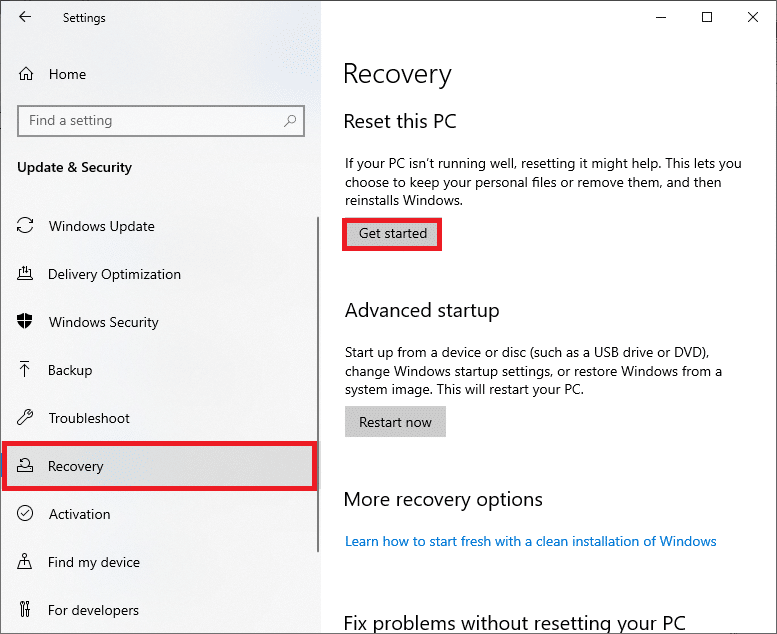
5. Follow the instructions on the screen and your Windows will return to the previous version.
Method 2: Show NVIDIA Control Panel
Sometimes, unknowingly, if you hide the NVIDIA Control Panel, it disappears. In rare cases, it is also possible that your Windows 10 or third party application is hiding the icon. Thus, it may appear that it is missing. Follow the steps given below and display the NVIDIA Control Panel.
1. Press the Windows key, type control panel and click Open.
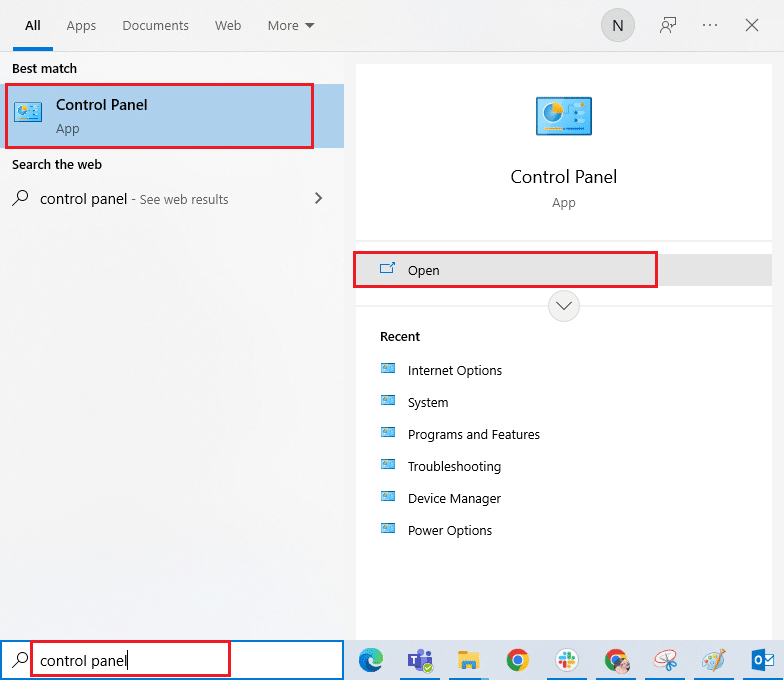
2. Here, set "Large Icon View", then select "NVIDIA Control Panel" from the list of items.
3. Select the "Desktop" menu at the top.
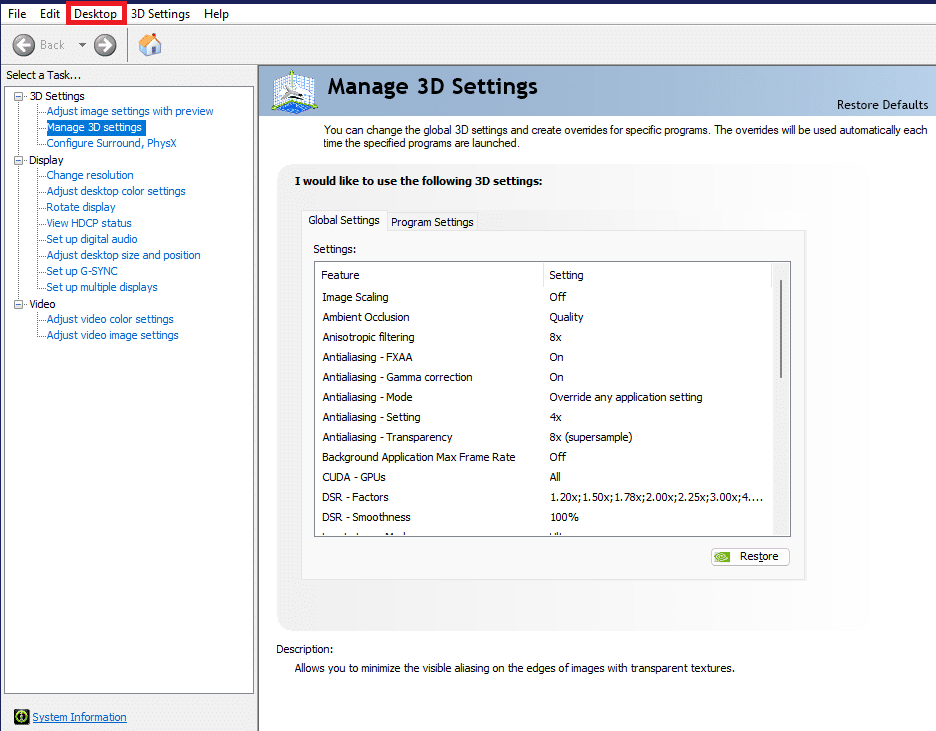
4. In the Desktop menu, make sure that the options "Add desktop context menu" and "Show notification bar icon" are enabled. If not, mark it.

5. Finally, close the NVIDIA Control Panel application and try opening it from the desktop or taskbar.
Method 3: Restart NVIDIA Services
Various services are constantly running in the background to keep other applications running smoothly. Therefore, restart all services related to NIVIDIA so that the control panel reappears. Here's how to do it and fix the missing NVIDIA Control Panel display settings issue.
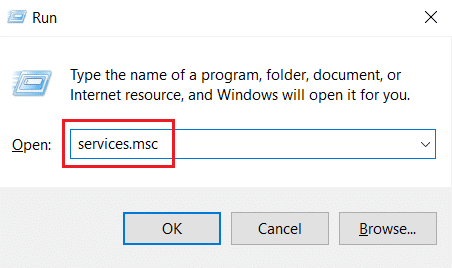
1. Press the Windows + R keys at the same time to open the Run dialog box.

2. Type services.msc and press the Enter key to open the Services window.
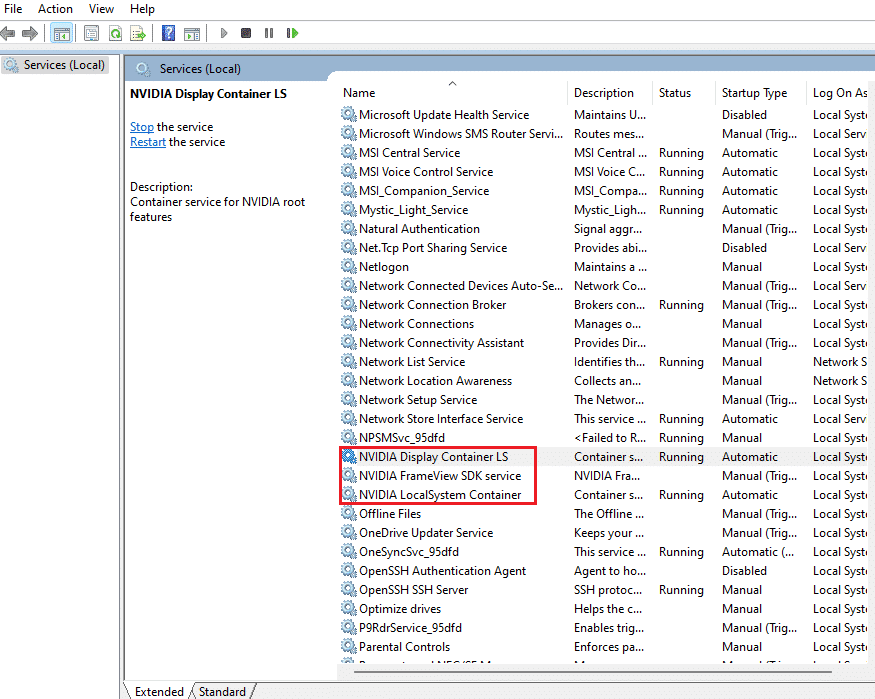
3. In the Services window, look for services whose names begin with NVIDIA. Right-click each such service and select Restart from the context menu.
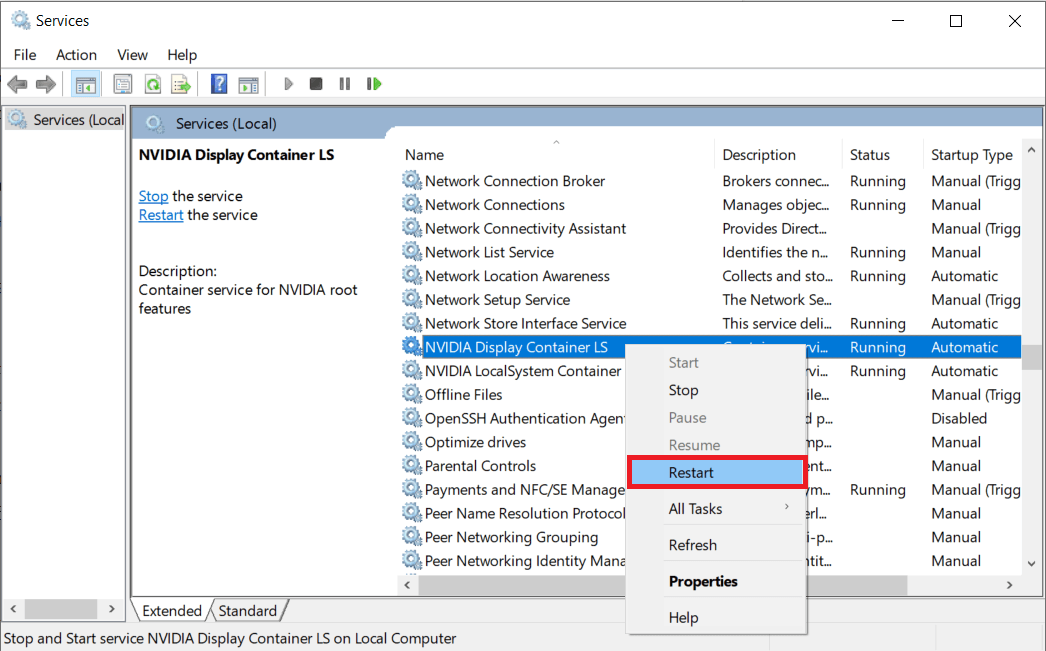
4. If the service is not running, right-click it again and click Start.
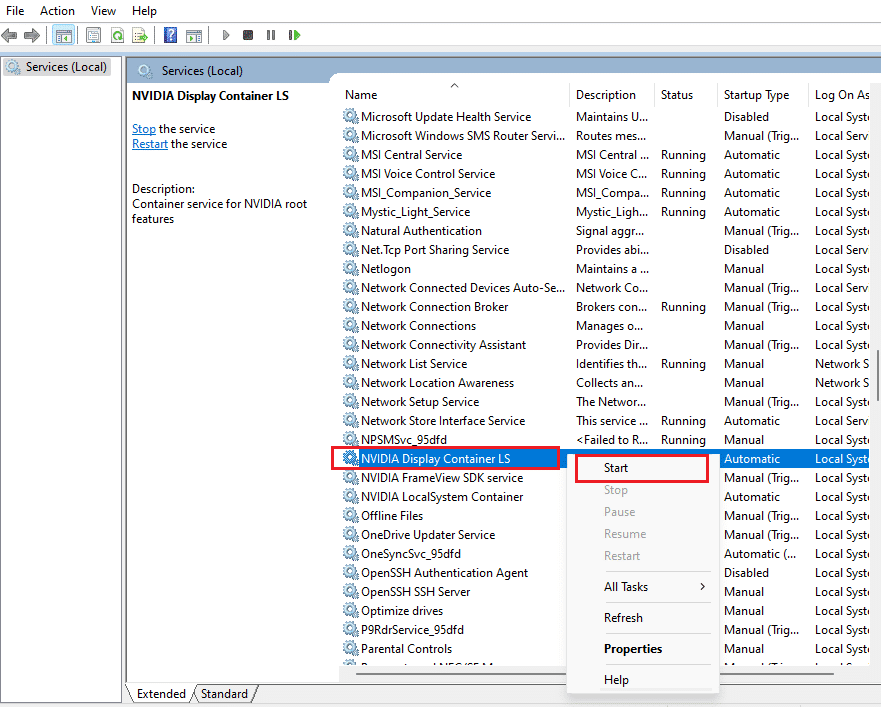
5. Repeat steps 3 and 4 to restart the following services:
- NVIDIA Local System Container
- NVIDIA Network Services Container
- NVIDIA Telemetry Container
Check if this method returns the NVIDIA Control Panel application. If not, don't lose hope. Try the following solution to fix NVIDIA Control Panel missing issue on Windows 10.
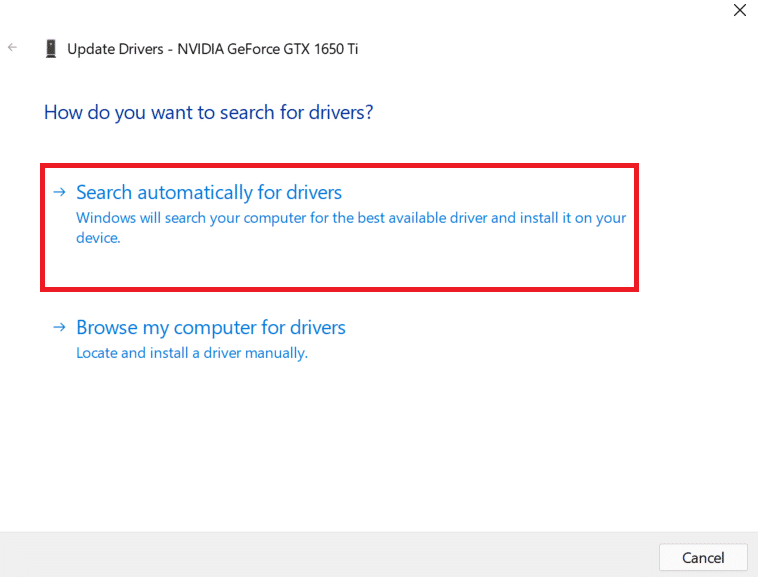
Method 4: Update NVIDIA graphics driver
The graphics driver is an integral part of any online game or computer itself. GPU manufacturers frequently release updates and features. In addition, to avoid any technical issues such as screen flickering, display malfunctioning, screen on/off, etc., you need to update your graphics driver as it is responsible for the efficiency and performance of your computer. So, update your graphics driver and see if that update works. Read our guide on 4 ways to update graphics drivers in Windows 10.
Method 5: Manually Open NVIDIA Control Panel
You can force the NVIDIA Control Panel to show up by launching it manually. To do this, follow the steps given below.
1. Press the Windows + E keys at the same time to launch File Explorer.
2. Navigate to the next location path.
C:Program FilesNVIDIA Corporation
Note. The location may vary depending on your installation.
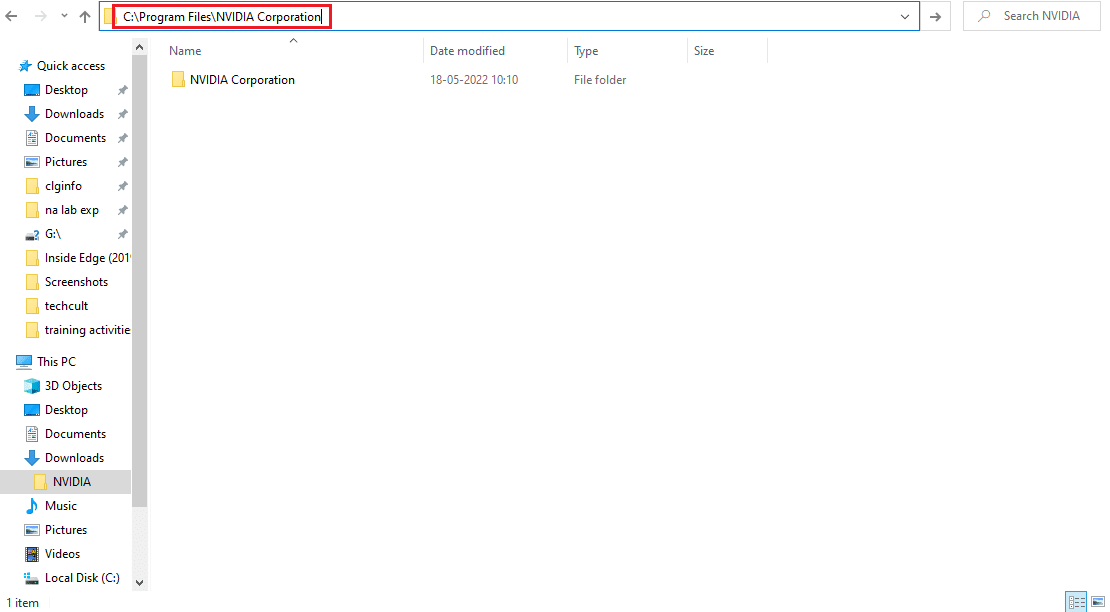
3. Double click and open the Control Panel Client folder. Locate and right-click the nvcplui.exe file. Then select "Run as administrator" from the context menu.
Check if the NVIDIA Control Panel missing from Windows 10 is found again.
Method 6: Do not overclock the GPU
Overclocking the GPU removes the limitation of the graphics card and allows it to run above its safe limit. Thus, this process can sometimes throw an error. Therefore, it is necessary not to cross the limit. This is because further restriction may stop your graphics card from working. And that overclocked GPU might be the reason why the NVIDIA Control Panel is missing. While no direct cause has been found, many users have reported that lowering the GPU overclock allowed them to see the NVIDIA Control Panel again.
Method 7: Change compatibility settings
If the error reoccurs frequently even after fixing it, NVIDIA Support has provided us with a permanent solution. Follow the instructions below to change the compatibility settings and fix the missing NVIDIA Control Panel display settings issue.
1. Press the Windows + E keys at the same time to open File Explorer.

2. Navigate to the next location.
C:Program FilesNVIDIA CorporationDisplay.NvContainer
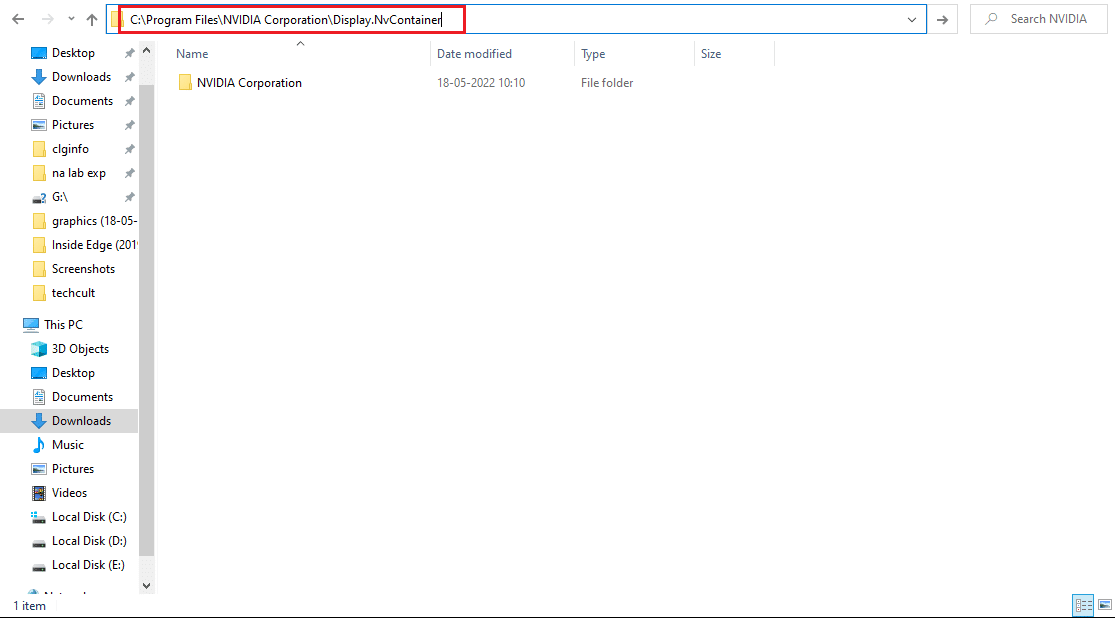
3. Locate the Display.NvContainer file in the Display.NvContainer folder. Right-click it and choose Copy from the context menu.
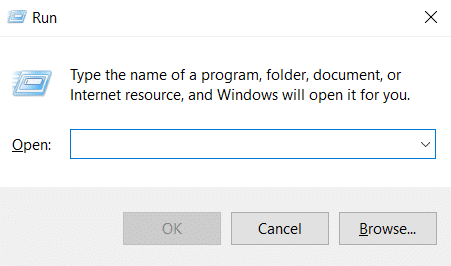
4. Press the Windows + R keys at the same time to open the Run dialog box.
5. Type shell:startup and press the Enter key to launch the Startup folder.
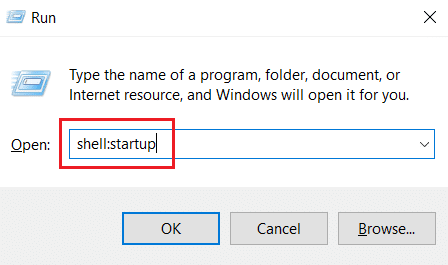
6. In a folder, press the Ctrl + V keys simultaneously to paste the copied folder.
7. Next, right-click the copied Display.NvContainer folder and select Properties from the context menu.
8. In the Properties window, click the Compatibility tab. Now check the "Run this program as an administrator" checkbox under Settings. Select "Apply" and then click "OK" to save your changes.
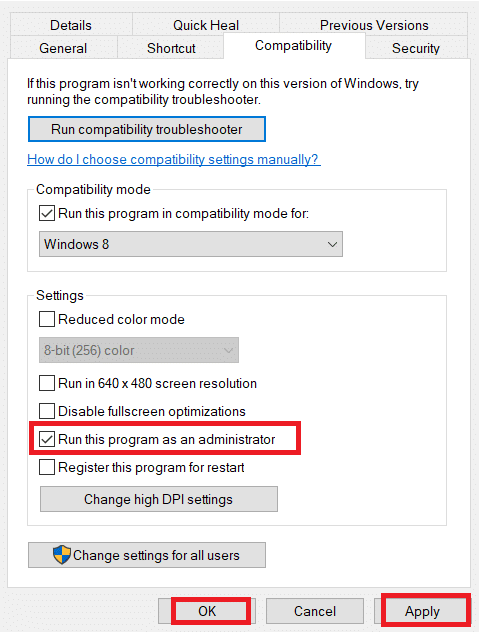
Check to see if the NVIDIA Control Panel display settings that are missing in your Windows 10 have been fixed.
Method 8: Reinstall the NVIDIA graphics driver
None of the above solutions worked? Don't worry. You have one last method to work out. This is an attempt to reinstall the NVIDIA Control Panel application. Here's how to uninstall and reinstall the app.
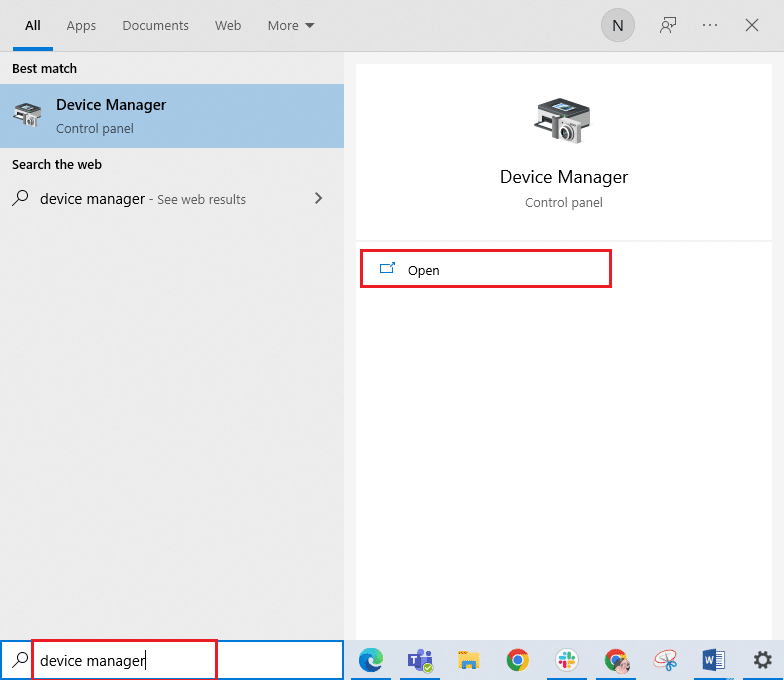
1. Press the Windows key, type Device Manager and click Open.
2. Double-click Display adapters to expand the driver.
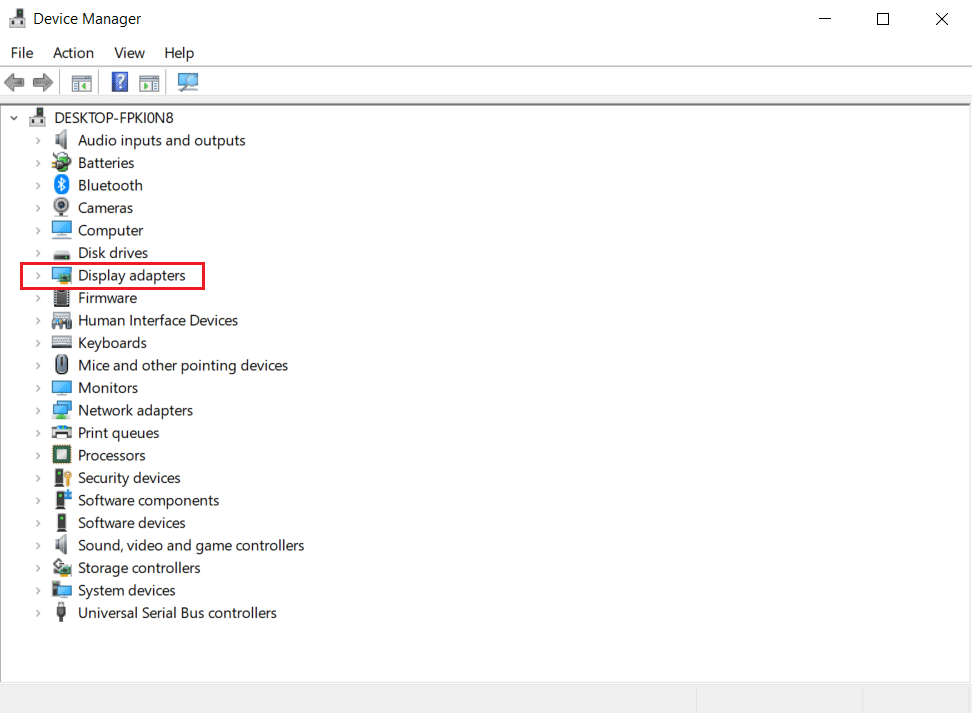
3. Here, right-click on the NVIDIA graphics driver or adapter and select Uninstall device from the context menu.

4. Follow the instructions on the screen to uninstall the driver and restart your computer.
5. Go to the NVIDIA Driver Download page, fill in your NVIDIA adapter model information, and select Search.
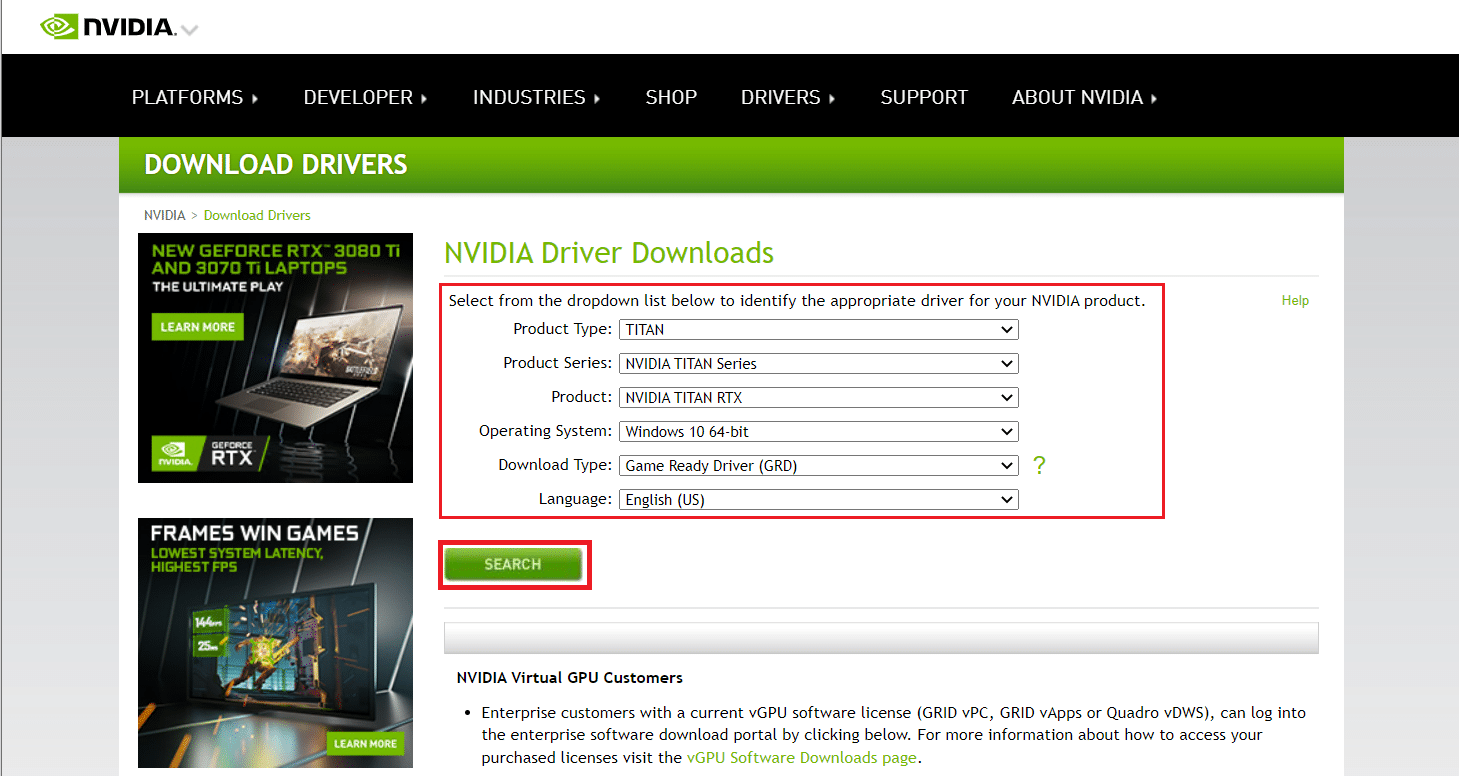
6. On the new page, click Download to download the installation wizard.
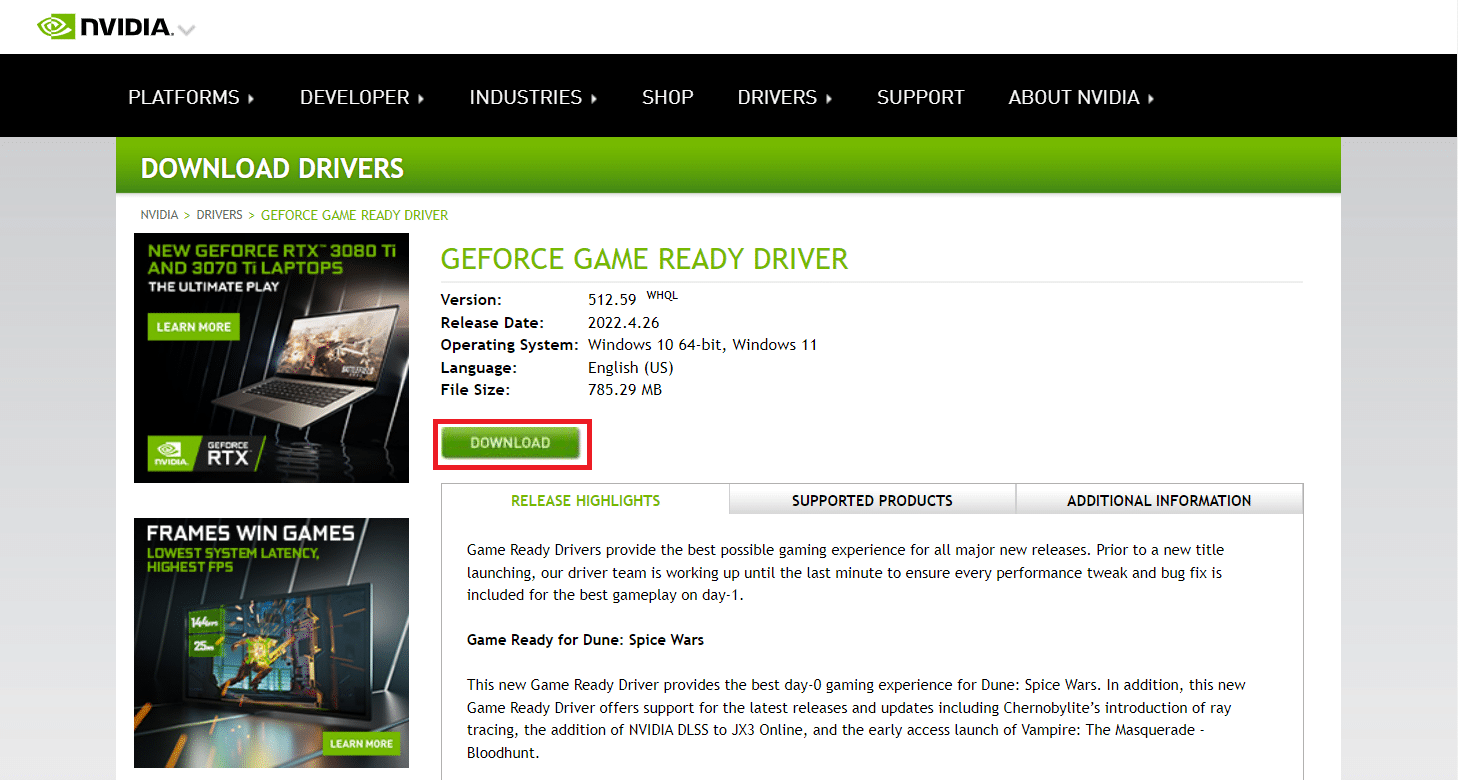
7. Once downloaded, run the setup file and install the driver on your system.
8. Finally, restart your computer and see if you can find the NVIDIA Control Panel on the desktop or in the notification area.
Pro tip: How to install the NVIDIA Control Panel app
To install the NVIDIA Control app from the Microsoft Store, follow these steps:
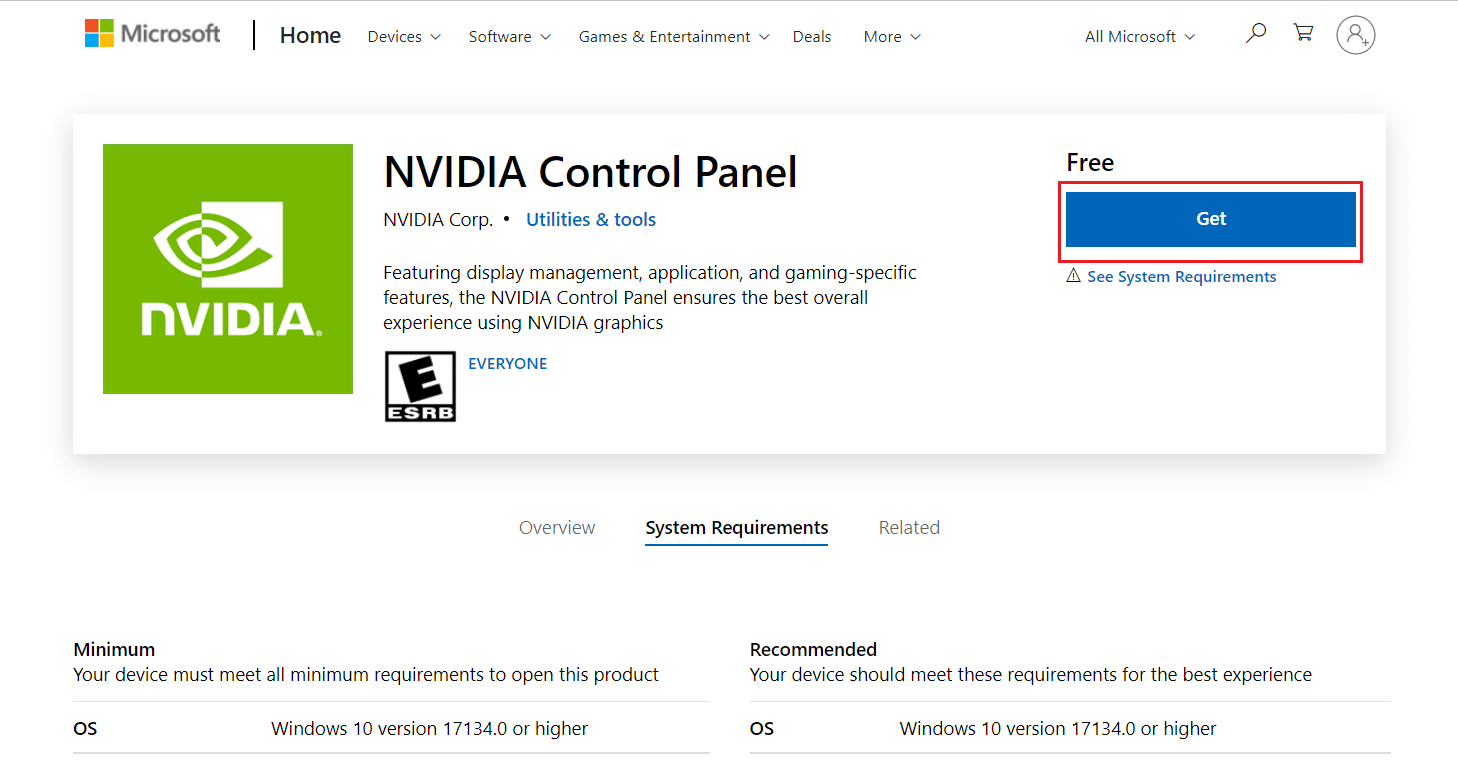
1. Go to the NVIDIA Control Panel page in the Microsoft Store.
Note. Make sure all system requirements are met.
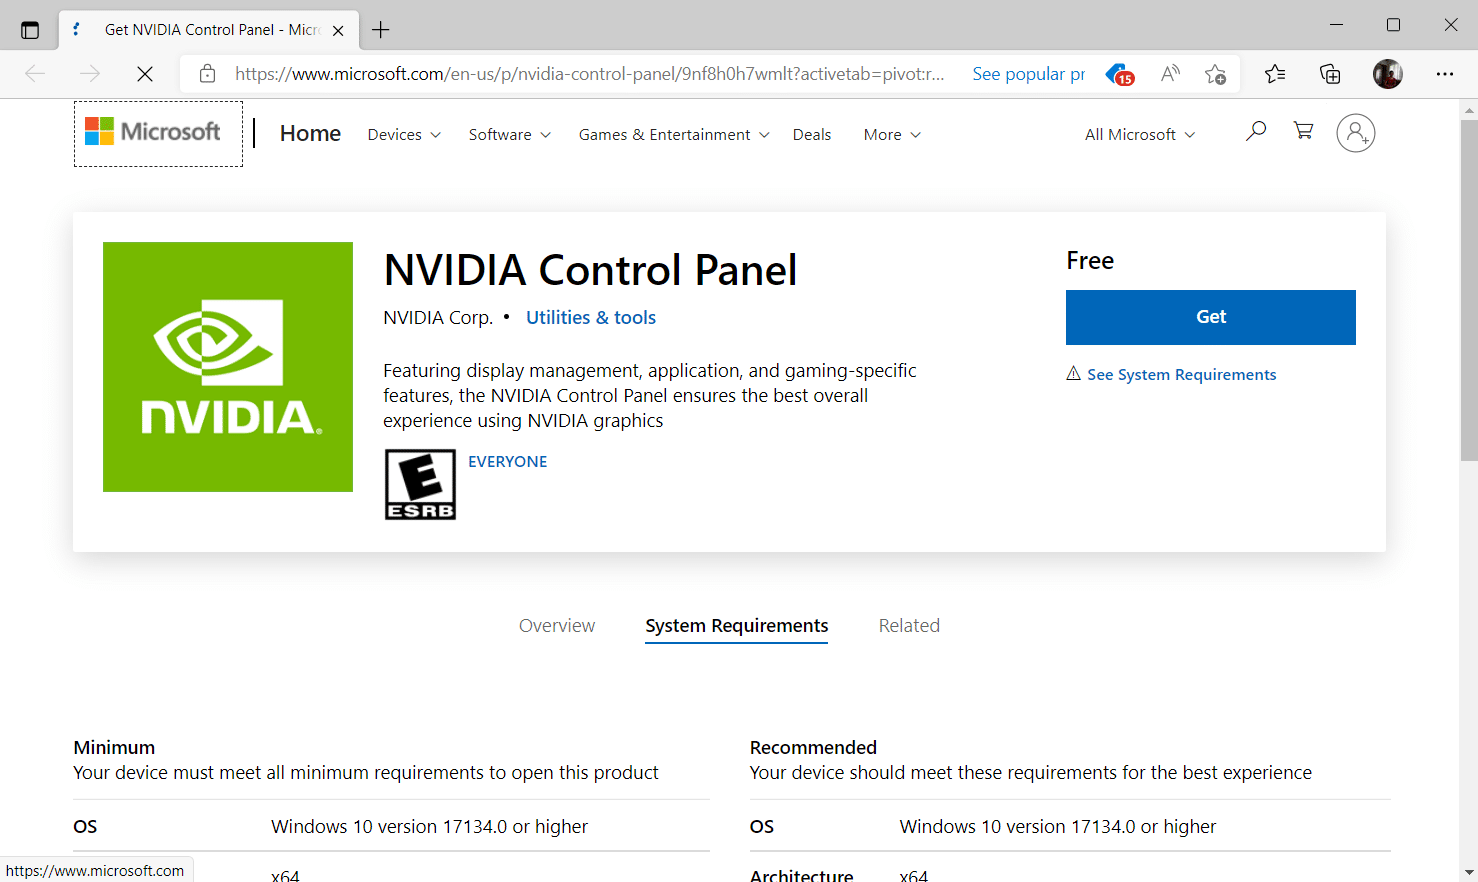
2. Click the "Get" button to install the application.
Check if the issue of missing Windows 10 in NVIDIA Control Panel still exists.
***
We hope this guide was helpful and you were able to fix the missing NVIDIA Control Panel in Windows 10. Let us know which method worked best. Please feel free to contact us with any questions or suggestions through the comment section below. Also, let us know what you would like to know next.