Fix issue with SADES headset not being recognized by Windows 10
The SADES series of gaming headphones and headsets provide a truly immersive gaming experience. Their uncompromising attention to hardware style is second to none. During use, users have reported problems with the headset, such as the SADES headset not being recognized by Windows 10. Some users have also reported this issue when they bought their new headphones and the SADES headset does not exist. If you are looking for how to resolve this error before requesting a replacement, then you have come to the right article. Sometimes bugs in Windows can also cause the headset not to work. In this article, you will learn about troubleshooting methods to effectively resolve the issue.
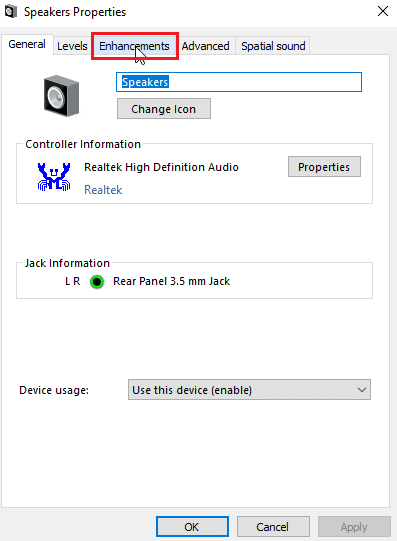
How to fix SADES headset not being recognized by Windows 10
Before we see the fixes, let's look at some of the causes of the problem.
- Conflicts with Cortana
- Headphones disabled
- Driver Issues
- Conflicts with exclusive control
- Problems with sound enhancement
- Sound Format Issues
- Problems with the Realtek app
Note. These methods involve making changes to the audio drivers. Before uninstalling any audio drivers or modifying/reinstalling them, create a system restore point in case you encounter any problems.
Method 1: Basic Troubleshooting Methods
You can try these basic troubleshooting methods to resolve the issue.
1A. Clean dust particles
Sometimes dust particles can interfere with a successful connection to a computer. You can clean the headphone contact with isopropyl alcohol. For a 3.5mm audio port, try cleaning the port with compressed air. If you don't have a compressed air tank, you can gently clean it with a cotton swab.
 Image by john robertson from Pixabay
1B. Replace damaged cable
Windows cannot recognize the headphones if the cables are damaged. If the headphones support detachable cables, you can replace the cable to see if it fixes the unrecognized SADES headphones.
1C. Try a different headphone port
If your computer has two audio ports, you can try connecting to a different port to see if that solves the problem. If the headphones work with the new port, the problem might be with the old audio port. If you don't have another audio port, don't worry, you can use the USB audio port connectors where you can use a USB hub as an audio port. There are many USB-Audio connectors available on the market.
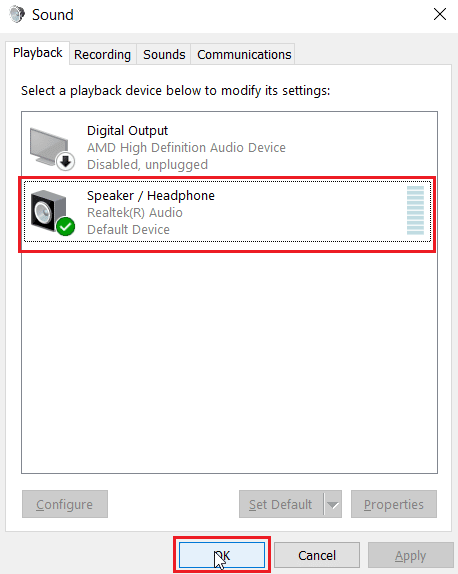
1D. Check if the headphones are muted
If somehow your SADES headset has been disabled, this problem may occur, check if your headset is disabled by following the steps below.
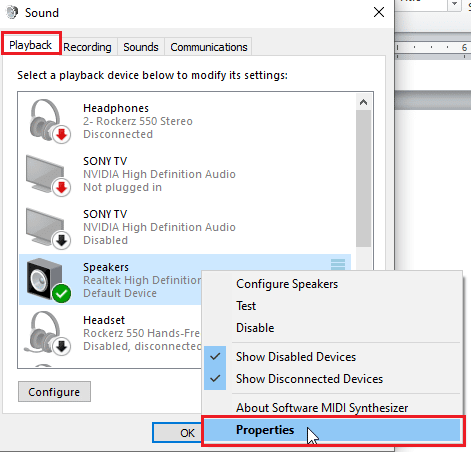
1. Connect your headphones to your laptop or PC.
2. Now right click on the speaker icon in the right corner and select "Sounds".

3. Click the Playback tab to view connected devices.
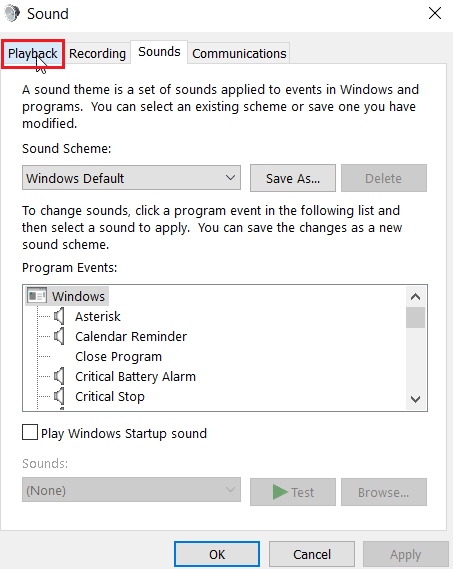
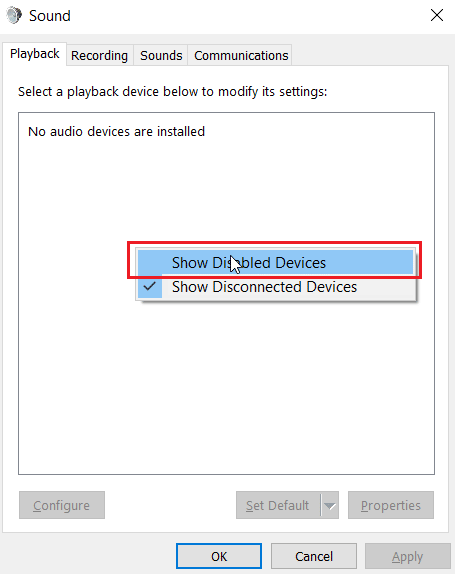
4. If no devices are enabled or present, the message No audio devices installed will appear. In this case, right-click anywhere on the screen and select the "Show Disabled Devices" option.
5. Disabled devices will be displayed, right click them and select Enable to enable the device.
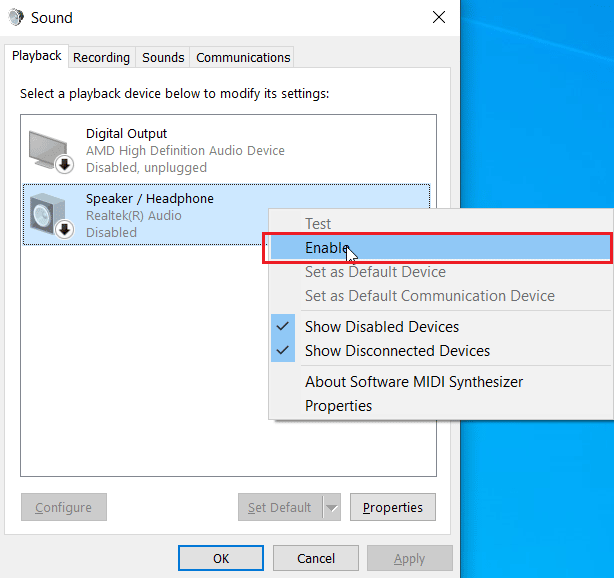
6. Then press OK to exit.
1E. Run the Audio Troubleshooter
There is a built-in Windows troubleshooter that can guide the user through the troubleshooting process and fix the SADES headset not being recognized by Windows 10. Follow these steps:
1. Open troubleshooting settings by typing Windows in the search bar. Click Open.
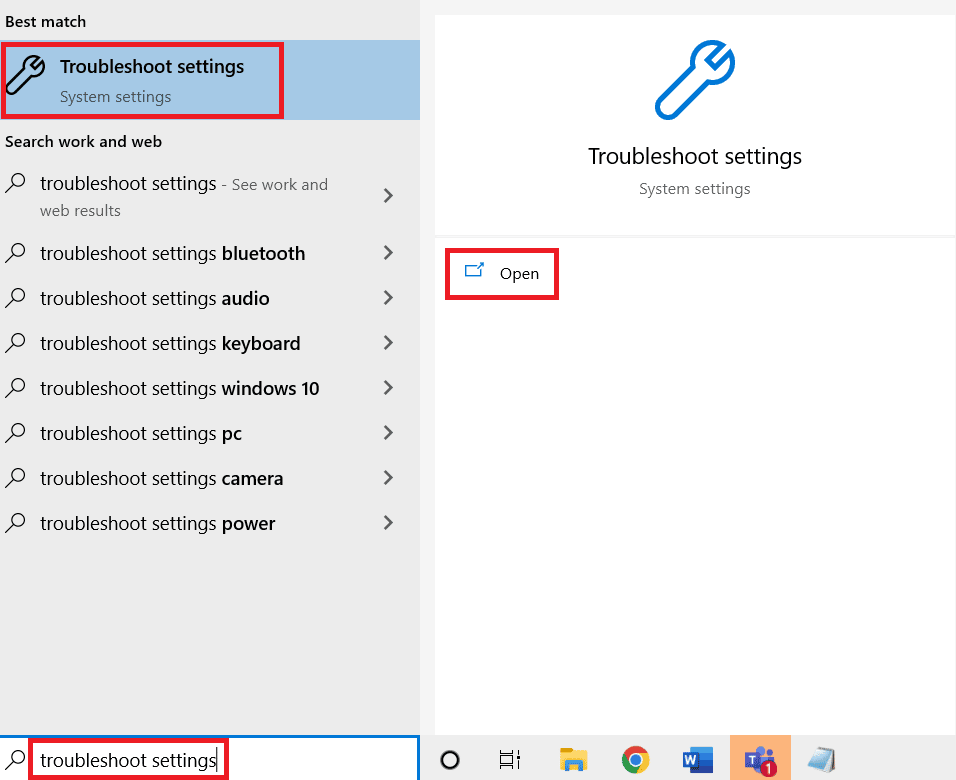
2. Scroll down and select the audio playback troubleshooter.
3. Click the Run the troubleshooter button.
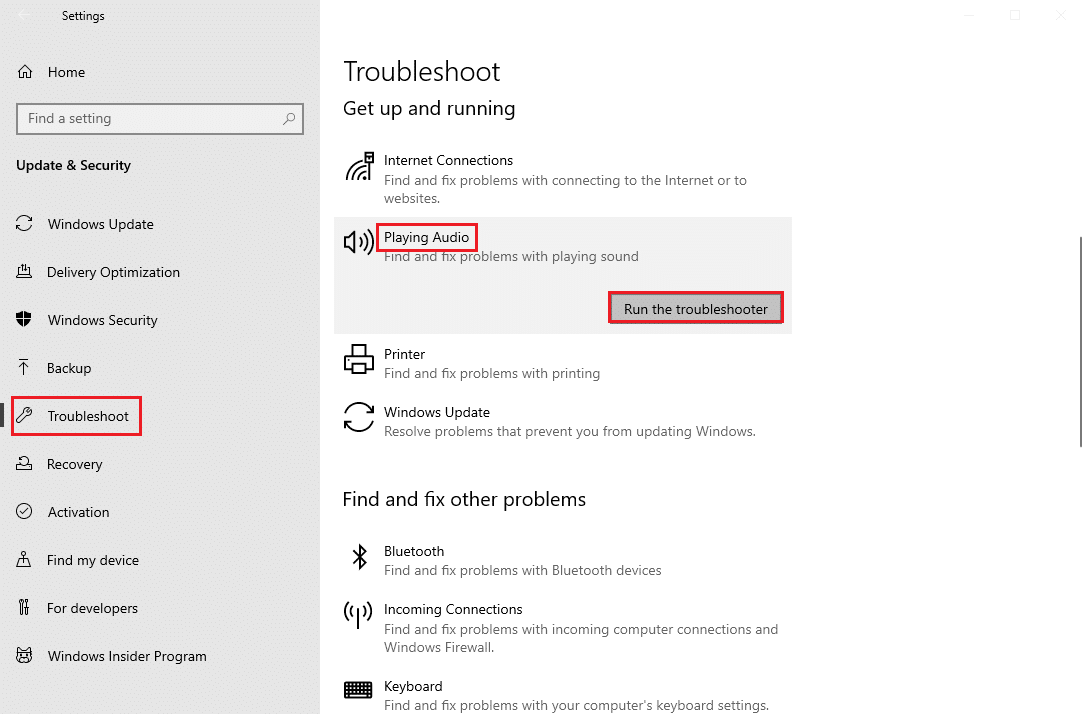
4. Wait for the troubleshooter to find problems, if any.
5. Follow the instructions on the screen to apply the fix.
1 floor Update Windows
You can also fix software errors on your computer by updating your operating system. Always check if you have updated your Windows operating system and if there are any updates pending, use our guide How to download and install the latest Windows 10 update.

Method 2: Download the SADES headset driver.
By default, SADES drivers are installed automatically when they are connected. If you inserted an old device, the SADES headset may not be recognized by Windows 10. You can download the drivers for the headset from the official link.
1. Visit Sades headset driver official page .
2. Various series of SADES headsets will be introduced on the web page. Find the one that fits your headset.
3. Tap "More" under the headset.

4. Finally, click the download arrow to download the driver.
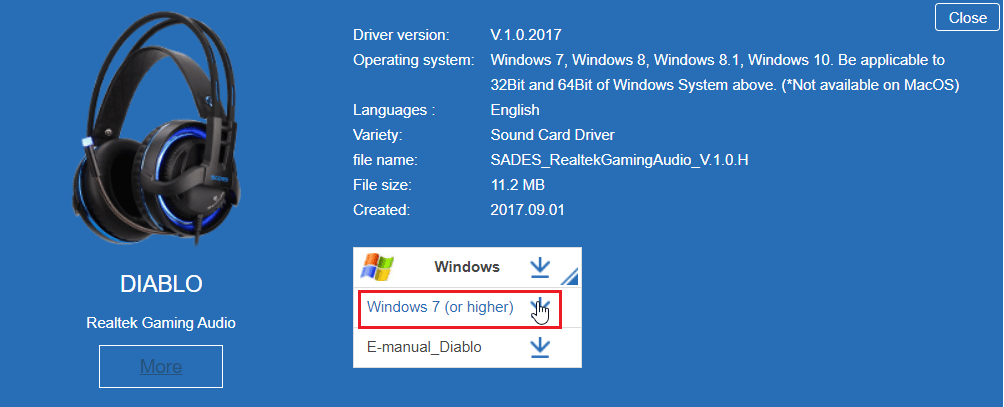
5. Install the driver and it will decide that the SADES headset does not exist.
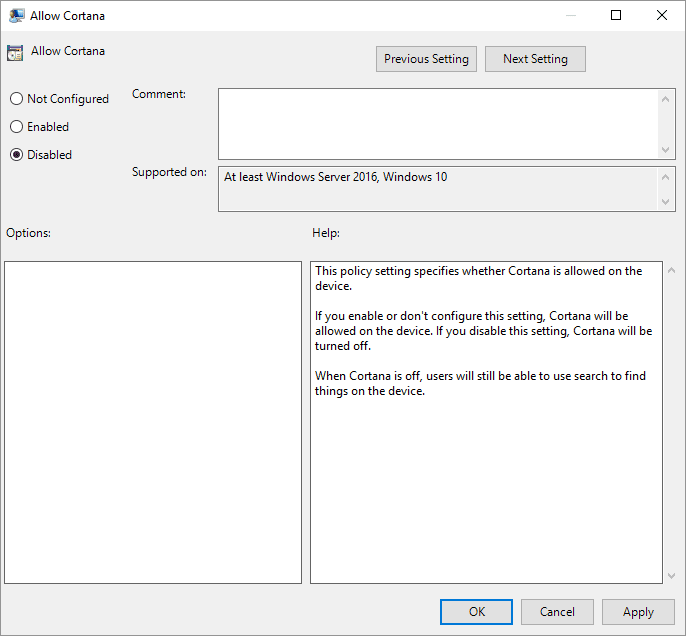
Method 3: Disable Cortana
Unrecognized SADES headphones can also be fixed by hiding Cortana from the Windows taskbar or disabling it. To do this, follow these steps:
1. Right click on the taskbar and click the "Show Cortana" button.
2. Make sure the checkbox is unchecked to hide Cortana from the taskbar.
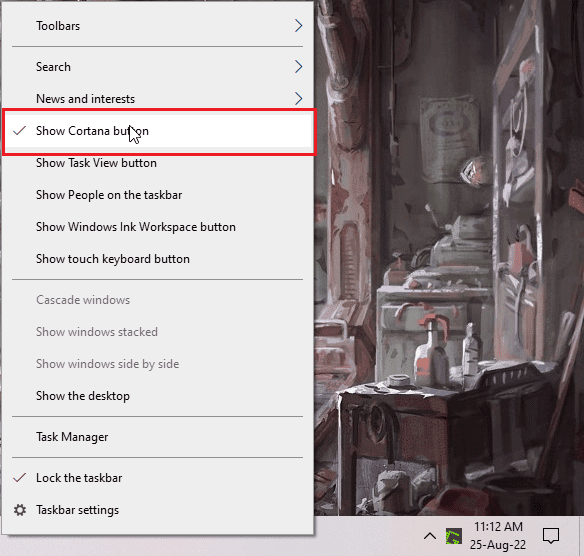
3. Now check if the issue is resolved.
4. If the problem persists, you can try disabling Cortana and see if Windows 10 recognizes the SADES headset.
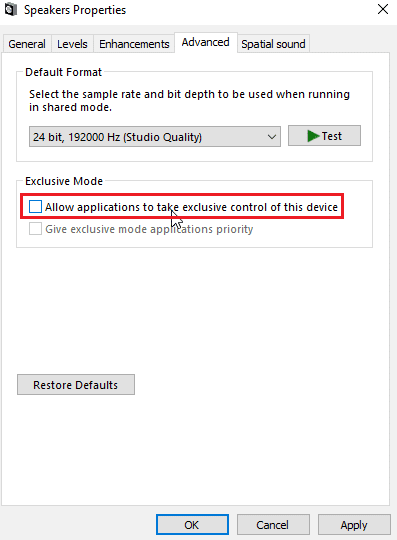
Method 4: Disable exclusive control
Sometimes applications can take exclusive control of any driver, including audio drivers; this may also result in the headphones not being detected. We can reconfigure the driver to disable application exclusive control.
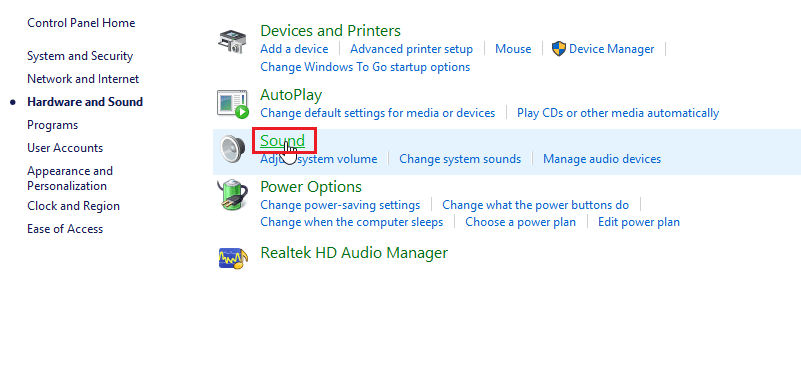
1. Press the Windows key, type control panel and click Open.
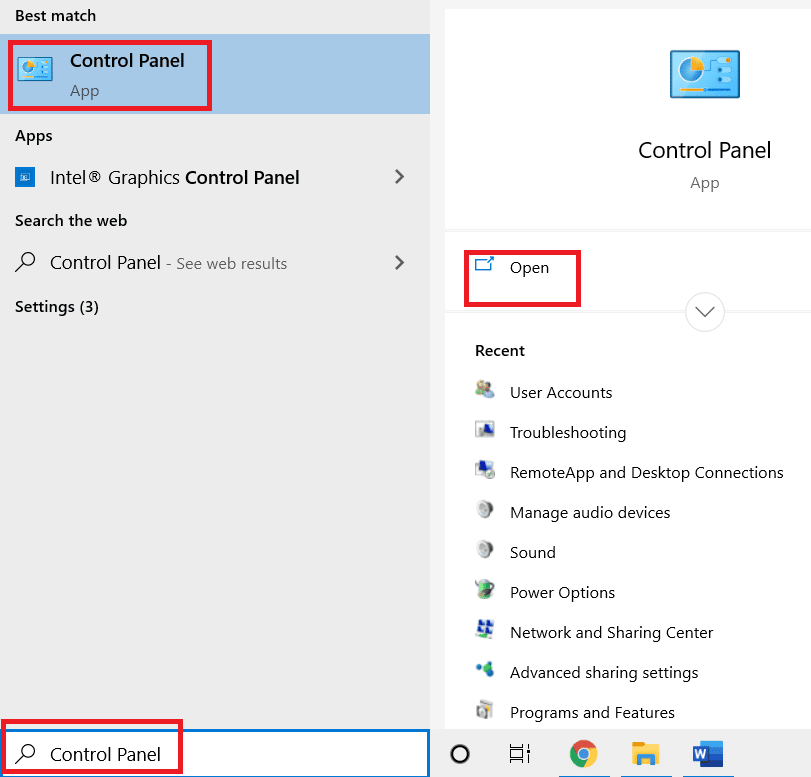
2. Set View by > Category, then click Hardware and Sound.

3. Click "Sound" to open properties related to sound.

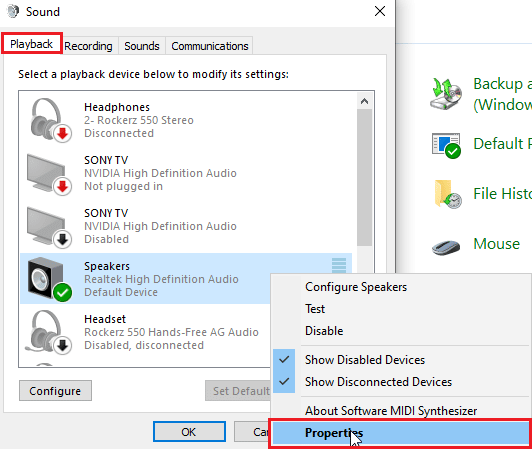
4. Go to the playback tab, right-click on the active audio driver and select "Properties".
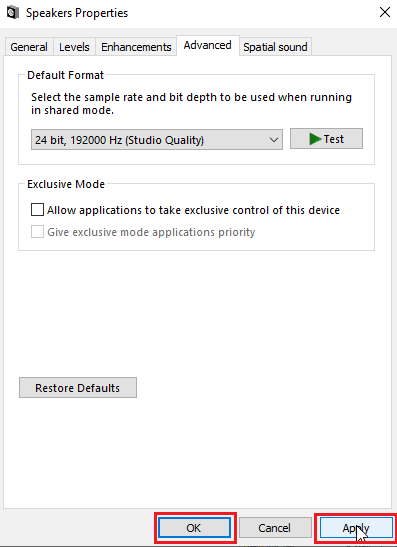
5. Click the "Advanced" tab and make sure that the "Allow applications to take exclusive control of this device" checkbox is unchecked.
6. Finally, click Apply and then click OK.
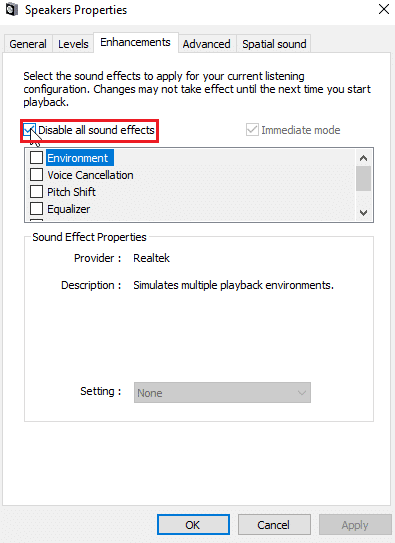
Method 5: Disable Sound Enhancements
Sound enhancements are a set of features first introduced in Windows 7 that improve certain aspects of sound. There are various known audio enhancement issues that will interfere with SADES headphones causing them to crash. Try turning off sound enhancements.
1. Launch the Control Panel app.
2. Click "Hardware and Sound" to open the properties related to the hardware.

3. Go to the "Sound" item and click on it, the sound properties will open.
4. Right-click the active audio driver and select Properties.
5. Now go to the "Enhancements" tab.
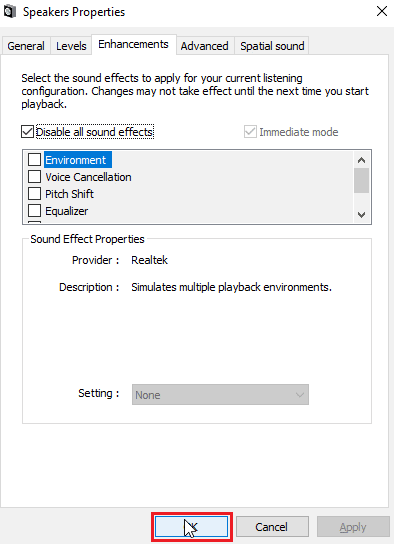
6. On this tab, check the "Disable all sound effects" box.
7. Finally, click OK.
Method 6: Change Audio Format Quality
Windows automatically assigns the default sound format quality. If the sound format quality is incorrect or not supported by the SADES headphones, there may be a problem with the SADES headset not being recognized by Windows 10.
1. Open the control panel and go to the "Hardware and Sound" section.

2. Click Sound, this will open the sound properties.

3. On the playback tab, find the active audio driver.
4. Right-click the active audio device and select Properties.

5. Go to the "Advanced" tab, here in the section "Default Format" there will be a drop-down list to select the sound quality.
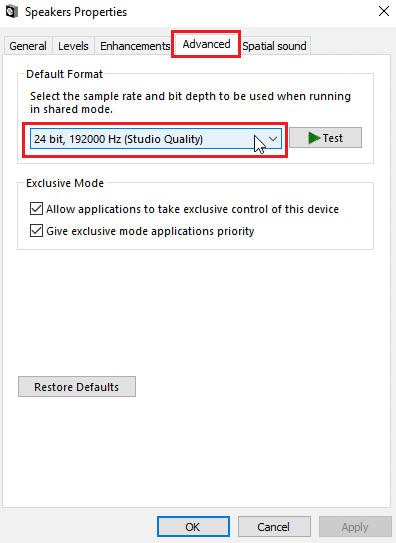
6. After selecting the sound quality, press OK to save the changes.
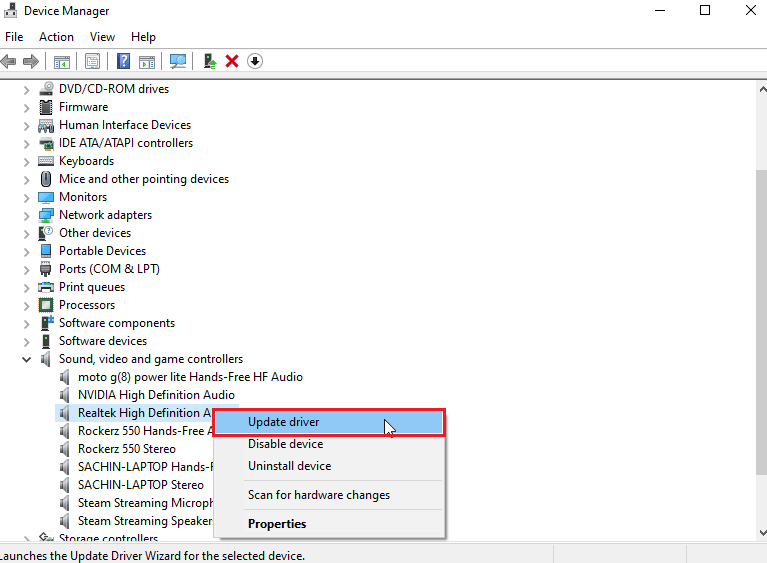
Method 7: Update Realtek HD Audio Driver
Sometimes there is no problem with the SADES headset because the driver is not up to date. To update your Realtek HD audio driver, read our guide on updating Realtek HD Audio drivers in Windows 10.
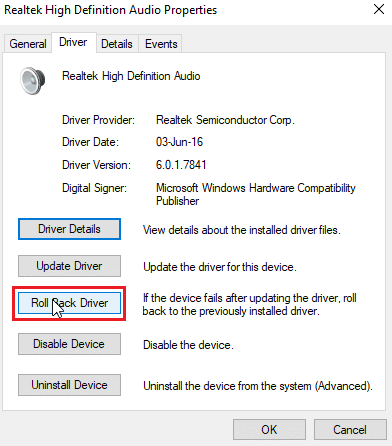
Method 8: Roll back driver updates
If you have older SADES headphones and a Windows update causes the driver to not recognize your device, you can try to roll back the device to a previous version through Device Manager. Read our guide on how to roll back drivers in Windows 10.
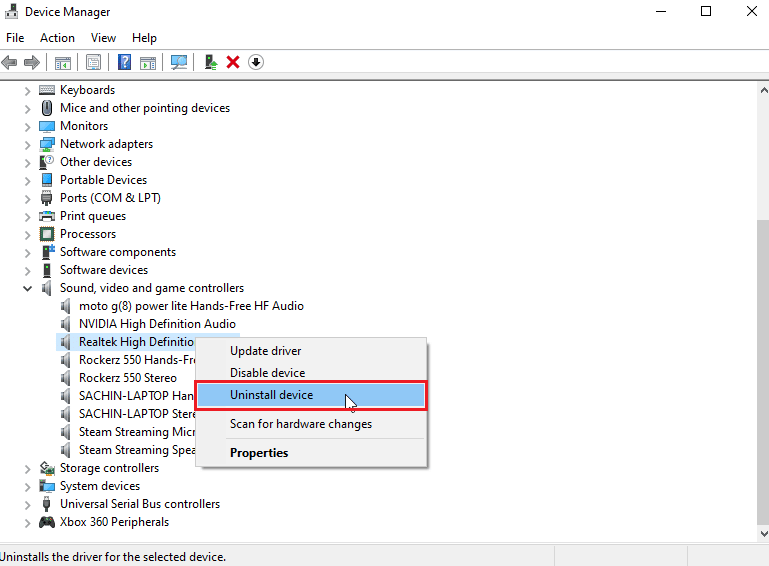
Method 9: Reinstall your audio drivers
Corrupted audio drivers can cause your SADES headset not to be recognized by Windows 10. You can try reinstalling your drivers to fix this issue. Windows will automatically install the audio driver after a simple restart. Read our guide on how to uninstall and reinstall drivers in Windows 10.
Method 10: Disable front panel jack detection (if applicable)
If you have the Realtek audio driver installed, you can disable front connector detection to fix the issue. There are known issues with front jack detection.
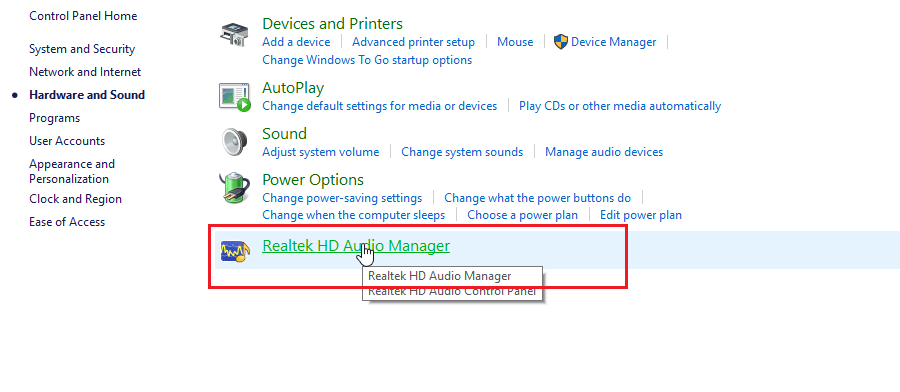
1. Launch the control panel and go to the "Hardware and Sound" section.

2. Now click Realtek HD Audio Manager.

3. Go to connector settings.
4. Make sure the checkbox to disable front jack detection is checked.
Method 11: Enable multithreading (if applicable)
Windows users reported that the headset was detected when they enabled multi-streaming and their headset was detected when the SADES headphones were not recognized.
1. Go to the Hardware and Sound section.

2. Now click Realtek HD Audio Manager.

3. Click Advanced device settings and enable multithreading.
4. Finally, click OK to save your changes.
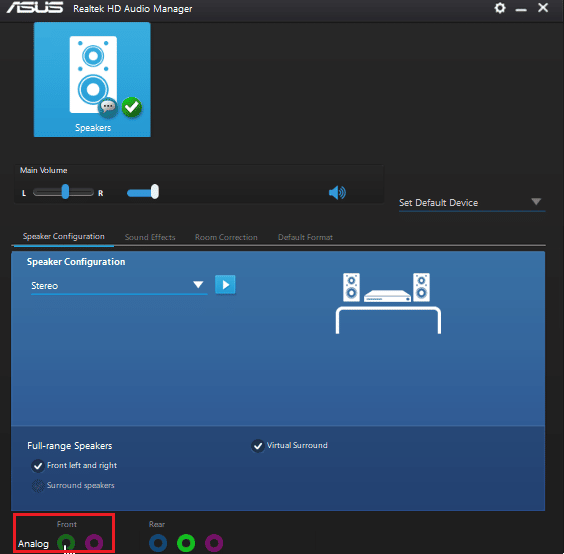
Method 12: Choose the right audio device
When you connect the device to the computer, the Realtek HD audio driver does not recognize the device. Because of this, it automatically assigns itself the default playback device. You may need to manually detect it by going through settings and making sure headphones are selected for input.
their headset was detected when the SADES headphones were not recognized.
1. Launch Realtek HD Audio Manager.
2. Press the front connector at the bottom of the interface.
Note. The Realtek HD Audio Manager shown here is a custom version modified by ASUS. It is based on the motherboard. Realtek HD Audio Manager will be different for you depending on your motherboard.
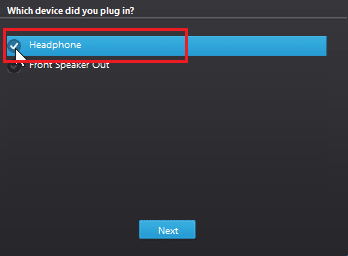
3. Select "Headphones" and click "Next".
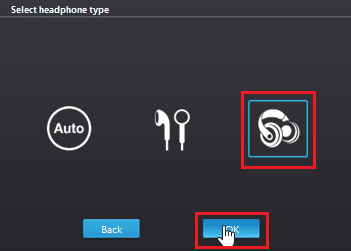
4. Now click the icon shown below and then click OK.
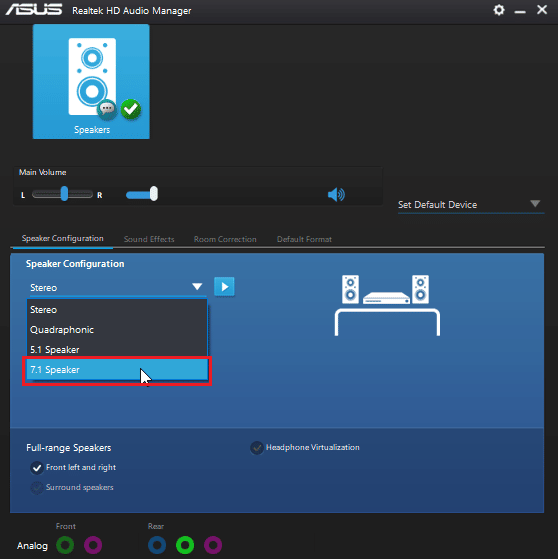
Method 13: Change speaker configuration settings
There is another known issue when connecting headphones that causes the SADES headset not to be recognized by Windows 10. If set to stereo, there may be an issue with headphones not being detected. So, follow these steps to fix this issue.
1. Open the Realtek HD Audio Manager application.

2. Click the speaker configuration drop-down menu.
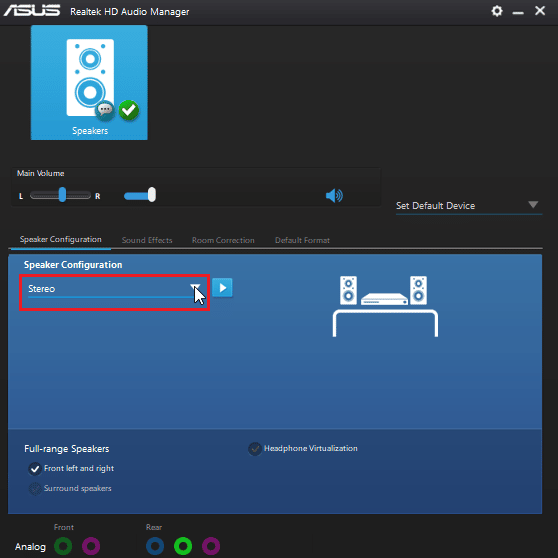
3. Select your 7.1 surround speakers and save your changes.
Frequently Asked Questions (FAQ)
Q1. Why don't my headphones work when plugged in?
Answer The problem may be due to a faulty audio driver, sound format, etc. Please read the guide above for full details.
Q2. How do I get Windows 10 to detect my headphones?
Answer Try changing the audio ports if you have two audio ports, or try running the audio troubleshooter to let Windows find the problems and fix them automatically.
Q3. How can I install the SADES driver?
Answer Visit the SADES website to download the drivers. Install drivers. Read Method 2 above for installing the SADES driver.
***
We hope that the detailed guide on SADES headset not recognized by Windows 10 was helpful to you and you were able to solve the problem. Please let us know which method we have listed worked best for you. If you have any suggestions or questions about the article, feel free to share them in the comments section below.