Fix High CPU Usage by Steam Client Loader on Windows 10
You can be a gamer or a professional gamer who relies on the Steam app, which is the world's most loved gaming platform. But someday you will encounter problems that you did not encounter while playing. High CPU usage when loading the Steam client is one such issue that most gamers have already experienced with their PCs. If you are also one of them, read this article to find helpful ways to fix Steam with 100% CPU issue once and for all. Let's start!
How to Fix High CPU Usage by Steam Client Loader on Windows 10
The following are some of the reasons why your PC might be experiencing the Steam Client Loader Loader High CPU error:
- Faulty and corrupted system files
- Steam Overlay
- Outdated graphics driver
- Broadcast to stream
- Large picture mode
- Default Steam Window: Store
Now you will see ways to completely solve the said problem. Read and follow each method and related steps carefully on your computer.
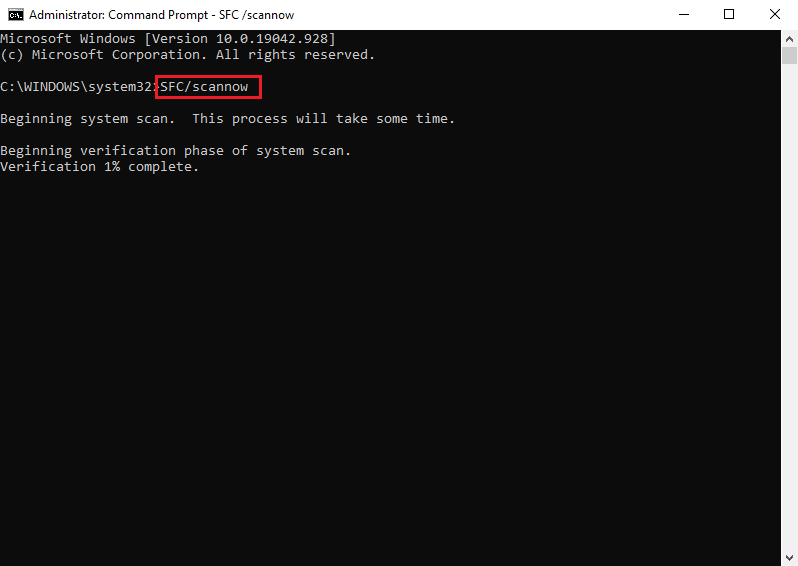
Method 1: Repair System Files
When your system files are corrupted, the computer exhibits high CPU and RAM usage. By running an SFC scan on your PC, corrupted files and the Steam client loader can also be fixed. Follow our guide to recovering system files in Windows 10.
Method 2: Repair the Steam Service
You can also repair the Steam service as this method fixed the issue of Steam using 100% CPU for multiple users. Follow the steps below to perform the same method on your PC.
1. Press the Windows + R keys at the same time to open the Run dialog box.
2. Type the following command in the provided field and press the Ctrl + Shift + Enter keys at the same time to run it as an administrator.
"C:Program Files (x86)SteambinSteamService.exe" /repair
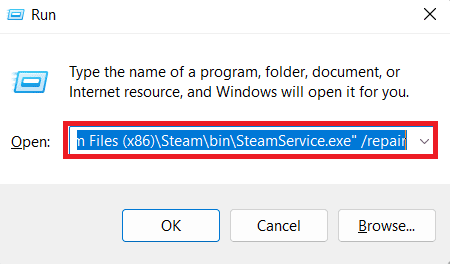
3. Finally, restart Steam.
Method 3: Change the skin of the Steam client to standard
It is perfectly normal to use different skins on Steam, but changing the default skin is believed to be the cause of the Steam client's high CPU usage issue. Follow the steps below to complete this step on your PC.
1. Open the Steam app on your computer.
2. Click "Pair" in the menu bar and click "Settings".

3. Then click on the "Interface" option as shown below.
4. In the "Select the skin you want to use on Steam (Steam restart required)" section, select the
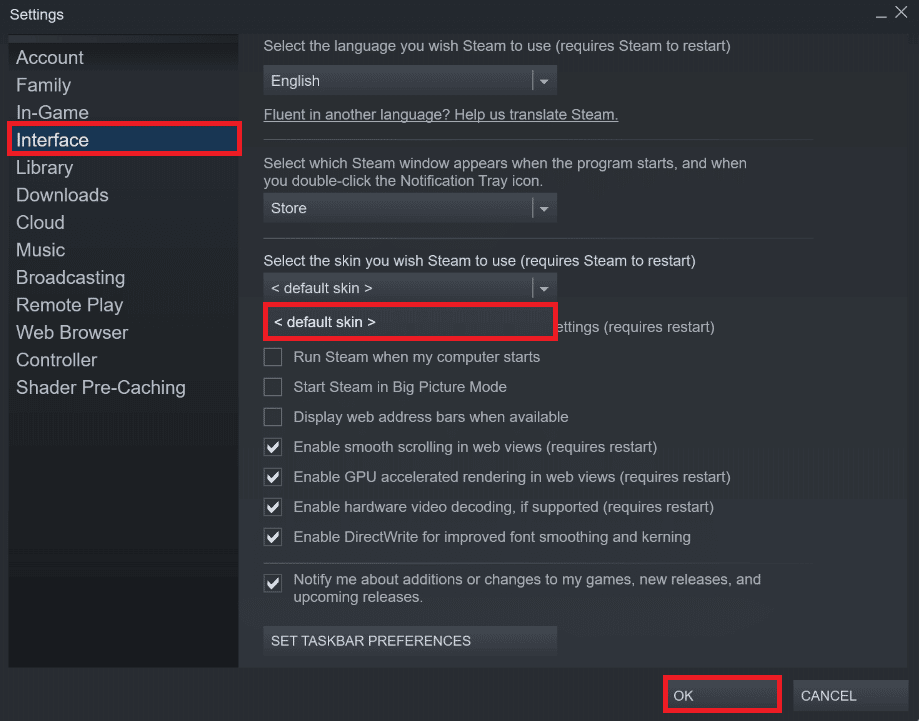
5. Then on the main menu, click on Steam > Exit as shown below.

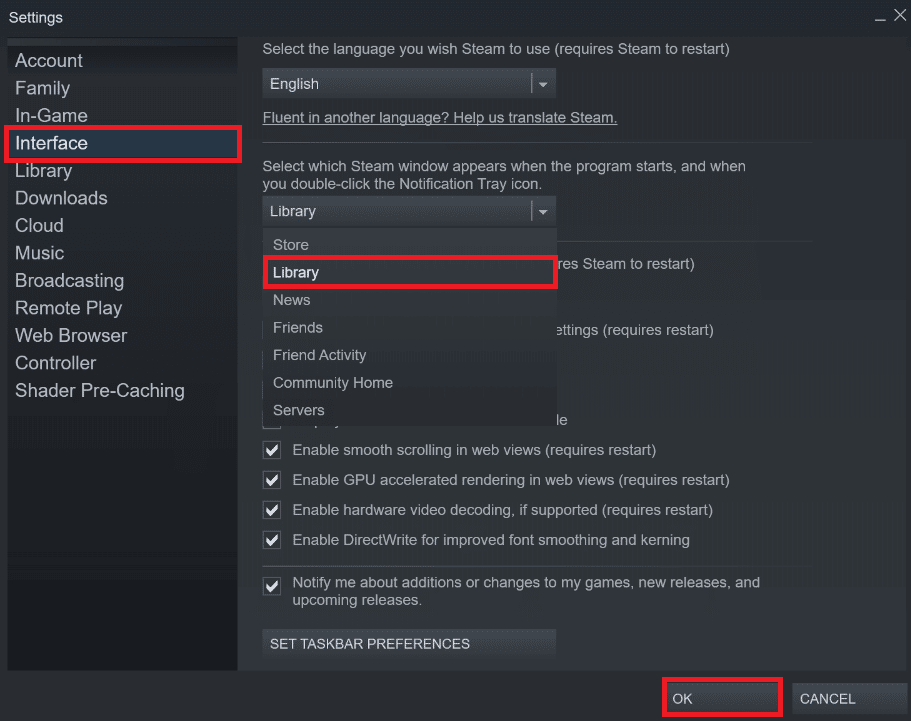
Method 4: Change Default Window to Library
If your Steam window is set to the Store menu by default, sometimes you may encounter the Steam Client Loader Loader High CPU error. Follow the steps below to change this default window to something else, such as "Library".
1. Open the Steam app on your PC.
2. Select the Steam option from the menu bar and click "Settings" to open the "Settings" window.

3. On the Interface tab, select the Library option from the drop-down menu as shown in the figure.
4. Now click the OK button at the bottom.
5. Then click on Steam > Exit Main Menu as mentioned in the previous method.
6. Finally, restart the Steam app on your PC.
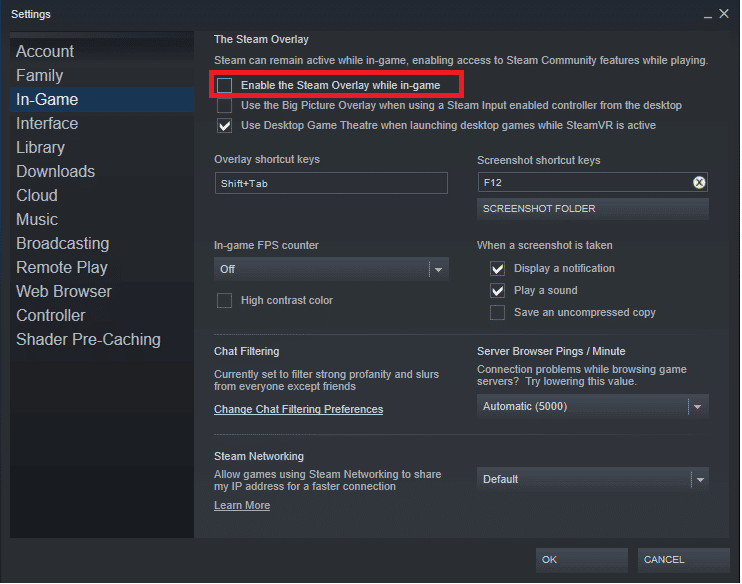
Method 5: Disable the Steam Overlay
Several Steam users have noticed that Steam is using 100% CPU when the Steam Overlay is enabled. When any game is launched on Steam with this feature enabled, it will automatically increase the CPU usage of the respective PC. With that in mind, you can disable the "Enable Steam Overlay While Playing" option in your Steam settings. Read and follow the How to disable the Steam overlay on Windows 10 guide to the end to understand this method in detail. After following the given steps, check if you have fixed the indicated problem or not.
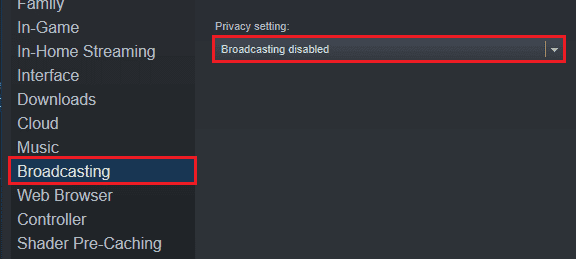
Method 6: Disable Broadcasting on Steam
Broadcasting on Steam requires high CPU usage to work properly. You can disable this option in Steam settings to see if high CPU usage will fix it or not.
1. Open the Steam application with administrator rights on your PC.
2. Select the Steam option from the menu bar and click "Settings" as shown in the picture.

3. Then click Broadcast > Broadcast Disabled as shown in the figure.
4. Then click OK and exit the main Steam screen.
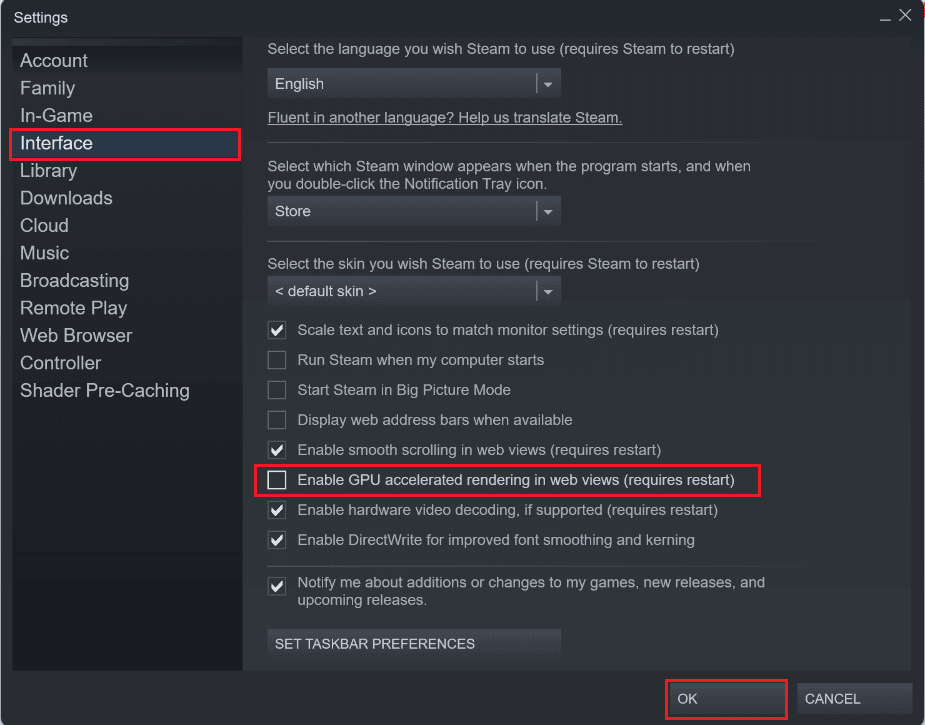
Method 7: Disable GPU-accelerated rendering in Web Views
1. Launch the Steam application with administrator rights.
2. Click Steam > Settings as shown in the picture.

3. Then click the "Interface" tab in the left pane and uncheck "Enable GPU accelerated rendering in web views" as shown in the figure.
4. Now click OK and exit the application.
5. Finally, restart the Steam application and check the status of the Steam client loader high CPU usage issue.
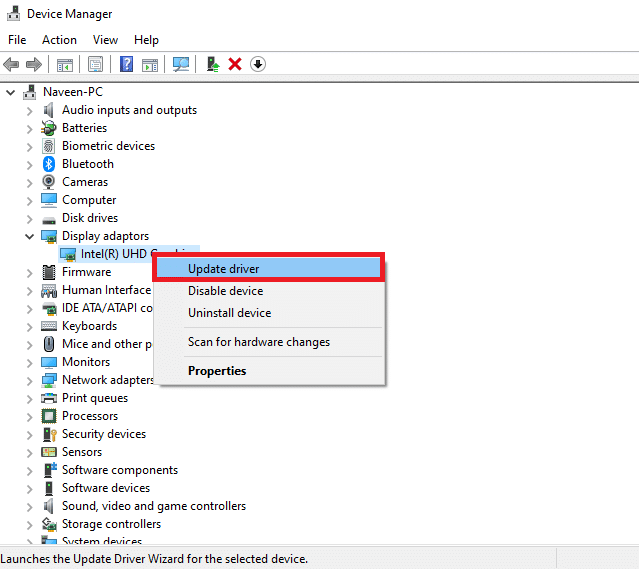
Method 8: Update the graphics driver
This Steam using 100% CPU error can occur on your computer if you have an outdated graphics driver installed. You can update your graphics driver to the latest version to eventually fix your desired issue. Read our guide on 4 Ways to Update Graphics Drivers in Windows 10 to learn about the different methods you can use to update your graphics driver.
Method 9: Use the Steam Client Beta
1. Open Steam and click Steam > Settings.

2. Click the "Account" > "MODIFY" tab in the "Participating in Beta Testing" section as shown below.
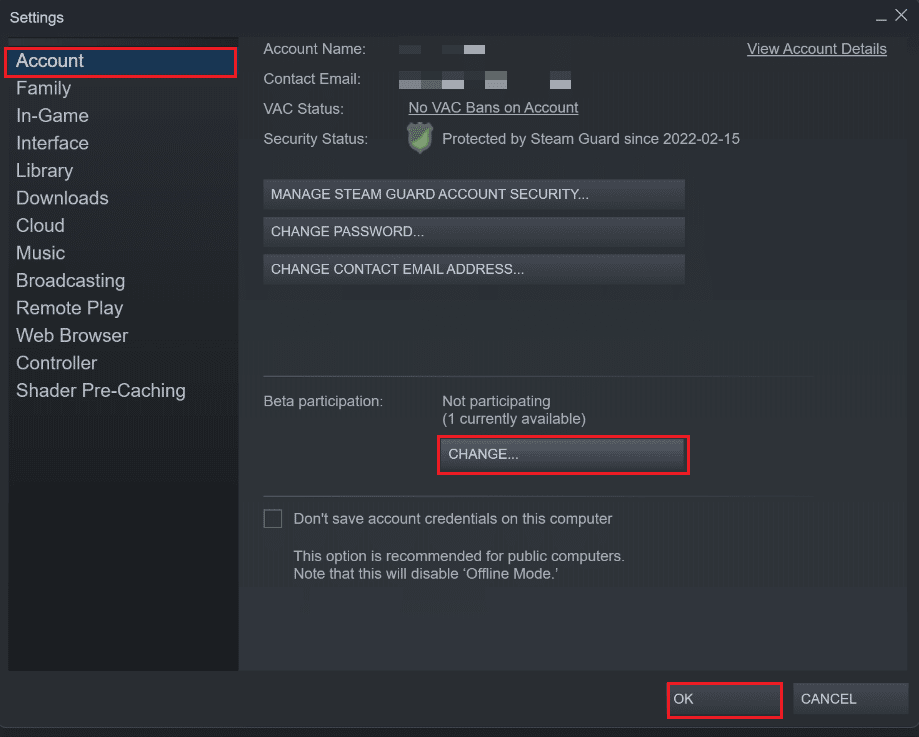
3. Select "Steam Client" from the drop-down menu.
4. Now click OK and restart the Steam application.
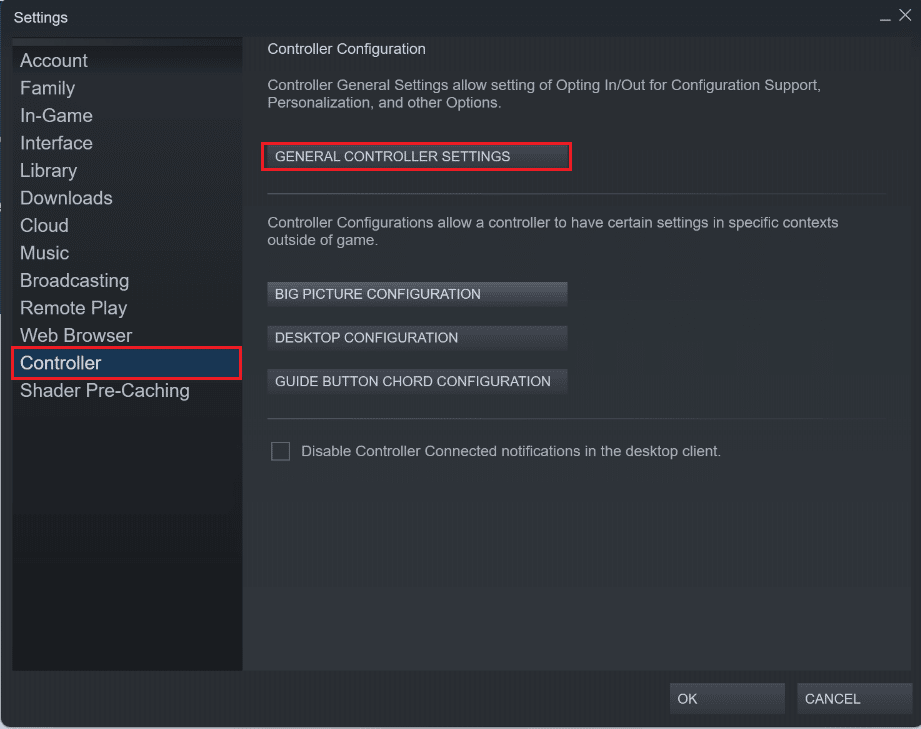
Method 10: Large Picture Mode Workaround
Follow the steps below to resolve the large picture mode issue if it is causing the issue.
1. Open Steam and launch the settings menu as above.
2. In the Controller section, click on CONTROLLER GENERAL SETTINGS as shown in the figure.
3. Clear all checkboxes here and click "Back" as shown in the picture.
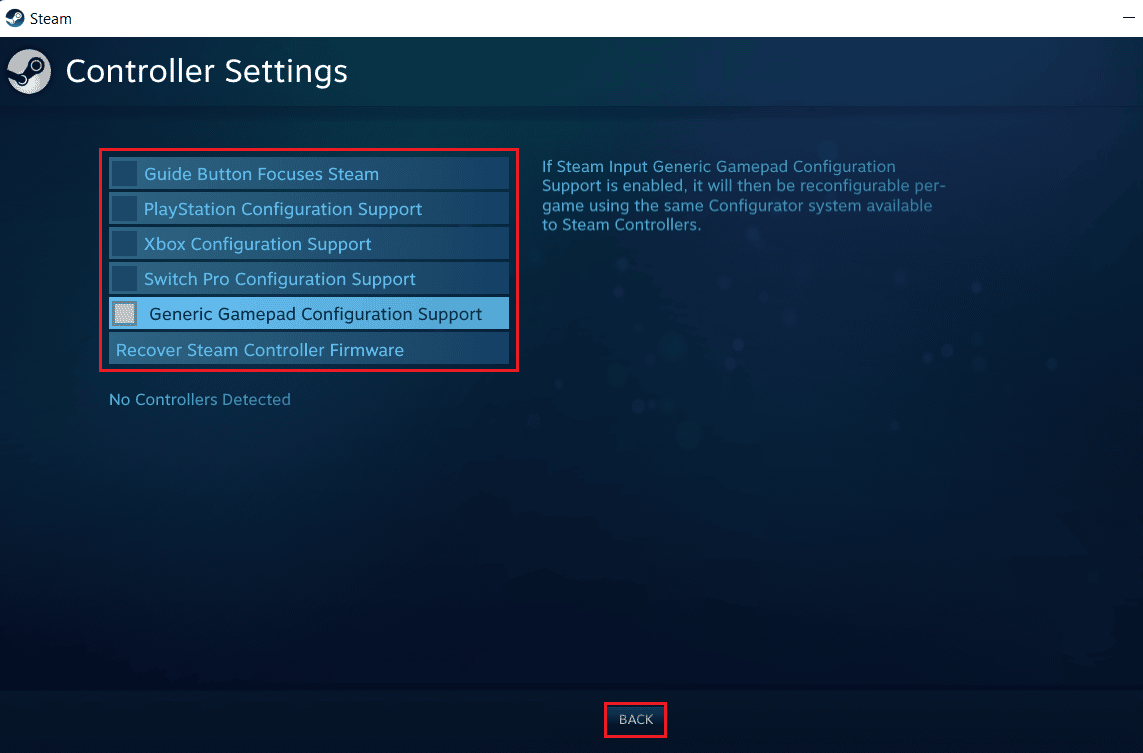
4. Then, in the Controllers section, open and close all selected configurations one by one.

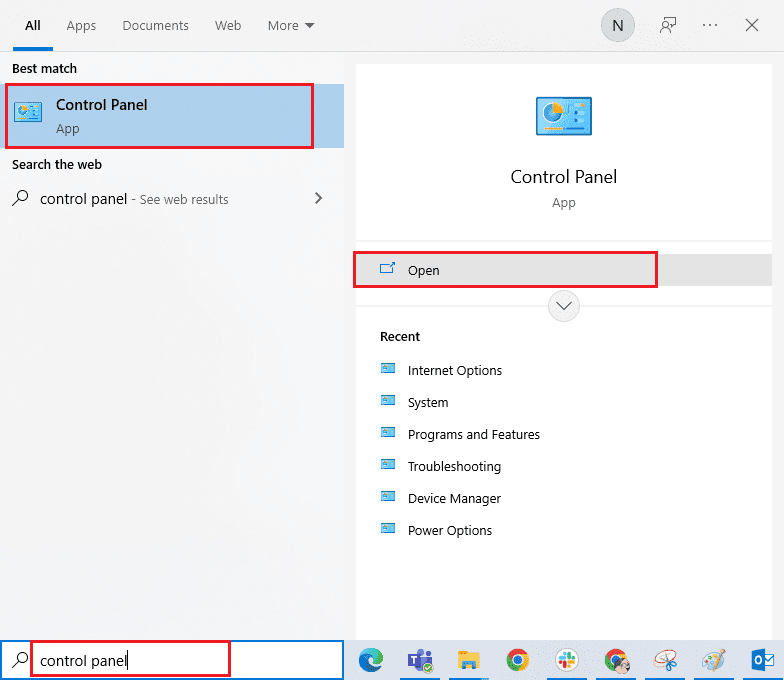
Method 11: Reinstall Steam
If nothing helped you to solve the desired error, reinstall the Steam application on your computer. Reinstalling the Steam client will install the latest version with bug fixes and crashes from the previous version. After reinstalling the Steam app, check if you have fixed the issue of Steam using 100% CPU on your PC.
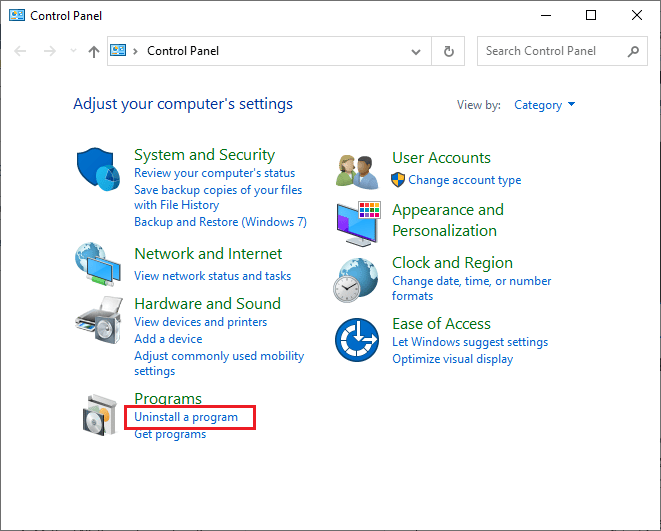
1. Press the Windows key, type "Control Panel" and click "Open".
2. Set "View by > Category", then click "Uninstall a program" in the "Programs" menu, as shown in the figure.
3. In the Programs and Features utility, find Steam.
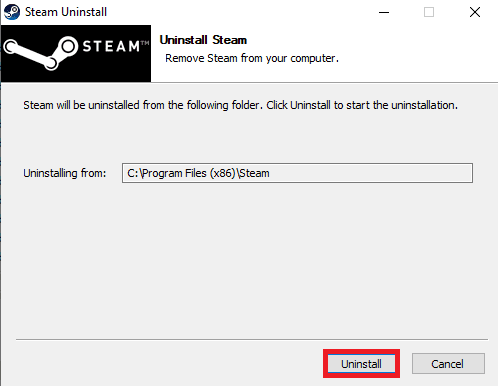
4. Now click on Steam and select the Uninstall option as shown in the image below.

5. Click the Uninstall button on the Steam uninstall window to uninstall the Steam app on your PC.
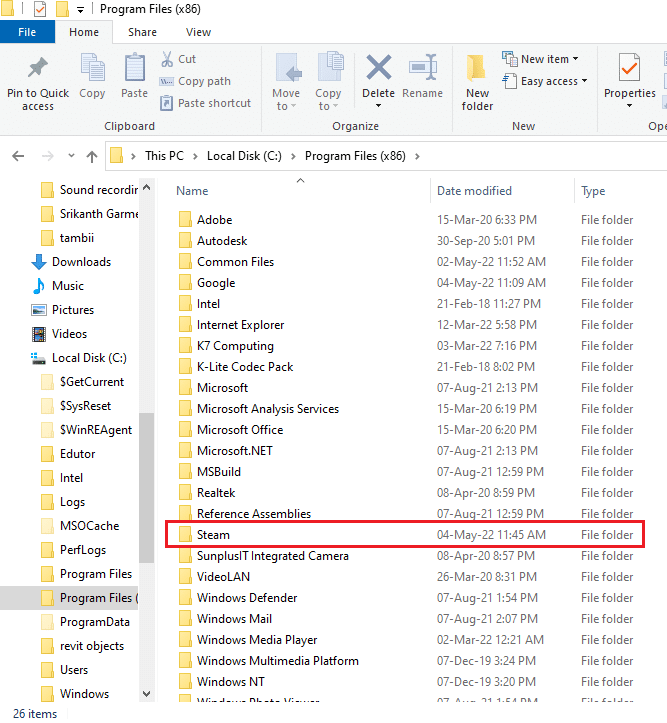
6. Delete the Steam folder along the path Local Disk (C:) > Program Files (x86) by pressing the Delete key.
The steps below will help you reinstall the Steam app on your computer from scratch.
7. Now go to the Steam download page in your default web browser and click the "Install Steam" button on the top right corner of the home page.

8. Click the INSTALL STEAM button on the next page to download the Steam application to your computer.

9. Then click on the downloaded SteamSetup.exe file at the bottom left of the page to launch the Steam application on your PC.

10. Click the "Next" button on the "Steam Setup" window to begin installing the Steam app on your PC.

11. Select the desired language in the next window and click the Next button in the wizard.

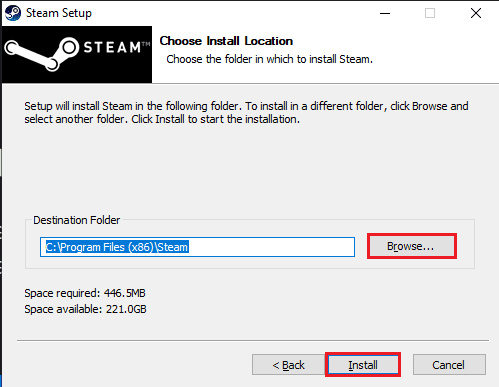
12. Then select the destination folder of the Steam application by clicking on the "Browse..." button and clicking on the "Install" button to complete the installation of the application.
13. Finally, click the "Finish" button on the "Completing Steam Setup" window to complete the steam setup.

14. Create a new account or sign in to an existing account using your Steam app login credentials.

***
So now you understood how to fix high CPU usage by Steam client loader on your Windows 10 PC with detailed steps. You can let us know about any questions about this article or suggestions about any other topic you want us to write an article about. Leave them in the comments section below so we know.