Fix front audio jack not working in Windows 10
The front audio connectors are the front microphones/headphones that are present on the personal computer. Separate audio ports are usually present in laptops, either on the sides or on the front. The reason your front audio jack is not working is either due to your drivers or the connection between the motherboard and the computer case. This issue is usually resolved by the simple methods in this article and does not require major troubleshooting in most cases. When you encounter this issue, you cannot connect headphones or a microphone to the front jacks. Don't get annoyed, here are a few ways to fix your front panel audio jack not working issue.
How to fix front audio jack not working in Windows 10
Here we have compiled a collection of 13 troubleshooting ideas to help you solve and prevent the front panel audio jack not working problem in Windows 10. But before jumping to the solution, let us know about the possible causes of this problem.
- Connection problems between motherboard and audio jack.
- It is possible that your audio drivers are outdated and present on your computer.
- The port is not authenticated with the appropriate settings.
- Your audio device is not installed by default on your computer.
- The front panel audio ports are not recognized.
If you are facing front audio jack not working on Windows 10 PC, here are a few ways to fix it. To resolve the issue, follow the steps below.
Preliminary checks
1. Use another device to test the earbuds. If any of the front panel audio jacks are not working on your computer, make sure your headphones are not physically damaged. This will help you figure out if the issue is with your headphones or audio settings.
- Connect the headphones to another computer to check if the headphones work. You can also connect headphones to your mobile phone to test it.
- If you hear sound in the headphones from other devices, then there is no problem in the headphones. You can try the methods below to resolve the issue discussed.
2. Check the connection between the motherboard and the audio jack: If the above method did not help you solve the problem of the front panel audio jack not working, you should make sure that the motherboard and the audio jack are properly connected. In many cases, the connection may not be correct. If the connection is not correct, the computer will display that there is no front connector at all. You can check the connection between the motherboard and the audio jack by following these steps.
- Locate the connection between the motherboard and the front audio jack by opening the computer case.
- If your computer has a USB connector on the front panel, you will see a USB cable and an audio cable, make sure both wires are connected correctly.
- In some cases, users have reported that this issue can be fixed by swapping the connectors and inserting them inside the motherboard. Always check that the connecting wires are connected correctly.
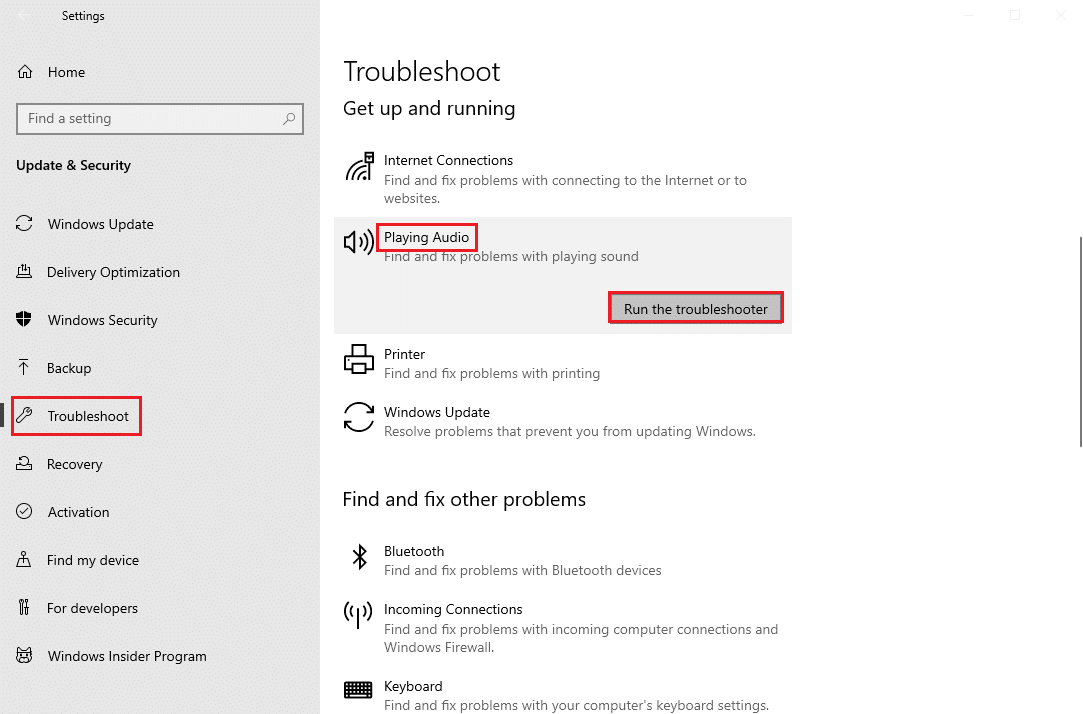
Method 1: Run the Sound Troubleshooter
The built-in troubleshooter on Windows 10 PC will help you fix any hardware issues and errors automatically. All audio devices connected to your computer will be checked for hardware issues and issues will be easily resolved. Follow our How to Run the Hardware and Devices Troubleshooter guide to troubleshoot all audio-related hardware issues on your PC. Alternatively, you can run the Sound Troubleshooter individually as outlined in our How to Run the Windows Update Troubleshooter guide, but make sure you select the Play Sound option as shown.
Method 2: Choose a default device
You must ensure that the front audio jack is set as the default device to avoid any conflicts such as front audio jack not working. You must set your audio device as the default device as mentioned below in order to fix the error in question.
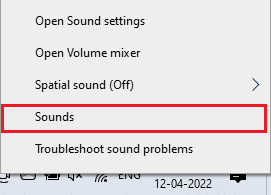
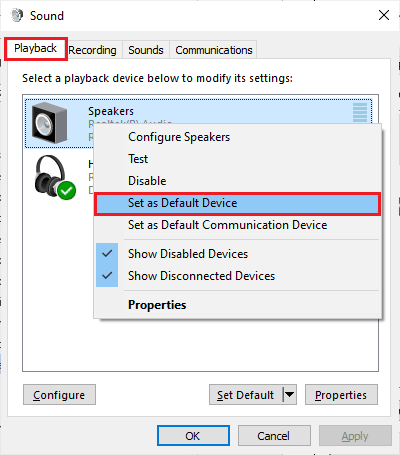
1. Right-click the Speakers icon in the lower right corner of the screen and select the Sounds option.
2. Then go to the Playback tab and right click on the audio jack you want to set as default.
3. Now select the "Set as default device" option as highlighted and click "Apply" and "OK" to save the changes.
Method 3: Disable Front Panel Connector Detection (For Realtek Sound Card)
If you are using a Realtek sound card, follow this method, otherwise skip to the next method. Here are the steps to fix the front panel audio jack not working problem by unplugging the front panel jack.
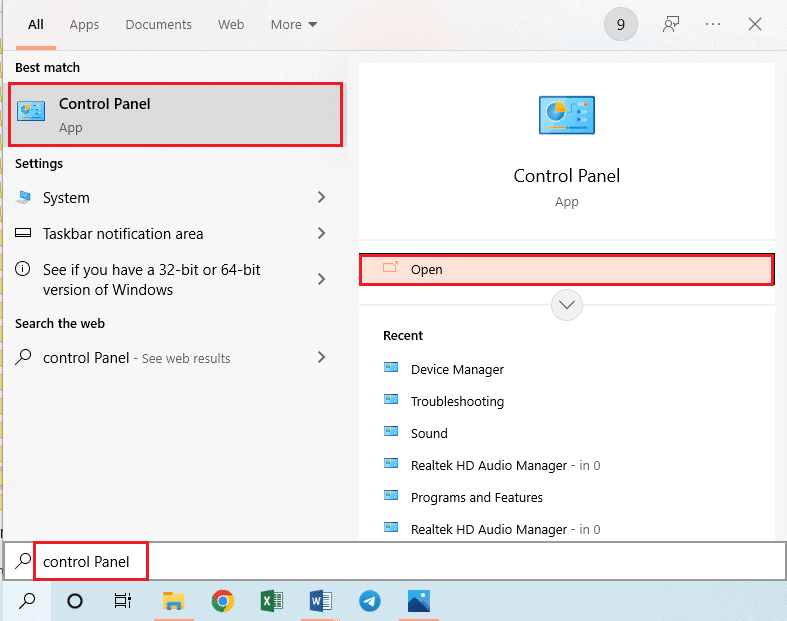
1. Press the Windows key, type "Control Panel" and click "Open".
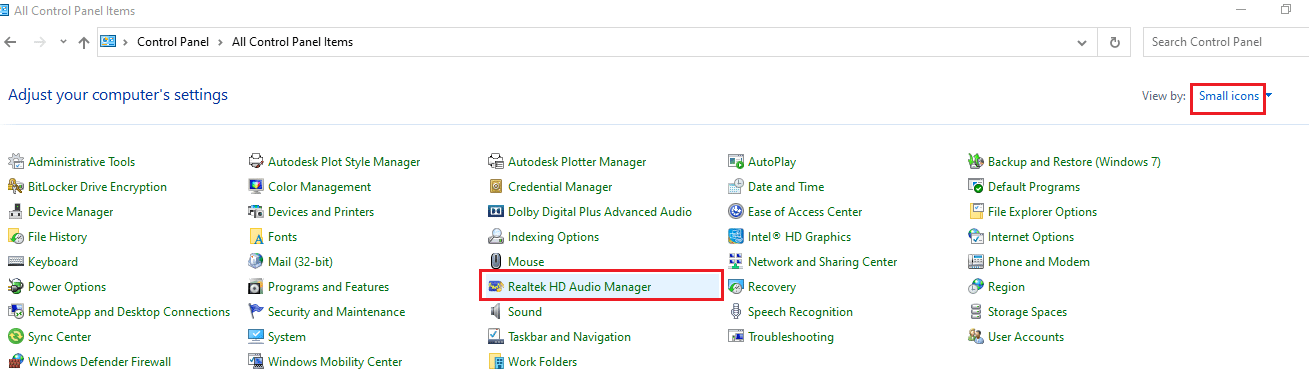
2. Set View > Small Icons, then click Realtek HD Audio Manager.
3. Click the folder icon in the upper right corner of the screen.
4. The screen will prompt "Connector settings", check the box next to "Disable front panel connector detection".
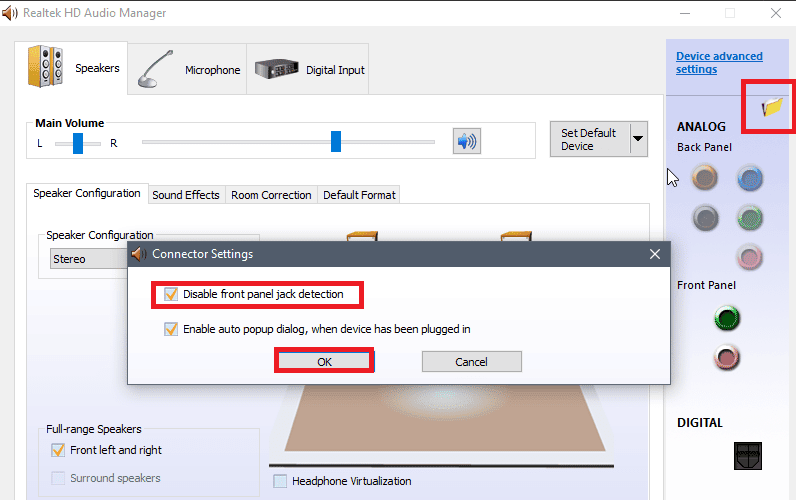
5. Click OK to save your changes.
If you are unable to open the Realtek HD Audio Manager on your computer, you have an alternative option to disable front panel jack detection using the Registry Editor. Here are the steps to do so.
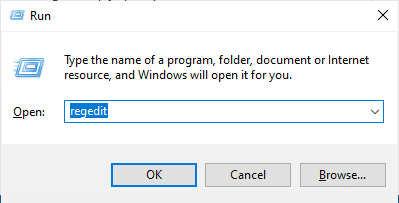
1. Open the Run dialog box by pressing the Windows + R keys at the same time.
2. Type regedit and click OK.
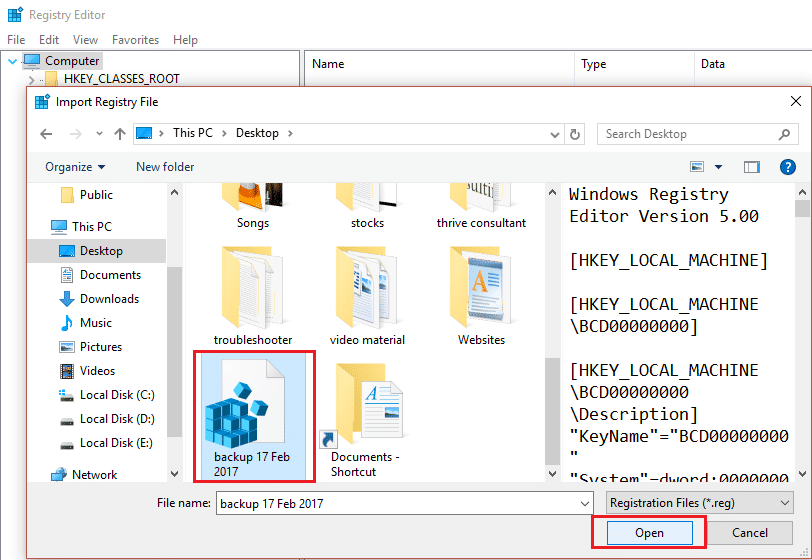
3. Click "File" > "Export" before changing anything to back up the registry first. If any unwanted results appear, you can go to File > Import to undo the changes.
Note. If you don't know how to back up the registry, use our guide "How to back up and restore the registry in Windows" and follow the steps described.
4. After creating the backup, navigate to the following path in the registry editor.
HKEY_LOCAL_MACHINESYSTEMCurrentControlSetControlClass{4d36e96c-e325-11ce-bfc1-08002be10318}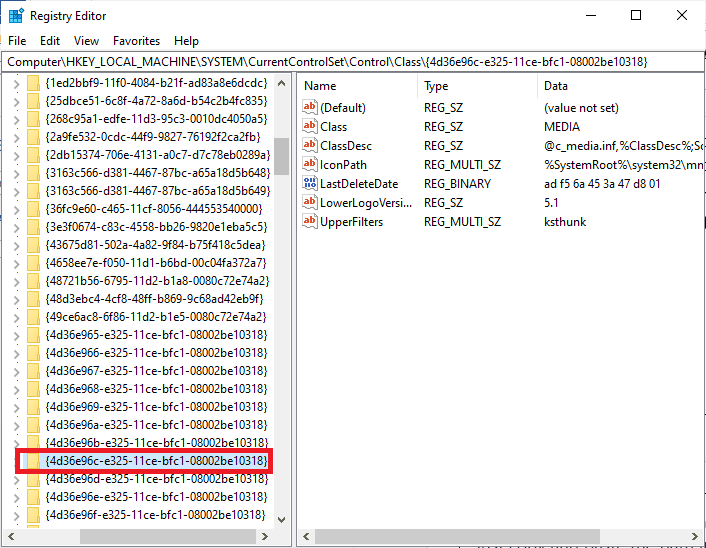
5. Expand all folders whose names start with 000.
6. After expanding all folders with a name starting with 000, if you find the "Settings" folder, open it too.
7. When you open the Settings folder, you will find a folder with a name starting with Drv8186_DevType. Now expand it and click the Settings folder again.
Note. If you don't find the "Settings" folder in the Drv8186_DevType folder, please proceed to the next method.
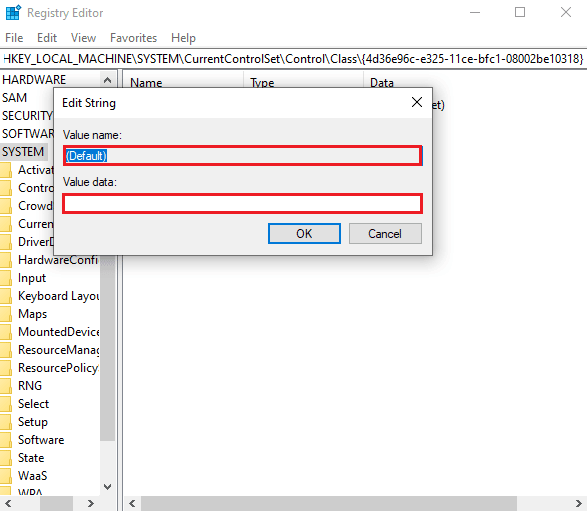
8. In the Settings folder, go to the right pane and right click on the screen. Then click "Create" and then "Binary Value" as shown in the picture.
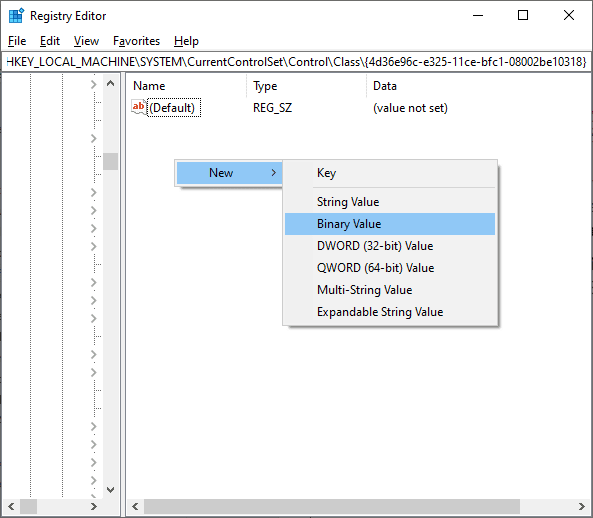
9. Name the binary value as JackCtrl and set the given value as FF 82 40 00.
10. Close the editor and restart your PC.
Check if you have fixed the problem with the front audio jack not working. Some computers do not have the exact registry keys listed in the above method. In this case, check if the following steps apply.
1. Repeat steps 1-4 as above.

2. Now expand all the folders whose names start with 000* and check which folder contains the DriverDesc registry.
3. If you find a DriverDesc key with a Realtek Audio data value, you need to make changes to the corresponding folder containing the DriverDesc.
4. Expand the appropriate folder and select GlobalSettings.
5. Then in the right pane find EnableDynamicDevices and double click it.
Note. If you can't find the EnableDynamicDevices key, go to the right pane and right-click the screen. Then click "Create" and then "Binary Value" named EnableDynamicDevices as shown.

6. Now set the data value to 00 00 00 00.
7. Close the registry editor and restart your computer.
Method 4: Restore default sound settings
If the method above doesn't work, try restoring your audio enhancement settings to their defaults. This will help you solve the problem with the front panel audio jack not working.
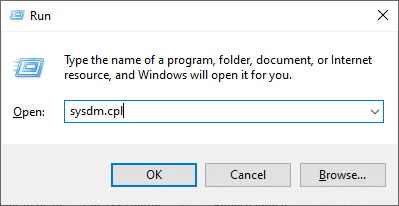
1. Press the Windows + R keys at the same time to open the Run dialog box.
2. Type sysdm.cpl and press the Enter key to launch System Properties.
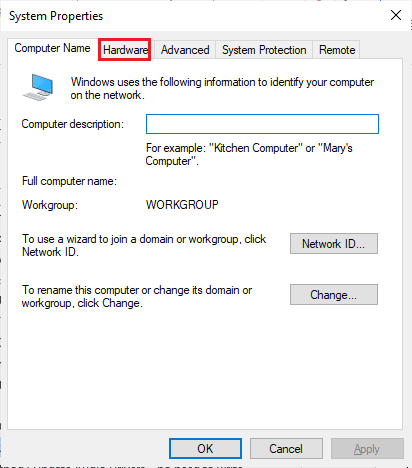
3. In the pop-up window, click the Hardware tab.
4. Click Device Installation Options.
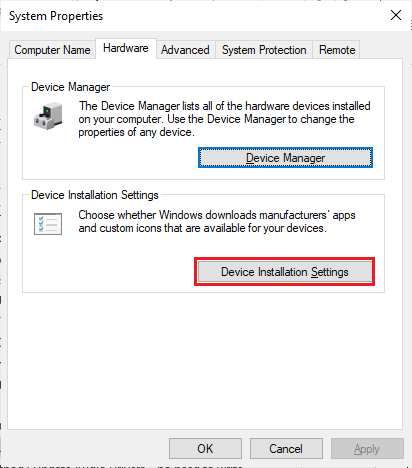
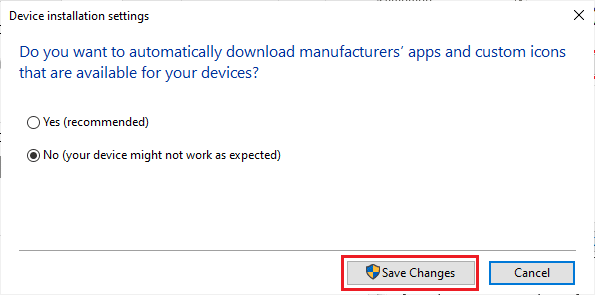
5. Then select No (your device may not work as expected).
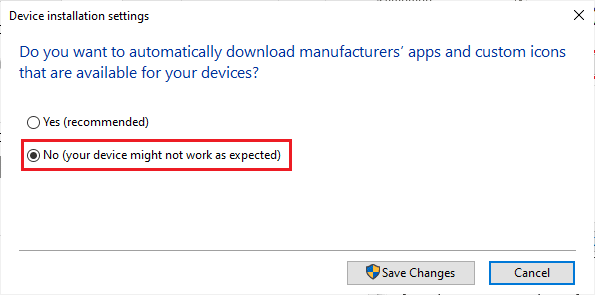
6. Now click Save Changes.
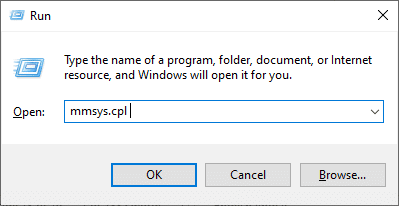
7. Open the Run dialog again, type mmsys.cpl and press the Enter key to launch the Sound window.
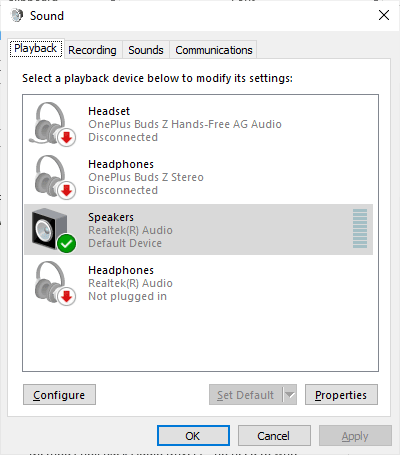
8. On the Playback tab, double-click the device you are trying to use. The properties window will open.
9. Now go to the Advanced tab and click on Restore Defaults to restore the default settings.
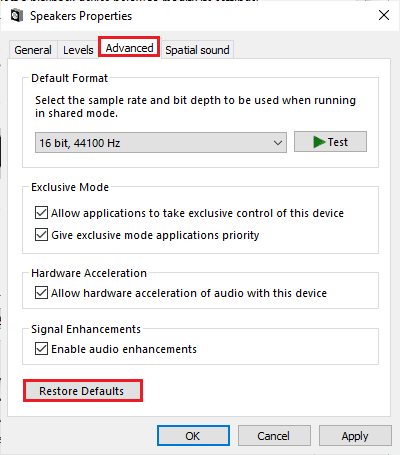
10. Then go to the Spatial Audio tab.
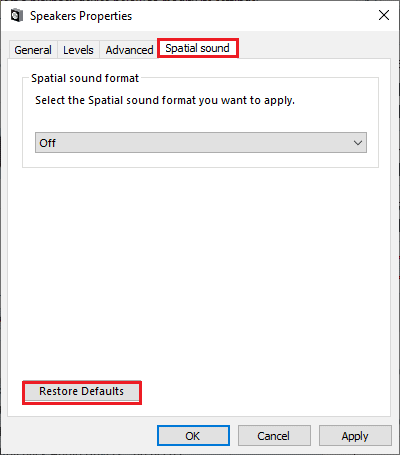
11. Click "Restore Defaults" and everything will be restored to default.
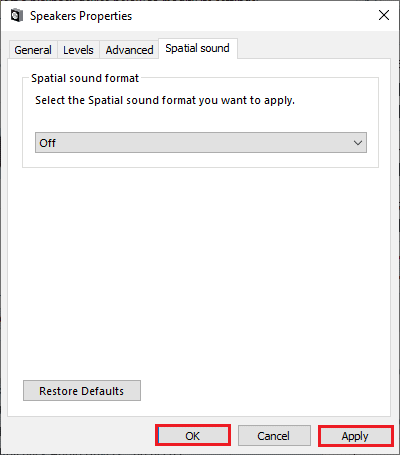
12. Finally, click Apply and then click OK.
13. Now check if you have fixed the problem with the sound on the front audio jack.
Method 5: Update Windows
If any new Microsoft updates are pending to be installed on your PC, several errors and Windows 10 front audio jack not working cannot be resolved on your PC. According to many users, updating Windows 10 PCs will help you fix your front audio jack issue. Follow our guide on how to download and install the latest Windows 10 update to update your Windows 10 PC.
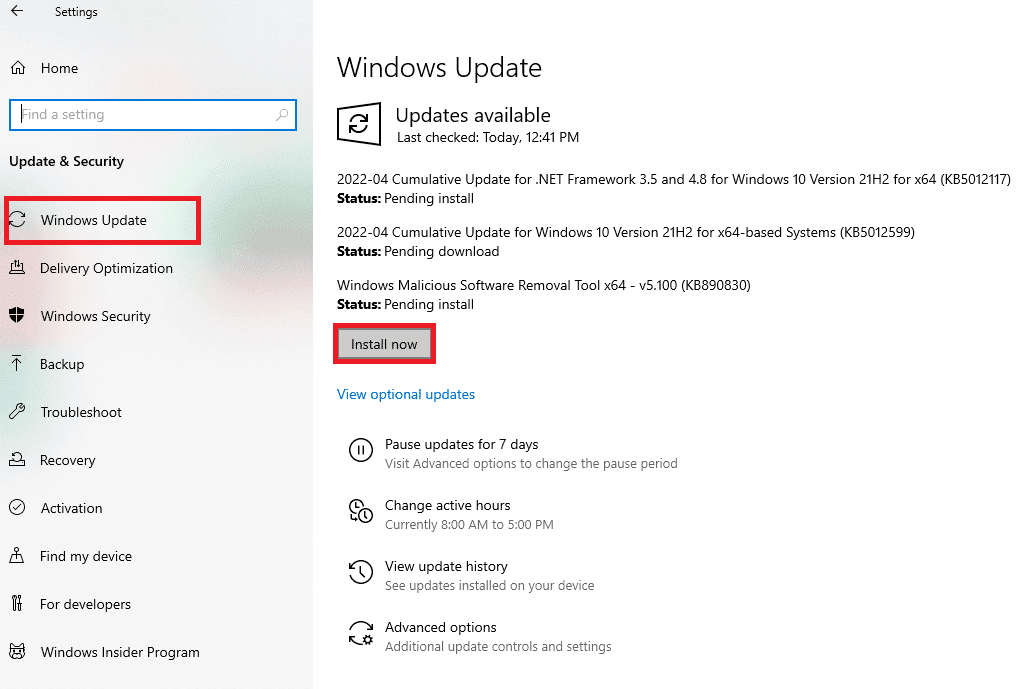
After updating the Windows operating system, check if you can access sound through the front audio jack.
Method 6: Update Audio Drivers
Any incompatible audio driver versions on your computer will always result in the front audio jack not working. Always make sure you are using an updated version of your audio drivers, and if your computer is missing the latest drivers, it is advised to update them as mentioned in our guide How to Update Realtek HD Audio Drivers in Windows 10.
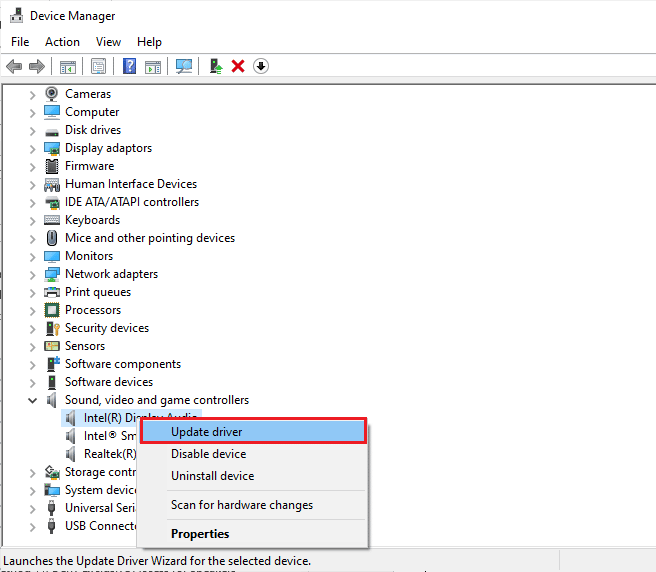
Once you have updated your audio drivers to the latest version, check if you have fixed the front audio jack not working with Windows 10 issue.
Method 7: Reinstall your audio drivers
You are only advised to reinstall device drivers if you cannot get any fix by updating them. The steps to reinstall drivers are very simple and you can do it by using a third party app or by following the steps manually as mentioned in our How to Uninstall and Reinstall Drivers in Windows 10 guide.
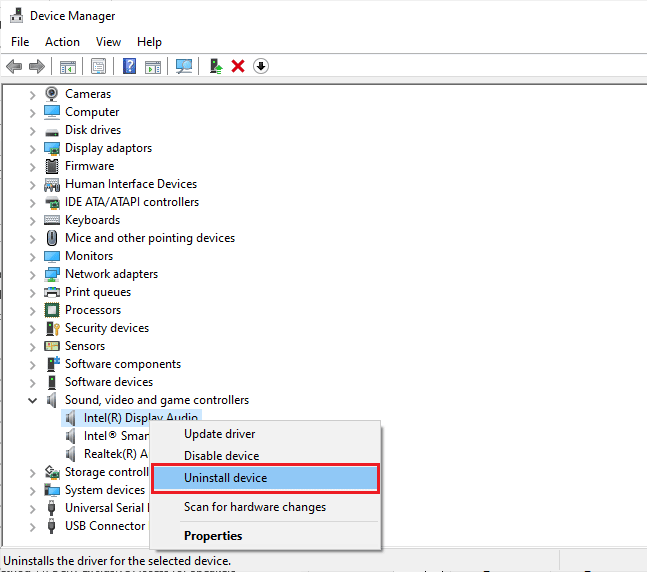
After reinstalling the audio drivers, check if you can fix the issue in question.
Method 8: Roll Back Audio Driver Updates
Sometimes the current version of the audio drivers can cause some kind of audio conflicts, in which case you need to restore the previous versions of the installed drivers in order to fix the problem with the front panel audio jack not working. This process is called driver rollback and you can easily roll back your computer drivers to their previous state by following our guide How to roll back drivers in Windows 10.
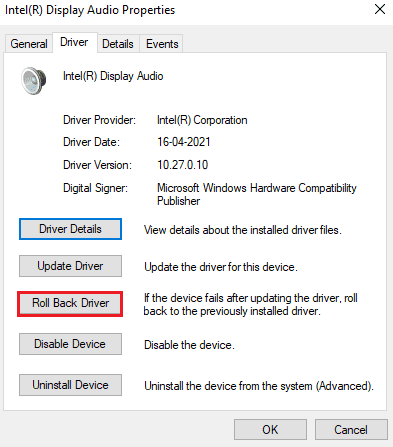
Wait until the previous versions of the drivers are installed on your Windows 10 PC. After that, check if you have fixed the problem with the front audio jack.
Pro Tip: Use the audio jack on the back
If all the methods mentioned above don't work for you, you can try plugging in the audio jack that is on the back of your device. Every computer has an audio jack on the front, but there are also audio jacks that are directly connected to the motherboard. You may also have hardware issues with the front audio jacks. If this is the case, try checking the audio jacks on your motherboard to see if the audio issue is only occurring on the front jack. You may need to have your computer manufacturer fix it or take your device to an authorized service center. Locate the green headphone and pink microphone audio jack and try connecting your device to it. They will be connected and you will be able to use headphones or headphones without any problems.
***
Now you would fix the problem with the front audio jack not working. If you are stuck in the middle of the troubleshooting process, let us know in the comments section. Feel free to contact us for additional questions.