Fix error in wsclient.dll in Windows 10
WSClient.dll, also known as Window Store Licensing Client, is a type of DLL (Dynamic Link Library) file. A DLL file is a manual which means they store information and provide instructions already entered for the respective executables. The essence of the invention of this type of files is to save space when allocating memory between like-minded programs and to run your computer efficiently. It is developed by Microsoft as system files for the Windows operating system and is designed with a set of driver procedures and functions. No technology is perfect. They develop better after exposure to their problems. This concept now applies to the WSClent.dll error as well. Hence, this guide will help you learn more about what the WSClient.dll error is and how to fix it.
How to fix wsclient.dll error in Windows 10
While WSClient.dll helps to be efficient, sometimes they are also vulnerable. If a shared DLL file has been corrupted or gone missing, it generates various runtime error messages that are triggered when trying to load or start Windows. Such error messages are listed below.
- Access Violation at address - WSClient.dll.
- Cannot find WSClient.dll.
- Cannot find C:WindowsSystem32WSClient.dll.
- Cannot register WSClient.dll.
- Unable to start Windows. A required component is missing: WSClient.dll. Please install Windows again.
- Failed to load WSClient.dll.
- The application has failed to start because WSClient.dll was not found.
- The file WSClient.dll is missing or corrupt.
- This application failed to start because WSClient.dll was not found. Reinstalling the app may fix the issue.
There are various reasons such as using an older version of Windows and drivers, malware infection, bad sector on the media, accidental deletion of WSClient.dll, and more. Hence, the solutions to resolve such errors are given below. Try each upcoming method until you find your potential solution.
Method 1: Update Windows
Windows Update is the first solution for any file-related errors. This certainly applies to the error in wsclient.dll. Thus, it is necessary to check if the Windows operating system is running smoothly. Bugs and bugs should always happen in Windows OS as they are inevitable. To fix this, Microsoft often releases an updated version of the OS fixing these bugs and bugs. In addition, they also improve security features to protect the system from cybersecurity related issues and compatibility attributes. To learn more about Windows Updates, read our guide What is Windows Update.
If you are running an older version of Windows 10 and Windows 11, please see our How to Download and Install the Latest Windows 10 Update and How to Download and Install Windows 11 Updates guide respectively and update your respective OS.
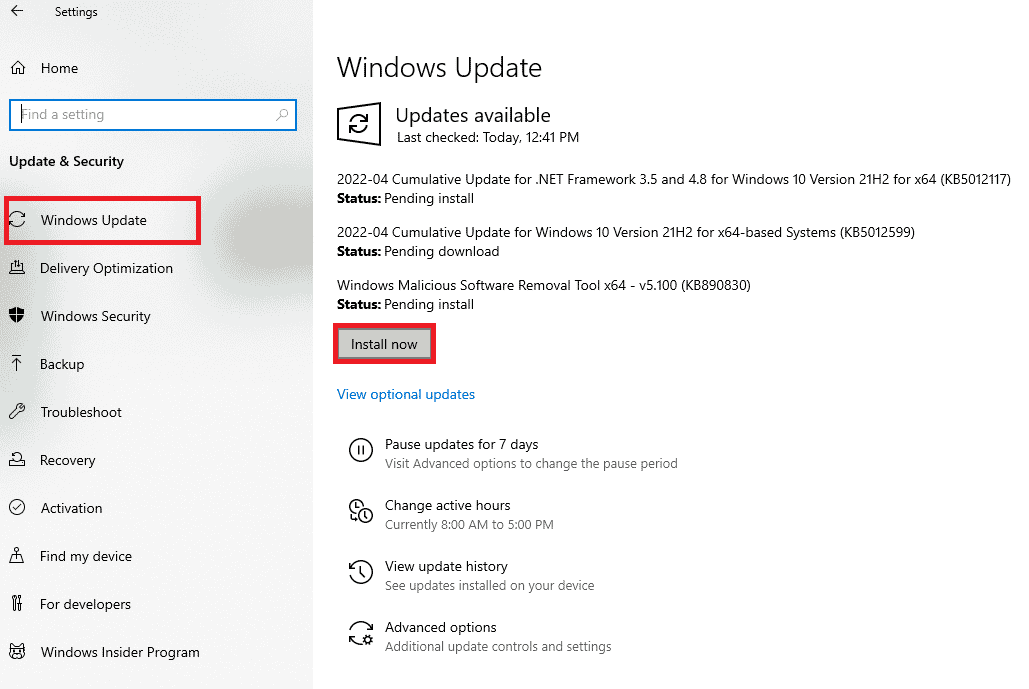
Finally, check if the missing wsclient.dll error is resolved.
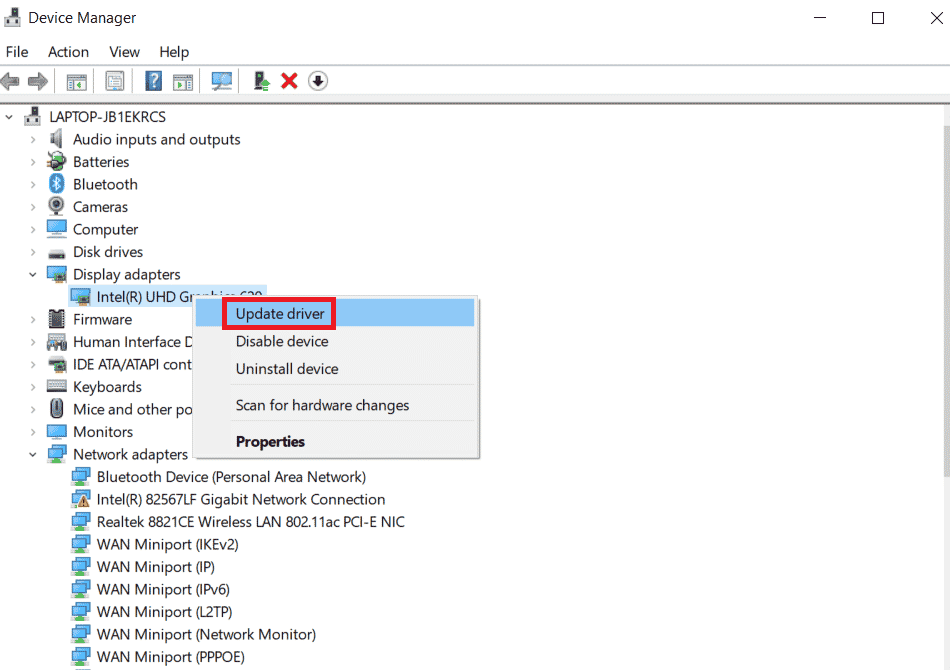
Method 2: Update device drivers
The graphics driver is an important function of the computer. GPU manufacturers often release updates and features. So, update your graphics driver to fix the WSClient.dll loading error and see if that update works. Read our guide on 4 Ways to Update Graphics Drivers in Windows 10 to do the same.
Method 3: Run a malware scan
Error loading WSClient.dll can occur if any malware is present on your system. Malicious content files can unexpectedly disrupt your system. One such way is to corrupt files stored in Windows. Hence, it is extremely important to scan your computer for any malware and destroy it as soon as possible. To run malware, see How to Run a Virus Scan on My Computer and follow the instructions in that article.
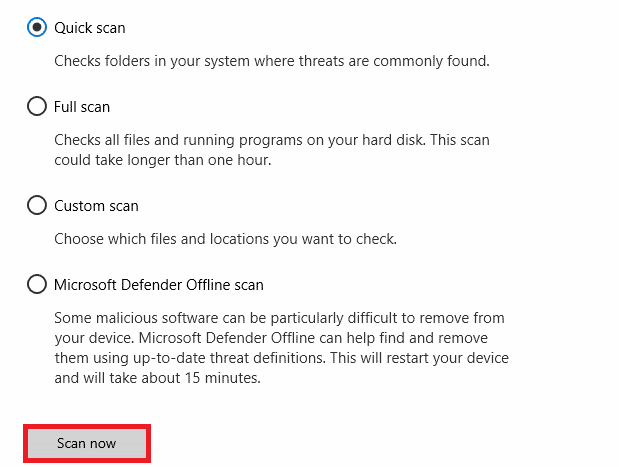
Unfortunately, if you detect the presence of such malware during a scan, be sure to follow the steps in our How to Remove Malware from Your PC in Windows 10 guide and eliminate it immediately.
Method 4: Run the WSReset Command
Executing the WSReset command is a fairly simple method. This is because performing WSReset can resolve the problem of an error in wsclient.dll when starting Windows. So follow the steps given below and follow the WSReset technique.
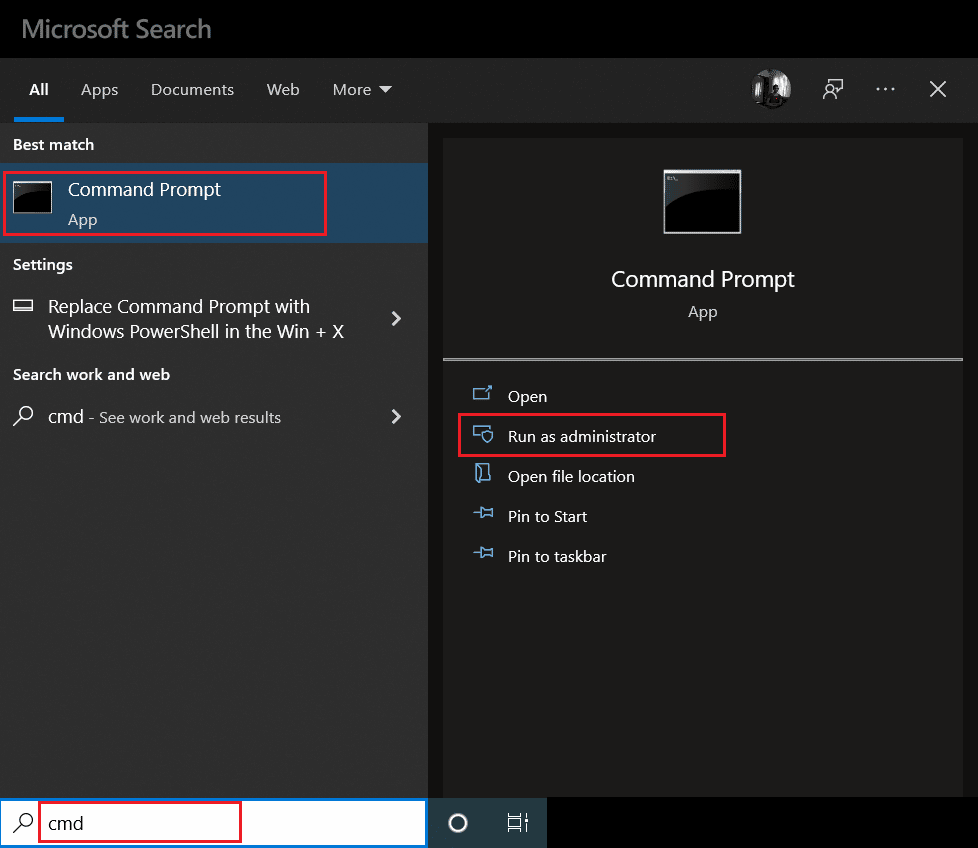
1. Press the Windows key and type cmd, then click "Run as Administrator" to launch Command Prompt with administrator privileges.

2. Type the wsreset command and press the Enter key to execute it.
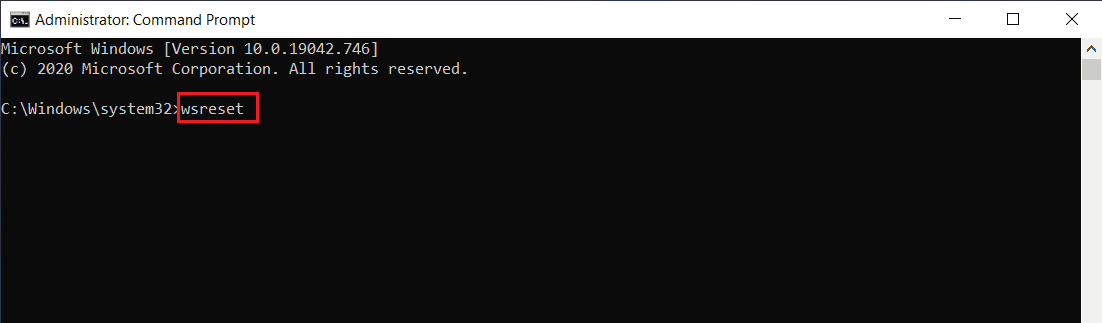
3. Wait a few seconds for the process to complete. Hopefully the missing wsclient.dll error should be fixed by now. If not, try one by one the other following methods given below.
Method 5: Disable WSRefreshBannedAppsListTask
One way to resolve the wsclient.dll error is to disable the WSRefreshBannedAppsListTask task through the Task Scheduler program. Here's how to do it.
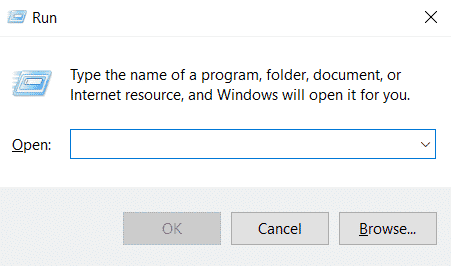
1. Press the Windows + R keys at the same time and launch the Run dialog box.
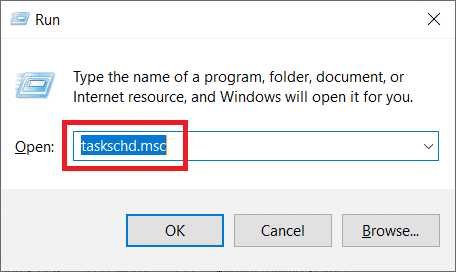
2. Type taskschd.msc and press the Enter key.
3. In the Task Scheduler window, navigate to the following path and expand it.
Task Scheduler Library > Microsoft > Windows > WS
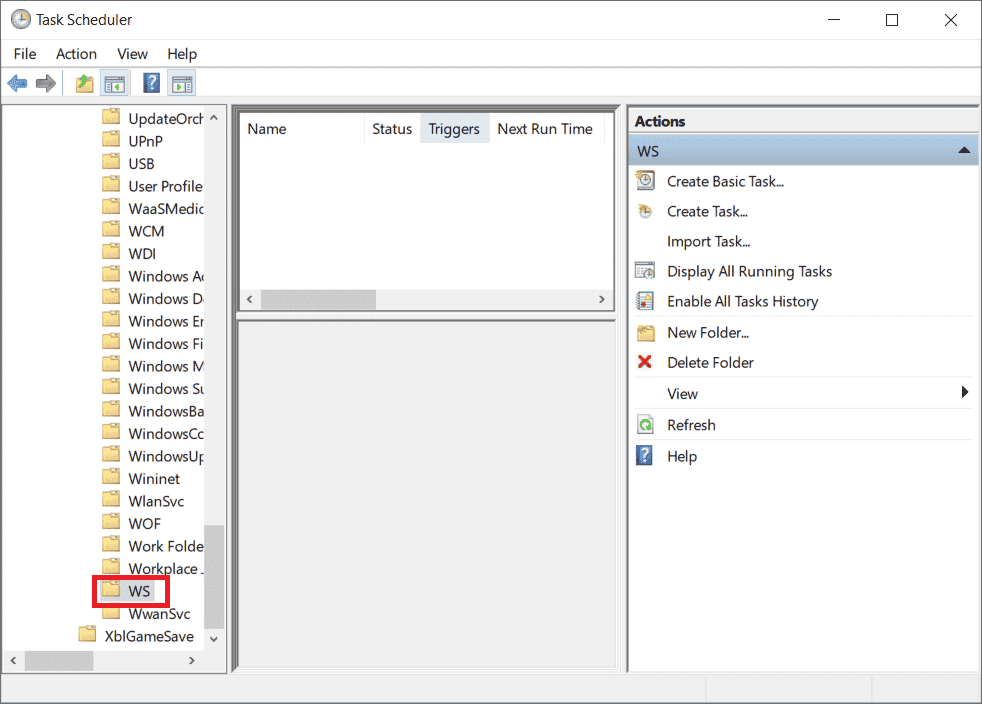
4. Right-click the WSRefreshBannedAppsListTask task file and select Disable from the context menu.
5. After disabling this task, check if the issue is resolved Loading WSClient.dll. Also, keep in mind that if you don't have this particular task in the WS folder, you can skip this solution.
Method 6: Register back the problematic DLL file
Sometimes a problem with DLL (Dynamic Link Library) files can cause certain errors. In this case, you need to re-register the problematic DLL file. You are well aware of the fact about registry cleaning. It is a built-in utility tool present in the OS itself that is used to clean junk files, identify the culprit of PC slowness and fix it, and finally fix registry problems. If you have administrator rights on your PC, then this method can be done very easily. Here's how to do it.
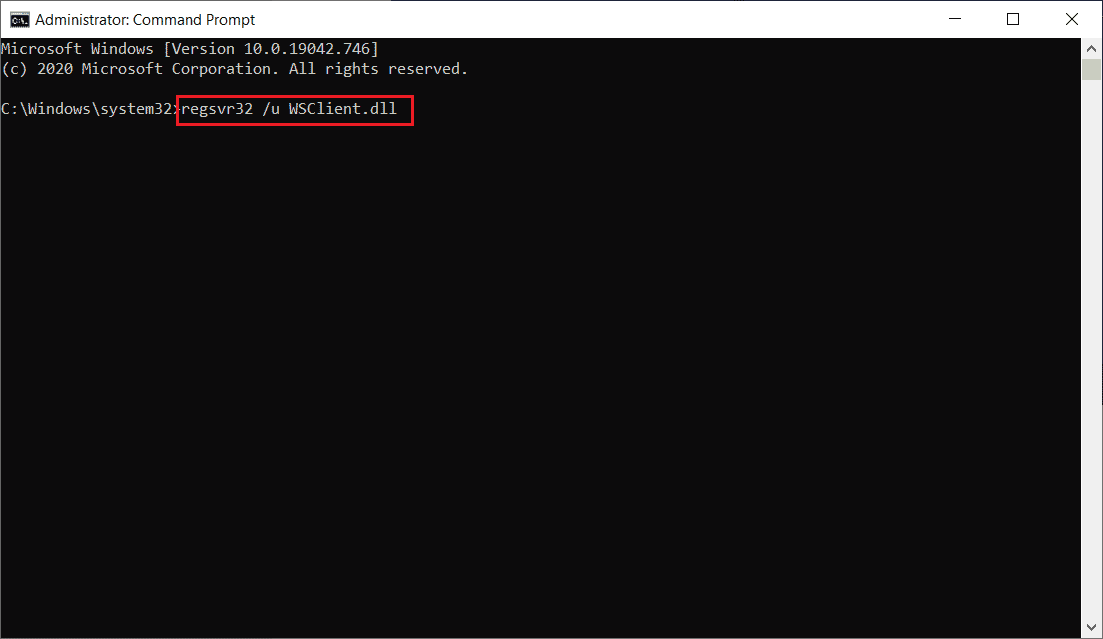
1. run the command prompt as an administrator.
2. Then type the following command and press the Enter key to execute it.
regsvr32 /u WSClient.dll
3. Then type this command and press the Enter key.
regsvr32 /to WSClient.dll
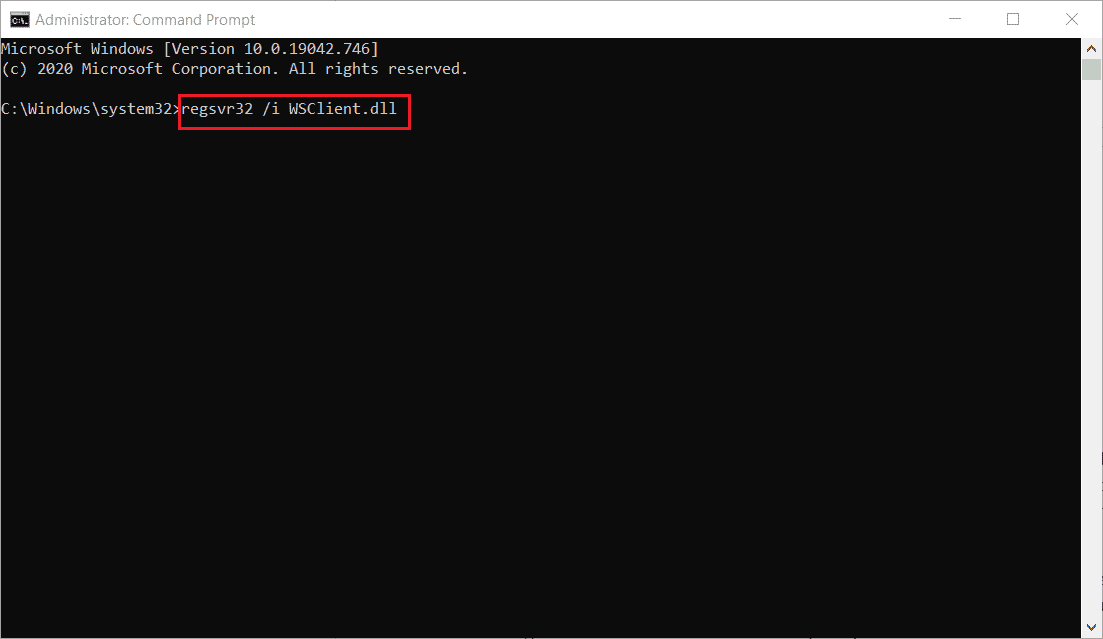
4. Once these commands are executed, you are done. Hopefully this method fixed the error in wsclient.dll. If not, try next.
Method 7: Repair System Files
Whenever you have a missing or corrupted file, your system doesn't work properly. This is because the corruption, as the name suggests, stops causing crashes like Windows crash on your PC if not fixed soon. Here, if wsclient.dll is missing issue, it is highly recommended to perform SFC and DISM scan process. SFC (System File Checker) or DISM (Deployment Image Servicing and Management) are two utility tools present in the Windows OS that allow users to repair missing or corrupted files by simply executing certain commands through Command Prompt in Administrator mode. To perform this method, check out our guide to restoring system files in Windows 10 and follow the instructions given in it.

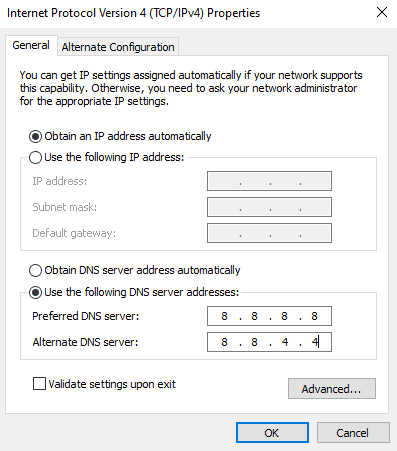
Method 8: Change the DNS Server Address
Several users reported that the error in wsclient.dll was resolved when they changed their DNS server. This is because the DNS (Domain Name System) plays a significant role in causing this problem. This server is responsible for efficient communication. However, sometimes the DNS server you use can slow down for various possible reasons and create a vulnerable state for a DLL (Dynamic Link Library) file such as WSClient.dll. In such cases, you need to change the address of your DNS server. Read our guide on how to change DNS settings in Windows 10 to do the same. If you are using Windows 11, follow the guide How to change DNS server settings in Windows 11. After making the appropriate changes to your DNS server, you need to switch to Google DNS or OpenDNS to completely resolve the error. To do this, read our guide on how to switch to OpenDNS or Google DNS on Windows.
Method 9: Reinstall the Microsoft Visual C++ Distribution Package
If you are using an outdated version of the Microsoft Visual C++ Distribution Pack, you may encounter an error loading WSClient.dll in wsclient.dll. Therefore, you need to update this software or uninstall it completely and then install it again with the latest version. Both methods work quite well, however it is recommended to reinstall the Microsoft Visual C++ Redistribution Package by following the steps below.
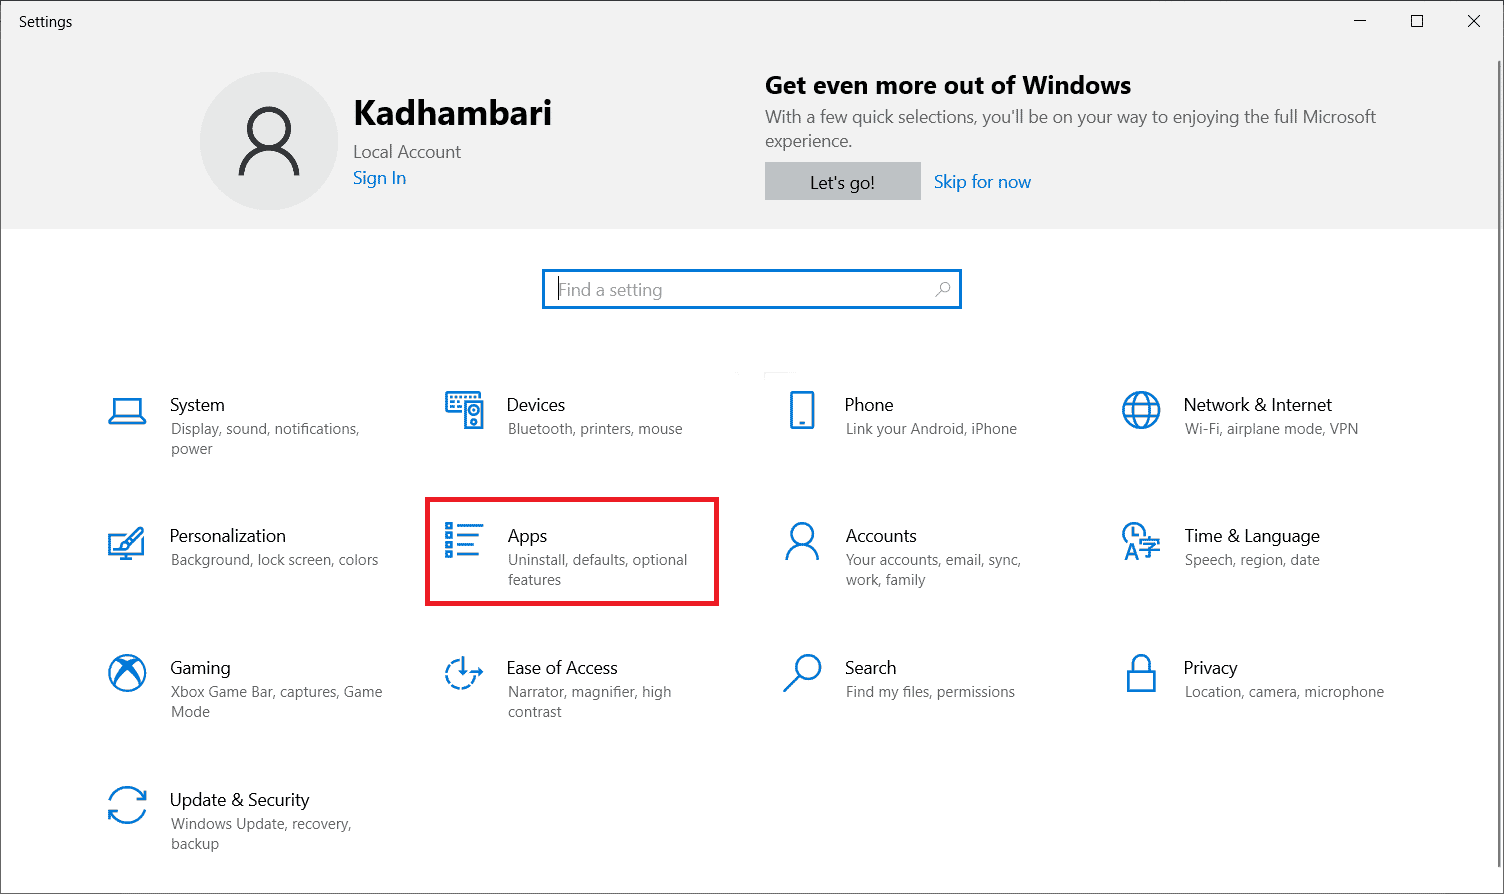
1. Press the Windows key + I at the same time to open Settings.
2. Click on Application settings.
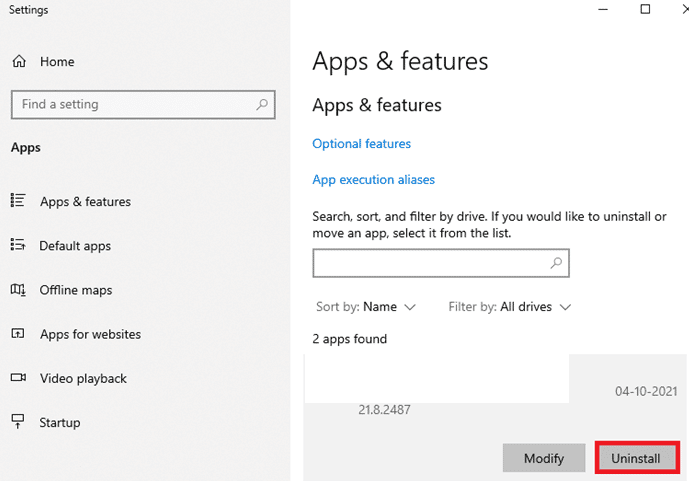
3. Now select Apps & features from the left pane. Then browse and locate each Microsoft Visual C++ program and select Uninstall.
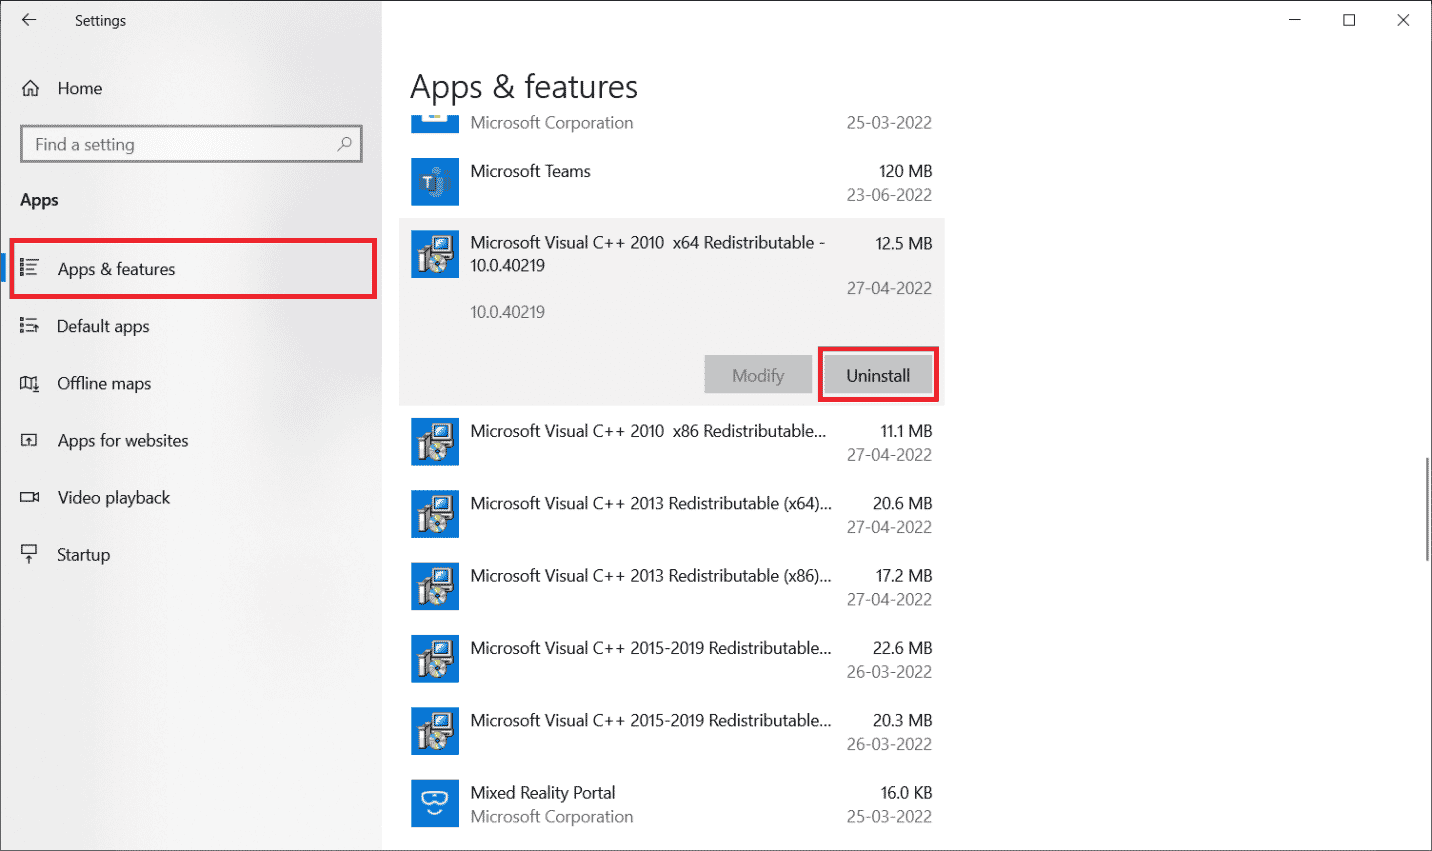
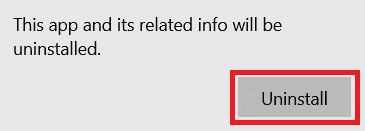
4. Finally, click "Delete" in the confirmation prompt.
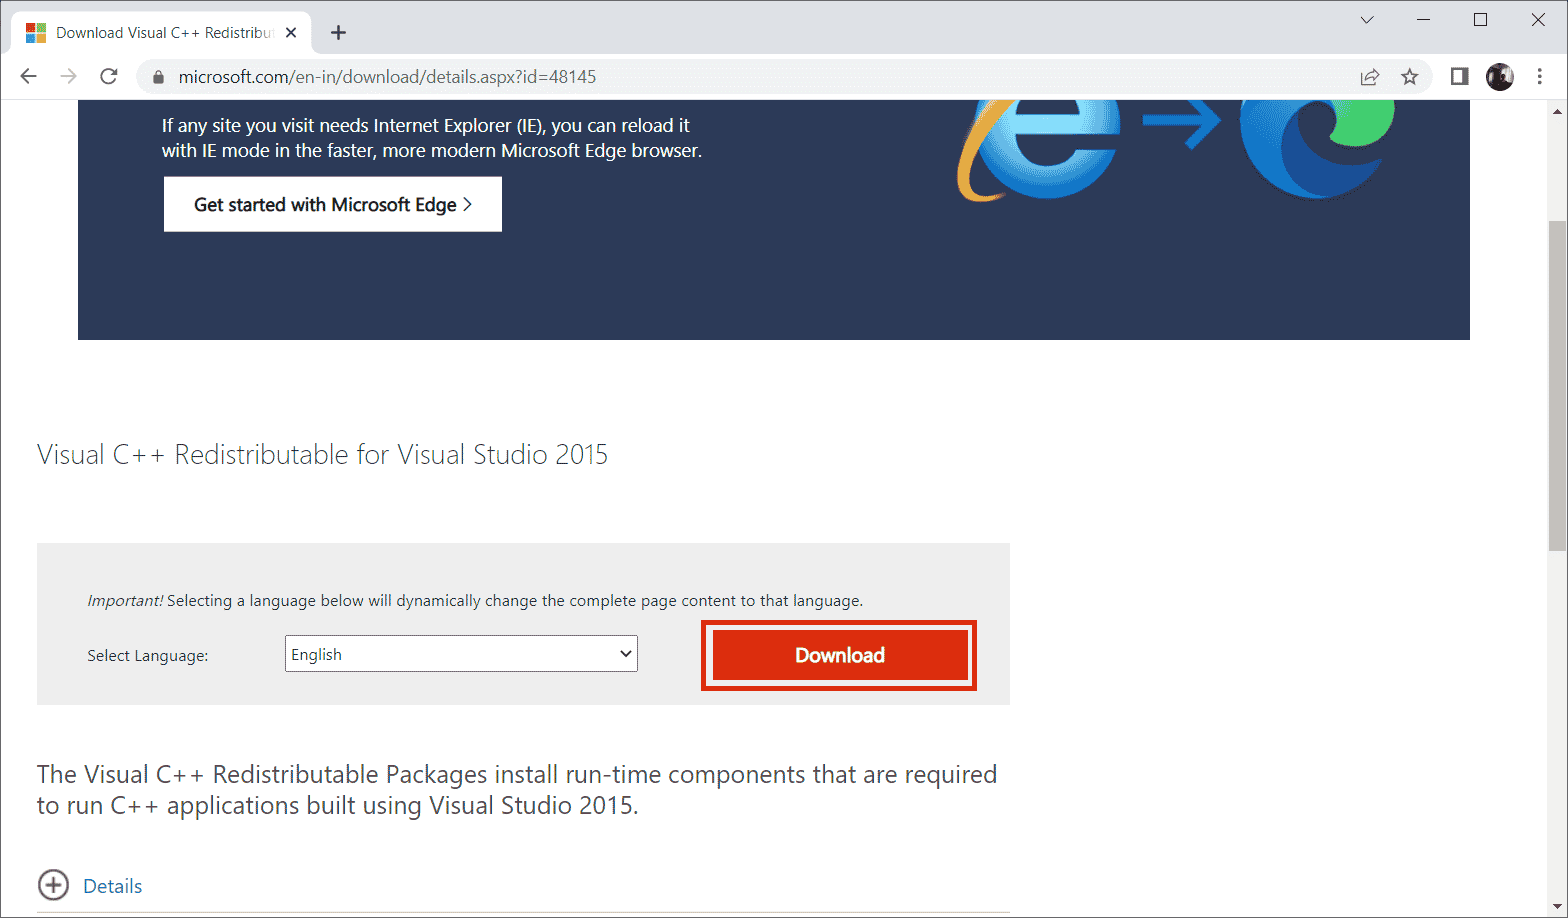
To install the Microsoft Visual C++ programs back on your computer, follow these steps.
5. Go to the official Microsoft web page. Then select "Language" and click the "Download" button to download the latest version of the Microsoft Visual C++ Runtime.
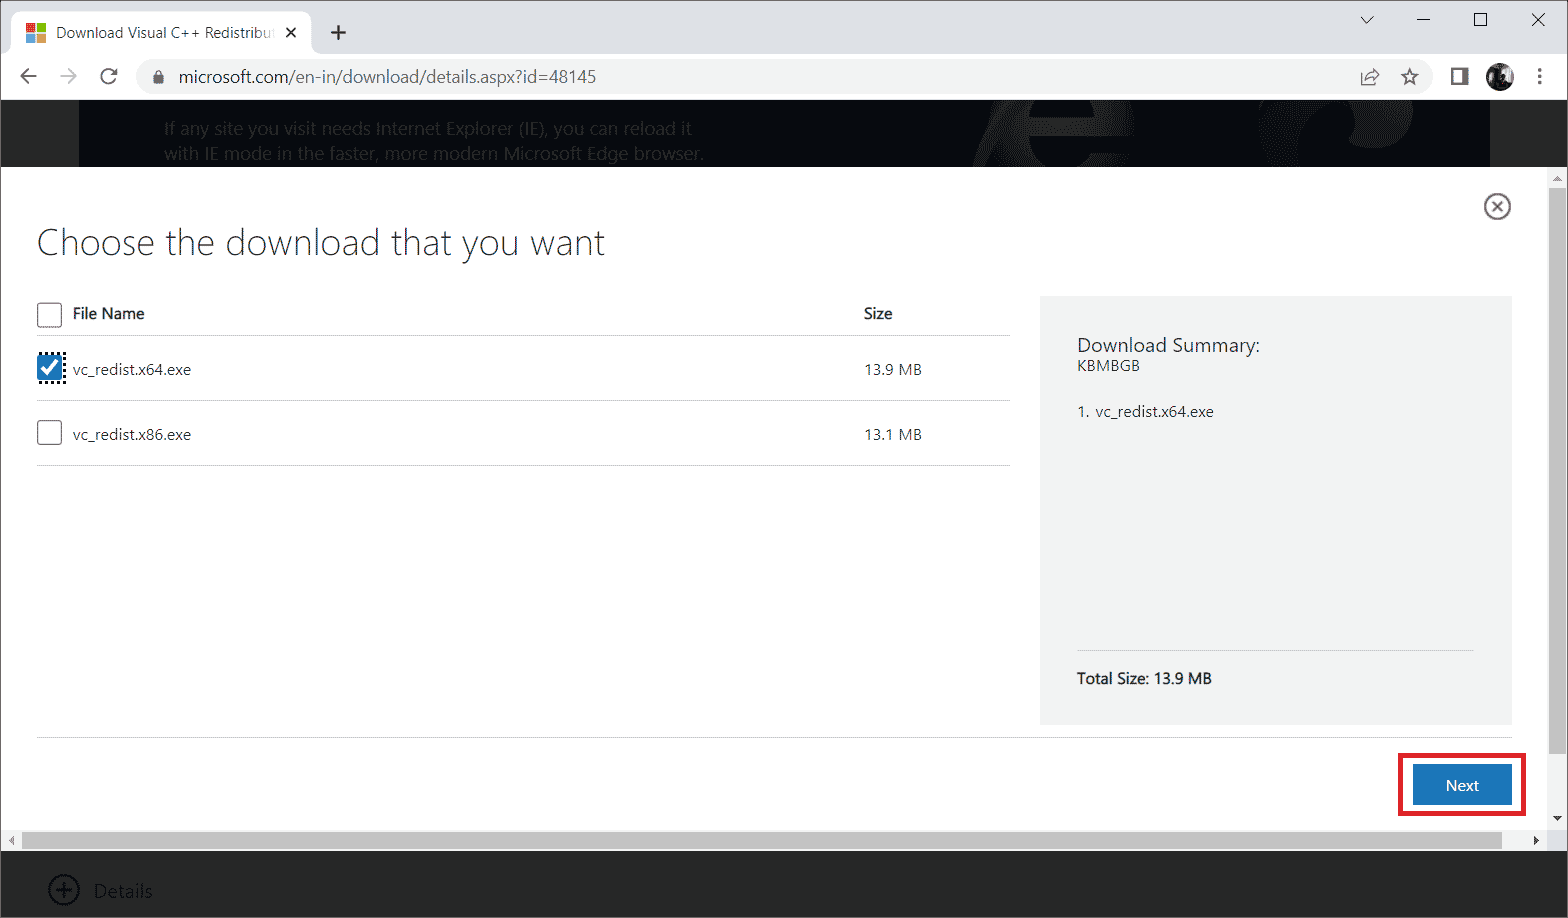
6. Select the type of file you want to upload and click the "Next" button to complete it.
7. Double click the downloaded setup file and open it to start the installation process.

8. Select the I agree to the license terms check box and select Install to start the installation.
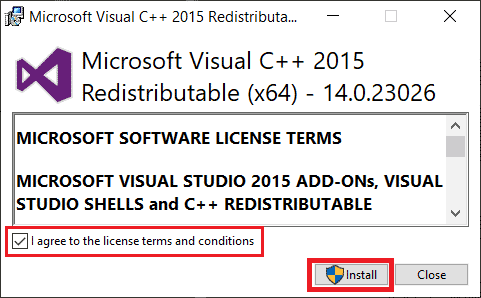
9. Follow the instructions on the screen to continue and complete the installation.
10. After that, restart your computer for the changes to take effect. Then check if the error in wsclient.dll is resolved.
Method 10: Reinstall a Specific Program
If a program or software cannot be opened or loaded because the wsclient.dll file is missing, uninstall the program as described above and reinstall it again to resolve the issue. This solution may seem strange, but it can easily work.
1. Press the Windows key, type apps and features, and click Open.
2. Select the conflicting program and click Remove.
3. Click Uninstall again to confirm the same and follow the on-screen instructions to complete the uninstall process.
Method 11: Manually download WSClient.dll
Sometimes you need to manually load WSClient.dll. This is because using an older version of WSClient.dll can cause an error and therefore require manual intervention. Here's how to download WSClient.dll yourself.
1. Go to the official website of WSClient.dll.

2. On the main page, you will find many different versions. Therefore, depending on your operating system, select 32-bit or 64-bit respectively. Then choose the latest version along with it to ensure good performance.
Note. Keep in mind that some programs you use may require an older version to work. Therefore, it is recommended to check and download the installation file according to your requirements.
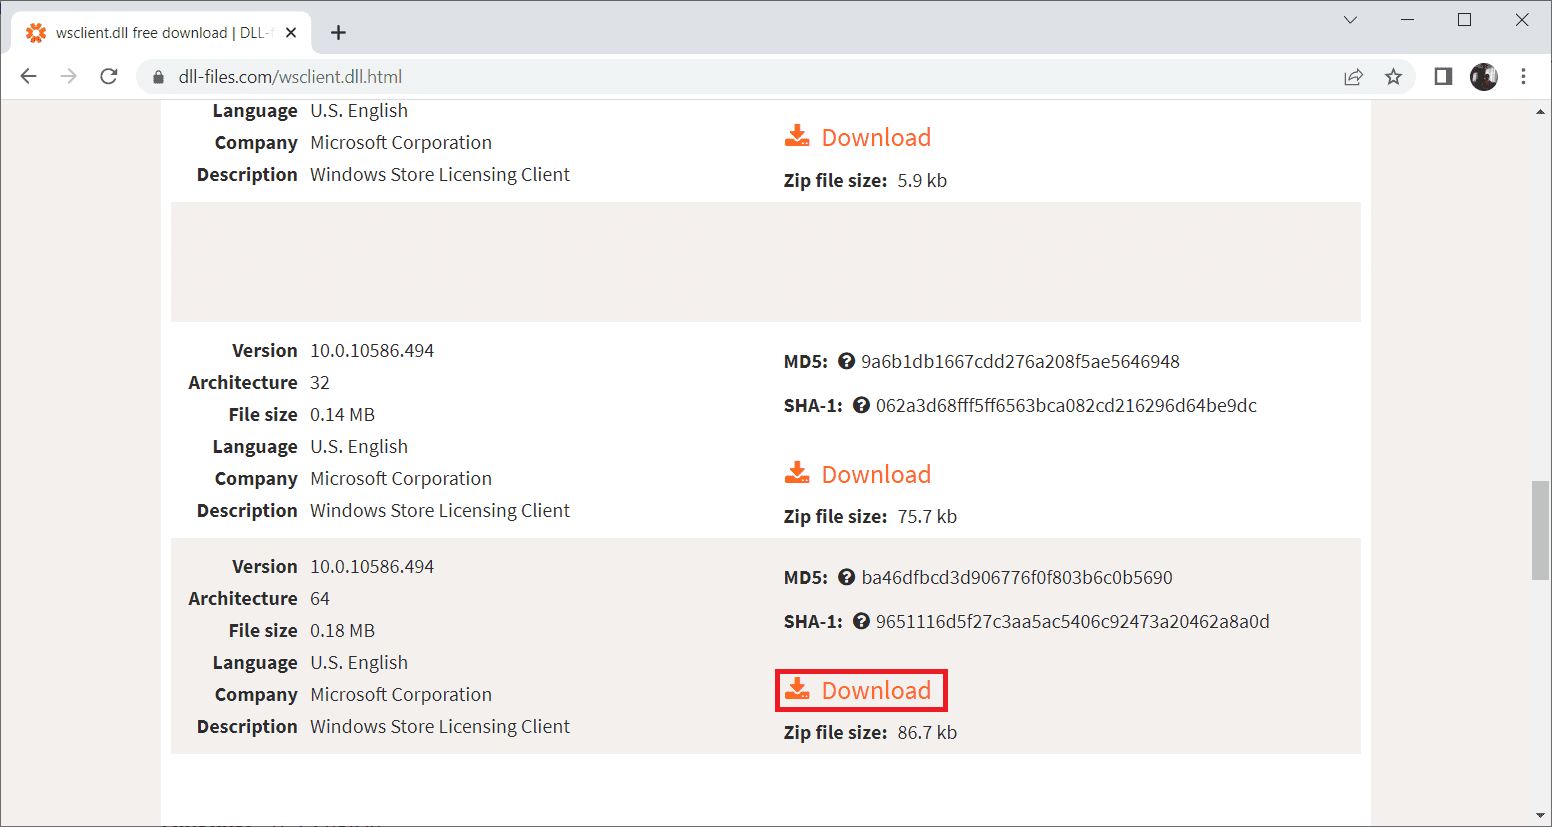
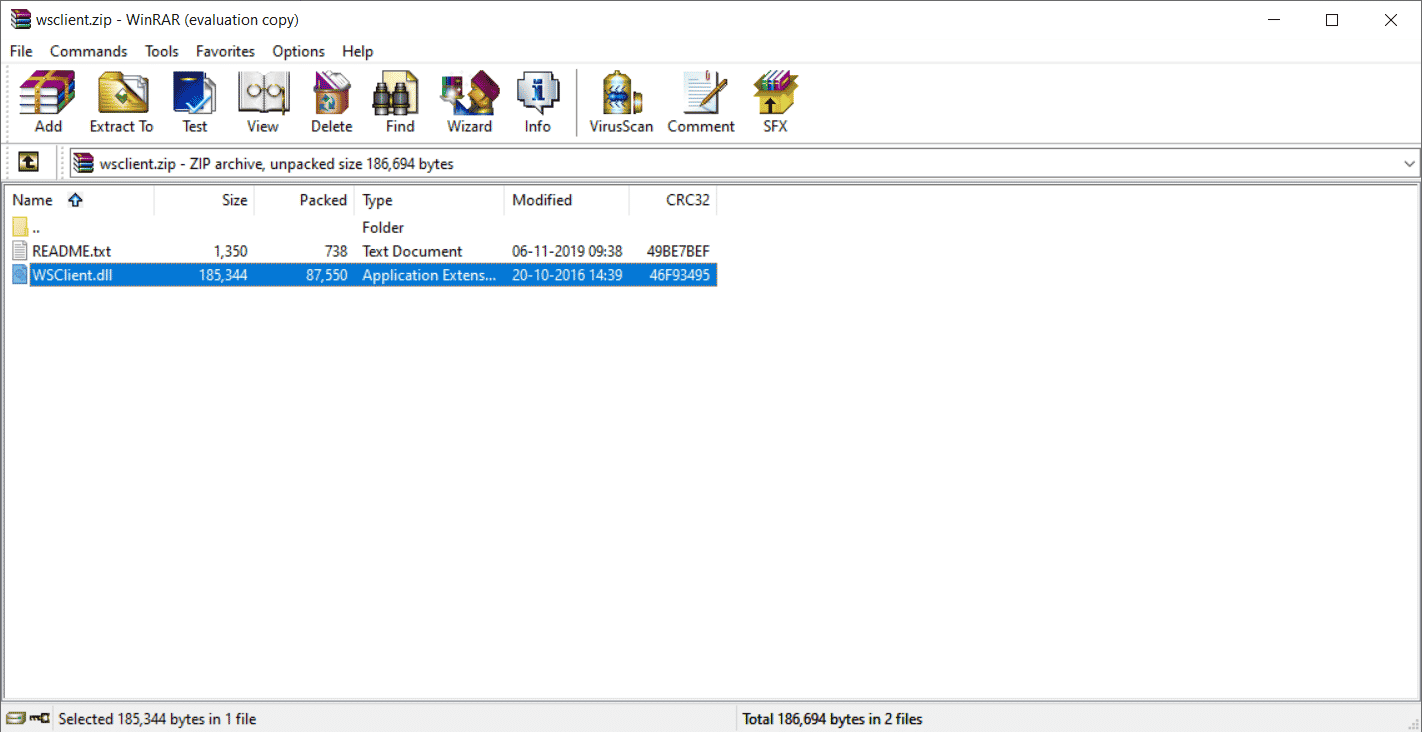
3. After downloading the installation file for the correct version, double-click the wsclient.zip folder and open it.
4. Here, extract the DLL file to the desired location on your computer.
5. Finally, place the extracted DLL file in the path of the program that is requesting the file.
6. After that, restart your computer to save your changes.
Note. Be careful and download the correct version for the effective functioning of the DLL file.
Check if the problem with loading WSClient.dll is resolved.
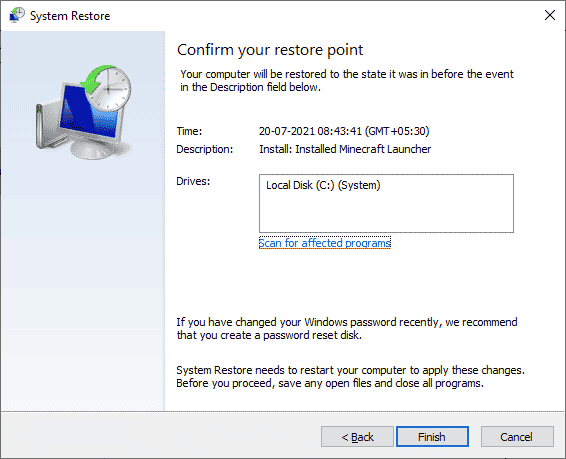
Method 12: Perform a System Restore
If none of the above methods worked, then the last thing you need to do is perform a system restore. This option will help you restore the entire state of your computer to its previous state. This method will certainly help you because Windows can behave strangely as there are many applications and programs present in the operating system. To learn more about System Restore Point and System Restore, check out our guide How to Create a System Restore Point in Windows 10 and How to Use System Restore in Windows 10 respectively.
***
Once your PC has been restored to its original version, check if the wsclient.dll missing issue is resolved. I hope you have already learned what the WSClient.dll error is and how to fix the error in wsclient.dll. Please feel free to contact us with any questions or suggestions through the comment section below.