Fix Epson Scanner Cannot Communicate on Windows 10
Millions of corporate offices and home businesses use Epson scanners for document processing. These Epson scanners are available as standalone or integrated models with a printer. Among many scanners in the world, Epson printers are known for their reliability and functionality when scanning documents. Although these scanners have many advantages, few users complain that Epson scan cannot communicate with the scanner due to a problem with Windows 10. If you are also facing the same problem, we will help you fix the Epson Scanner Communication Error with effective troubleshooting techniques. malfunctions. So, keep reading to solve the problem that Epson scanner cannot communicate.
How to Fix Epson Scanner Can't Communicate on Windows 10
In this section, we have compiled a list of reasons why Epson scan cannot communicate with the scanner on your Windows 10 PC. Analyze them carefully to choose the right troubleshooting method.
- The scanning software is running without administrator rights. Therefore, the correct connection was not established.
- The network adapter cannot communicate effectively with the scanner.
- Several other background tasks are interfering with the scanner.
- Some important background services do not work on PC.
- Files on your computer are damaged or damaged.
- The presence of malware or viruses.
- You are using an outdated version of the Windows operating system.
- A proxy connection is interfering with scan operations.
- Scanner drivers are incompatible.
- An overprotective antivirus or firewall program is interfering with features.
Here are some effective troubleshooting methods to help you fix Epson Scanner Communication Error on Windows 10 PC.
Method 1: Basic Troubleshooting Methods
Following are a few basic methods that you can follow;
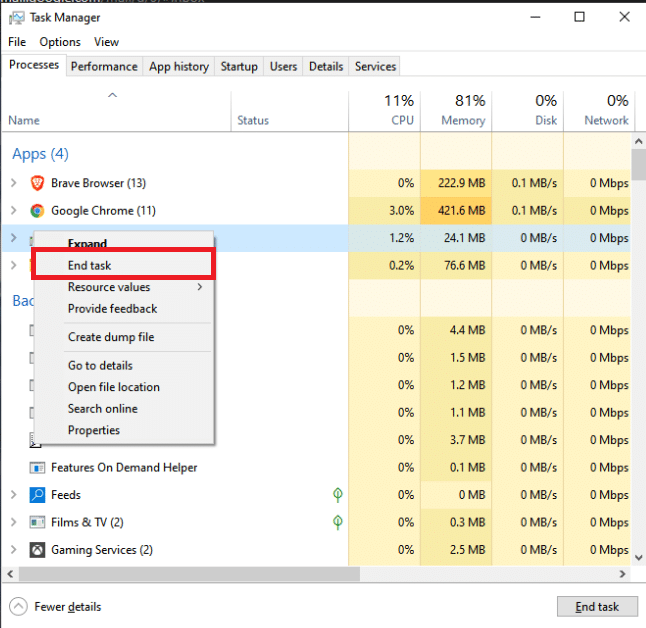
1A. Close background tasks
Several users have confirmed that Epson Scanner Communication Error can be resolved by closing all background tasks running on your PC. To complete a task, follow our guide How to complete a task in Windows 10 and proceed according to the instructions.
After closing all background processes, check if you can use the Epson scanner without problems.
1B. Switch to short USB cables
Although many technicians suggest that devices can be connected using very long USB cables, this can result in loss of signal between the scanner and the network. If you placed the scanner in a different corner of the room, try moving it and connecting it with a short USB cable. Try this temporarily and check if it works or not. If this fixes the Epson scan can't communicate with scanner Windows 10 issue, long USB cables are the culprit.
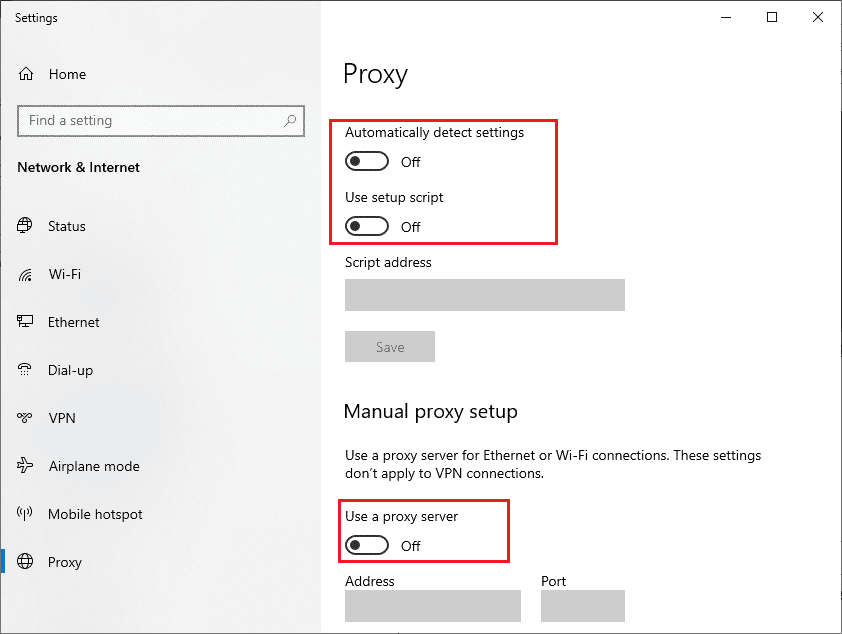
1C. Disable proxy server
Sometimes, if the network configuration on your Windows 10 computer is not suitable, you will experience communication errors with Epson scanners. If you have installed any VPN service or use proxy servers on your PC, please read our guide "How to disable VPN and proxy server in Windows 10" and follow the steps in the article.
After disabling the VPN client and proxy servers, check if you have fixed the communication error of Epson scanners. However, if you are facing the same problem, try connecting to a mobile hotspot.
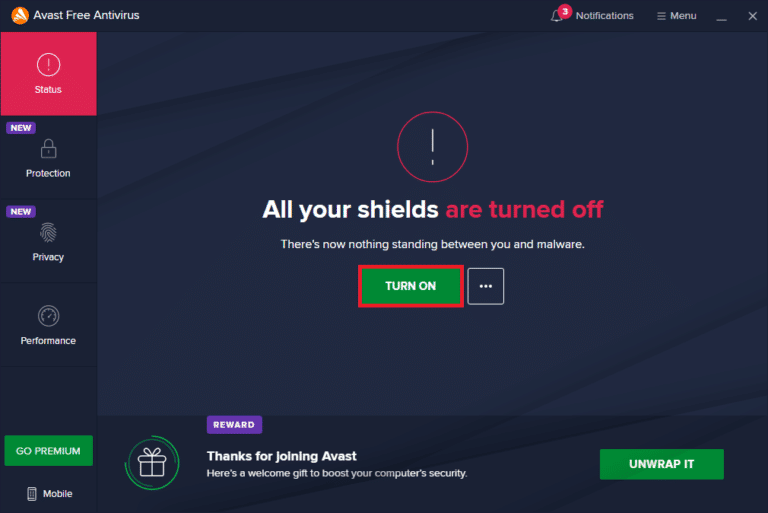
1D. Temporarily disable your antivirus (if applicable)
Your antivirus program may mistakenly block any updated features of Windows applications such as Epson. Several Windows users have identified many compatibility issues. They are difficult to tolerate and fix. It is recommended to temporarily disable any built-in or third-party anti-virus software in order to resolve the communication error of Epson scanners. Read our guide on how to temporarily disable your antivirus in Windows 10 and follow the instructions to temporarily disable your antivirus program on your PC.
1E. Update Windows
You can also resolve Epson scanner communication errors on your computer by updating the operating system. Always check if you have updated your Windows operating system and if any updates are pending, use our guide to download and install the latest Windows 10 update.
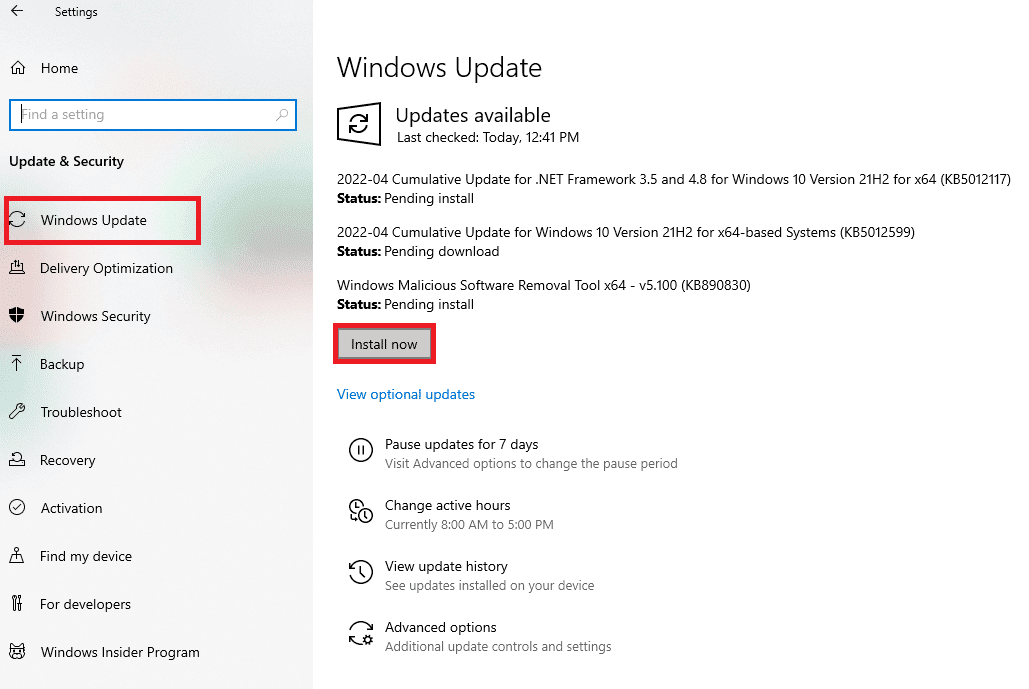
After updating the Windows operating system, check if you can connect to the scanner.
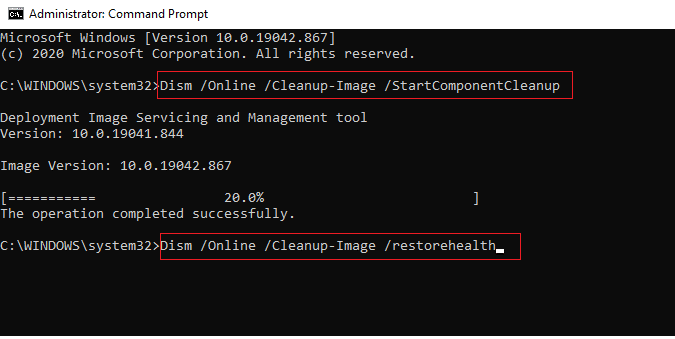
1 floor Restore system files
If you have corrupted system files in your Windows operating system, your computer may face many problems with internet connection. If you've been experiencing communication errors with Epson scanners recently, chances are that the files on your computer have been damaged or corrupted. Windows 10 PC has built-in recovery tools like SFC (System File Checker) and DISM (Deployment Image Servicing and Management) to help you fix any corrupted files. Read our guide to restoring system files in Windows 10 and follow the steps to repair any corrupted files.
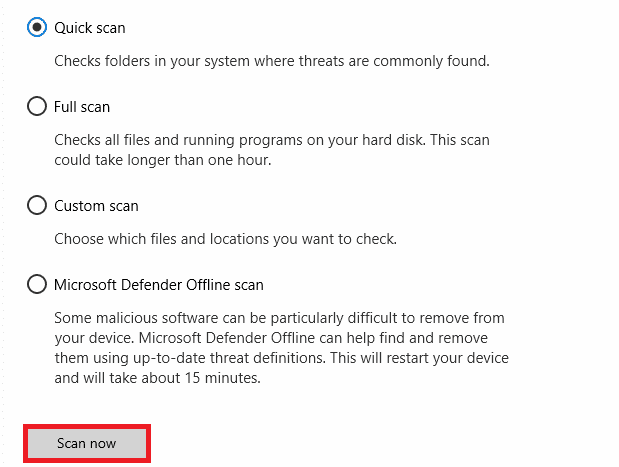
1g Run a malware scan
The presence of viruses causes conflicts and errors, such as communication errors of Epson scanners. So, install reliable antivirus software on your computer and run a full scan. If you don't know how to run a malware scan, check out our guide "How do I run a virus scan on my computer?". will help you do it.
Also, if you want to remove malware from your computer, check out our guide on how to remove malware from your computer in Windows 10.
Method 2: Run the scanner software as an administrator
You should first try running the scanning application with administrator rights. Some applications and programs that require input from any external source will require administrator rights. Hence, follow the below steps to do the same.
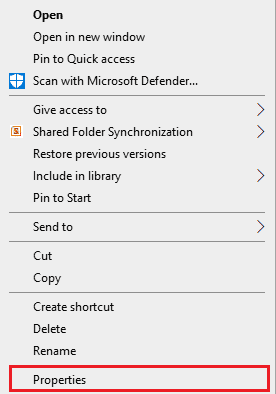
1. Right-click the Epson Scan shortcut on the desktop and select "Properties".
2. Then go to the "Compatibility" tab and check "Run this program as an administrator".
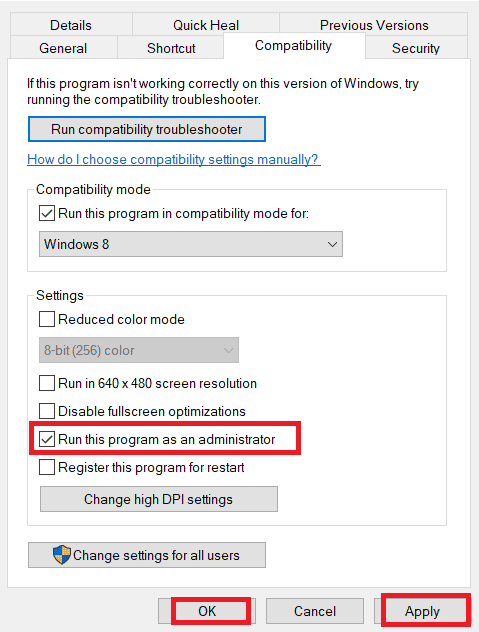
3. Finally, click "Apply" > "OK" to save the changes.
Method 3: Run the Network Troubleshooter
To fix various internet connection issues, you can use the built-in tool provided on Windows 10 PC when needed. You can analyze and diagnose common network-related problems with the Windows Network Troubleshooter. This is a systematic process that, when followed step by step, will help you fix the problem with an Epson scanner that cannot transmit data. Follow our guide to troubleshoot network connection issues in Windows 10 to fix all network related issues with the Network Adapter troubleshooter.
You can use the steps in the guide to diagnose Wi-Fi, Ethernet, and all network adapter connections on your Windows 10 PC. Finally, check if you have fixed the Epson scanners communication error.
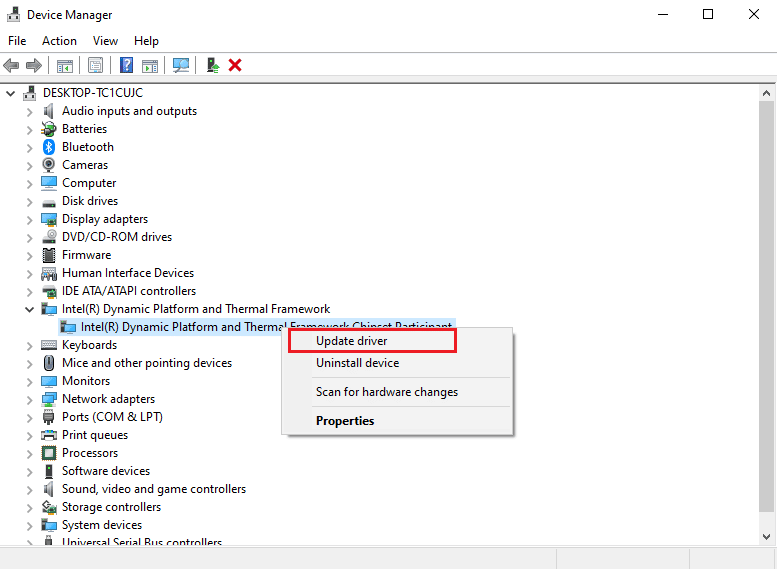
Method 4: Update scanner drivers
Device drivers establish the link between your computer hardware and the operating system. Also, faulty or corrupted drivers lead to a communication error in Epson scanners. Many users have reported that updating their WLAN drivers helped them resolve the issue. It is recommended that you update your scanner drivers to improve the reliability of your network adapters, fix compatibility issues, and resolve a communication error. Follow our guide to updating device drivers in Windows 10 to do so. Make sure you expand Image Devices as shown below.
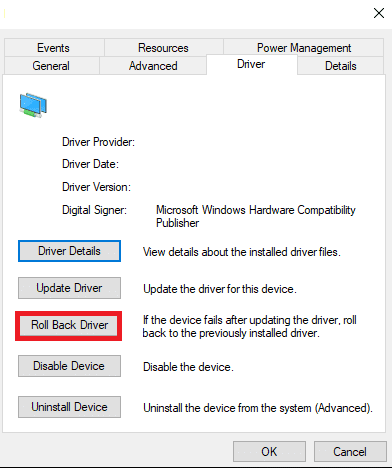
Method 5: Roll back scanner drivers
When you roll back drivers, all current versions of the hardware device will be removed and previously installed drivers will be installed on your PC. This feature will be very useful when some new driver update doesn't work with your computer. Follow our Windows 10 driver rollback guide to fix an Epson scanner communication error.
Once your Windows 10 computer has the previous version of the drivers installed, check if you have fixed the Epson scanners communication error.
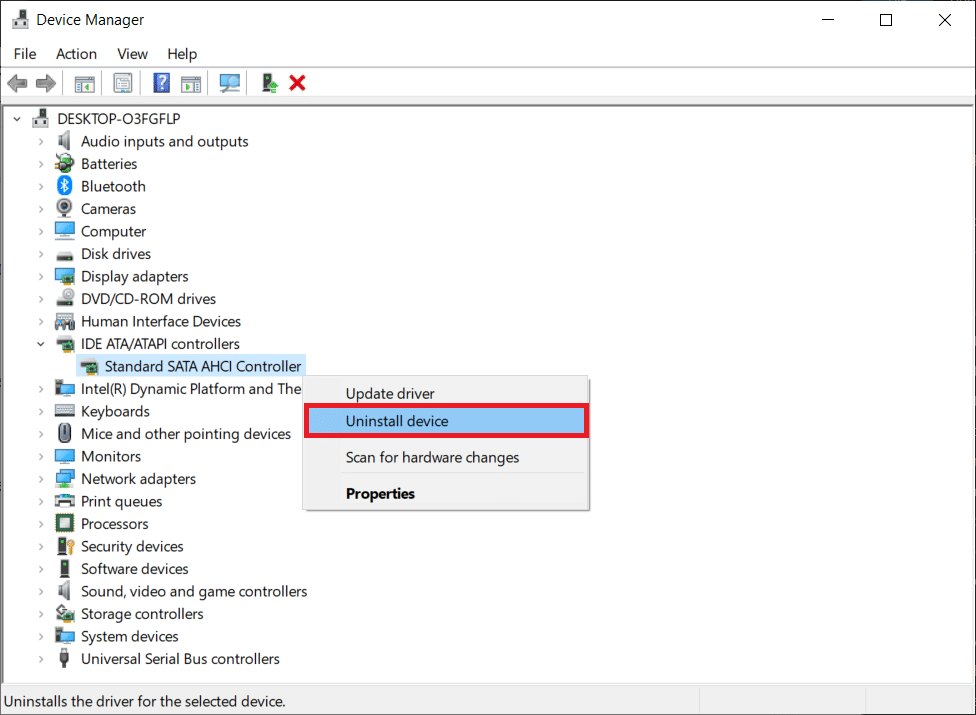
Method 6: Reinstall your scanner drivers
Incompatible drivers need to be reinstalled to fix the problem that the Epson scanner cannot communicate. You are only advised to reinstall device drivers if you cannot get any fix by updating them. The steps to reinstall drivers are very simple and you can do it with a third party application or manually. Follow our guide on uninstalling and reinstalling drivers in Windows 10 to reinstall the drivers on your Windows 10 computer. Make sure you have expanded Image Devices as shown below.
After reinstalling the scanner drivers, check if you have fixed the communication error of Epson scanners.
Method 7: Restart the Shell Hardware Detection Service
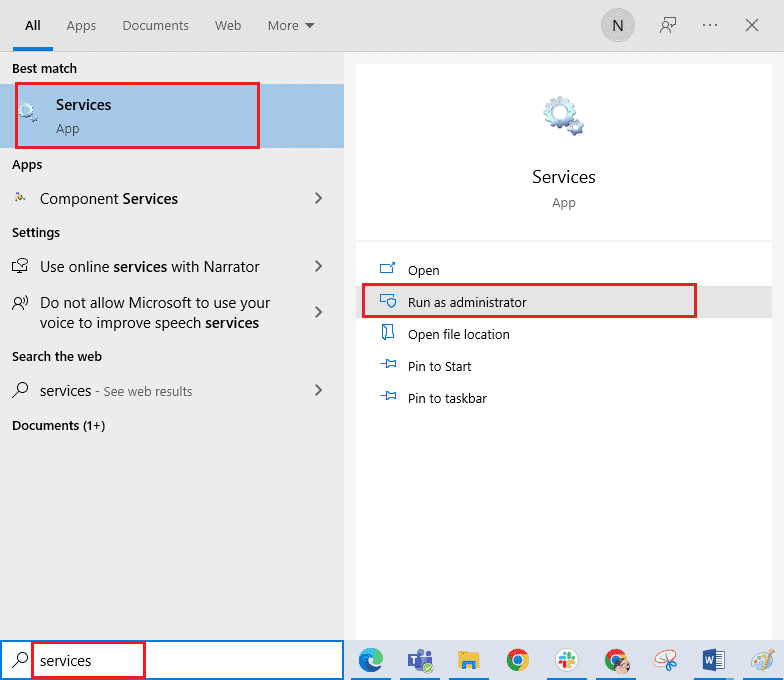
The Shell Hardware Detection Service detects whether any other hardware is connected to your system or not and discovers all scanners, storage devices, and printers connected to your device. It provides AutoPlay hardware event notifications. If this service is stopped for any reason, you will encounter the Epson Scanner Could Not Communicate error. Follow these steps to restart this service:
1. Type "Services" in the search menu and click "Run as administrator".
2. Now scroll down and double click Shell Hardware Detection Service.
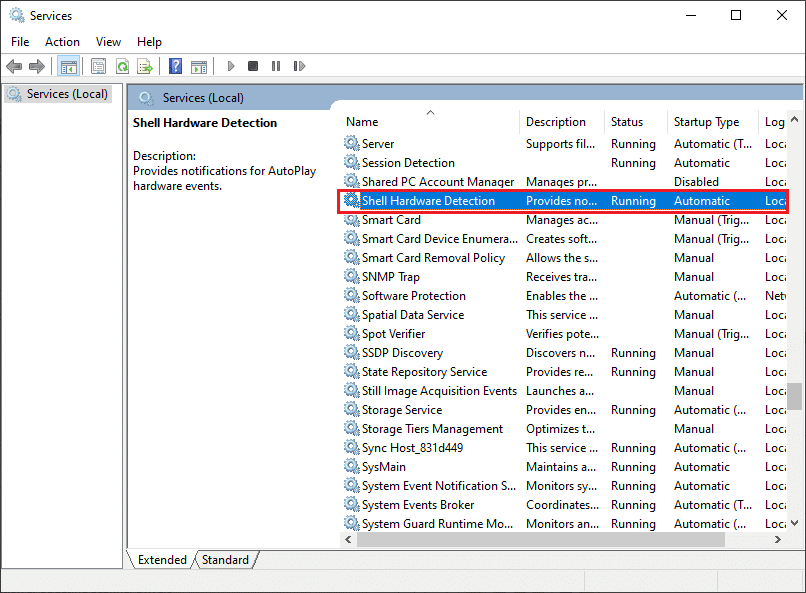
3. In the new pop-up window, set Startup Type to Automatic.
Note. If the status of the service is "Stopped", click the "Start" button. If the status of the service is "Running", click "Stop" and "Start" again.
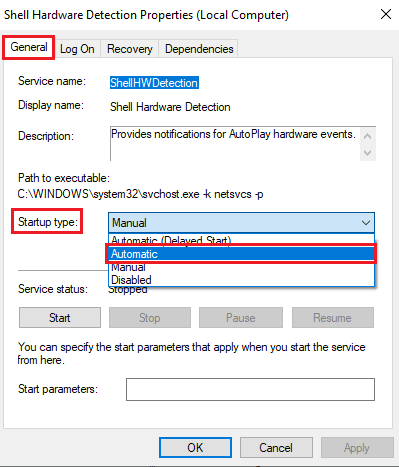
4. Click Apply > OK to save your changes.
5. Unplug the scanner from the mains and wait a while. Reconnect it back.
6. Repeat the same steps for the Windows Imaging Service and see if it works.
Method 8: Fix your wireless connection
In some cases, the Epson scanning software on your PC cannot automatically establish a connection between LAN addresses. This happens more often when you are using a wireless network. While you can find addresses in the app, this doesn't always work. Hence, manually add the address as mentioned below.
1. Enter Epson Scan Settings in the search menu. Now click Open.
2. In the scan settings, select the "Add" option under "Network Scanner Address".
Note. Make sure you select the correct scanner using the Scanner Selection drop-down menu at the top.
3. The screen for entering the address will now appear. Follow the steps below to find the correct address.
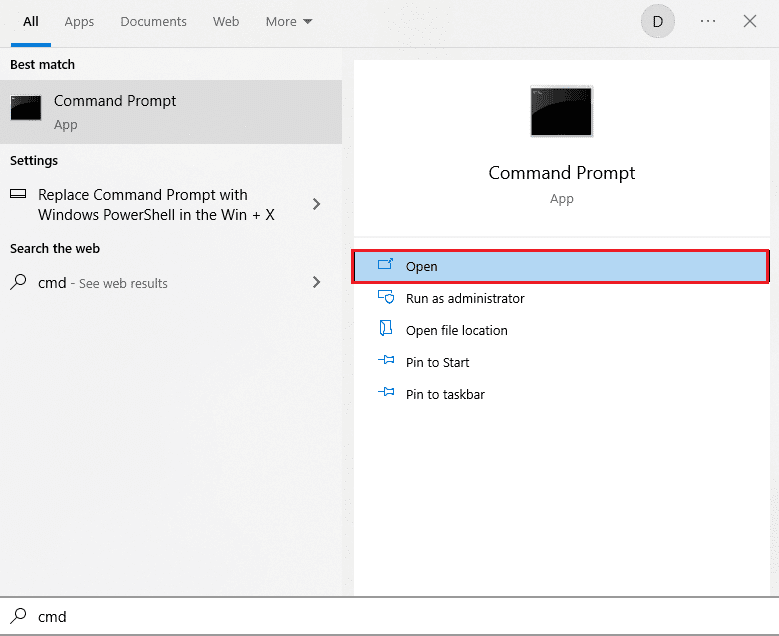
4. Type cmd in the search bar and click "Open".
5. Then type the ipconfig /all command and press the Enter key.
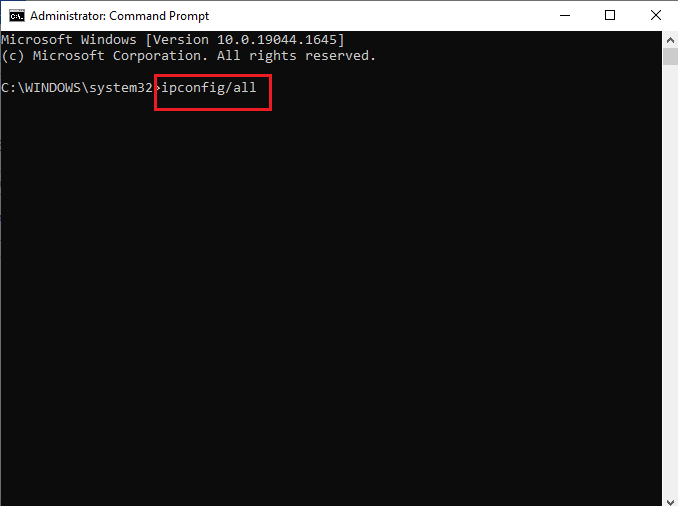
6. Now write down the details of the default gateway in the window.
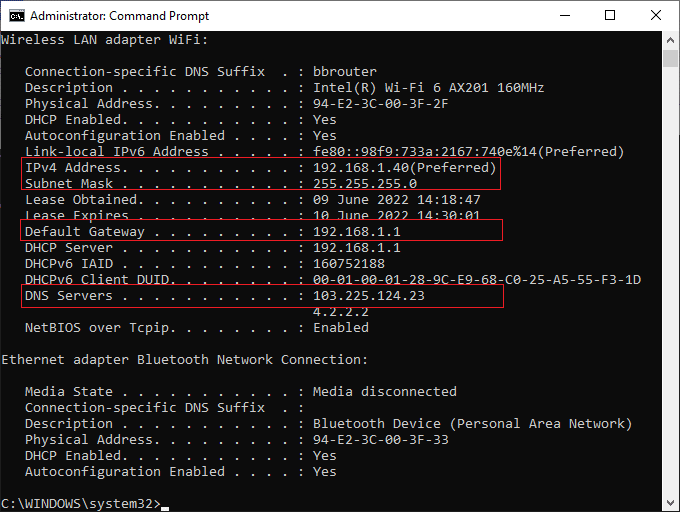
7. Copy this address (here 192.168.1.1) and enter it in your browser to access the router.
8. Write down the list of devices connected to the network. On the same screen, you can find the IP address of your scanner. Write down its meaning.
9. Then go to the "Add" window of the "Scan Settings" window and enter the IP address of your scanner in the "Enter Address" menu.
10. Click OK to save your changes.
Note. You can also click "Test" to make sure the connection was successful.
Method 9: Disable Password Protected Sharing
The password protected sharing option is designed to share files and folders safely and securely. If this setting is enabled, users connected to your network will not be able to access files on your PC unless a privacy password is entered manually. Several reports suggest that this feature triggers an Epson scan that cannot communicate with a scanner error. Hence, you should disable this option, reconnect the scanner and check if it works or not.
Note. You should always enable the setting if something goes wrong.
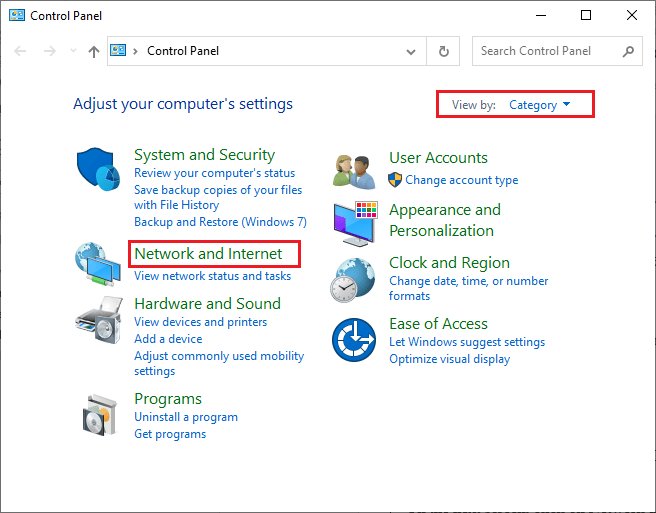
1. Type Control Panel in the search bar and click Open.
2. Then set "View by category" and click "Network and Internet".
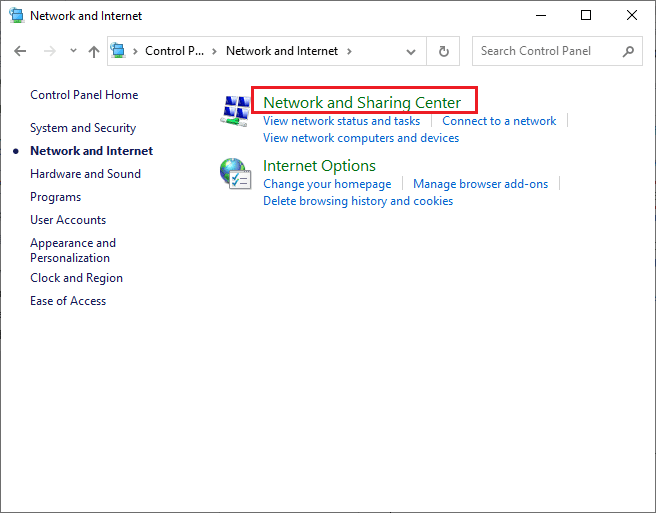
3. Now click "Network and Sharing Center" as shown in the picture.
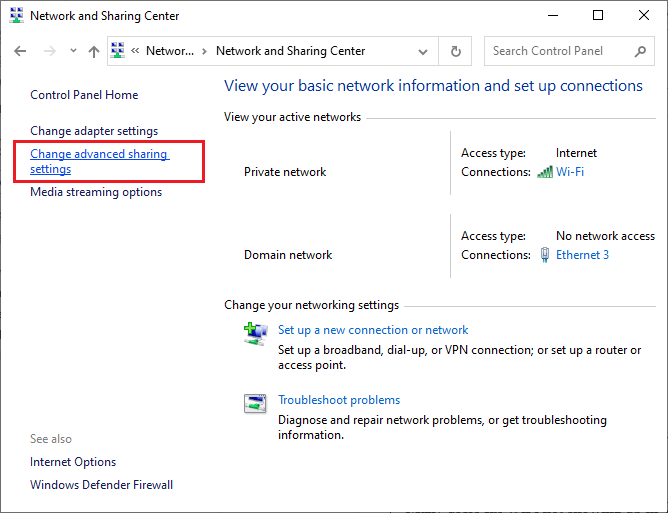
4. Now click the link "Change advanced sharing settings" as shown in the picture.
5. Expand the "All networks" section and click "Turn off password protected sharing".
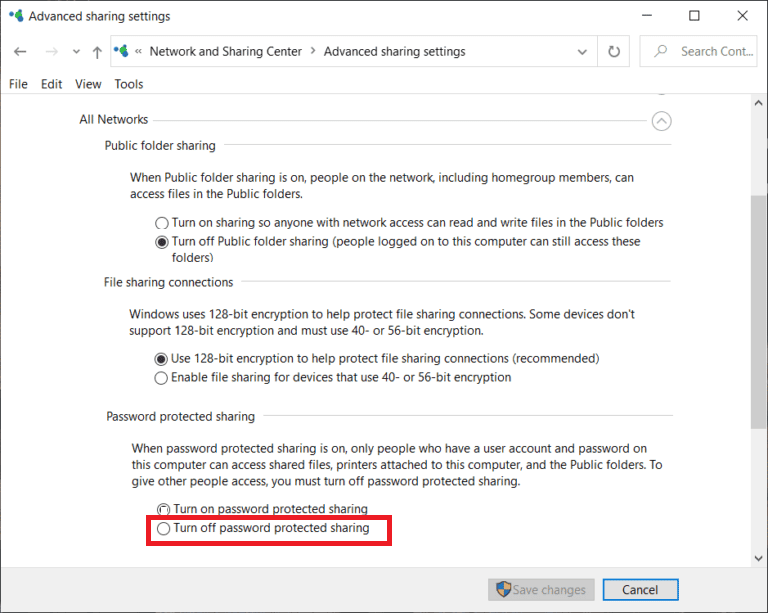
6. Now click Save Changes and unplug your scanner for a minute. Reconnect the scanner and check if the connection error is gone.
Method 10: Change ports from LPT1 to USB 001
Previously, the old Line Print Terminals technology was used to connect printers and scanners. Now most printers and scanners have switched to USB. Hence, check if USB is used in your device and if it works. This method effectively fixes the problem that the Epson scanner cannot communicate if you encounter the problem after upgrading to Windows 10.
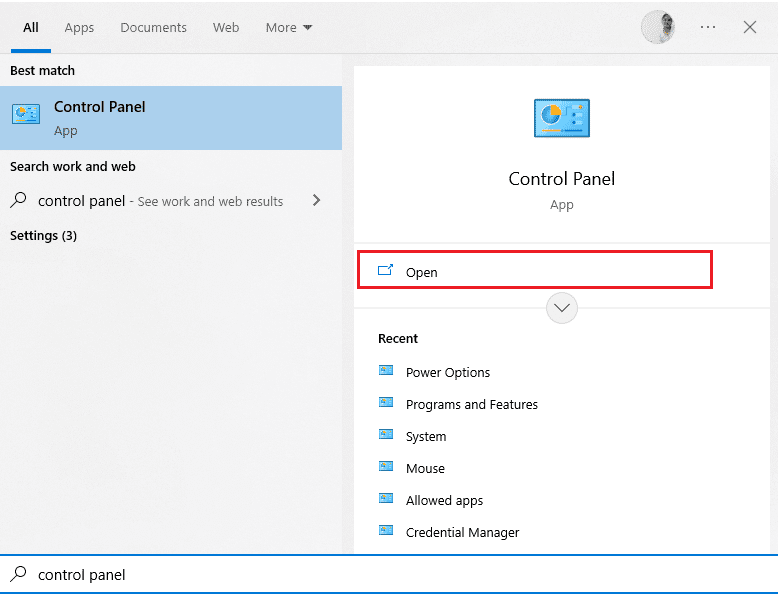
1. Press the Windows key and type Control Panel. Then click Open.
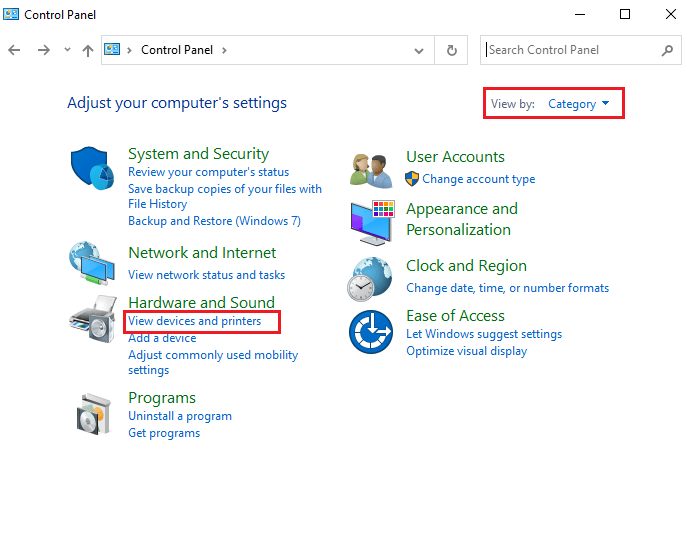
2. Now set "View by Category" and click on "View Devices and Printers" as shown.
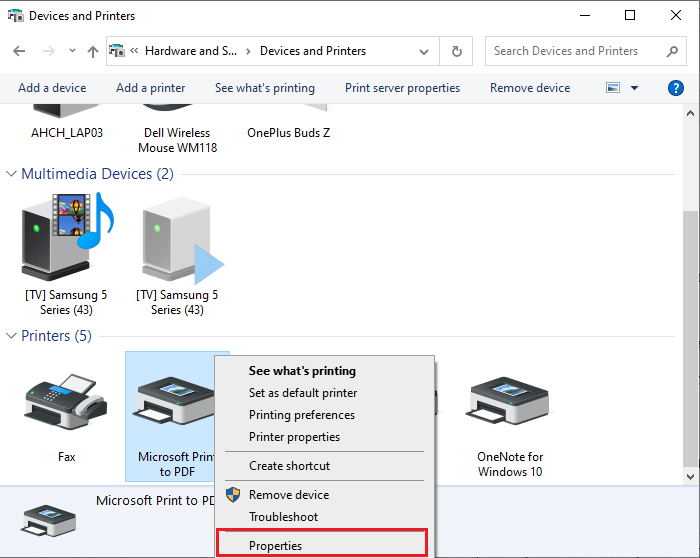
3. Now right click on the printer and select "Properties".
4. Click the Ports tab and change the ports from LPT1 to USB 001.
5. Save your changes by clicking Apply > OK. Then unplug your device and plug it back in after a while.
Method 11: Change Windows Defender Firewall settings
You will also encounter that Epson scan cannot communicate with the scanner due to an overly reactive or overprotective antivirus package on your Windows 10 computer. This prevents the connection between the launcher and the network. So, to fix this problem, you can either whitelist Epson in your firewall settings or disable firewall protection temporarily.
Option I: Whitelist escndv.exe
To allow C:WINDOWStwain_32escndvescndv.exe in Windows Defender Firewall, follow our guide to allow or block applications through Windows Firewall and follow the steps as instructed.

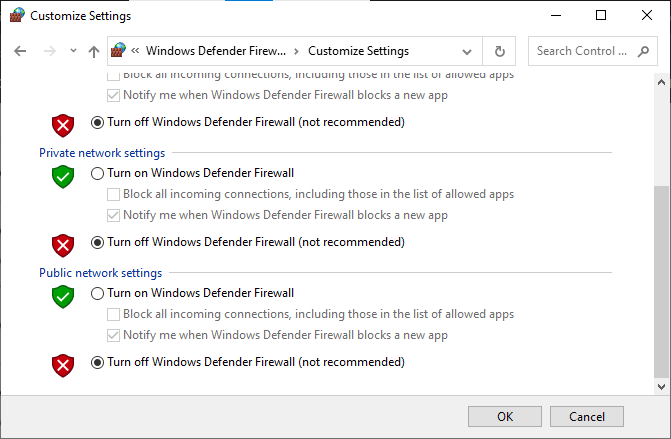
Option II: Turn off the firewall (not recommended)
If you don't know how to disable Windows Defender Firewall, our guide to disable Windows 10 Firewall will help you with that.
Option III: Create a New Rule in the Firewall
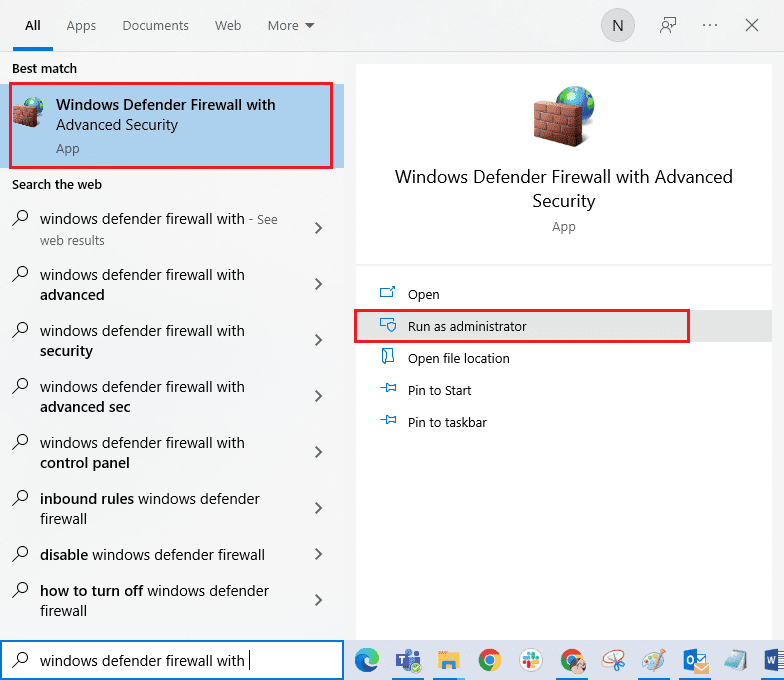
1. Press the Windows key and type Windows Defender Firewall with Advanced Security. Then click "Run as administrator".
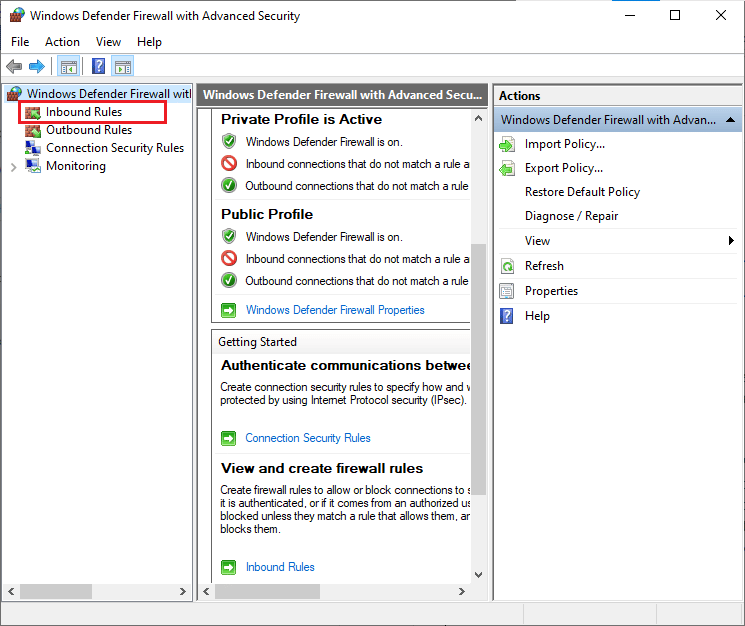
2. Click "Inbound Rules" as shown in the left pane.
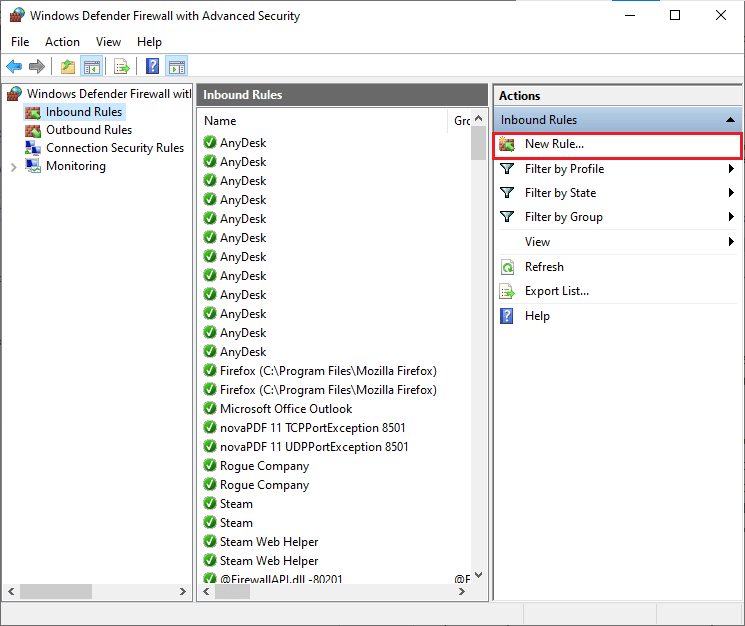
3. Click "New Rule..." as shown in the right pane.
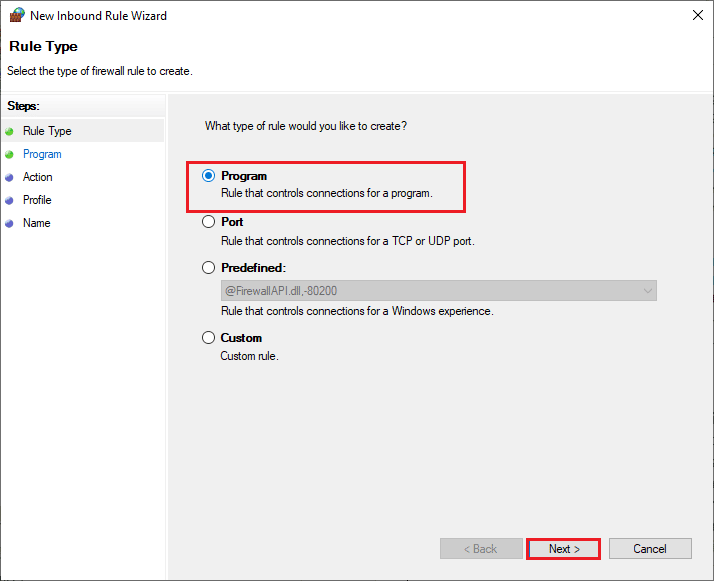
4. Be sure to select the "Program" option under "What type of rule do you want to create?". menu and click "Next" > as shown in the figure.
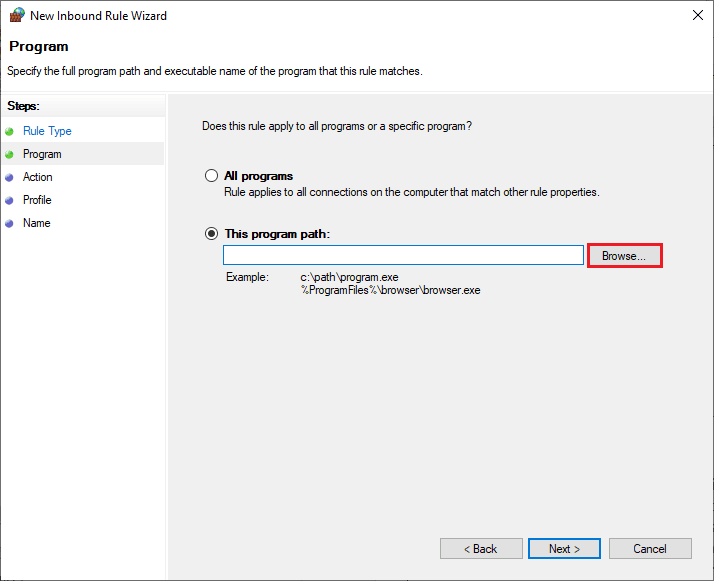
5. Then click the "Browse..." button corresponding to the Path to this program: as shown.
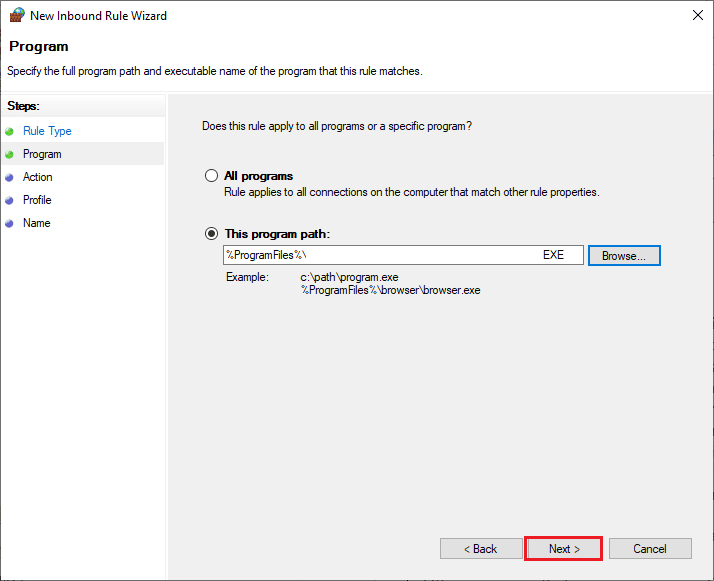
6. Navigate to the path C:WINDOWStwain_32escndvescndv.exe and double click the installation file. Then click on the Open button.
7. Click Next > in the New Inbound Rule Wizard window.
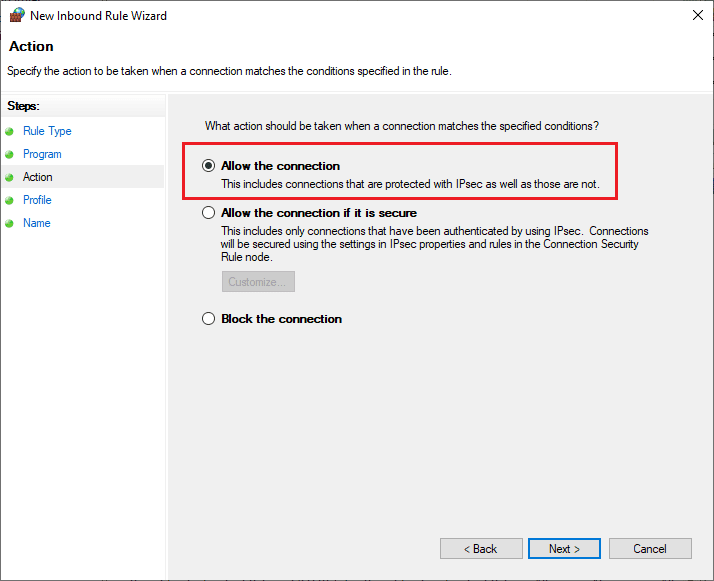
8. Now select the radio button next to Allow the connection and click Next > as shown.
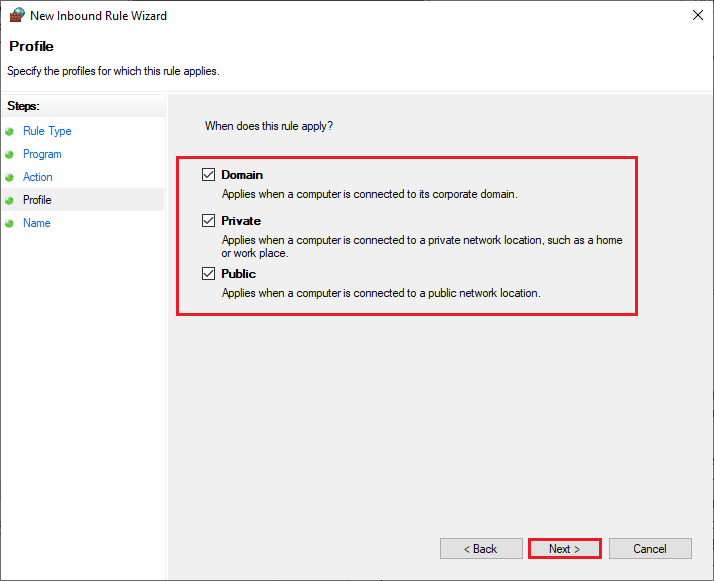
9. Make sure the Domain, Private, and Public fields are selected, and click Next >.
10. Finally, add a name to the new rule and click Finish.
***
We hope this guide was helpful and you learned how to fix the Epson scanner cannot communicate error on Windows 10. Let us know how this article helped you the best. Also, if you have any questions/suggestions regarding this article, feel free to post them in the comments section.