Fix Cortana Taking up Memory in Windows 10
One feature that makes the Windows 10 version superior to others is the Cortana app. However, with its advanced functionality, there is a problem with Cortana using too much memory on your PC. High memory usage issue Cortana slowed down and broke core processes. Thus, the purpose of the article is to provide solutions for Cortana that solve memory issues and control the memory used by the Cortana application. Read this article until the end to learn how to fix Cortana memory usage issue on Windows 10 PC.
How to fix Cortana taking up memory in Windows 10
Cortana is a virtual assistant from Microsoft. If you are experiencing high memory usage while using the Cortana app, you can follow the troubleshooting methods provided in this article.
Method 1: Basic Troubleshooting Methods
If you are facing a problem with Cortana because it uses a lot of memory space, you can try the basic troubleshooting methods below first. The simple methods mentioned below can fix Cortana taking up memory on your PC.
1. Restart your computer
If your PC has certain glitches that are causing the Cortana app to take up memory, you can try restarting your PC. Press the Windows key, click the power button on the start menu, and select the Restart option to restart your computer.

2. Recover corrupted files
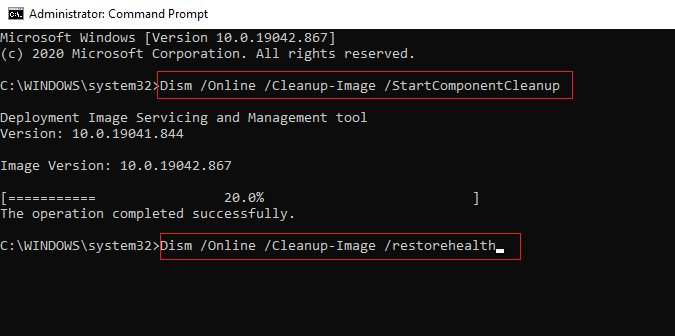
If you have malicious files on your computer, it can cause the Cortana app to load with a delay, causing the Cortana app to take up a lot of memory. You can scan files and check for malicious files in system files with DISM and SFC tools. Read the article to learn how to restore system files in Windows 10.
3. Update your graphics drivers
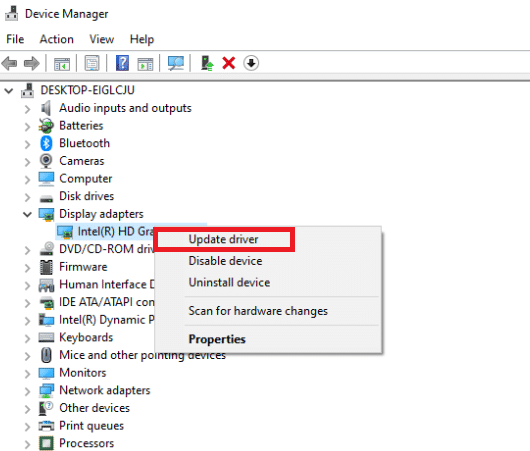
Since Cortana is a visual and graphics based application, you need to install an updated graphics driver on your PC for it to work properly. Read the article to find out how to update the graphics drivers on your PC and fix the issue.
4. Activate a balanced meal plan
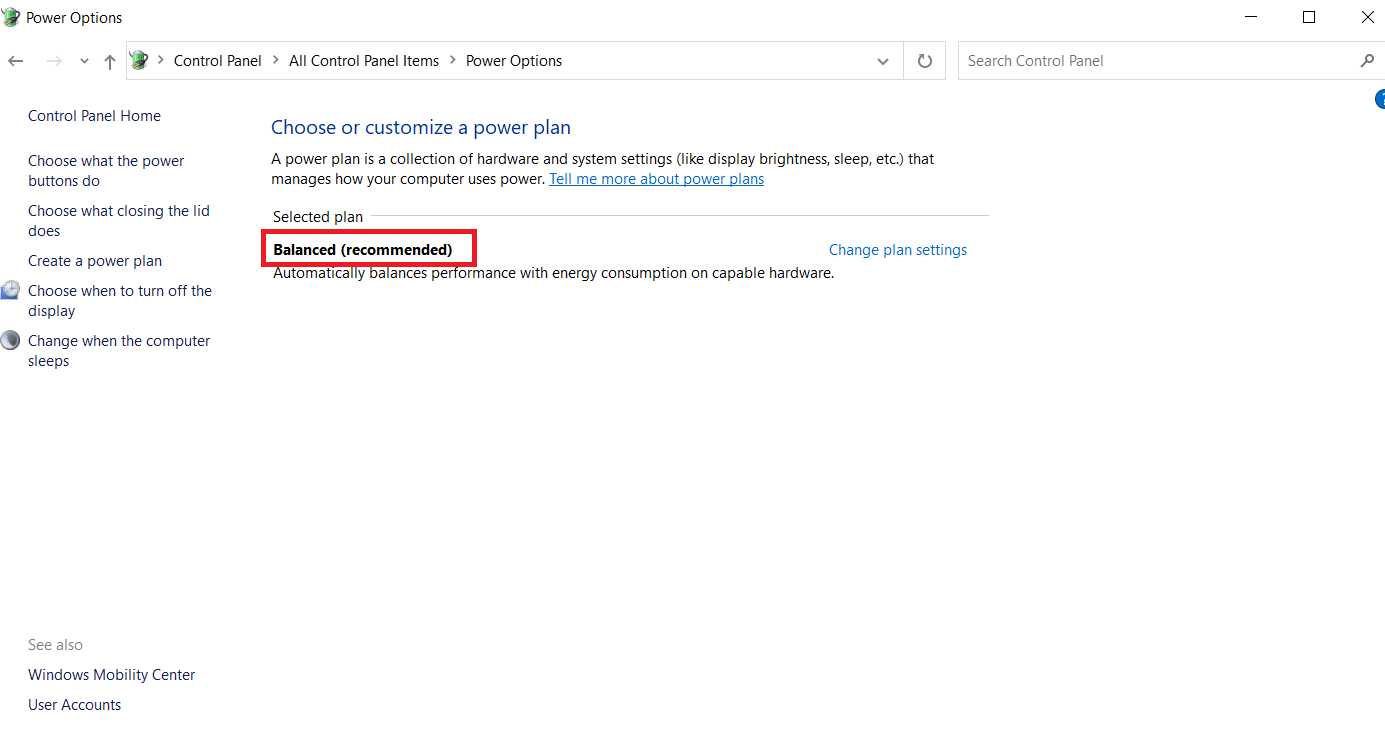
If you're using a power plan that consumes a lot of power, the Cortana app can take up a lot of memory. To solve this problem, you need to use a no-meal plan or a balanced meal plan. Read the article to learn how to change power plans in Windows 10.
5. Disable Cortana
If the Cortana app is causing problems on your PC, you can try disabling the app on your PC permanently to fix the problem. Read the article on how to disable the Cortana app on your PC to fix this issue.
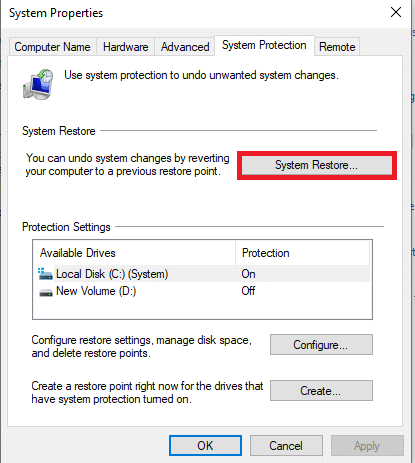
6. Perform a system restore
Sometimes the Cortana app could use little memory while your PC was in the previous settings. If so, you can try reverting to a previous setting by restoring your computer. Read the article to learn how to use System Restore in Windows 10.
If the basic troubleshooting methods don't resolve Cortana's high memory usage on Windows 10, follow the methods listed below to resolve the issue.
Method 2: Change the properties of the SearchUI.exe file
You can manually change the properties of the Cortana executable or SearchUI.exe by following the steps below to fix Cortana taking up memory issue.
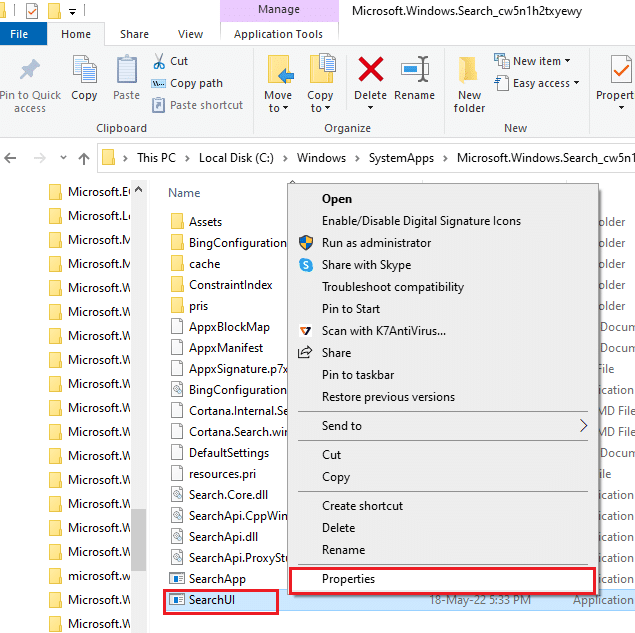
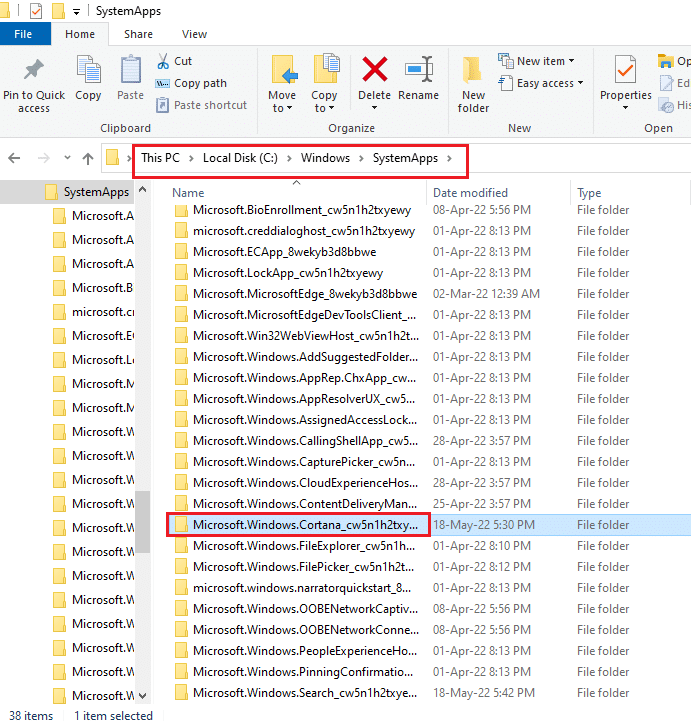
1. Press the Windows + E keys at the same time to launch File Explorer and navigate to the Microsoft.Windows.Cortana_cw5n1h2txyewy folder by navigating to the path below.
C:WindowsSystemAppsMicrosoft.Windows.Cortana_cw5n1h2txyewy

2. Right-click the SearchUI.exe file in the list and select Properties from the menu to open the Properties window.
3. Go to the "Security" tab and click the "Advanced" button in the SearchUI properties window.
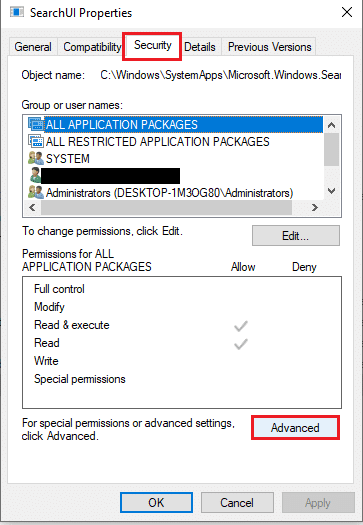
4. In the SearchUI Advanced Security Settings window, click the Edit button to change the permissions.
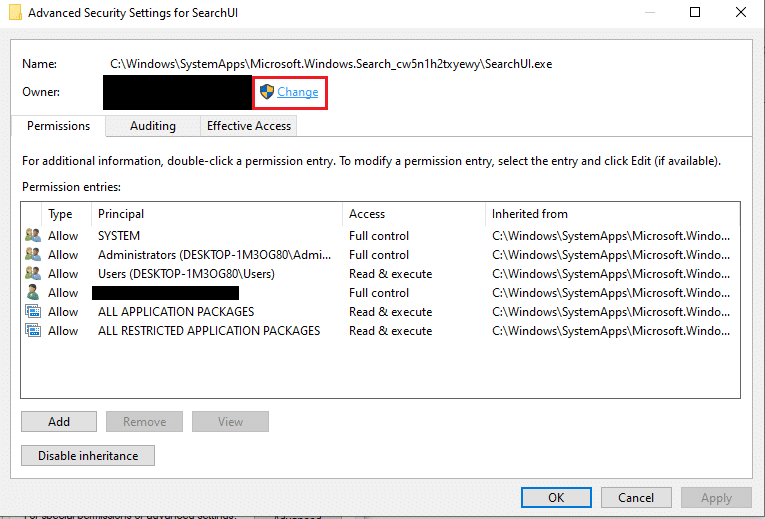
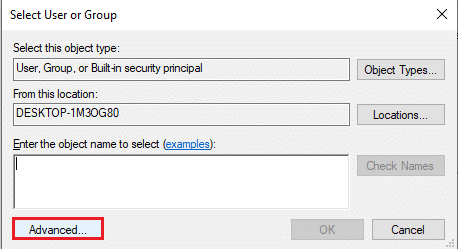
5. Click the "Advanced..." button in the lower left corner of the "Select User or Group" window.
Note. Alternatively, you can enter the user account name in the "Enter the object name to select:" field and click the account in the results.
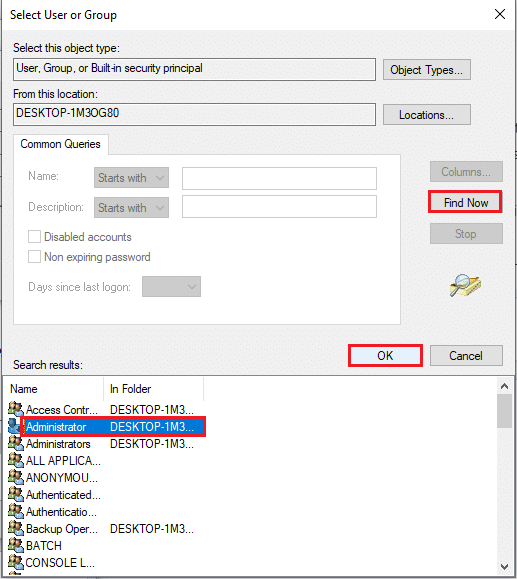
6. Now click the "Find Now" button, select the user account name in the "Search Results:" line and click the "OK" button to select the account.
Note. Here, the administrator account is selected in the list for clarification.
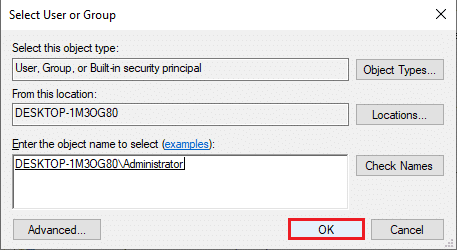
7. Click OK on the "Select User or Group" window to confirm the user account selection.
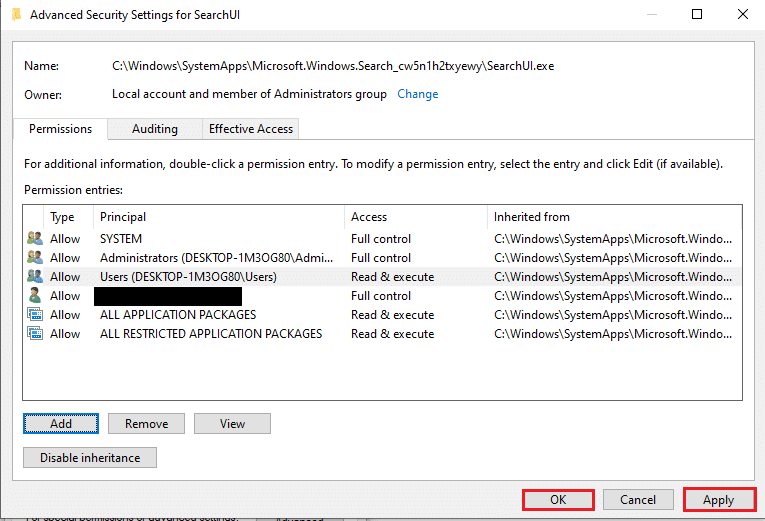
8. In the "Advanced security settings for SearchUI" window, select the added user account and click the "Add" button in the lower left corner of the window.
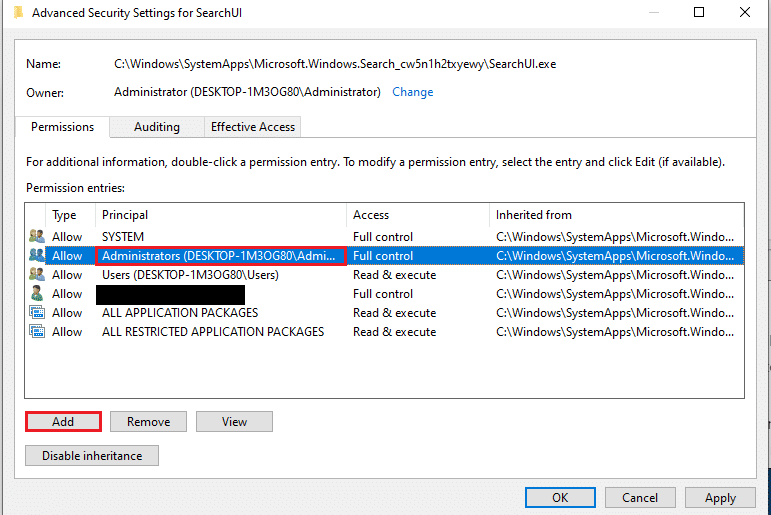
9. Then select the "Allow" option from the "Type" drop-down menu and select all the options in the "Basic Permissions" panel.
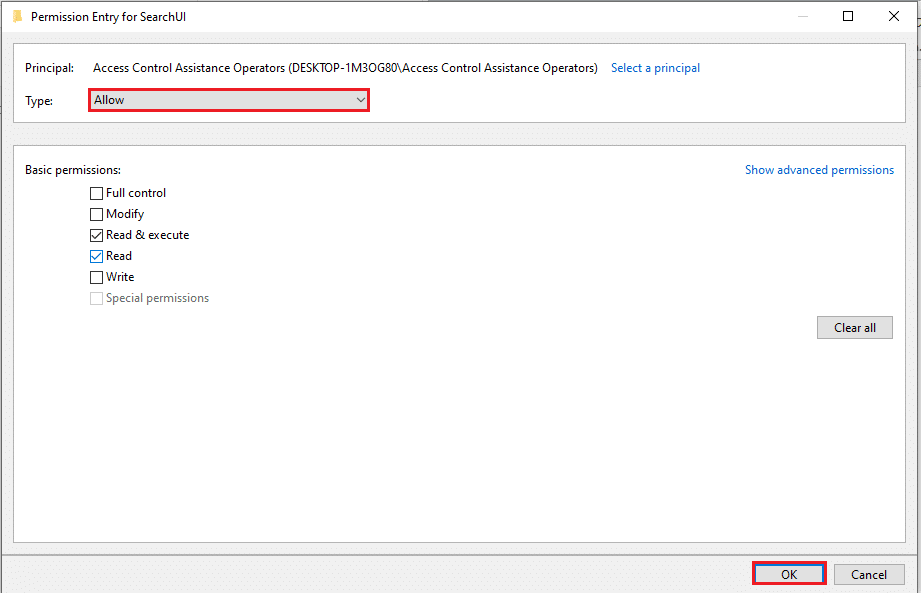
10. Click OK to grant the account permission.
11. Next. Click the "Apply" button and then the "OK" button in the "Advanced security settings for SearchUI" window to complete the process.
Method 3: Delete the SearchUI.exe file
This method will allow you to completely remove the Cortana executable in order to fix Cortana taking up memory issue. Follow the given steps to fix Cortana's high memory usage in Windows 10.
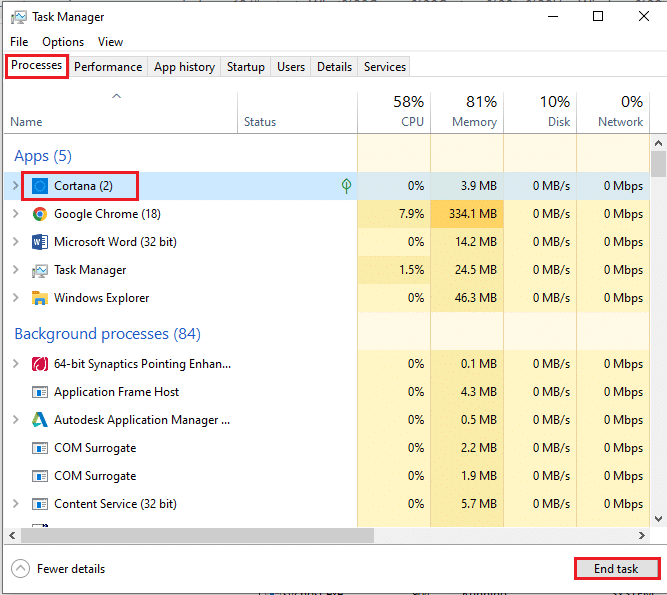
1. Press the Ctrl + Shift + Esc keys at the same time to open the Task Manager.
2. Click the Processes tab, select the Cortana app in the Applications section, and click the End Task button to close the Cortana app.
Note. This step will close the Cortana app running in the background and prevent data loss on your PC.
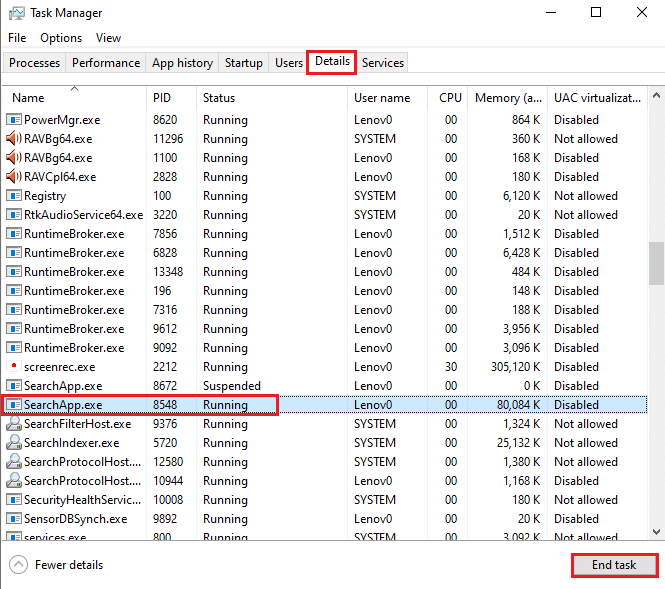
3. Click the Details tab and select the SearchUI.exe file, then click the End Task button.
Note. This step will disable the SearchUI.exe file running in the background so that you can easily delete the file on your PC.
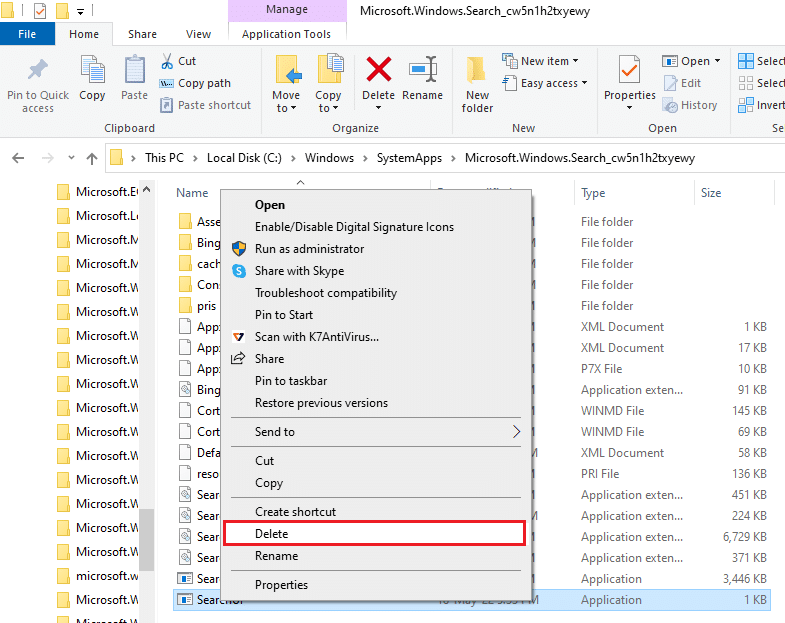
4. Simultaneously press the Windows + E keys to open File Explorer and navigate to the Microsoft.Windows.Cortana_cw5n1h2txyewy folder by navigating to the specified folder path.
C:WindowsSystemAppsMicrosoft.Windows.Cortana_cw5n1h2txyewy
5. Right-click the SearchUI.exe file in the list and select Delete from the menu to delete the file.
Note. You can also delete a file by selecting it and pressing the Delete key.
Method 4: Uninstall the Cortana App
If none of the above methods fixes the problem, then you can uninstall the Cortana app. Follow the given steps to do so.
Option I: via command line
You can use a command line application and run a few commands to fix Cortana taking up memory on your PC. This method will allow you to override issues and permissions on your PC and you can easily fix Cortana's high memory usage issue.
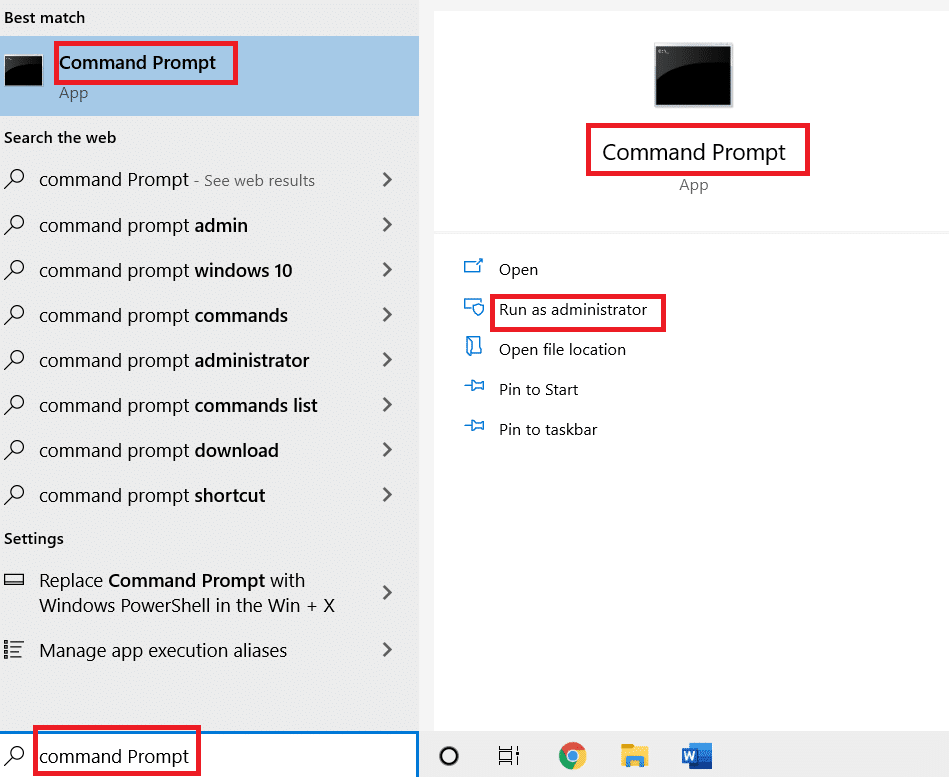
1. Press the Windows key, type "Command Prompt" and click "Run as administrator".
2. Click Yes on the UAC window to allow the command line application as an administrator.
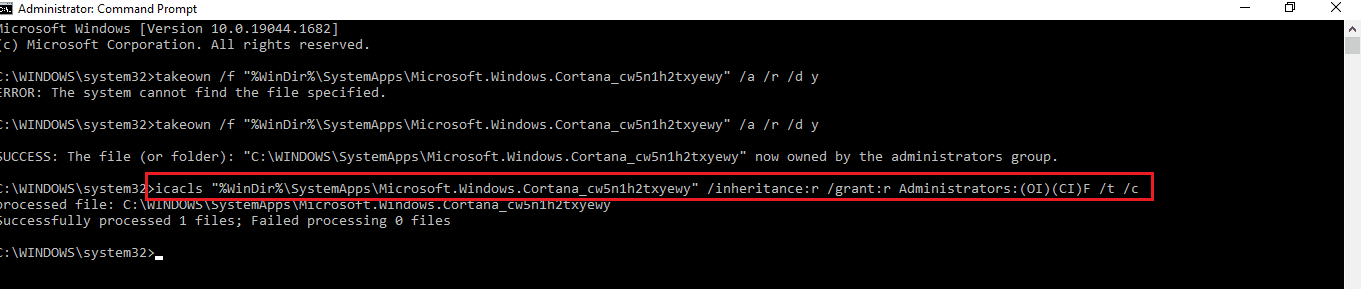
3. Type this command and press the Enter key to take ownership of the Microsoft.Windows.Cortana folder.
takeown /f "%WinDir%SystemAppsMicrosoft.Windows.Cortana_cw5n1h2txyewy" /a /r /d y

4. Then run the following command and press the Enter key to grant administrator permissions.
icacls "%WinDir%SystemAppsMicrosoft.Windows.Cortana_cw5n1h2txyewy" /inheritance:r /grant:r Administrators:(OI)(CI)F /t /c
5. Type this command and press the Enter key to delete the SearchUI.exe file on your PC.
taskkill /im SearchUI.exe /f
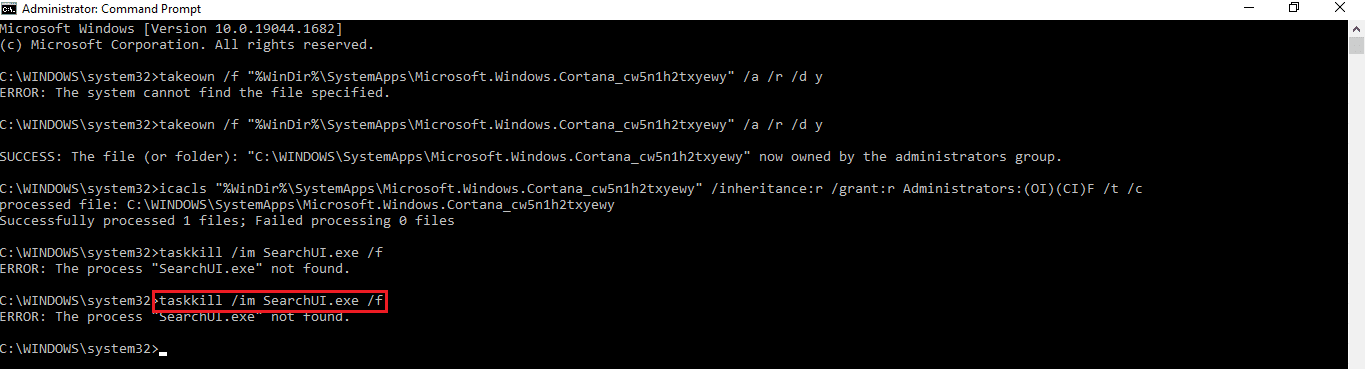
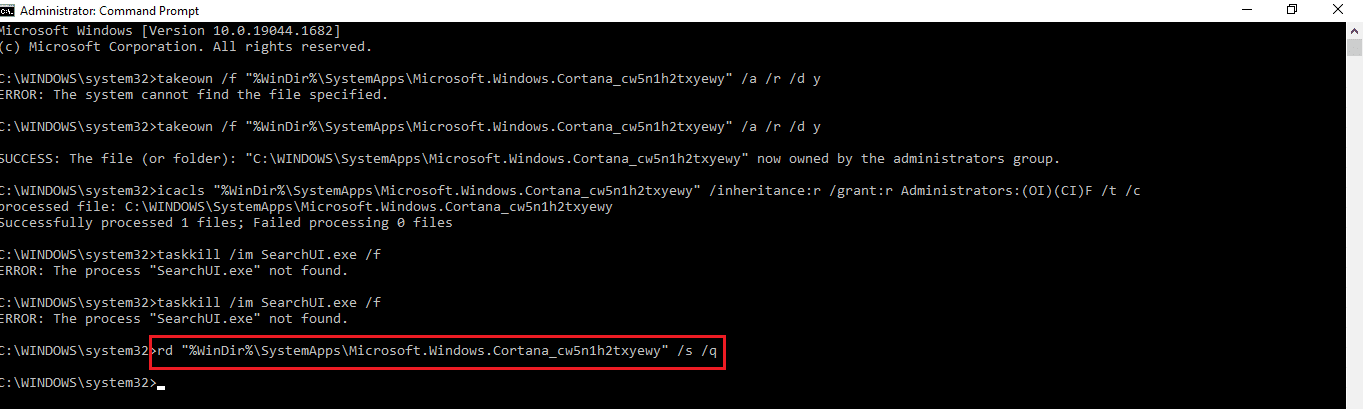
6. Finally, run the following command to remove the Microsoft.Windows.Cortana directory from your PC and press the Enter key to execute the command.
rd "%WinDir%SystemAppsMicrosoft.Windows.Cortana_cw5n1h2txyewy" /s /q
Option II: through Windows PowerShell
Because the Cortana app is a built-in app in Windows 10, it's not easy to remove it like other apps. However, you can use the Windows PowerShell app to uninstall the package and fix the issue with Cortana taking up memory on your PC.
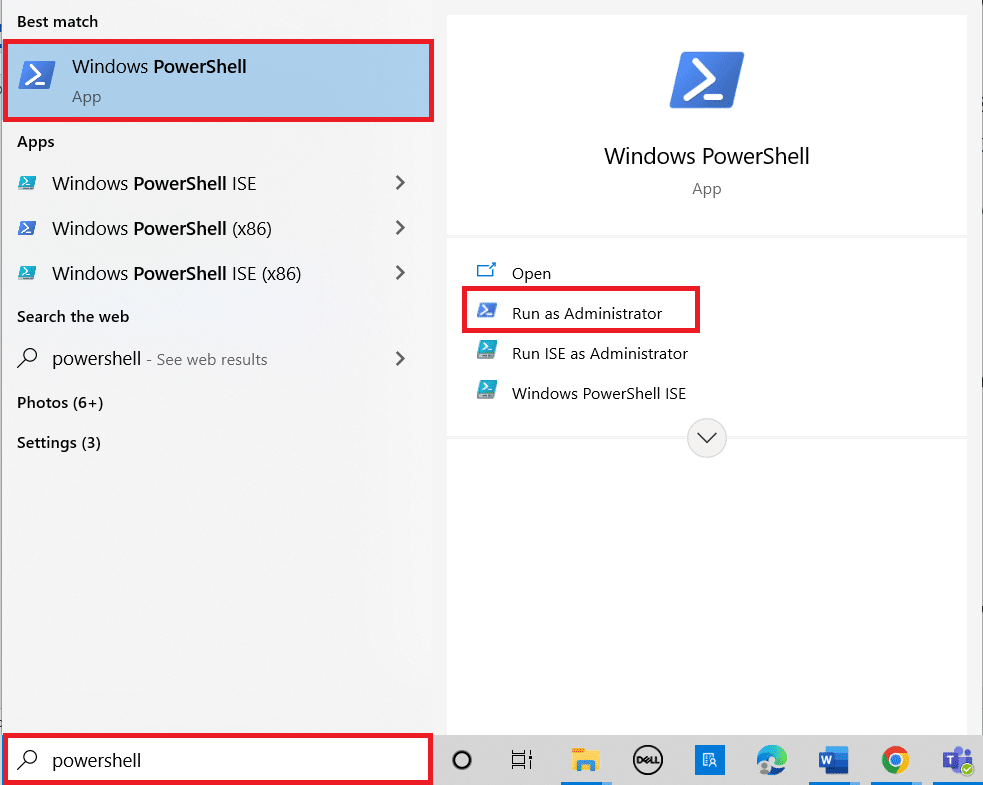
1. Press the Windows key, type PowerShell and click "Run as administrator".
2. Click Yes on the User Account Control window.
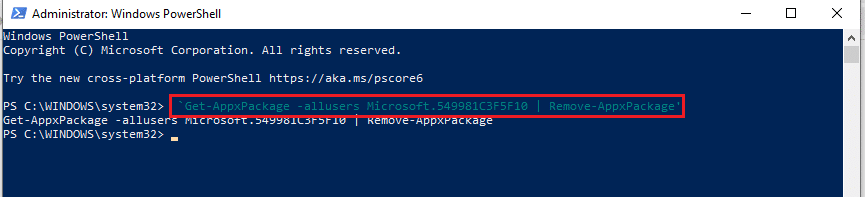
3. Then type the following command and press the Enter key to remove the Cortana app from your PC.
‘Get-AppxPackage -allusers Microsoft.549981C3F5F10 | Remove-AppxPackage’
***
The article focuses on the methods to fix Cortana taking up memory on Windows 10. If Cortana is using too much memory on your PC, you can follow the methods mentioned in the article and fix Cortana high memory usage issue. You can manage Cortana with memory in Windows 10 and make your computer more functional using the described methods. If you have any suggestions or questions about the topic, please leave them in the comments section so we can follow up.