14 Ways to Fix MSI Afterburner Not Working on Windows 10
MSI Afterburner is a popular graphics card software. This helps improve the performance of device information monitoring. The application is useful for overclocking and changing default graphics card settings. Among all these pluses, people using the app have encountered the issue of MSI Afterburner not working with Windows 10. Sometimes it resists opening and other times it cannot change the clock speed of the device. If you are also facing the same problem, you will be pleased to know that we have prepared a detailed guide for you to help you find ways to fix MSI Afterburner not working on your system.
Ways to Fix MSI Afterburner Not Working on Windows 10
Whether there is one feature you can't use or the entire app you're struggling with, there are several causes that cause this problem and you should be aware of them. So let's briefly discuss these reasons:
- Multiple overlays running on your system at the same time may be the reason why MSI Afterburner does not run in parallel. These overlays usually include Steam and NVIDIA, and disabling them is the best solution.
- The integrated graphics card is the second cause that causes MSI Afterburner installation to fail, which can be resolved by disabling the integrated graphics card in the BIOS and allowing the external graphics card to perform all graphics related functions on your system.
Many methods help to solve the problem when MSI Afterburner won't overclock or won't open. Before moving on to the methods, check that the cable is connected correctly. Using the wrong port, such as the GPU port for display, may not work in Afterburner, so make sure the correct cable is connected to the correct one.
We have listed simple and complex methods in an ordered list to help you solve this problem. So, without delay, let's start with the first one:
Method 1: Perform a Clean Boot
The last resort for all your MSI Afterburner related issues is to clean boot your system. A clean boot will restart the system with only important programs, excluding all buggy and corrupted applications. Read our How to Clean Boot in Windows 10 guide to do the same.
Method 2: Change Compatibility Options
Another way to help you resolve the issue of MSI Afterburner not running side by side on your desktop is if the application is not configured for compatible mode. So, try running it in compatibility mode and see if the issue gets resolved:
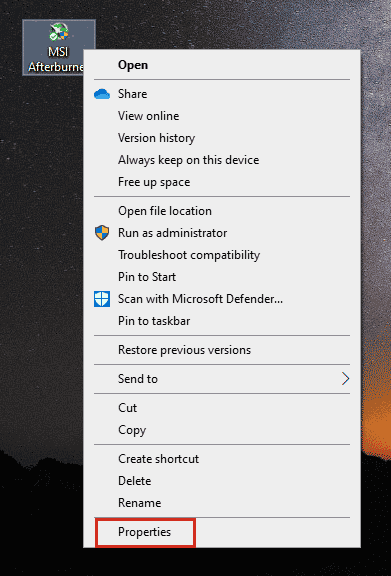
1. Right-click the MSI Afterburner application and select the "Properties" option.
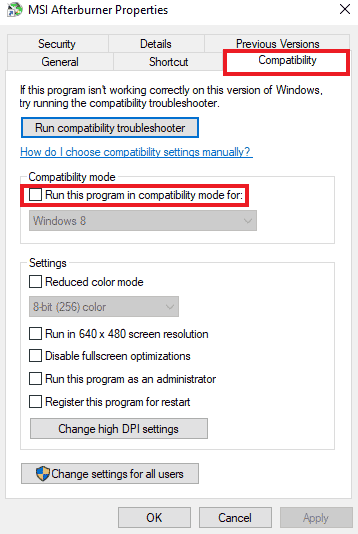
2. Click the "Compatibility" tab and check "Run this program in compatibility mode for".
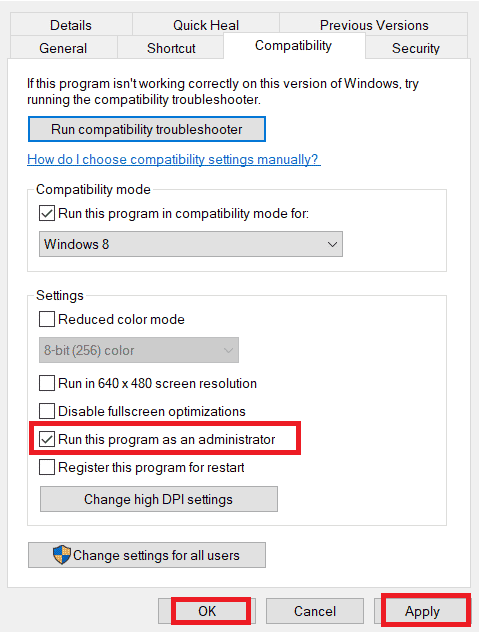
3. Then check the "Run this program as an administrator" checkbox in the "Settings" section. Finally, select "Apply" and then click "OK" to save your changes.
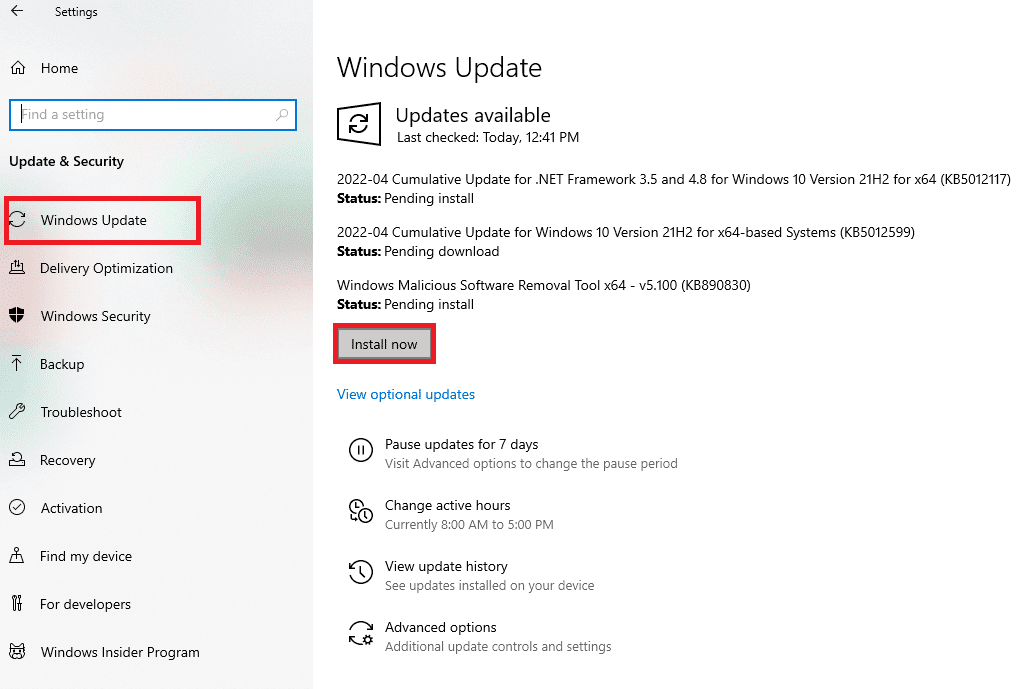
Method 3: Update Windows
You can also fix MSI Afterburner not working by updating your operating system. Always check if you have updated your Windows operating system and if there are any updates pending, use our guide How to download and install the latest Windows 10 update.
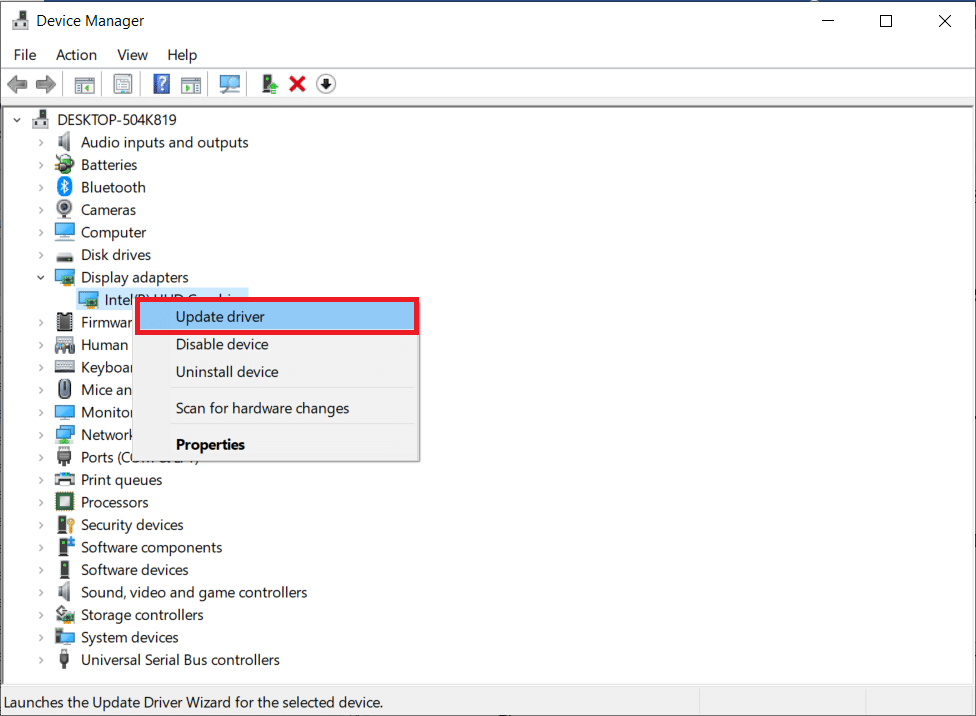
Method 4: Update the graphics driver
If your system's graphics driver is outdated or buggy, it may cause MSI Afterburner overclocking to be interrupted. Therefore, updating them regularly is a must, you can learn more about them with our guide on 4 Ways to Update Your Graphics Driver in Windows 10.
Method 5: Disable I/O Driver
If a low-level I/O driver is enabled for an application, it may cause MSI Afterburner not to work with Windows 10 issue. So make sure it is disabled. To do this, open the properties of MSI Afterburner and follow the steps given below:
1. Double click the MSI Afterburner shortcut.
2. Click the settings icon.
3. Select the Enable low-level I/O driver check box to disable it.
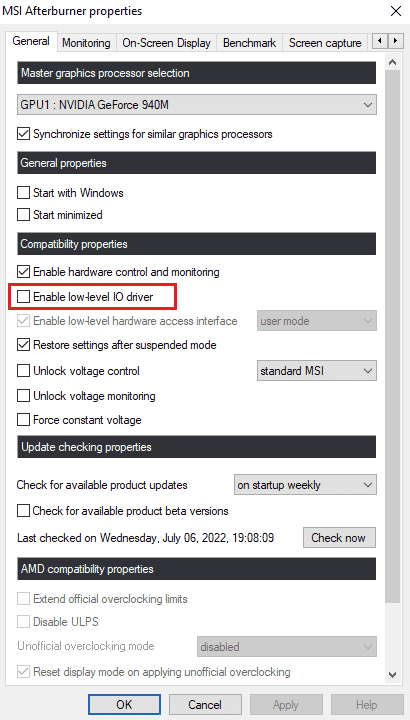
4. Now that the I/O driver is disabled, reboot the system, launch the MSI Afterburner application and see if the error is resolved.
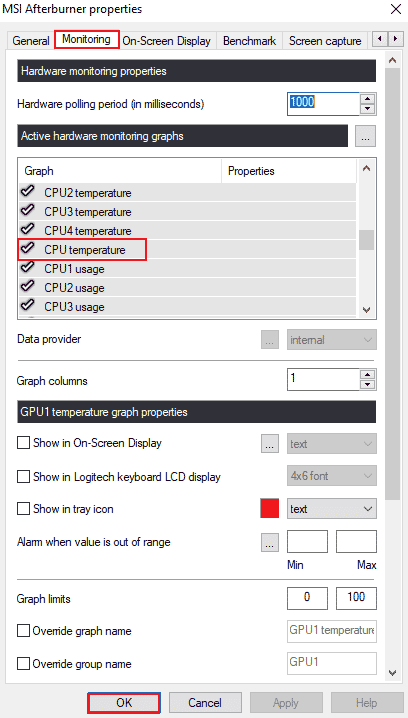
Method 6: Adjust screen display settings
If your system has cpu temperature disabled, this might be the reason why MSI Afterburner won't open. Therefore, disable it in the active hardware monitoring graphs in the MSI Afterburner settings.
1. Launch the MSI Afterburner application.

2. Click on the settings application MSI Afterburner.

3. Click the "Monitoring" tab, turn on the CPU temperature and click "OK".
Method 7: Set the detection level to high
If the problem with MSI Afterburn not working is related to a specific game, adjusting the game's executable options can help. So, try this using the given steps:
1. Press the Windows key, type RivaTuner Statistics Server and click Open.

2. Click the plus button in the lower left corner of the window after the main window opens.
3. Navigate to the C:Program Files folder to find the game's executable file.
4. After adding the executable game file to the program. Set the detection level to high.
Method 8: Disable the NVIDIA Overlay
As discussed earlier, multiple overlay tools running in the background can cause MSI Afterburner to not run in parallel. Therefore, disabling them may help, and you can take the following steps to perform this method on your system:
1. Press the Windows key, type GeForce Experience and click Open.
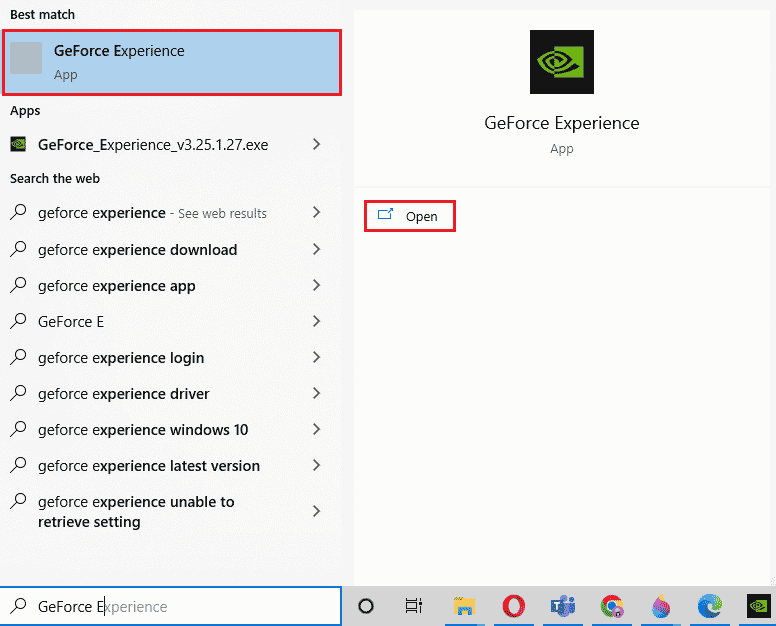
2. Click the settings icon.
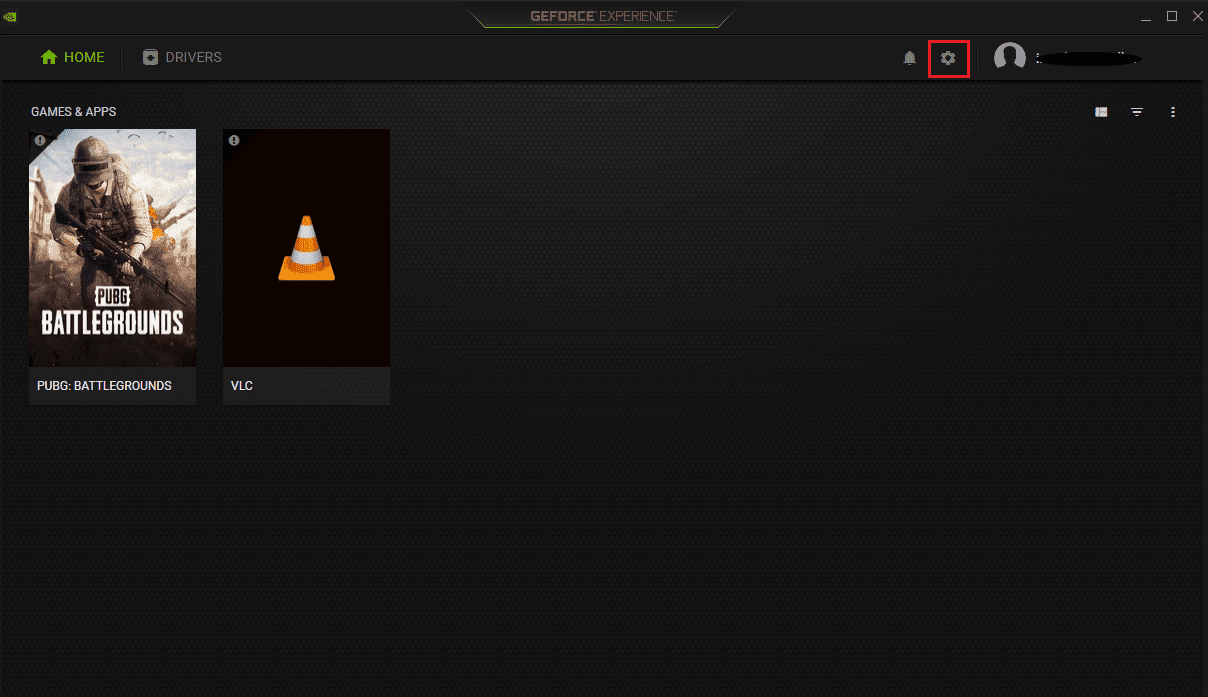
3. Then click General.
4. Disable Allows you to record, stream, stream and take screenshots of your gameplay.
5. Finally, click Apply.
Method 9Disable the Steam Overlay
The NVIDIA overlay is not the only one that can be disabled to get rid of the MSI Afterburner not working on Windows 10 issue. You also need to disable the Steam overlay, which can interrupt MSI Afterburner.
1. Press the Windows key, type steam and click Open.
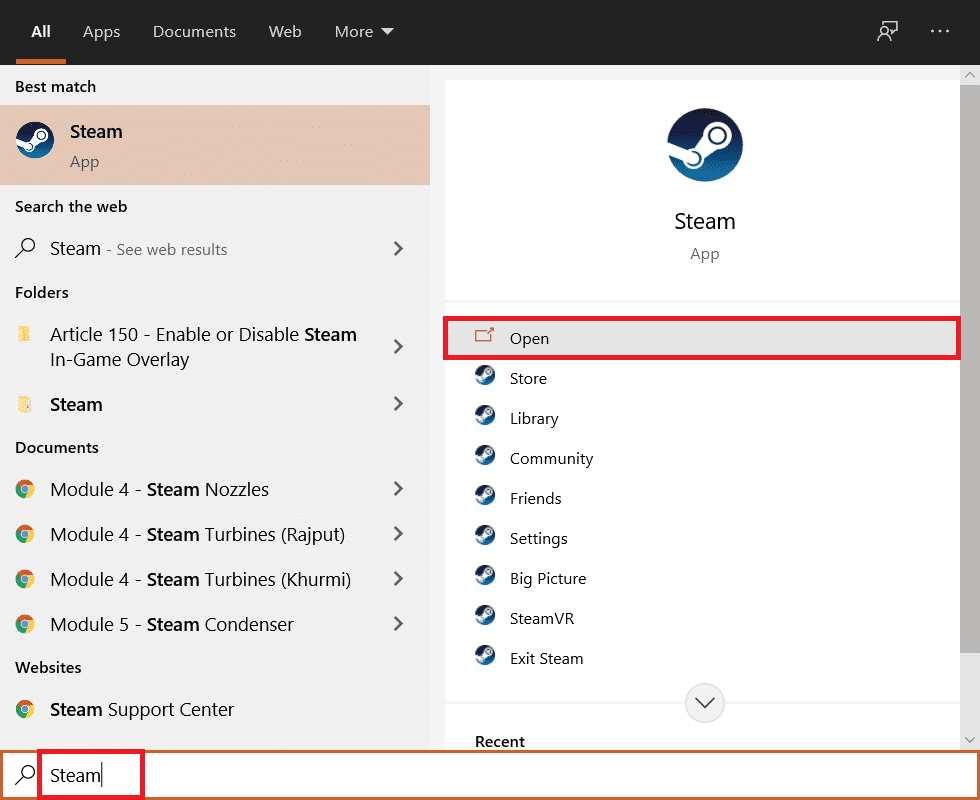
2. Click LIBRARY.

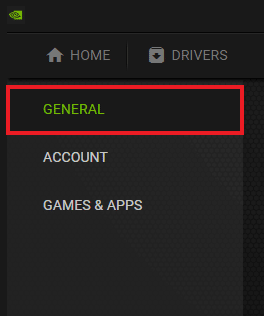
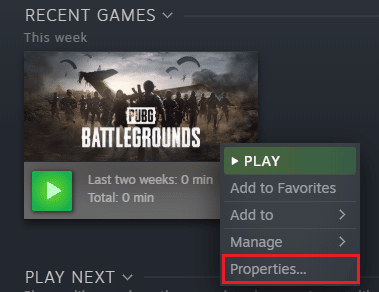
3. Right-click the game to open Properties.
4. On the GENERAL tab, uncheck Enable Steam overlay while playing.
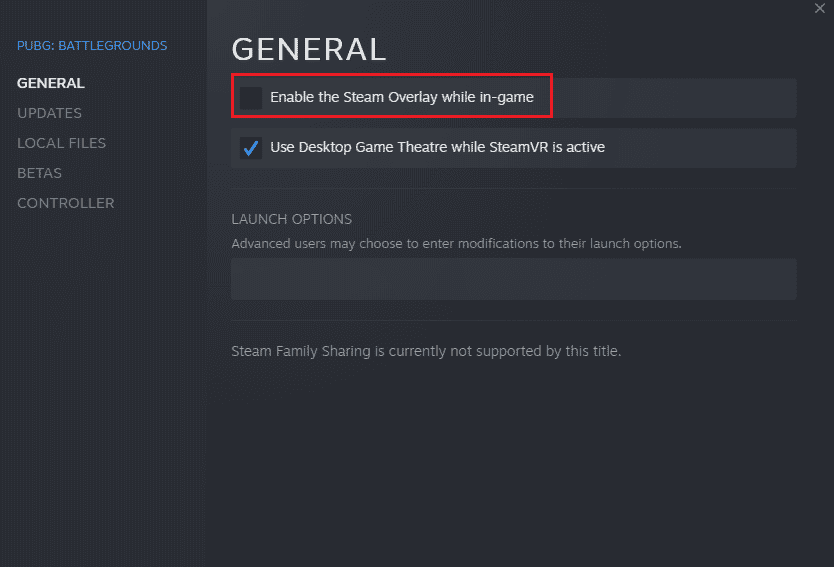
5. Now that the Steam overlay is disabled, check if the MSI Afterburner installation error issue is resolved.
Method 10: disable the video card
Disabling the built-in graphics card and enabling an external graphics card to perform system display functions helps to resolve the issue that MSI Afterburner won't open. To open the BIOS settings, read our How to Enter the BIOS in Windows 10 guide, and then follow the given steps to disable your graphics card:
1. Click the Advanced tab and select Embedded Device Configuration.
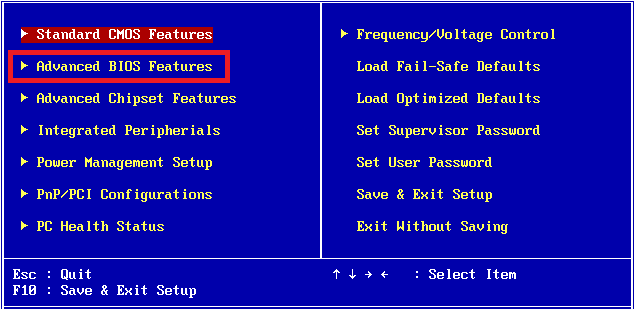
2. Now select Primary Graphics Adapter and press the Enter key.
3. Then select "Exit" and click "Exit with changes".
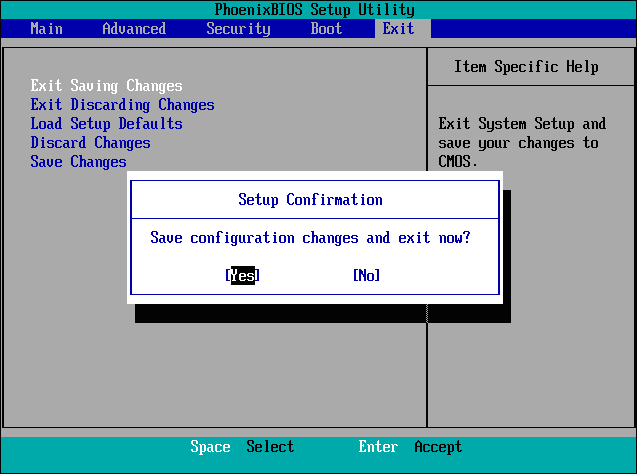
After rebooting the system, check if the issue is resolved.
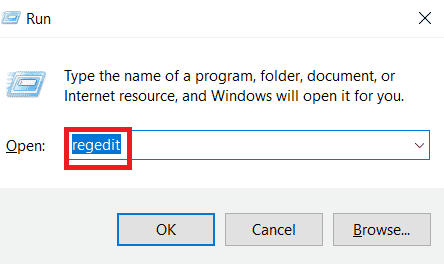
Method 11: Disable the ULPS Setting
In AMD Crossfire settings, disabling ULPS lowers the voltage, which helps MSI Afterburner run smoothly and smoothly. Here is how you can disable the ULPS setting:
1. Press the Windows + R keys at the same time to open the Run dialog box.
2. Type regedit and press the Enter key to launch the Registry Editor.
3. Click the Edit tab and select Find.
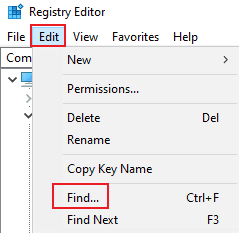
4. Type EnableULPS in the field and click Find Next.
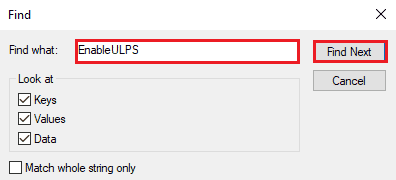
5. Double-click EnableULPS.
6. Set value from 1 to 0.
7. Now find the next EnableULPS value for cards by pressing F3.
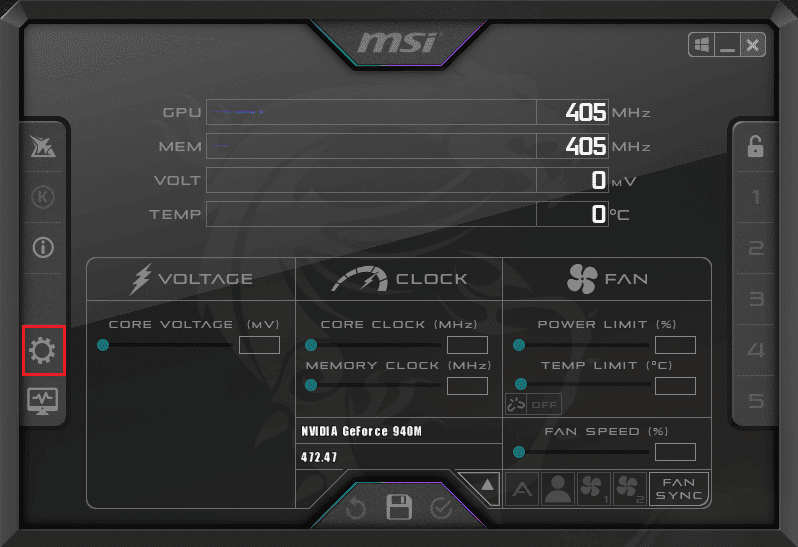
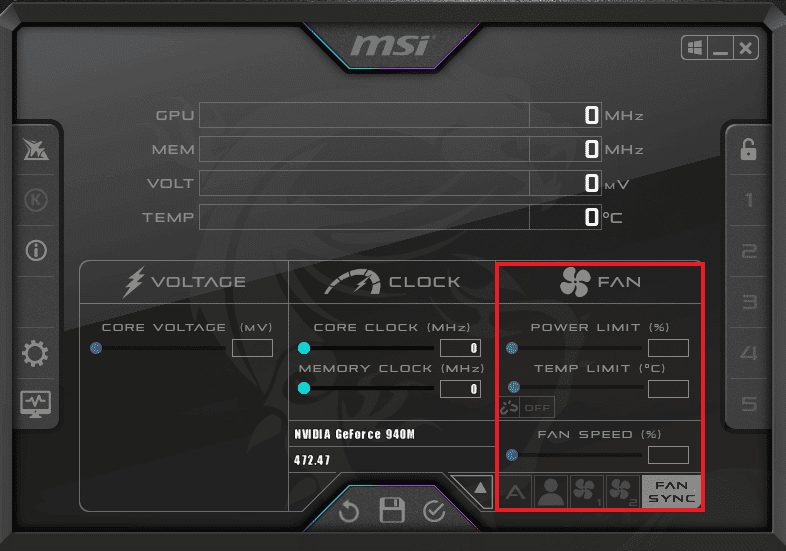
Method 12: hardware modification
Another way to solve the MSI Afterburner overclocking problem is to enable hardware modification, which has been proven effective in many cases. Below are the steps to allow device modification:
1. Open the MSI Afterburner application by double-clicking the shortcut.

2. Set the FAN parameters here.
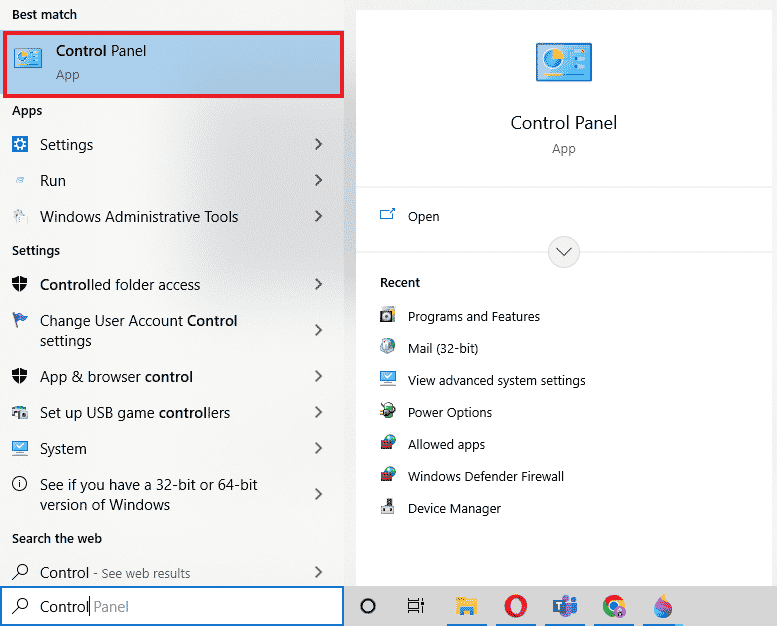
Method 13: Reinstall Afterburn Application
If for some reason the installation of MSI Afterburner on your device failed, try reinstalling the application. To do this, remove the pre-installed MSI Afterburner file and follow the steps given below for it:
1. Press the Windows key, type "Control Panel" and click "Open".
2. Set View > Large Icons, then click Programs and Features.
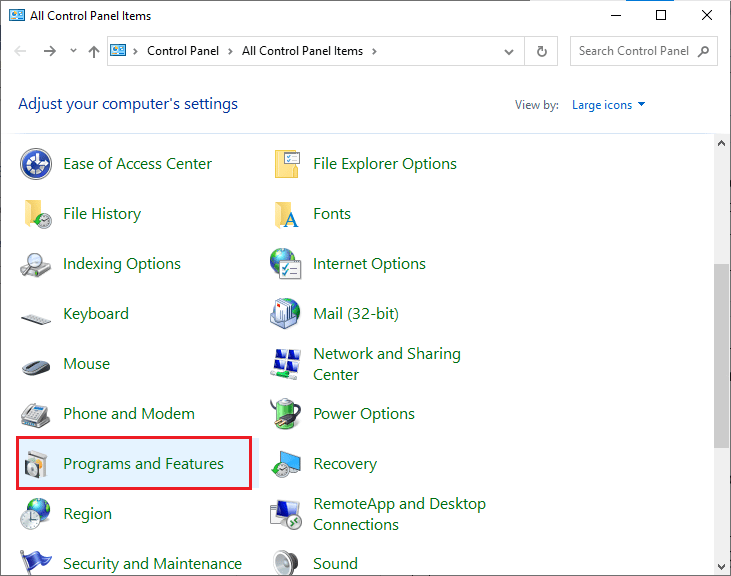
3. Right-click the MSI Afterburner application and select Uninstall.
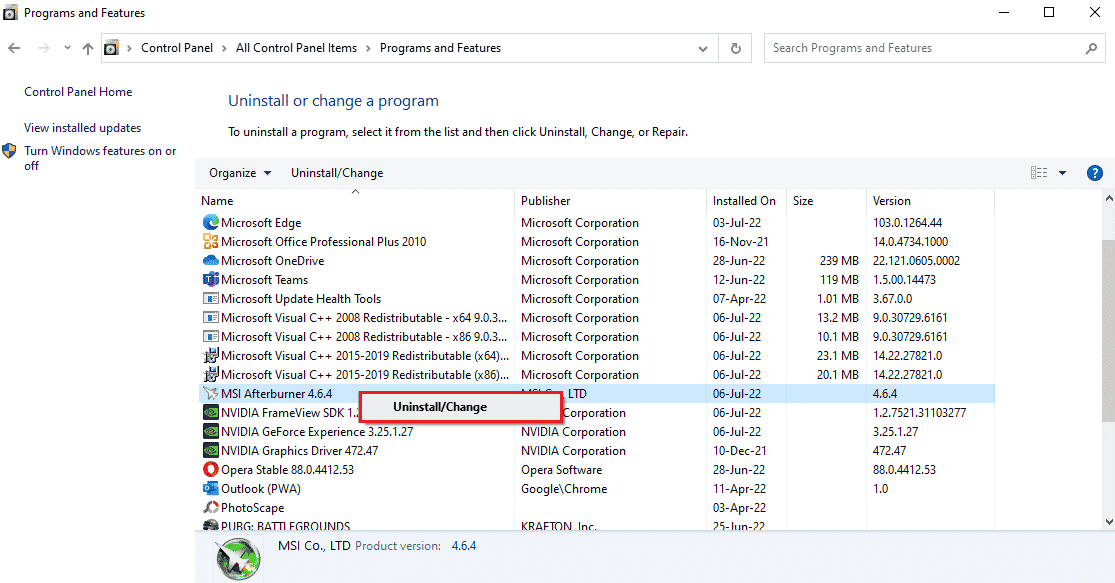
4. Then restart your computer by clicking "Finish" when the uninstaller completes the process.
5. Visit the Afterburner official website and click the Download Afterburner button.
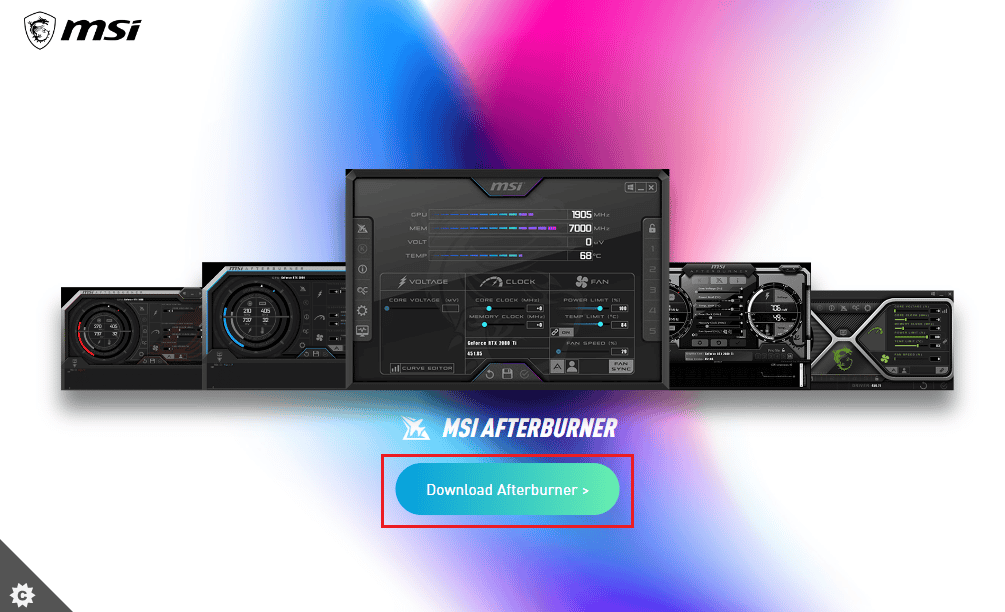
6. Follow the instructions on the screen to complete the installation on the PC.
7. Finally, after reinstalling Afterburner on your computer. Make sure Afterburner doesn't work with Windows 10.
Frequently Asked Questions (FAQ)
Q1. What happens if I uninstall MSI Afterburner?
Answer Removing MSI Afterburner will cause the graphics card in your system to work at the factory. In addition, the data stored in the application will be lost upon deletion.
Q2. Does MSI Afterburner affect performance?
Answer Yes, MSI Afterburner helps improve your system's performance by fixing latency issues, if any. It also improves performance by overclocking and optimizing your PC.
Q3. Can MSI Afterburner show CPU temperature?
Answer Yes, MSI Afterburner can monitor CPU temperature and provide accurate data. It also helps keep track of other temperature changes in your system.
Q4. Does MSI work with all brands of graphics cards?
Answer Yes, MSI Afterburner works with any video card in your system. It's free and works for all brands.
Q5. Why can't I overclock MSI Afterburner?
Answer If you encounter any issue where MSI Afterburner overclocking is not working, it might be related to the onboard graphics card being enabled, please try disabling it to solve the problem.
***
MSI Afterburner is an excellent application for maximizing system performance and for monitoring running services. But sometimes the app can crash and stop working. We hope our guide helped you resolve this issue and you were able to fix MSI Afterburner not working on Windows 10. Let us know which of these 14 methods was the most helpful for you. If you have additional questions or suggestions, please leave them below in the comments section.