How to install Jenkins on Windows, Ubuntu and CentOS?
Step by step guide to install Jenkins.
In this article, we will learn how to install Jenkins on the following operating systems.
For all of the above operating systems, the Jenkins installation steps are slightly different, but the setup steps are the same.
What is Jenkins?
Jenkins is an open source automation tool that allows developers to run projects and applications. It is used to build and deploy software and applications. It is a powerful automation application that enables continuous integration and continuous delivery of projects, regardless of the platform you are working on.
Because Jenkins is a Java application, it runs stand-alone on any computer that has the Java Runtime Environment (JRE) installed.
Premise
JDK8+ is required for all operating systems. So first we need to install JDK8 or later. You can download and install it from here .
Installing Jenkins on Windows
With the JDK installed and running, we are ready to download and install Jenkins. Click here to download the latest Jenkins MSI package for Windows.
- Double click the jenkins.msi file to start the installation.
- Click "Next" and then install
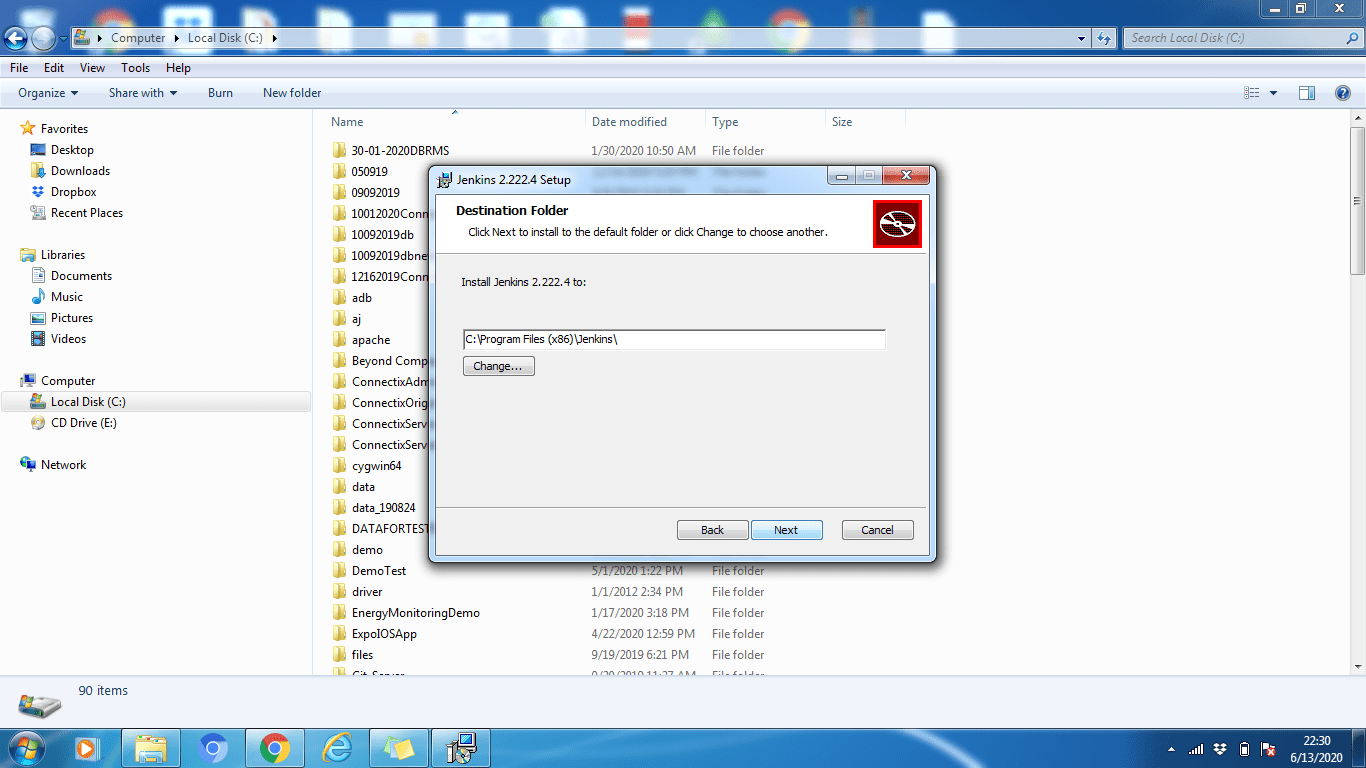
- Click the "Change" button if you want to install it to a different directory. In this example, we will keep the default option, click Next.
- When the installation process is complete, click the "Finish" button to complete the installation.
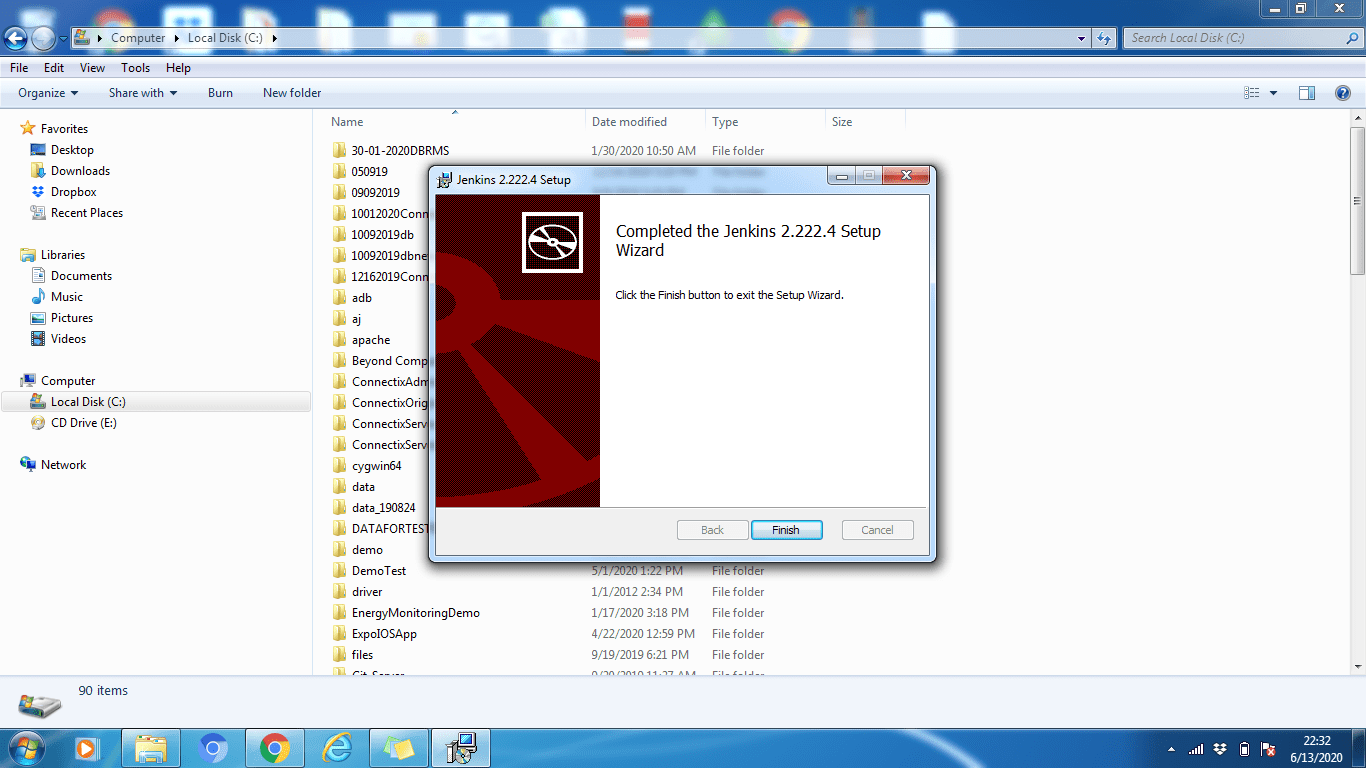
As you can see, installing Jenkins on Windows is very easy. Just like any other standard software.
Installing Jenkins on Ubuntu
As mentioned before, make sure JDK8+ is installed and running on your Ubuntu machine. If it is not installed, run the command below to install it.
sudo apt install default-jdk-headless
[email protected]:~$ sudo apt install default-jdk-headlessReading package lists... Done Building dependency tree Reading state information... Done The following NEW packages will be installed: default-jdk-headless 0 upgraded, 1 newly installed, 0 to remove and 102 not upgraded. Need to get 1132 B of archives. After this operation, 6144 B of additional disk space will be used. Get:1 http://archive.ubuntu.com/ubuntu bionic-updates/main amd64 default-jdk-headless amd64 2:1.11-68ubuntu1~18.04.1 [1132 B] Fetched 1132 B in 2s (676 B/s) Selecting previously unselected package default-jdk-headless. (Reading database ... 30061 files and directories currently installed.) Preparing to unpack .../default-jdk-headless_2%3a1.11-68ubuntu1~18.04.1_amd64.deb ... Unpacking default-jdk-headless (2:1.11-68ubuntu1~18.04.1) ... Setting up default-jdk-headless (2:1.11-68ubuntu1~18.04.1) ... [email protected]:~$
To verify that Java has been successfully installed, run the following command:
Java version
[email protected]:~$ java -versionopenjdk version "11.0.7" 2020-04-14 OpenJDK Runtime Environment (build 11.0.7+10-post-Ubuntu-2ubuntu218.04) OpenJDK 64-Bit Server VM (build 11.0.7+10-post-Ubuntu-2ubuntu218.04, mixed mode, sharing) [email protected]:~$
Once it is installed, we are ready to proceed with the installation of Jenkins.
Installation steps:
Step 1: First, open a command terminal (Ctrl+Alt+T).
Step 2: To install Jenkins, let's add the repository key to the system.
wget -q -O - http://pkg.jenkins-ci.org/debian/jenkins-ci.org.key | sudo apt-key add -
[email protected]:~$ wget -q -O - http://pkg.jenkins-ci.org/debian/jenkins-ci.org.key | sudo apt-key add -OK [email protected]:~$
Step 3: After adding the key, we need to add the address of the Debian package repository to the machine.
sudo sh -c 'echo deb http://pkg.jenkins-ci.org/debian-stable binary/ > /etc/apt/sources.list.d/jenkins .list
Step 4: Now update the Ubuntu packages.
sudo apt update
[email protected]:~$ sudo apt updateHit:1 http://archive.ubuntu.com/ubuntu bionic InRelease Get:2 http://archive.ubuntu.com/ubuntu bionic-updates InRelease [88.7 kB] Ign:3 http://pkg.jenkins-ci.org/debian-stable binary/ InRelease Get:4 http://pkg.jenkins-ci.org/debian-stable binary/ Release [2044 B] Get:5 http://pkg.jenkins-ci.org/debian-stable binary/ Release.gpg [195 B] Get:6 http://archive.ubuntu.com/ubuntu bionic-backports InRelease [74.6 kB] Get:7 http://archive.ubuntu.com/ubuntu bionic/universe amd64 Packages [8570 kB] Get:8 http://pkg.jenkins-ci.org/debian-stable binary/ Packages [17.6 kB] Get:9 http://security.ubuntu.com/ubuntu bionic-security InRelease [88.7 kB] Get:10 http://security.ubuntu.com/ubuntu bionic-security/main amd64 Packages [748 kB] Get:11 http://security.ubuntu.com/ubuntu bionic-security/main Translation-en [237 kB] Get:12 http://security.ubuntu.com/ubuntu bionic-security/restricted amd64 Packages [50.8 kB] Get:13 http://security.ubuntu.com/ubuntu bionic-security/restricted Translation-en [12.3 kB] Get:14 http://security.ubuntu.com/ubuntu bionic-security/universe amd64 Packages [673 kB] Get:15 http://security.ubuntu.com/ubuntu bionic-security/universe Translation-en [223 kB] Get:16 http://security.ubuntu.com/ubuntu bionic-security/multiverse amd64 Packages [7808 B] Get:17 http://security.ubuntu.com/ubuntu bionic-security/multiverse Translation-en [2856 B] Get:18 http://archive.ubuntu.com/ubuntu bionic/universe Translation-en [4941 kB] Get:19 http://archive.ubuntu.com/ubuntu bionic/multiverse amd64 Packages [151 kB] Get:20 http://archive.ubuntu.com/ubuntu bionic/multiverse Translation-en [108 kB] Get:21 http://archive.ubuntu.com/ubuntu bionic-updates/main amd64 Packages [969 kB] Get:22 http://archive.ubuntu.com/ubuntu bionic-updates/main Translation-en [329 kB] Get:23 http://archive.ubuntu.com/ubuntu bionic-updates/restricted amd64 Packages [60.5 kB] Get:24 http://archive.ubuntu.com/ubuntu bionic-updates/restricted Translation-en [14.7 kB] Get:25 http://archive.ubuntu.com/ubuntu bionic-updates/universe amd64 Packages [1085 kB] Get:26 http://archive.ubuntu.com/ubuntu bionic-updates/universe Translation-en [337 kB] Get:27 http://archive.ubuntu.com/ubuntu bionic-updates/multiverse amd64 Packages [15.9 kB] Get:28 http://archive.ubuntu.com/ubuntu bionic-updates/multiverse Translation-en [6420 B] Get:29 http://archive.ubuntu.com/ubuntu bionic-backports/main amd64 Packages [7516 B] Get:30 http://archive.ubuntu.com/ubuntu bionic-backports/main Translation-en [4764 B] Get:31 http://archive.ubuntu.com/ubuntu bionic-backports/universe amd64 Packages [7484 B] Get:32 http://archive.ubuntu.com/ubuntu bionic-backports/universe Translation-en [4436 B] Fetched 18.8 MB in 58s (327 kB/s) Reading package lists... Done Building dependency tree Reading state information... Done 102 packages can be upgraded. Run 'apt list --upgradable' to see them. [email protected]:~$
Step 5: Finally, to install Jenkins, run the command below
sudo apt install jenkins
[email protected]:~$ sudo apt install jenkinsReading package lists... Done Building dependency tree Reading state information... Done The following additional packages will be installed: daemon The following NEW packages will be installed: daemon jenkins 0 upgraded, 2 newly installed, 0 to remove and 102 not upgraded. Need to get 65.7 MB of archives. After this operation, 66.8 MB of additional disk space will be used. Do you want to continue? [Y/n] Y Get:1 http://archive.ubuntu.com/ubuntu bionic/universe amd64 daemon amd64 0.6.4-1build1 [99.5 kB] Get:2 http://pkg.jenkins-ci.org/debian-stable binary/ jenkins 2.235.1 [65.6 MB] Fetched 65.7 MB in 3min 34s (307 kB/s) Selecting previously unselected package daemon. (Reading database ... 29242 files and directories currently installed.) Preparing to unpack .../daemon_0.6.4-1build1_amd64.deb ... Unpacking daemon (0.6.4-1build1) ... Selecting previously unselected package jenkins. Preparing to unpack .../jenkins_2.235.1_all.deb ... Unpacking jenkins (2.235.1) ... Setting up daemon (0.6.4-1build1) ... Setting up jenkins (2.235.1) ... invoke-rc.d: could not determine current runlevel Processing triggers for systemd (237-3ubuntu10.39) ... Processing triggers for man-db (2.8.3-2ubuntu0.1) ... Processing triggers for ureadahead (0.100.0-21) ... [email protected]:~$
Jenkins installed successfully. Now we can start the Jenkins server.
Step 6: Starting Jenkins with the systemctl command
sudo systemctl start jenkins
systemctl does not show output, so we can check the status with the below command. With this command, we can check if Jenkins is active or not.
status sudo systemctl jenkins
[email protected]:~$ sudo systemctl status jenkins● jenkins.service - LSB: Start Jenkins at boot time Loaded: loaded (/etc/init.d/jenkins; generated) Active: active (exited) since Sat 2020-04-04 10:10:19 UTC; 2 months 16 days ago Docs: man:systemd-sysv-generator(8) Tasks: 0 (limit: 4915) CGroup: /system.slice/jenkins.service Apr 04 10:10:18 ip-172-31-17-25 systemd[1]: Starting LSB: Start Jenkins at boot time... Apr 04 10:10:18 ip-172-31-17-25 jenkins[1984]: Correct java version found Apr 04 10:10:18 ip-172-31-17-25 jenkins[1984]: * Starting Jenkins Automation Server jenkins Apr 04 10:10:18 ip-172-31-17-25 su[2037]: Successful su for root by root Apr 04 10:10:18 ip-172-31-17-25 su[2037]: + ??? root:root Apr 04 10:10:18 ip-172-31-17-25 su[2037]: pam_unix(su:session): session opened for user root by (uid=0) Apr 04 10:10:18 ip-172-31-17-25 jenkins[1984]: mesg: ttyname failed: Inappropriate ioctl for device Apr 04 10:10:18 ip-172-31-17-25 su[2037]: pam_unix(su:session): session closed for user root Apr 04 10:10:19 ip-172-31-17-25 jenkins[1984]: ...done. Apr 04 10:10:19 ip-172-31-17-25 systemd[1]: Started LSB: Start Jenkins at boot time. [email protected]:~$
Step 6: Port Setup (Optional)
By default, Jenkins runs on port 8080 and we need to make this port accessible from anywhere (if not available).
Let's open the port:
sudo ufw allow 8080
We can check the status of the port below the following command:
sudo ufw status
[email protected]:~$ sudo ufw statusStatus: active To Action From -- ------ ---- 8080 ALLOW Anywhere 8080 (v6) ALLOW Anywhere (v6) [email protected]:~$
If the status indicates that the firewall is inactive, run the following command, otherwise it is not required.
sudo ufw allow OpenSSH
followed by
sudo ufw enable
Installing Jenkins on CentOS
First, make sure JDK8+ is installed and running on the machine. If it is not installed, run the command below to install the OpenJDK 8 package.
sudo yum install java-1.8.0-openjdk-devel
[[email protected] ~]$ sudo yum install java-1.8.0-openjdk-develCentOS-8 - AppStream 1.0 kB/s | 4.3 kB 00:04 CentOS-8 - AppStream 397 kB/s | 5.8 MB 00:14 CentOS-8 - Base 3.5 kB/s | 3.9 kB 00:01 CentOS-8 - Extras 547 B/s | 1.5 kB 00:02 Jenkins-stable 6.5 kB/s | 2.9 kB 00:00 Dependencies resolved. ================================================================================ Package Arch Version Repository Size ================================================================================ Installing: java-1.8.0-openjdk-devel x86_64 1:1.8.0.252.b09-3.el8_2 AppStream 9.8 M Transaction Summary ================================================================================ Install 1 Package Total download size: 9.8 M Installed size: 41 M Is this ok [y/N]: y Downloading Packages: java-1.8.0-openjdk-devel-1.8.0.252.b09-3.el8_2. 531 kB/s | 9.8 MB 00:18 -------------------------------------------------------------------------------- Total 507 kB/s | 9.8 MB 00:19 Running transaction check Transaction check succeeded. Running transaction test Transaction test succeeded. Running transaction Preparing : 1/1 Installing : java-1.8.0-openjdk-devel-1:1.8.0.252.b09-3.el8_2.x86 1/1 Running scriptlet: java-1.8.0-openjdk-devel-1:1.8.0.252.b09-3.el8_2.x86 1/1 Verifying : java-1.8.0-openjdk-devel-1:1.8.0.252.b09-3.el8_2.x86 1/1 Installed products updated. Installed: java-1.8.0-openjdk-devel-1:1.8.0.252.b09-3.el8_2.x86_64 Complete! [[email protected] ~]$
To verify that Java has been successfully installed, run the following command.
java -version
[[email protected] ~]$ java -versionopenjdk version "1.8.0_252" OpenJDK Runtime Environment (build 1.8.0_252-b09) OpenJDK 64-Bit Server VM (build 25.252-b09, mixed mode) [[email protected] ~]$
Once it is installed, we are ready to proceed with the installation of Jenkins.
Installation steps
Step 1. First, open a command terminal.
Step 2: To install Jenkins, first we need to download and add the Jenkins GPG key:
sudo wget -O /etc/yum.repos.d/jenkins.repo http://pkg.jenkins-ci.org/redhat-stable/jenkins.repo
[[email protected] ~]$ sudo wget -O /etc/yum.repos.d/jenkins.repo http://pkg.jenkins-ci.org/redhat-stable/jenkins.repo--2020-06-21 04:29:52-- http://pkg.jenkins-ci.org/redhat-stable/jenkins.repo Resolving pkg.jenkins-ci.org (pkg.jenkins-ci.org)... 52.202.51.185, 64:ff9b::34ca:33b9 Connecting to pkg.jenkins-ci.org (pkg.jenkins-ci.org)|52.202.51.185|:80... connected. HTTP request sent, awaiting response... 200 OK Length: 85 Saving to: ‘/etc/yum.repos.d/jenkins.repo’ /etc/yum.repos.d/je 100%[==================>] 85 --.-KB/s in 0s 2020-06-21 04:29:54 (2.61 MB/s) - ‘/etc/yum.repos.d/jenkins.repo’ saved [85/85] [[email protected] ~]$
Step 3: After downloading and adding the Jenkins GPS key, import the following Jenkins GPG key:
sudo rpm --import https://jenkins-ci.org/redhat/jenkins-ci.org.key
Step 4: Update CentOS Packages
sudo yum update
[[email protected] ~]$ sudo yum updateLast metadata expiration check: 0:17:09 ago on Sun 21 Jun 2020 04:21:20 AM PDT. Dependencies resolved. Nothing to do. Complete! [[email protected] ~]$
Step 5: With the Centos packages updated, we are ready to install Jenkins:
sudo yum install jenkins
[[email protected] ~]$ sudo yum install jenkinsLast metadata expiration check: 0:19:26 ago on Sun 21 Jun 2020 04:21:20 AM PDT. Dependencies resolved. =============================================================================== Package Architecture Version Repository Size =============================================================================== Installing: jenkins noarch 2.235.1-1.1 jenkins 63 M Transaction Summary =============================================================================== Install 1 Package Total download size: 63 M Installed size: 63 M Is this ok [y/N]: y Downloading Packages: jenkins-2.235.1-1.1.noarch.rpm 172 kB/s | 63 MB 06:16 ------------------------------------------------------------------------------- Total 172 kB/s | 63 MB 06:16 Running transaction check Transaction check succeeded. Running transaction test Transaction test succeeded. Running transaction Preparing : 1/1 Running scriptlet: jenkins-2.235.1-1.1.noarch 1/1 Installing : jenkins-2.235.1-1.1.noarch 1/1 Running scriptlet: jenkins-2.235.1-1.1.noarch 1/1 Verifying : jenkins-2.235.1-1.1.noarch 1/1 Installed products updated. Installed: jenkins-2.235.1-1.1.noarch Complete! [[email protected] ~]$
Step 6: Starting Jenkins via systemctl
sudo systemctl start jenkins
Since systemctl does not show output, you can check the status with the below command. And through this command you can check if Jenkins is active or not.
sudo systemctl status jenkins
[[email protected] ~]$ sudo systemctl status jenkins[sudo] password for toadmin.ru: ● jenkins.service - LSB: Jenkins Automation Server Loaded: loaded (/etc/rc.d/init.d/jenkins; generated) Active: active (running) Docs: man:systemd-sysv-generator(8) Jun 20 11:15:22 localhost.localdomain systemd[1]: Starting LSB: Jenkins Automa> Jun 20 11:15:23 localhost.localdomain runuser[1456]: pam_unix(runuser:session)> Jun 20 11:15:33 localhost.localdomain jenkins[1433]: Starting Jenkins [ OK ] Jun 20 11:15:33 localhost.localdomain systemd[1]: Started LSB: Jenkins Automat> Jun 21 04:23:04 localhost.localdomain systemd[1]: Stopping LSB: Jenkins Automa> [[email protected] ~]$
Step 7: Port Setup (Optional)
By default, Jenkins runs on port 8080 and we need to make this port accessible from anywhere (only if it's not available). Let's open the port
sudo firewall-cmd --permanent --zone=public --add-port=8080/tcp
[[email protected] ~]$ sudo firewall-cmd --permanent --zone=public --add-port=8080/tcpsuccess [[email protected] ~]$
After setting the port, restart the firewall.
sudo firewall-cmd --reload
[[email protected] ~]$ sudo firewall-cmd --reloadsuccess [[email protected] ~]$
Jenkins setup
Once Jenkins is installed, it will run on port 8080. Let's set it up by navigating to http://localhost:8080 in our favorite browser.
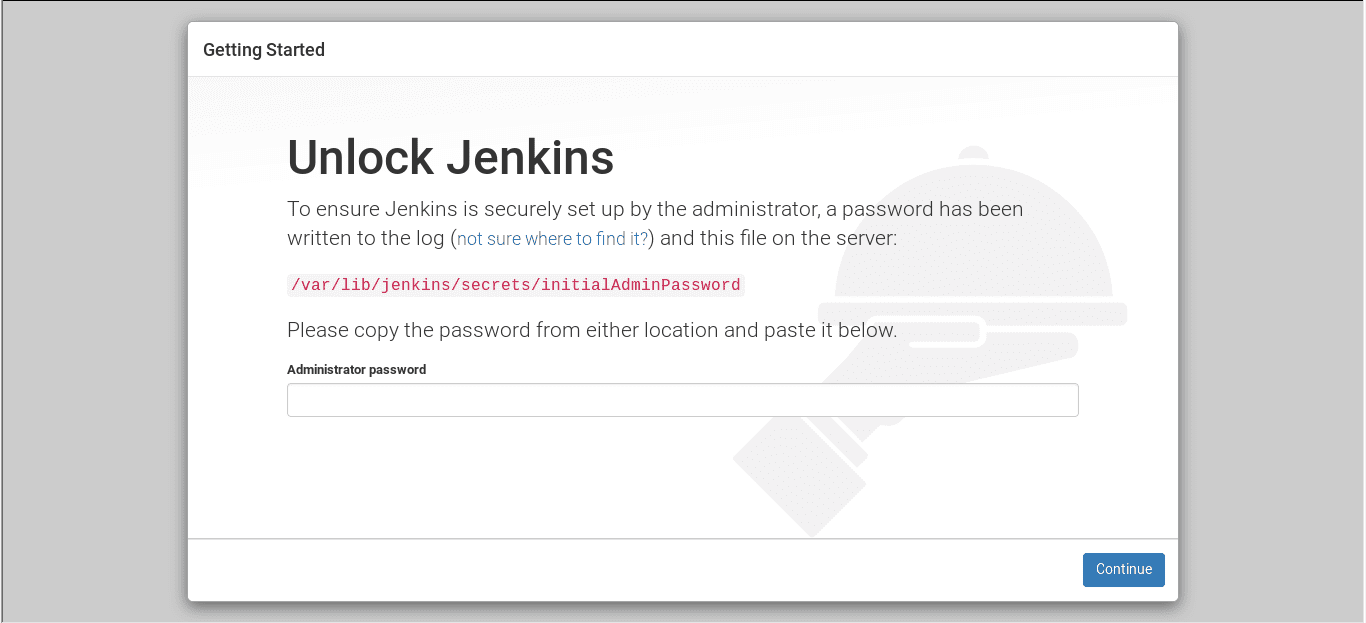
Step 1: Visit http://localhost:8080
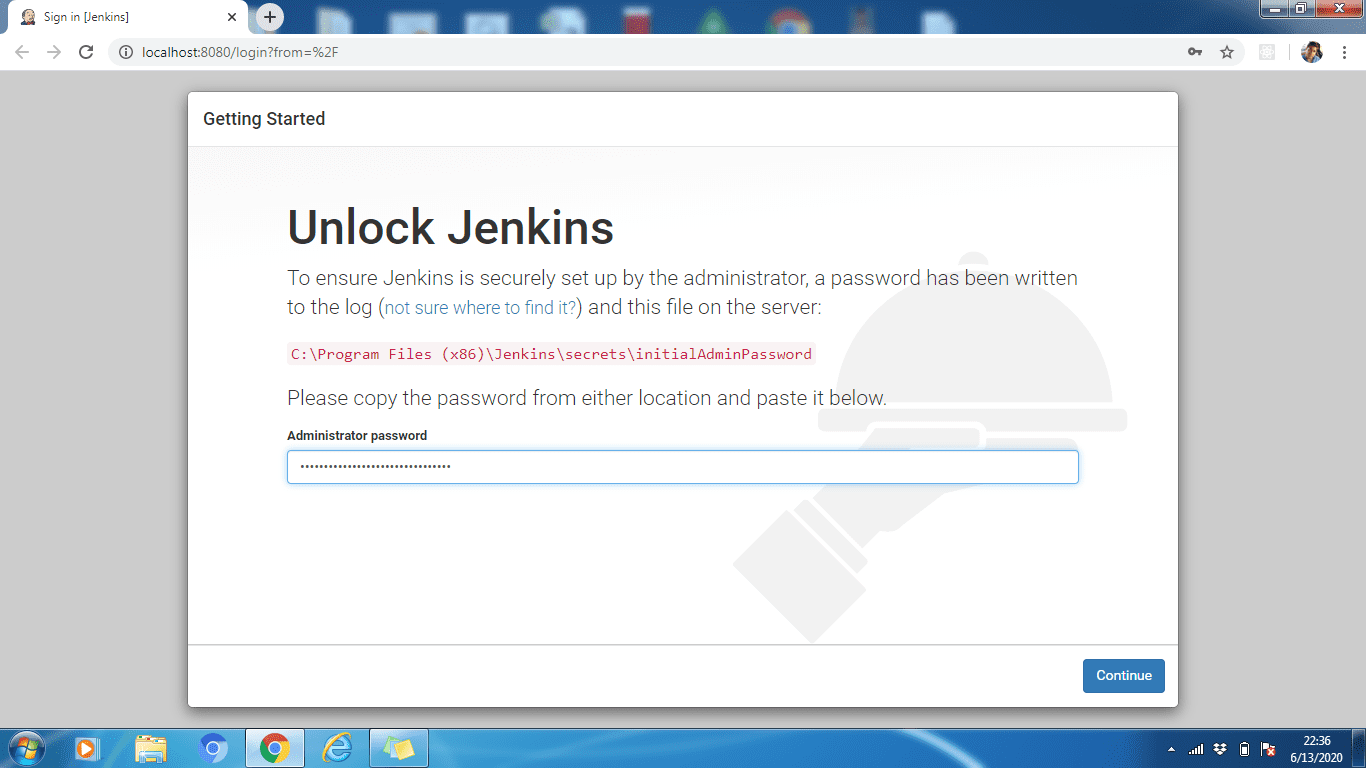
Step 2: To unlock Jenkins, copy the admin password from the file located at
C:Program Files (x86)JenkinssecretsinitialAdminPassword
/var/lib/jenkins/secrets/initialAdminPassword
Now paste it into the Admin Password field. Then click the Continue button.
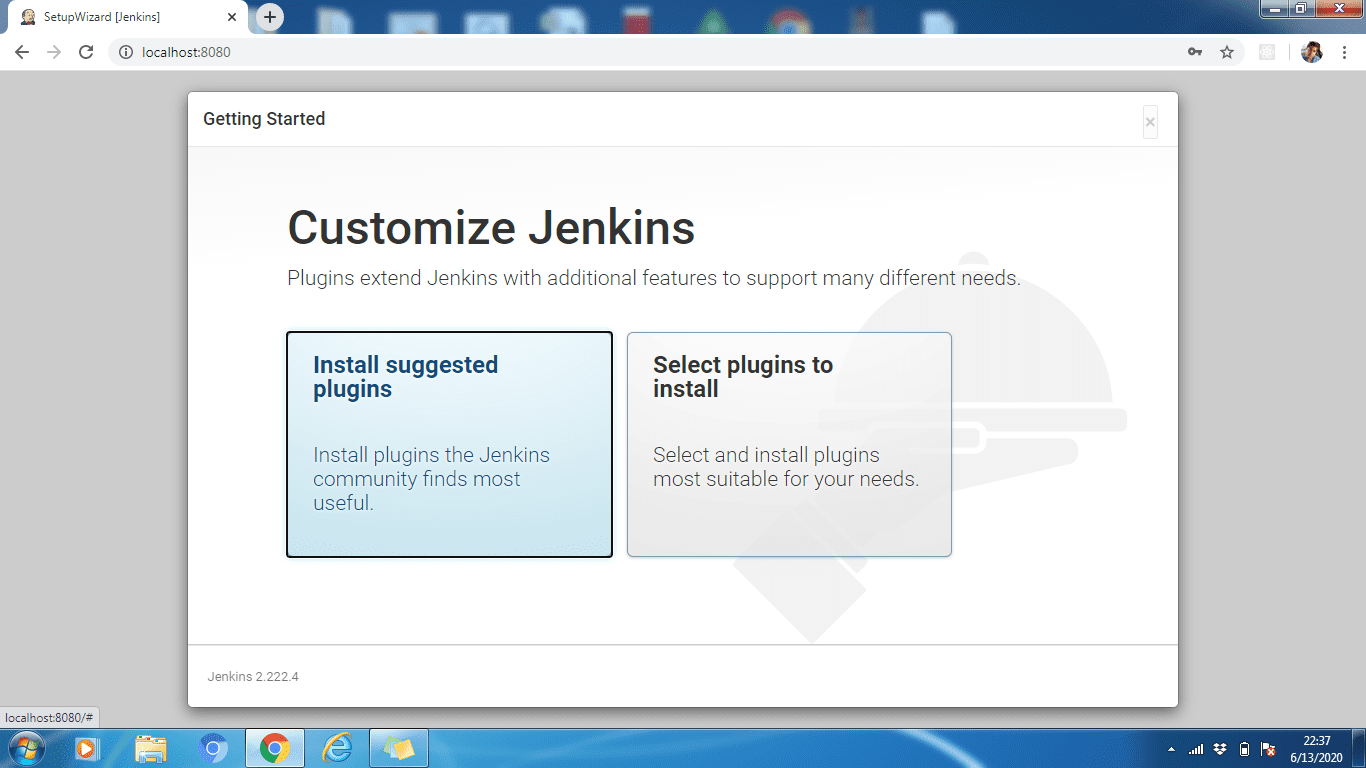
Step 3: You can either install the suggested plugins or select plugins depending on your use case. Here we will install the suggested plugins.
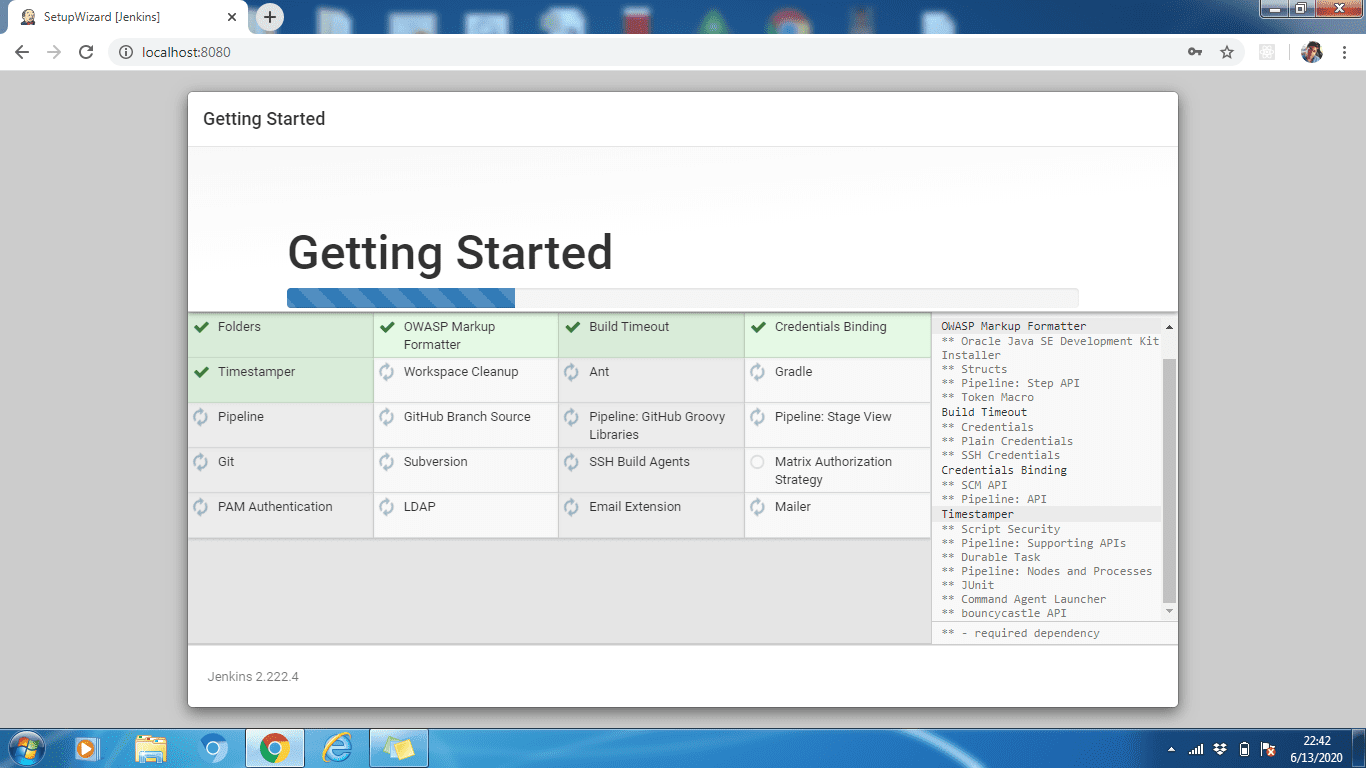
Step 4: Wait until all plugins are installed. When the installation is complete, click Continue.
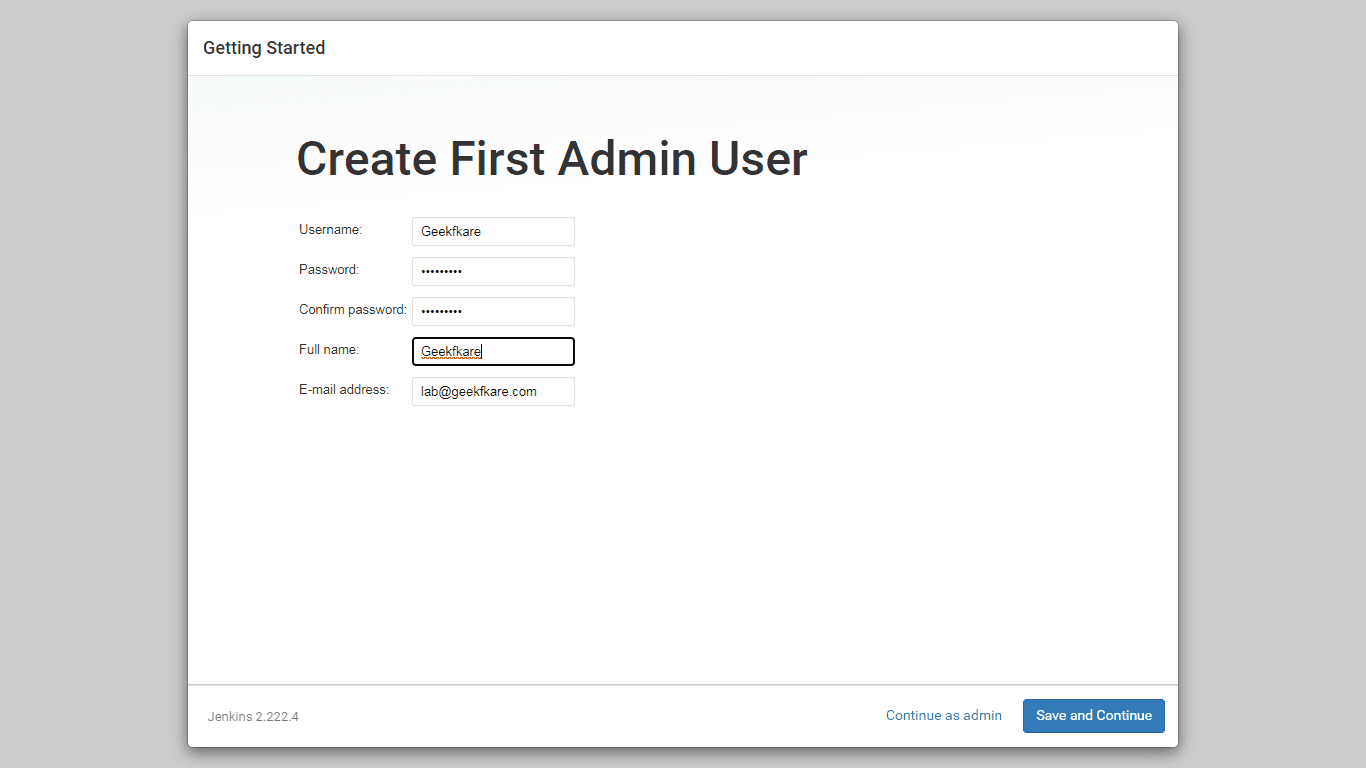
Step 5: Create an administrator profile for Jenkins. Enter the required details and click Save and Continue.
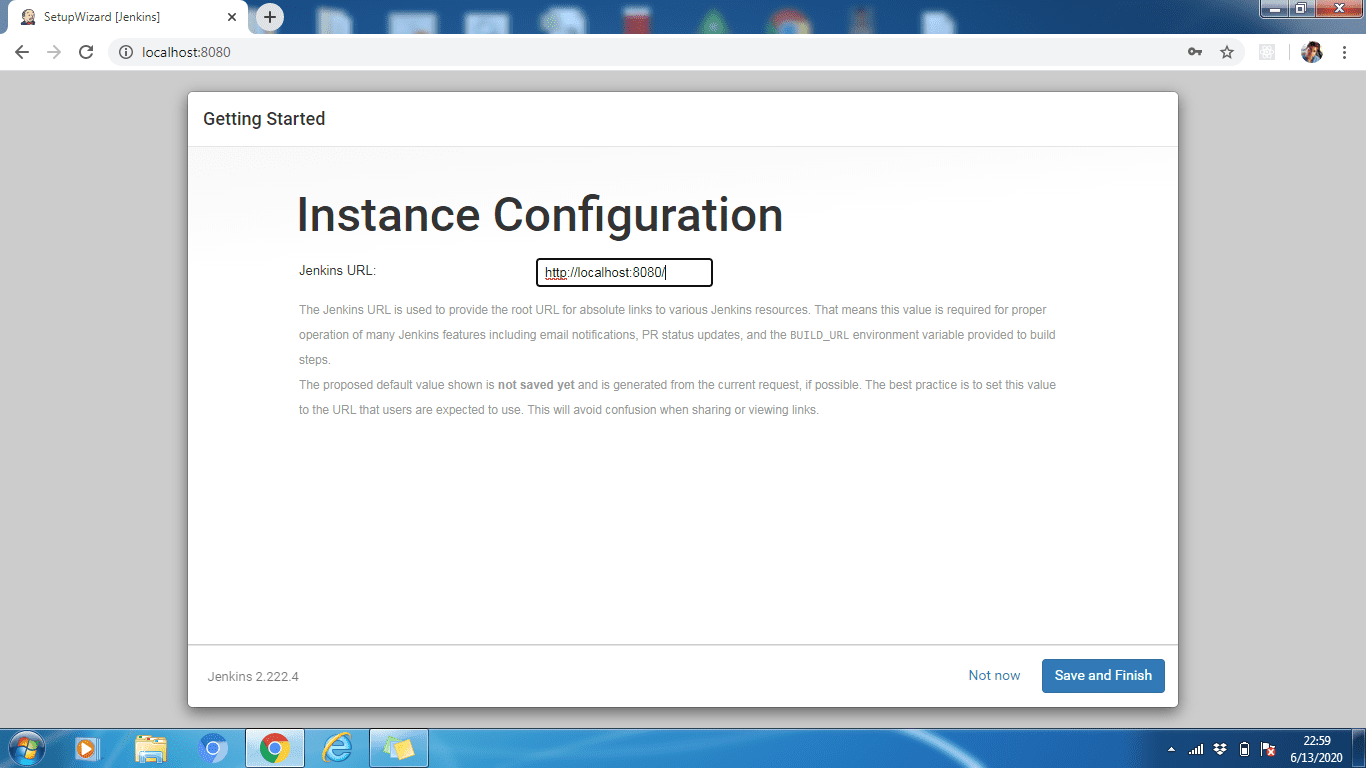
Step 6: If necessary, we can change the Jenkins URL. Let's leave it at the default http://localhost:8080. Click "Save and Finish" to complete the setup process. Now click "Start using Jenkins".
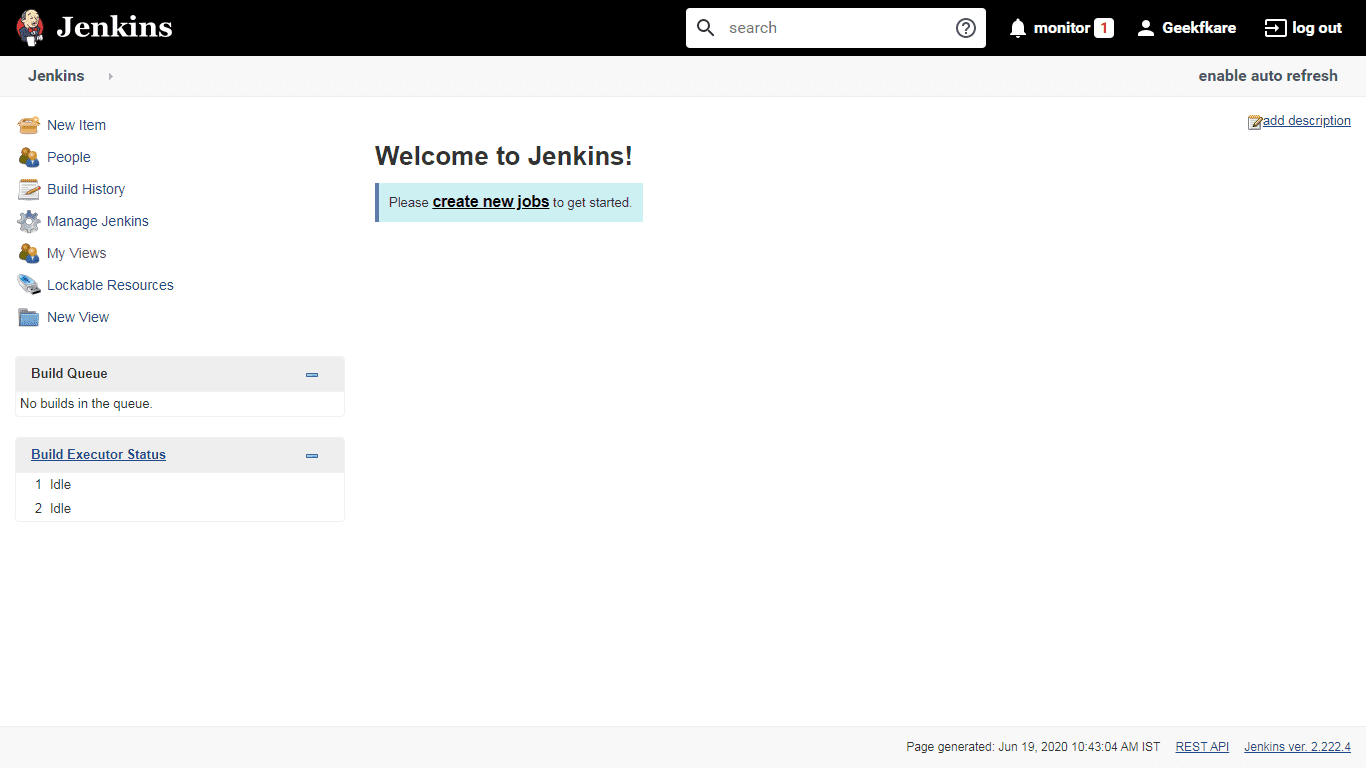
Finally, the setup process is complete and the above option is the default. Welcome to Jenkins! page.
The Jenkins setup step is the same for all OS except step 2 where we need to get and enter the administrator password. This password can be obtained from a file and stored in the path specified in the Unlock Jenkins UI.
Summary
So above were the steps to install Jenkins on your favorite OS. Then learn how to create your first Jenkins Pipelines.
Installing Jenkins is easy, and if you're setting up a remote team, you can either get a cloud VM and install it yourself, or upgrade to the Jenkins hosting platform.